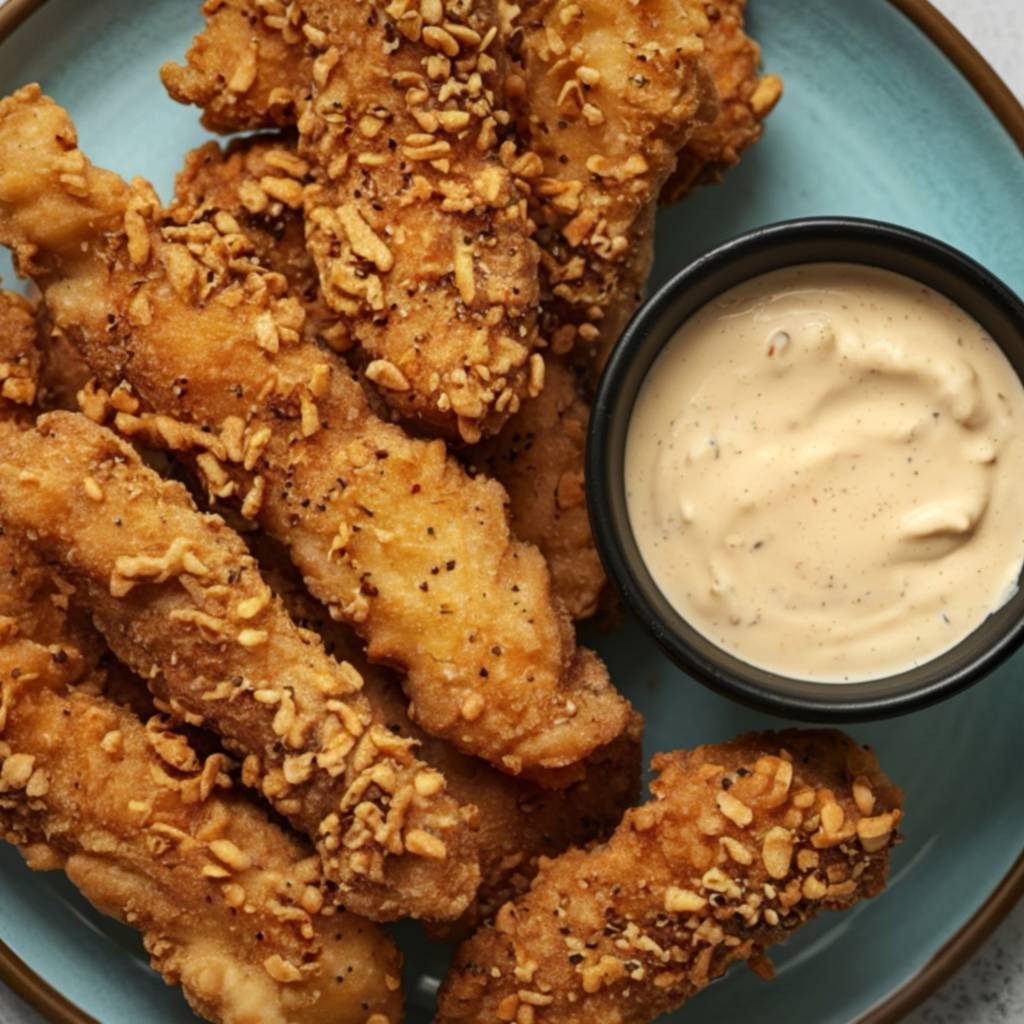
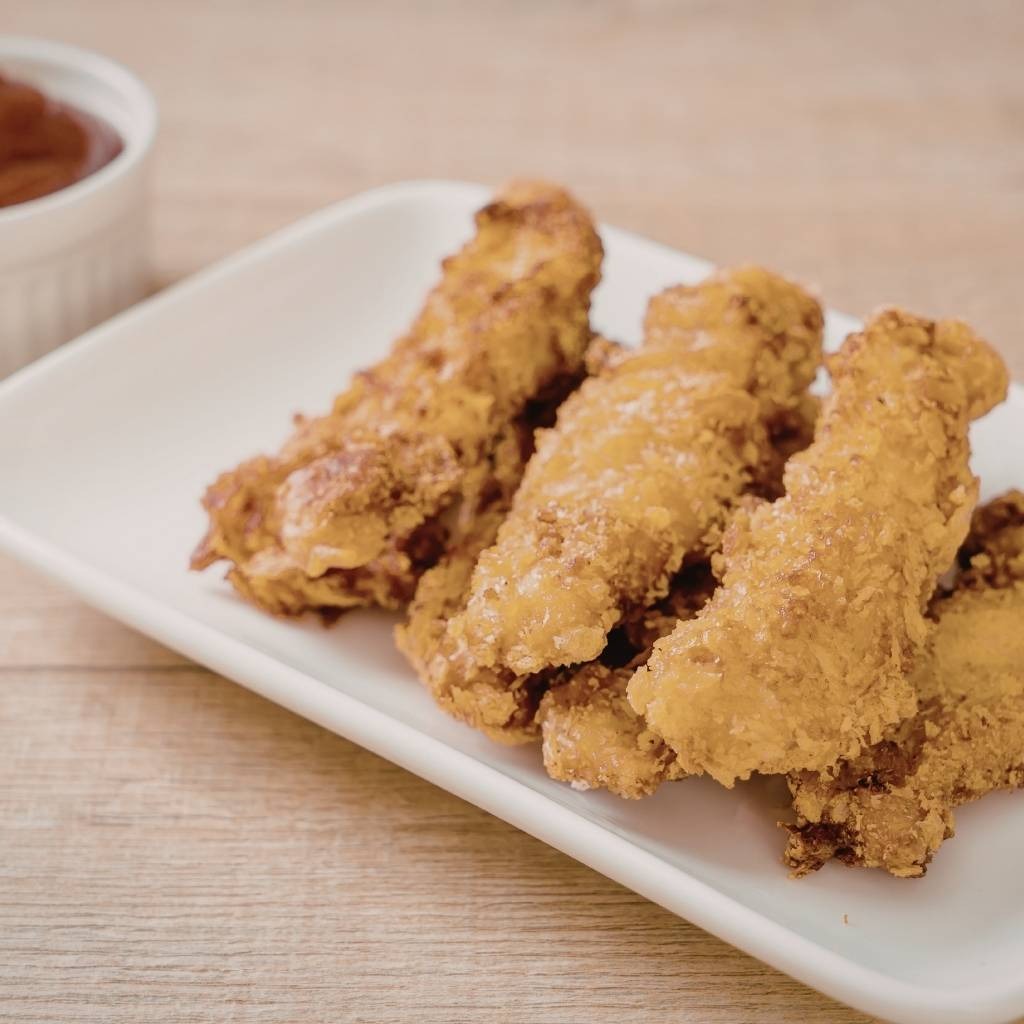
There’s something truly magical about the sizzle of chicken tenders fresh from the oven, their golden exterior crackling with every bite while the tender meat inside stays incredibly juicy and flavorful. This recipe transforms what could be an ordinary weeknight dinner into something special that brings families together around the table with genuine excitement. Whether you’re cooking for picky eaters, health-conscious diners, or anyone who simply appreciates comfort food done right, these baked chicken tenders deliver crispy perfection without the mess and guilt of deep frying. Next, the beauty of this recipe lies in its simplicity—you need just a handful of basic ingredients and about thirty minutes total from kitchen to table. Additionally, homemade versions far surpass the frozen grocery store varieties in taste, texture, and nutritional value, giving you restaurant-quality results in your own kitchen. To top it off, this dish is incredibly versatile, serving equally well as a quick family lunch, a meal prep staple, or an impressive addition to your dinner spread when guests are coming over.
Ingredients
This recipe makes approximately 4 servings, yielding about 16 to 20 tender pieces depending on chicken breast size.
- 1.5 pounds boneless, skinless chicken breasts
- 1 cup all-purpose flour
- 2 large eggs
- 1/4 cup whole milk
- 1 teaspoon garlic powder
- 1 teaspoon onion powder
- 1 teaspoon paprika
- 1/2 teaspoon cayenne pepper
- 1 teaspoon kosher salt
- 1/2 teaspoon black pepper
- 1/2 teaspoon dried thyme
- 2 tablespoons olive oil
- Cooking spray for baking sheet
Step-by-Step Instructions
Preparing Your Chicken
Preheat your oven to 400 degrees Fahrenheit and line a large baking sheet with parchment paper or aluminum foil for easy cleanup. Meanwhile, take your chicken breasts and place them on a cutting board, then carefully slice each breast lengthwise into strips approximately 3/4 inch thick. To ensure even cooking, gently pound any thicker pieces to about 1/2 inch thickness using a meat mallet or the bottom of a heavy pan. Pat the chicken pieces dry with paper towels, as this step is crucial for achieving that coveted crispy exterior rather than a soggy coating.
Creating Your Breading Station
Combine the flour, garlic powder, onion powder, paprika, cayenne pepper, salt, black pepper, and thyme in a shallow bowl or plate, mixing thoroughly so the seasonings distribute evenly. In another shallow bowl, whisk together the eggs and milk until well combined, creating a smooth egg wash that will help your coating adhere beautifully to each piece. Position these two bowls along with your prepared baking sheet in a line, setting up an efficient assembly line that makes the breading process quick and organized.
Coating the Chicken
Take one piece of dried chicken and dip it completely into the egg mixture, allowing any excess to drip back into the bowl. Next, transfer the coated piece to your flour mixture and press it gently into the seasoned flour, ensuring all sides get thoroughly covered. Flip and coat again to guarantee complete coverage, then place the breaded piece on your prepared baking sheet. Continue this process with all remaining chicken pieces, arranging them in a single layer without crowding the pan.
Preparing for Baking
Drizzle the olive oil evenly over all the breaded chicken pieces, which will help them achieve that golden, crispy texture as they bake. Additionally, lightly mist the top of each piece with cooking spray if you have it on hand, as this extra step promotes even browning and crispiness throughout. Allow the chicken to sit on the baking sheet for about 5 minutes before baking, giving the coating time to set.
Baking to Golden Perfection
Place your baking sheet in the preheated 400-degree oven and bake for 15 to 18 minutes, depending on the thickness of your chicken pieces. However, about halfway through cooking, check on your tenders and give them a gentle shake or flip if desired, though this step isn’t absolutely necessary. The chicken is done when the coating is golden brown and a meat thermometer inserted into the thickest piece reads 165 degrees Fahrenheit, ensuring perfect doneness every single time.
Cooling and Serving
Remove the baking sheet from the oven and let the chicken tenders rest on the pan for about 2 minutes before transferring to a serving plate. This brief resting period allows the exterior to set properly while the interior remains tender and juicy.
Serving and Storing Tips
How to Serve These Chicken Tenders
Serve your crispy baked chicken tenders immediately while they’re still warm and at their absolute best texture. First, pair them with classic sides like french fries, roasted sweet potato wedges, or a fresh green salad with your favorite dressing. Additionally, they work wonderfully with creamy pasta dishes, rice pilaf, or steamed vegetables for a more substantial meal. For dipping sauces, consider offering honey mustard, ranch dressing, barbecue sauce, marinara, or garlic aioli—the options are truly endless. Furthermore, these tenders are perfect for transforming into chicken sandwiches by placing them in soft buns with lettuce, tomato, and your choice of condiments.
Storing Your Leftovers
Store any leftover baked chicken tenders in an airtight container in the refrigerator for up to 4 days, keeping them fresh and ready for quick meals. To maintain their texture, try storing them in a single layer separated by parchment paper rather than stacking them on top of each other. Freezing is also an excellent option—simply place cooled tenders in a freezer-safe container or bag and they’ll keep for up to 3 months. When you’re ready to enjoy frozen tenders, you can reheat them directly in a 375-degree oven for about 10 minutes, or thaw them overnight in the refrigerator and reheat for 5 to 7 minutes.
Helpful Notes
Ingredient Substitutions and Modifications
Substitute panko breadcrumbs for half the flour if you prefer an extra-crunchy coating that stands up beautifully to any sauce. Alternatively, gluten-free flour works wonderfully as a one-to-one swap for traditional all-purpose flour, making this recipe accessible to those with dietary restrictions. For those watching their sodium intake, use salt-free seasoning blends or reduce the salt content while still maintaining wonderful flavor through the other spices. Additionally, you can use Italian seasoning instead of thyme if that’s what you have on hand, or experiment with different spice combinations to suit your family’s preferences.
Time-Saving Tips and Tricks
Prepare your chicken pieces and breading station the night before, then simply breeze through the coating and baking process when dinner time approaches. Next, consider buying pre-sliced chicken tenders from your butcher counter, which eliminates the slicing step entirely while still delivering homemade results. You can also double this recipe and freeze the uncooked breaded tenders on a baking sheet, then bake them directly from frozen by adding just 5 to 7 minutes to the cooking time.
Common Mistakes to Avoid
Avoid skipping the step of patting your chicken dry, as moisture prevents the coating from adhering properly and creates a soggy rather than crispy exterior. Furthermore, don’t skip the egg wash, as it acts as the crucial adhesive that keeps your seasoned coating in place throughout cooking. Additionally, resist the temptation to overcrowd your baking sheet, which traps steam and prevents proper crisping—arrange the tenders in a single layer with a little breathing room between each piece.
Chef Tips
Achieving maximum crispiness comes down to using an oven temperature of exactly 400 degrees and ensuring your baking sheet is completely dry before adding the breaded chicken. Additionally, brushing the tops of your tenders with a light coating of melted butter in the final 2 minutes of cooking adds incredible flavor and an extra-golden finish that makes them look and taste like restaurant quality.
Frequently Asked Questions
Can I use boneless chicken thighs instead of breasts? Yes, boneless chicken thighs work wonderfully and actually stay juicier than breasts, though you may need to add 2 to 3 minutes to the cooking time due to their thicker texture.
How can I make these tenders extra crispy? Spray the breaded chicken with cooking spray right before baking and increase the oven temperature to 425 degrees, reducing the baking time by about 2 to 3 minutes while monitoring for browning.
Can I prepare the breaded tenders in advance and bake them later? Absolutely—refrigerate your breaded, unbaked tenders for up to 24 hours in an airtight container, then bake as directed, adding just 1 to 2 minutes to the cooking time since they’ll start cold.
What’s the best way to reheat leftover chicken tenders? Reheat them in a 375-degree oven for 5 to 7 minutes to restore their crispiness, or use an air fryer at 360 degrees for just 4 to 5 minutes for exceptional results.
Can I make this recipe with raw panko breadcrumbs instead of flour? Yes, mix panko crumbs with your seasonings as your coating instead, and they’ll create an exceptionally crunchy exterior that many people prefer over a flour-based option.
Conclusion
These baked chicken tenders represent everything wonderful about homemade cooking—they’re simple enough for any skill level yet impressive enough to serve at your best dinner gatherings. The combination of perfectly seasoned flour, a silky egg coating, and precise oven baking creates a texture that rivals any restaurant version while remaining completely wholesome and made with ingredients you control. Moreover, the versatility of this recipe means you can enjoy it countless different ways throughout the month without ever getting bored. First, you might serve them with your favorite dipping sauce one night, then transform them into a delicious sandwich the next, and finally incorporate them into a hearty pasta dish before the week is through. Additionally, knowing you have a reliable homemade recipe means you’ll never again feel tempted by less-than-ideal frozen alternatives or expensive takeout options.
Next time you’re planning dinner and want something that everyone at your table will genuinely enjoy, remember this recipe and give it a try. The combination of minimal prep time, maximum flavor, and excellent nutritional value makes these baked chicken tenders a true winner for busy families, health-conscious eaters, and anyone who appreciates delicious food made the right way. Furthermore, once you master this technique, you can experiment with different seasonings, coatings, and serving suggestions to make it your own signature dish.
If you loved making these Baked Chicken Tenders, please save this recipe to your favorite recipe app or bookmark it for quick access whenever hunger strikes! Consider pinning it to your favorite Pinterest board so you can find it again instantly, and don’t forget to share it with friends and family who might benefit from this easy, delicious dinner solution. Your feedback and support mean everything to us, so please leave a comment below sharing how your tenders turned out and any creative variations you tried. Sharing your experience helps us create more delicious recipes just like this one, so we truly appreciate you taking the time to tell us what you loved!