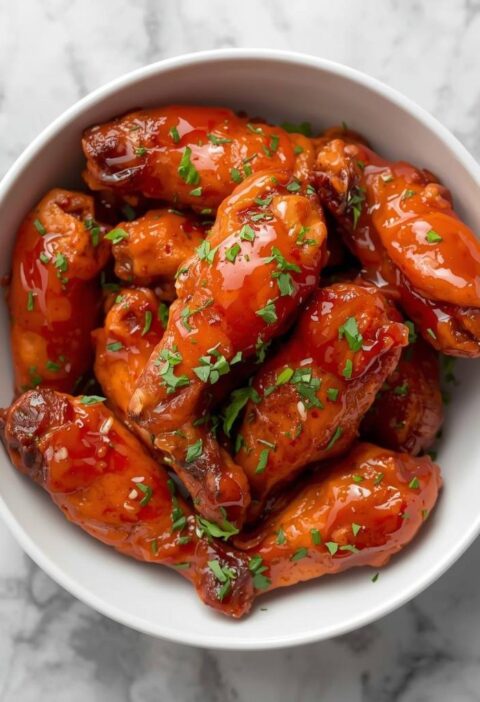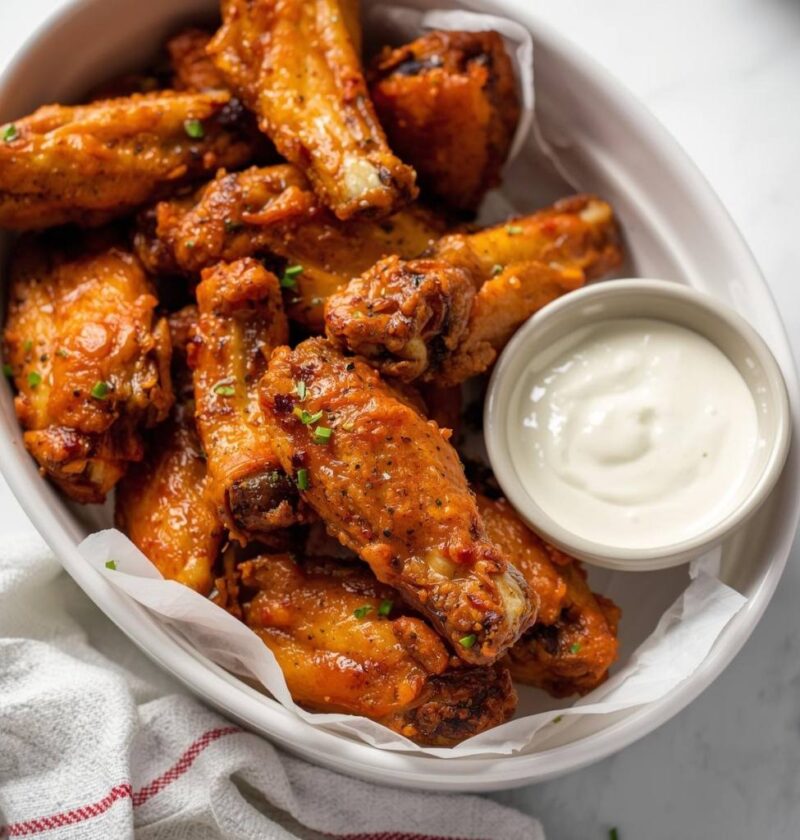
There’s something absolutely magnificent about crispy, golden baked chicken wings that emerge from the oven looking almost as appetizing as deep-fried versions, without the mess, guilt, or excessive oil involved in traditional frying. These irresistible little morsels deliver incredible textural contrast: a satisfying crunch on the outside paired with juicy, flavorful meat inside that makes every bite utterly crave-worthy. Picture this: the aroma of caramelizing wings and your choice of glaze filling your kitchen, making everyone’s mouths water before they even sit down at the table. What makes baked chicken wings truly special is how they transform from simple poultry into restaurant-quality appetizers through proper technique and a little oven magic. Unlike deep frying, which requires gallons of oil and careful temperature monitoring, baking chicken wings proves remarkably straightforward and forgiving. In less than forty-five minutes from prep to serving, you’ll have crispy, delicious wings that satisfy even the most demanding appetizer expectations. Best of all, these versatile wings work equally well slathered in buffalo sauce, honey sriracha glaze, barbecue sauce, teriyaki, or countless other flavor combinations, making them an invaluable recipe for parties, game days, casual dinners, or any occasion requiring impressive yet manageable appetizers.
Ingredients
This recipe makes 24 to 30 wings, serving 6 to 8 people as an appetizer.
- 3 pounds chicken wings (drummettes and flats separated)
- 2 tablespoons olive oil
- 1 teaspoon salt
- 1/2 teaspoon black pepper
- 1/2 teaspoon garlic powder
- 1/2 teaspoon paprika
- 1/4 teaspoon cayenne pepper (optional)
- 1 tablespoon baking powder (NOT baking soda)
- 1 tablespoon cornstarch
- For Buffalo Glaze:
- 1/2 cup buffalo sauce
- 3 tablespoons butter
- 1 tablespoon honey
- 1/2 teaspoon Worcestershire sauce
- Blue cheese dressing for serving
- 2 tablespoons fresh parsley, chopped (for garnish)
- Celery and carrot sticks for serving
Step-by-Step Instructions
Preparing Your Chicken Wings
- Begin by patting the chicken wings completely dry with paper towels, removing all excess moisture from the surface.
- Drying the wings thoroughly is absolutely crucial; moisture prevents crispy browning and results in steamed rather than baked wings.
- If necessary, use multiple paper towels and apply firm pressure, ensuring the wings become as dry as possible.
- Place the dried wings in a large mixing bowl, ready for seasoning and coating.
- In a small bowl, combine the salt, black pepper, garlic powder, paprika, cayenne pepper, baking powder, and cornstarch.
- The baking powder serves as the secret ingredient that promotes incredible crispiness without any baking flavor.
- Pour the olive oil over the wings in the large bowl, using your hands to coat them evenly.
- Sprinkle the seasoning mixture over the oil-coated wings gradually while tossing with your hands or tongs.
- Continue tossing and mixing until every wing becomes thoroughly and evenly coated with the seasoning blend.
- Ensure all crevices and surfaces receive coating, as this creates maximum crispiness and flavor.
Preparing Your Baking Surface
- Line two large baking sheets with aluminum foil, which makes cleanup incredibly easy and prevents sticking.
- Alternatively, you can use parchment paper, though foil provides slightly better browning on the bottom.
- Arrange two oven-safe wire racks on top of the foil-lined baking sheets, elevating the wings for air circulation.
- If you don’t have wire racks, simply line the baking sheets with foil and place the wings directly on them.
- Elevated racks produce the crispiest results because heat circulates underneath and around the wings completely.
Arranging and Baking the Wings
- Arrange the seasoned wings on the prepared racks in a single layer, ensuring they don’t overlap or touch.
- Proper spacing allows hot air to circulate around each wing, promoting even browning and maximum crispiness.
- If your baking sheets are small, divide the wings between two sheets rather than crowding them together.
- Preheat your oven to four hundred seventy-five degrees Fahrenheit, allowing it to reach full temperature.
- Place both baking sheets in the preheated oven, positioning one on the middle rack and one on the lower rack.
- Bake the wings for twenty to twenty-five minutes, checking their progress around the fifteen-minute mark.
- At the fifteen-minute mark, rotate the pans between racks, moving the lower pan to the middle and vice versa.
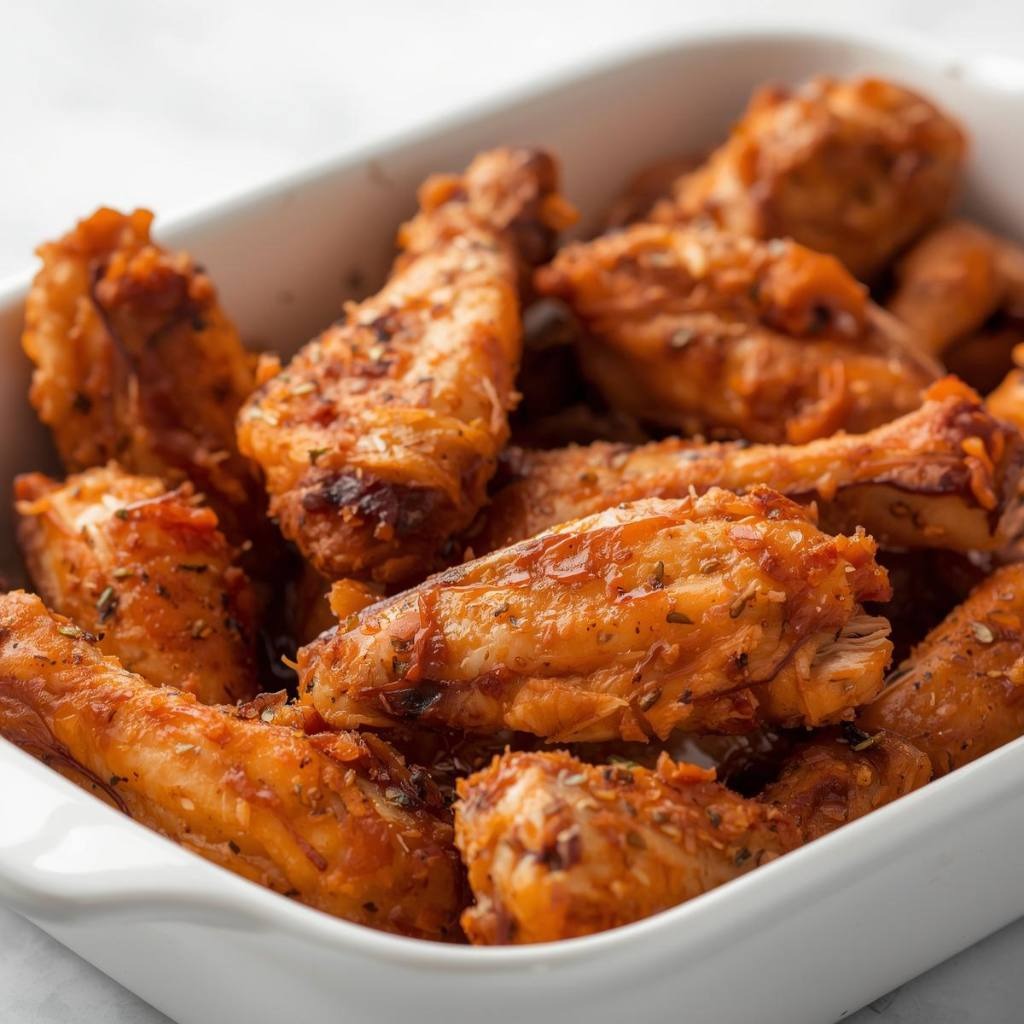
- Continue baking for an additional ten to twelve minutes until the wings become deeply golden brown.
- The wings are ready when they look crispy and caramelized, and the skin crackles when you touch it gently.
Preparing Your Glaze
- While the wings bake, prepare your buffalo glaze by combining buffalo sauce, butter, honey, and Worcestershire sauce.
- Combine these ingredients in a small saucepan over low heat, stirring occasionally until the butter melts completely.
- Once the butter melts, continue stirring for another minute until everything combines into a smooth, unified glaze.
- Remove the pan from heat and let the glaze cool slightly, which prevents it from being dangerously hot.
- Taste the glaze and adjust as needed, adding more honey if you prefer sweetness or more buffalo sauce for heat.
Coating and Finishing
- When the wings finish baking and reach that perfect golden-brown stage, carefully remove them from the oven using oven mitts.
- Place the baked wings in a large mixing bowl, which will serve as your tossing vessel.
- Pour the prepared buffalo glaze over the hot wings slowly, allowing it to coat them as you toss.
- Using tongs or two forks, toss the wings gently but thoroughly until every piece becomes evenly coated with glaze.
- Continue tossing for about one minute, ensuring the glaze adheres to all surfaces and crevices.
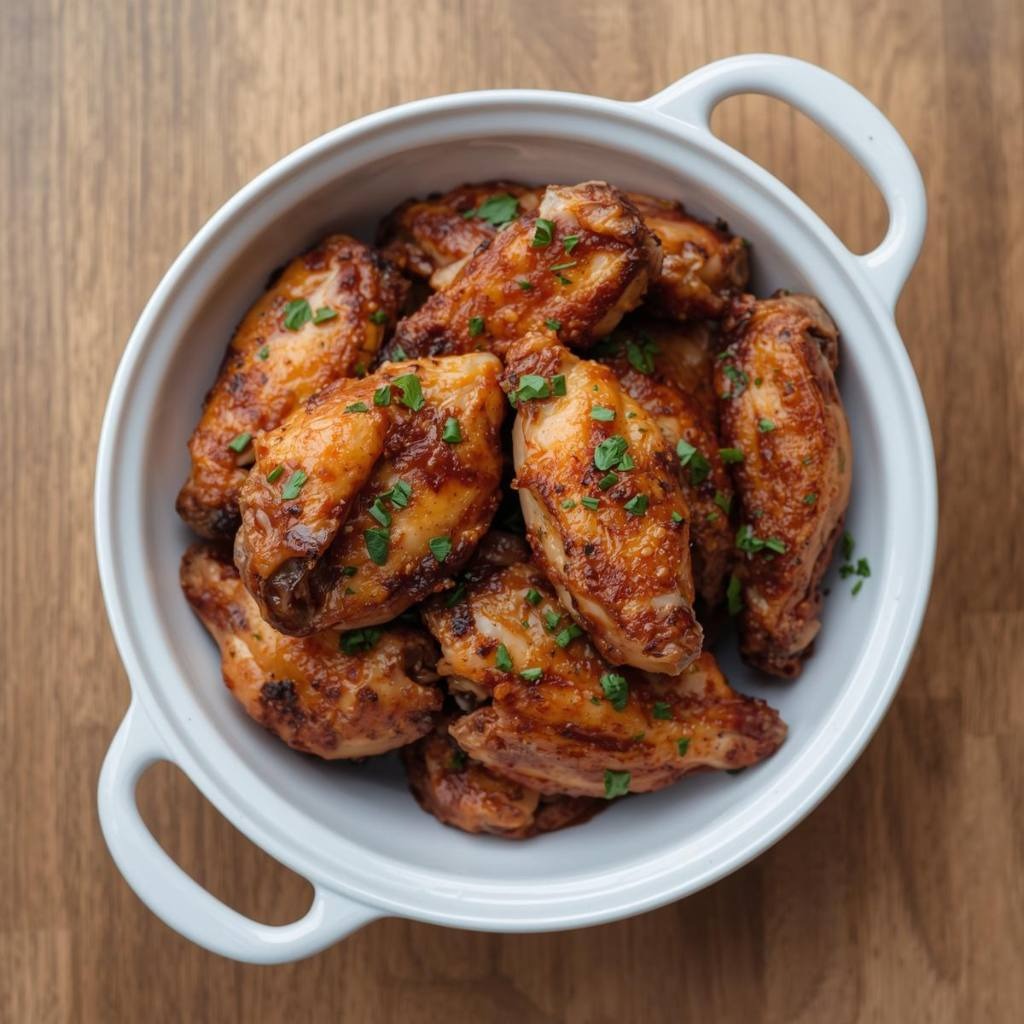
- Transfer the coated wings to a serving platter, arranging them in an attractive pile.
- If excess glaze remains in the bowl, drizzle it over the arranged wings for extra flavor and richness.
- Sprinkle fresh chopped parsley over the wings, adding bright color and fresh flavor.
- Arrange blue cheese dressing in a small bowl alongside the wings for dipping.
- Place celery and carrot sticks around the wings for crunchy, refreshing accompaniments.
- Serve the wings immediately while they’re still warm, crispy, and incredibly delicious.
Serving and Storing Tips
Serving Suggestions
These crispy baked chicken wings reach their absolute peak when served immediately from the oven while the coating remains crispy and the glaze is still warm. Serve with blue cheese dressing for dipping, which provides cooling creaminess that complements spicy buffalo wings perfectly. Ranch dressing offers a milder alternative for guests who prefer less tang or heat. Celery and carrot sticks provide refreshing crunch and help balance the richness of the wings and dressing. For entertaining large groups, arrange wings on platters with small napkins and toothpicks so guests can grab them easily without making a mess. Consider serving alongside other appetizers like spinach artichoke dip or buffalo chicken dip for a complete spread. For game day entertaining, keep extra wings warm in a slow cooker set to low, which maintains crispiness and temperature beautifully.
Storage and Reheating
Leftover baked chicken wings keep in the refrigerator for up to four days when stored in an airtight container. The glaze may solidify as the wings cool, which is completely normal and doesn’t affect quality or flavor. To reheat, place the wings on a baking sheet and warm in a four hundred-degree oven for eight to ten minutes until heated through. Alternatively, reheat in the microwave for one to two minutes, though oven reheating preserves crispiness better than microwaving. For a slow cooker option, transfer wings to the slow cooker set to low for thirty to forty-five minutes before serving. The wings can be frozen for up to three months in an airtight container; thaw overnight in the refrigerator before reheating. Frozen wings maintain their quality and reheat beautifully with crispy exteriors and juicy interiors.
Helpful Notes
First, the baking powder is absolutely essential for achieving crispy wings without deep frying; this ingredient reacts with the chicken’s surface and creates incredible texture. Additionally, avoid using baking soda as a substitute, as it creates a metallic taste that ruins the wings. However, ensure your baking powder is fresh and hasn’t expired, as old baking powder won’t provide optimal results. Feel free to customize your glaze using different sauces like honey sriracha, barbecue sauce, teriyaki, or garlic parmesan. Meanwhile, vegetarians cannot enjoy these wings, but you can apply the same technique to cauliflower florets or mushroom caps for an interesting vegetarian alternative. The hot oven temperature is crucial for achieving crispy wings; lower temperatures result in rubbery, unappealing texture. As a result, ensure your oven temperature reaches the full four hundred seventy-five degrees before placing wings inside. A common mistake involves skipping the wire racks and placing wings directly on baking sheets, which creates soggy bottoms rather than crispy exteriors. Instead, always use elevated racks for maximum air circulation. Another helpful tip involves not glaze the wings until after they’ve finished baking; adding glaze too early creates soggy wings. Additionally, if your glaze seems too thick, thin it with a tablespoon of water at a time until reaching desired consistency.
Chef Tips
The secret to restaurant-quality crispy baked wings lies in the combination of proper drying, high oven temperature, and elevated racks that allow hot air to circulate completely around each wing from all angles.
Additionally, toss the wings gently but thoroughly with the glaze immediately after they leave the oven; the residual heat helps the glaze adhere beautifully and creates a glossy, appetizing appearance.
Frequently Asked Questions
Can I bake the wings ahead and reheat them later? Absolutely! Bake the wings completely, let them cool, and refrigerate them up to four days. Reheat in a four hundred-degree oven for eight to ten minutes until heated through and crispy again.
What’s the best glaze for baked chicken wings? Buffalo sauce creates the classic version, but honey sriracha, barbecue sauce, teriyaki, and garlic parmesan all work wonderfully. Choose based on your flavor preferences and your guests’ tastes.
Can I use frozen chicken wings? Yes, frozen wings work perfectly; simply thaw them completely and pat them dry before seasoning. Ensure they’re completely thawed for even baking and proper cooking.
How do I prevent the wings from drying out during baking? The high temperature and short baking time prevent drying. Additionally, avoid opening the oven excessively, as this reduces internal temperature and extends cooking time unnecessarily.
Are these wings suitable for meal prepping? Yes, bake the wings completely, cool them, and refrigerate for up to four days without glaze. Store the glaze separately and combine just before reheating for best results.
If you loved this recipe for Baked Chicken Wings, we’d be absolutely thrilled if you’d save it to your favorite recipe collection, pin it to your Pinterest board, or share it with a friend who needs the ultimate game-day or party appetizer solution. Your support means everything and helps us continue creating delicious, accessible recipes that bring joy to your entertaining and gatherings! Please let us know in the comments below what you thought of these crispy wings or share any favorite glaze variations you’ve discovered. We can’t wait to hear how this recipe becomes your go-to appetizer for every celebration, gathering, and special occasion!