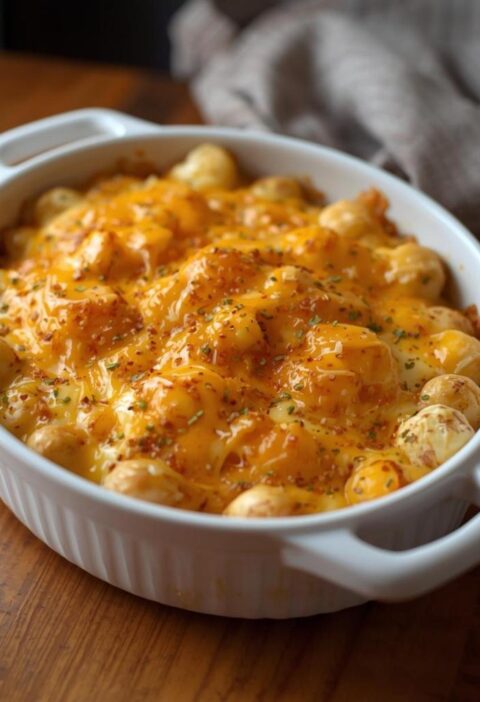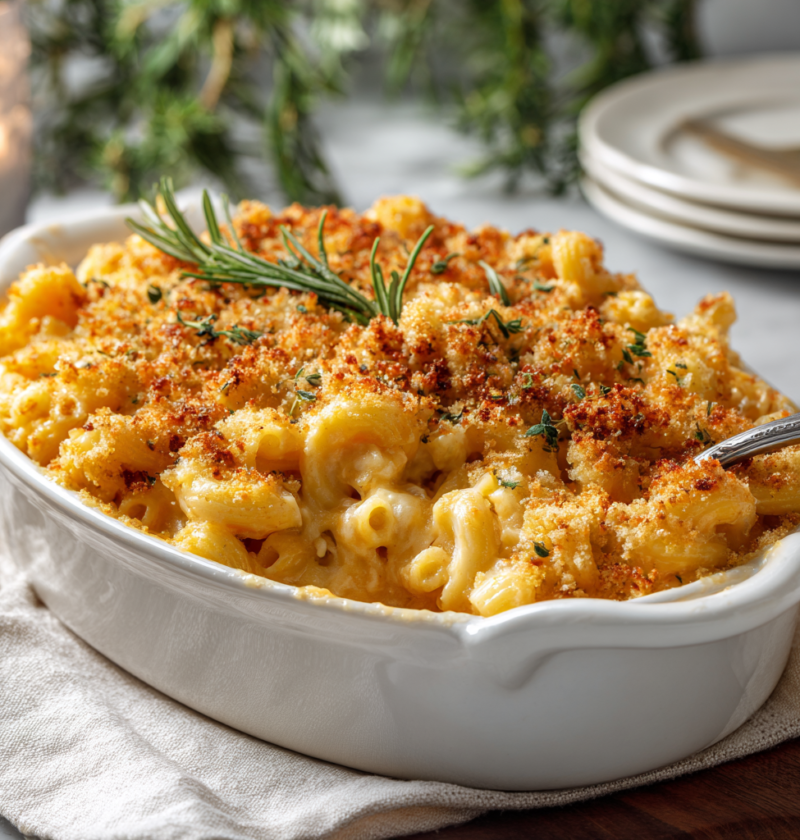
There’s nothing quite like the comfort of a creamy, golden Baked Mac and Cheese fresh from the oven, bubbling with cheese sauce and crowned with a crispy, buttery breadcrumb topping that delivers the perfect textural contrast. This beloved classic transcends age and occasion, appealing equally to children at family dinners and sophisticated adults at elegant gatherings where it appears alongside upscale cuisine. What makes this recipe truly special is its remarkable ability to deliver restaurant-quality results using straightforward techniques and readily available ingredients that you likely already have in your kitchen. The combination of creamy cheese sauce, tender pasta, and that irresistible crispy topping creates something genuinely greater than the sum of its parts—pure comfort in every bite. Whether you’re preparing a weeknight family dinner or bringing a crowd-pleasing side dish to a potluck, this baked version elevates the humble mac and cheese into something that feels intentional and special. This dish proves that sometimes the simplest comfort foods deliver the most satisfaction and joy when prepared with care and quality ingredients.
Why You’ll Love This Recipe
Next, let me share why home cooks absolutely adore making Baked Mac and Cheese. First, the preparation is straightforward enough for beginners yet sophisticated enough to impress even experienced home cooks and dinner guests. Additionally, the creamy, homemade cheese sauce tastes infinitely superior to boxed versions, yet requires only basic cooking skills and common ingredients. The baked version develops a wonderful golden, crispy top while the interior remains perfectly creamy and rich, creating incredible textural contrast in every forkful. Furthermore, this dish reheats beautifully, making it perfect for meal prep, potlucks, or preparing ahead when you’re expecting guests. The versatility of this recipe means you can customize the cheese blend, add vegetables, include proteins, or adjust the spice level to match your family’s preferences and dietary needs. This is the kind of dish that brings people together and creates memories around the dinner table.

Ingredients
Serves 8 people
• 1 pound elbow macaroni pasta • 6 tablespoons unsalted butter • 6 tablespoons all-purpose flour • 3 cups whole milk, room temperature • ½ cup heavy cream • 4 cups sharp cheddar cheese, shredded • 1 cup Gruyère cheese, shredded • ½ cup grated Parmesan cheese, divided • 1 teaspoon Dijon mustard • ½ teaspoon smoked paprika • ¼ teaspoon cayenne pepper • ¼ teaspoon black pepper • ½ teaspoon salt • ¼ teaspoon garlic powder • ¼ teaspoon onion powder • 2 tablespoons fresh thyme, chopped (or 1 teaspoon dried) • 2 tablespoons fresh chives, chopped • 2 cups panko breadcrumbs • 4 tablespoons melted butter • ¼ cup grated Parmesan cheese (for topping) • 2 tablespoons fresh parsley, chopped
Step-by-Step Instructions
Prepare Your Equipment and Ingredients
First, preheat your oven to 350 degrees Fahrenheit. Butter a 9-by-13-inch baking dish generously, ensuring the entire bottom and sides are well coated to prevent sticking. Measure out all your ingredients before beginning, allowing the milk and cream to come to room temperature—this is crucial because cold dairy can cause your cheese sauce to break or become grainy when mixed with hot ingredients. Having everything prepared and ready is the professional secret that transforms cooking from stressful to smooth and enjoyable.
Cook the Pasta
Bring a large pot of salted water to a rolling boil. Add the elbow macaroni and cook according to package directions until just al dente, meaning the pasta should have a slight firmness when bitten but not be hard or undercooked. Remember that the pasta will continue cooking in the oven, so slightly undercooking at this stage ensures it remains perfectly tender after baking. Drain the pasta in a colander and set it aside, but do not rinse it—the starch on the surface helps the cheese sauce adhere beautifully to each piece.
Create the Roux Base
Meanwhile, melt the butter in a large, heavy-bottomed saucepan over medium heat. Once the butter foams and becomes fragrant, sprinkle in the flour gradually while whisking constantly to combine. Continue cooking and whisking for approximately two to three minutes to create a smooth paste, which is called a roux. The roux should smell toasted and nutty, not raw or floury, indicating that the flour has cooked properly. This step is essential because it gelatinizes the flour starch, allowing the sauce to thicken properly when the liquid is added.
Build the Cheese Sauce
Slowly pour in the room-temperature milk while whisking constantly to prevent lumps from forming. Take your time with this step, adding the milk gradually and ensuring each addition is fully incorporated before adding more. Once all the milk is incorporated, add the heavy cream and continue whisking until the mixture is smooth and uniform. Bring the sauce to a gentle simmer over medium heat, stirring frequently with a wooden spoon or whisk for approximately eight to ten minutes until the mixture thickens enough to coat the back of a spoon.
Incorporate the Cheese and Seasonings
Remove the saucepan from heat and allow it to cool for approximately two minutes. Next, gradually add the shredded sharp cheddar and Gruyère cheeses in two batches, stirring gently after each addition until the cheese melts completely and incorporates smoothly into the sauce. The residual heat will melt the cheese without requiring additional cooking. Subsequently, add three-quarters of a cup of Parmesan cheese, Dijon mustard, smoked paprika, cayenne pepper, black pepper, salt, garlic powder, and onion powder, stirring until everything is well combined. Taste the sauce and adjust seasoning as needed—remember that the breadcrumb topping will add additional saltiness and richness, so season conservatively at this stage. Finally, stir in the fresh thyme and chives, which add brightness without overpowering the creamy cheese flavors.
Combine Pasta and Sauce
Add the cooked, drained pasta to the cheese sauce, folding gently but thoroughly with a spatula or wooden spoon until every piece of pasta becomes evenly coated with the luscious sauce. Transfer this mixture to the prepared baking dish, spreading it evenly across the bottom and smoothing the surface with a spatula. The dish can be prepared up to this point and refrigerated, covered, for up to twenty-four hours before baking—simply add approximately ten minutes to the baking time if baking from cold.
Prepare the Crispy Topping
In a medium bowl, combine the panko breadcrumbs with the melted butter, stirring until the breadcrumbs are evenly moistened and resemble wet sand. This ensures the topping becomes golden and crispy rather than dry and pale during baking. Add the remaining quarter cup of Parmesan cheese and fresh parsley to the breadcrumb mixture, stirring to combine evenly. Sprinkle this mixture generously and evenly over the top of the mac and cheese, creating a thick, uniform layer that will become golden and deliciously crunchy when baked.
Bake Until Golden
Place the baking dish in the preheated 350-degree Fahrenheit oven and bake for approximately thirty to thirty-five minutes until the top is golden brown and crispy, and the sauce is bubbling around the edges. The mac and cheese is perfectly done when you can see small bubbles breaking through the breadcrumb topping and the edges are bubbly but not burnt. If the top isn’t browning quickly enough, increase the oven temperature to 375 degrees during the final ten minutes of baking.
Rest Before Serving
Allow the Baked Mac and Cheese to rest for approximately five to ten minutes after removing it from the oven. This resting period allows the sauce to set slightly, making serving cleaner and preventing the dish from being too soupy. The internal temperature should still be hot, and the cheese sauce should remain creamy and delicious while achieving the perfect consistency for plating.
Serve with Pride
Using a large spoon or spatula, serve the mac and cheese directly from the baking dish, ensuring each portion includes plenty of the crispy breadcrumb topping along with the creamy pasta. Alternatively, you can portion it into individual serving bowls for a more elegant presentation. Serve immediately while everything is hot and the contrast between the crispy top and creamy sauce is at its most pronounced.
Serving and Storing Tips
Serving Suggestions
This classic comfort dish pairs beautifully with simple roasted vegetables such as broccoli, green beans, or asparagus, which provide a fresh, nutritious contrast to the rich cheese sauce. Next, serve alongside a crisp green salad dressed with a tangy vinaigrette to balance the creaminess of the mac and cheese. Additionally, grilled or roasted chicken, ham, or bacon makes an excellent protein accompaniment for heartier appetites. For entertaining, present the Baked Mac and Cheese as a stunning centerpiece alongside other complementary dishes, allowing guests to serve themselves and adjust portion sizes according to preference. This dish works equally well as a main course for casual family dinners or as an elegant side dish at more formal gatherings.
Storage and Reheating Tips
Store leftover Baked Mac and Cheese in an airtight container in the refrigerator for up to four days. To reheat, transfer individual portions or the entire baking dish to a 350-degree Fahrenheit oven, covered with foil, for approximately fifteen to twenty minutes until warmed through and hot. Alternatively, individual portions can be reheated in the microwave, loosely covered, for two to three minutes, though oven reheating produces superior results and prevents the sauce from becoming watery. These roll-ups also freeze beautifully for up to three months—assemble the baking dish completely before baking, wrap it tightly with plastic wrap and foil, then bake from frozen, adding approximately fifteen to twenty minutes to the baking time. Thawing is not necessary when baking from frozen, making this perfect for advance meal preparation and busy weeks.
Helpful Notes and Tips
Ingredient Substitutions and Flexibility
One of the greatest advantages of this recipe is its adaptability to different preferences, dietary restrictions, and available ingredients. First, if you don’t have Gruyère cheese, substitute with additional sharp cheddar, Fontina, or Swiss cheese for similar results. Additionally, you can replace up to half the cheddar with smoked cheddar for a deeper, more complex flavor profile. For a lighter version, substitute half the heavy cream with chicken or vegetable broth, though the sauce will be less rich and creamy. Furthermore, if you prefer a milder cheese flavor, use medium cheddar instead of sharp, or add an additional cup of Parmesan for a more sophisticated flavor.
Vegetable and Protein Additions
Feel free to customize this dish by adding your favorite vegetables and proteins to personalize it for your family’s preferences. Next, cooked broccoli florets, diced roasted red peppers, sun-dried tomatoes, or caramelized onions all work beautifully mixed into the mac and cheese before baking. Additionally, crispy bacon pieces, diced ham, or cooked ground beef add protein and heartiness for more substantial meals. For a vegetarian version, simply omit any meat and focus on vegetables that complement the cheesy sauce.
Time-Saving Tips
Purchase pre-shredded cheese from your grocery store if you’re short on time, though freshly shredded cheese creates a creamier sauce with better texture when melted. Additionally, prepare the entire baking dish in the morning and refrigerate it, covered, until dinner time, then simply pop it in the oven without thawing. Furthermore, you can make the cheese sauce ahead and refrigerate it for up to two days, then reheat gently over low heat and combine with freshly cooked pasta when ready.
Common Mistakes to Avoid
One frequent error involves cooking the pasta too long, which results in mushy, overcooked mac and cheese—remember that the pasta continues cooking in the oven, so slightly undercooking is essential. Another common mistake is adding cold milk to the hot roux, which creates lumps and an unpleasant texture—always use room-temperature or warm milk for a smooth sauce. Additionally, avoid overmixing the cheese into the sauce; gentle stirring until melted prevents overdeveloping gluten in the flour mixture. Finally, don’t skip the resting period after baking, as this allows the sauce to set and makes serving infinitely cleaner and more enjoyable.
Chef Tips for Excellence
First, the secret to an impossibly creamy sauce lies in using room-temperature milk and cream, which prevents the sauce from breaking or becoming grainy when the cheese is added. Second, reserve a portion of the cheese sauce before mixing with pasta; drizzle it over the breadcrumb topping for extra richness and a more indulgent final dish.
Frequently Asked Questions
Can I make this dish ahead and freeze it? Absolutely—assemble the baking dish completely before baking, wrap it tightly with plastic wrap and foil, and freeze for up to three months; bake from frozen, adding fifteen to twenty minutes to the cooking time.
What if my cheese sauce is lumpy or grainy? Strain the sauce through a fine-mesh sieve into a clean pot, then reheat gently over low heat while whisking constantly until smooth.
Can I use different pasta shapes instead of elbow macaroni? Yes, any small pasta shape such as shells, cavatappi, or penne works beautifully, though cook times may vary slightly.
How do I prevent the breadcrumb topping from burning? Cover the baking dish loosely with foil during the first twenty minutes of baking, then remove and continue baking uncovered until golden.
Is this dish suitable for dairy-free or lactose-free diets? Yes, substitute dairy-free butter, milk, and cheese alternatives for traditional versions, though the texture and flavor will differ slightly from the original.
Conclusion
Baked Mac and Cheese represents the ultimate comfort food that brings warmth, joy, and satisfaction to any table where it’s served. This dish proves that the simplest ingredients, when treated with care and proper technique, create something genuinely magical and memorable. Whether you’re preparing a casual family dinner or impressing guests at a more formal gathering, this baked version delivers consistent, delicious results that satisfy and delight everyone fortunate enough to enjoy it. The golden, crispy top combined with the creamy, cheese-laden pasta creates an experience that goes far beyond basic sustenance—it’s genuinely comforting and delicious.
Now that you have the complete guide to creating perfect Baked Mac and Cheese at home, I’d love to hear about your experience! Did you try this recipe? How did it turn out for you and your family? Please save this recipe to your collection, pin it to your favorite Pinterest board, and share it with friends and family who appreciate classic comfort food at its finest. Your feedback and shares inspire us to keep developing more delicious recipes that bring joy and incredible meals to kitchens everywhere. Tag us on social media with your beautiful Baked Mac and Cheese creations—we absolutely love seeing your culinary successes and hearing how this dish brought warmth and happiness to your dinner table!