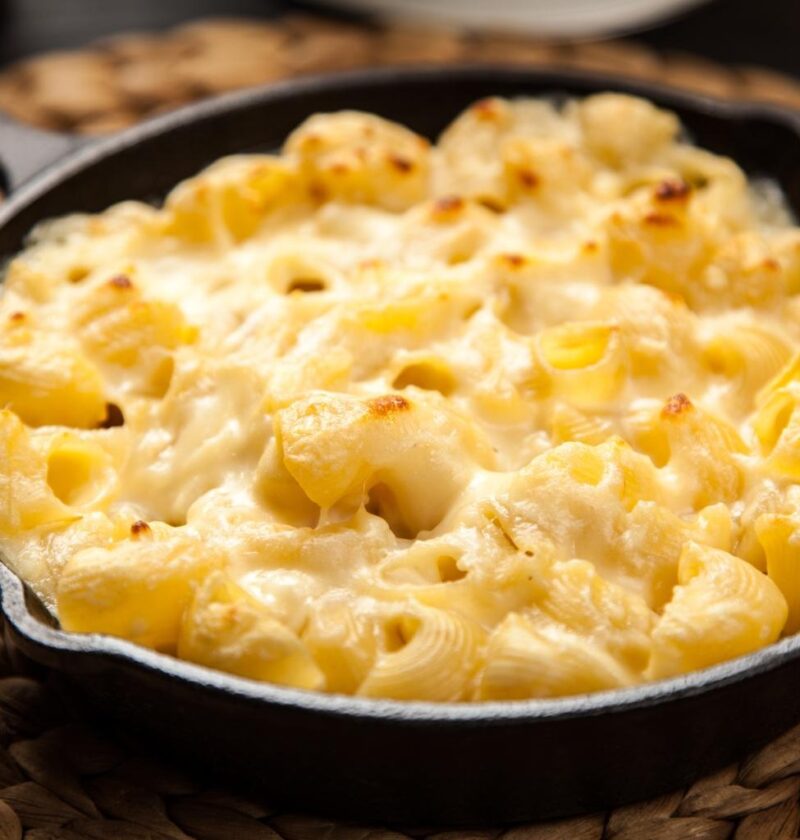
There’s something undeniably magical about a steaming bowl of baked mac and cheese. First, it brings back memories of childhood dinners and comforting family gatherings. The dish combines creamy sauce, tender pasta, and a perfectly golden crust that makes every forkful irresistible. What makes this version so special is the balance of three distinct cheeses that create layers of flavor without being heavy or overpowering. Additionally, the crispy breadcrumb topping adds a delightful textural contrast that elevates the entire dish. This recipe is designed for both seasoned cooks and kitchen beginners alike. Next, you’ll discover that the preparation requires just basic pantry ingredients and minimal culinary experience. The result is a restaurant-quality baked mac and cheese that tastes like you’ve spent hours in the kitchen, when in reality it comes together in less than an hour. Whether you’re planning a weeknight dinner or preparing something special for guests, this recipe delivers comfort, satisfaction, and genuine warmth with every bite.
Ingredients
Serves: 6-8 people
- 1 pound elbow macaroni pasta
- 4 tablespoons unsalted butter
- 3 tablespoons all-purpose flour
- 3 cups whole milk, room temperature
- 2 cups sharp cheddar cheese, shredded
- 1 cup gruyere cheese, shredded
- ¾ cup parmesan cheese, finely grated
- 1 teaspoon salt
- ½ teaspoon freshly ground black pepper
- ¼ teaspoon ground nutmeg
- ¼ teaspoon cayenne pepper (optional, for subtle heat)
- 2 cups panko breadcrumbs
- 3 tablespoons melted butter (for topping)
- 2 tablespoons fresh parsley, finely chopped (for garnish)
- 1 tablespoon fresh thyme leaves (optional, for garnish)
Preparation and Cooking Instructions
Cooking the Pasta
Preheat your oven to 350°F and position the rack in the center. Meanwhile, bring a large pot of salted water to a rolling boil. Next, add the elbow macaroni and cook according to package directions until al dente, which typically takes about 8 minutes. Drain the pasta in a colander but do not rinse it, as the starch helps the sauce adhere better. Transfer the cooked pasta to a large mixing bowl and set aside.
Creating the Cheese Sauce
First, melt the butter in a medium saucepan over medium heat. Once melted and foaming slightly, sprinkle the flour evenly over the butter while whisking constantly. Continue whisking for about 2 minutes to create a smooth paste called a roux, which will thicken your sauce. To begin building flavor, add the milk slowly while whisking continuously to prevent lumps from forming. Cook this mixture for another 5 minutes, stirring often, until it thickens slightly and coats the back of a spoon.
Next, reduce the heat to low and remove the saucepan from direct heat. Additionally, add the sharp cheddar cheese, gruyere cheese, and parmesan cheese one at a time, stirring thoroughly after each addition until completely melted. Season the sauce with salt, black pepper, nutmeg, and cayenne pepper if using. Taste the mixture and adjust seasonings as needed to match your preference.
Combining and Baking
Pour the warm cheese sauce over the cooked pasta and stir gently until every piece is well coated. Transfer the mac and cheese mixture to a buttered 9-by-13-inch baking dish, spreading it evenly. In a small bowl, combine the panko breadcrumbs with 3 tablespoons of melted butter, tossing with a fork until the crumbs are evenly moistened. Spread the buttered breadcrumb mixture evenly across the top of the mac and cheese.
Bake the dish in your preheated 350°F oven for 25 to 30 minutes, until the top is golden brown and the edges are bubbling slightly. However, if your oven tends to brown food quickly, you may want to check it at 20 minutes. Remove from the oven and let it rest for 5 minutes before serving, which allows the sauce to set slightly and makes serving easier. Garnish with fresh parsley and thyme leaves if desired.
Serving Tips
This creamy, comforting dish pairs beautifully with a simple green salad dressed in a light vinaigrette, which provides a refreshing contrast to the richness of the cheese sauce. Meanwhile, roasted vegetables like broccoli, Brussels sprouts, or asparagus make excellent side dishes that complement the mac and cheese perfectly. Additionally, you might serve this at casual dinner parties, family gatherings, or as a sophisticated side at a potluck. For a more casual presentation, consider pairing it with crispy bacon bits, sautéed mushrooms, or caramelized onions stirred into the pasta. Afterward, if you want to make it the star of a vegetarian meal, it requires no additional protein. The dish works equally well as a comforting weeknight dinner or as an impressive contribution to a special occasion menu.
Storage and Make-Ahead Tips
Refrigerator Storage
First, allow the baked mac and cheese to cool to room temperature before covering it with plastic wrap or transferring it to an airtight container. In the refrigerator, it will keep for up to 4 days. To reheat, cover the dish with foil and warm it in a 325°F oven for about 20 minutes until heated through, or microwave individual portions covered with a damp paper towel for 2 to 3 minutes.
Freezing Instructions
Next, this dish freezes exceptionally well for up to 3 months when stored properly. Cool the baked mac and cheese completely, then cover the baking dish tightly with plastic wrap followed by a layer of aluminum foil to prevent freezer burn. Alternatively, you can portion it into individual containers for convenient single servings. To reheat from frozen, thaw it overnight in the refrigerator, then warm it in a 325°F oven for about 30 minutes until heated through.
Make-Ahead Option
Additionally, you can prepare the mac and cheese up to the baking step, cover it, and refrigerate it for up to 8 hours before baking. However, if baking directly from the refrigerator, add 10 to 15 minutes to the baking time and check for doneness before removing from the oven.
Helpful Notes and Variations
Ingredient Substitutions
If sharp cheddar isn’t available, extra sharp cheddar or aged white cheddar works beautifully as a replacement. Meanwhile, for those who cannot find gruyere cheese, Swiss cheese or fontina cheese provides similar creamy characteristics. Additionally, if you prefer a stronger cheddar flavor, use 3 cups of cheddar and reduce the gruyere to ½ cup. Regarding dairy-free versions, use unsweetened plant-based milk and dairy-free cheddar and parmesan alternatives, though the flavor profile will differ slightly.
Optional Add-Ins
First, consider stirring in crispy bacon bits, diced ham, or sautéed sausage for a protein-rich variation. Next, add steamed broccoli florets, roasted cauliflower, or caramelized onions for additional vegetables and depth of flavor. Additionally, fresh thyme, smoked paprika, or a pinch of dijon mustard stirred into the sauce creates interesting flavor dimensions. For those who enjoy spice, jalapeño slices or diced red bell peppers add freshness and heat.
Common Mistakes to Avoid
First, avoid using cold milk when making the cheese sauce, as it causes lumps and requires more cooking time to thicken. Additionally, do not skip the roux step or rush the sauce-making process, as this is what creates the creamy, luxurious texture. Furthermore, resist the temptation to overmix after combining the pasta and sauce, as this can break down the pasta and create a mushy texture. Meanwhile, ensure the oven is properly preheated, as a cool oven results in undercooked breadcrumbs and soft pasta instead of the desired creamy interior with a golden top.
Chef Tips
First, for an extra-creamy texture, reduce the flour to 2 tablespoons and add ½ cup of heavy cream to the milk mixture. Next, if you want a deeper, more complex flavor, try broiling the top for the last 1 to 2 minutes of cooking just until it turns golden amber, but watch carefully to prevent burning.
Frequently Asked Questions
Can I use freshly shredded cheese instead of pre-shredded? Yes, freshly shredded cheese is actually preferable as it melts more smoothly without additives, creating a creamier sauce than pre-shredded varieties.
How do I prevent a skin from forming on the sauce? Place a piece of parchment paper or plastic wrap directly on the surface of the sauce if you need to let it sit before combining with pasta.
Can I make this in individual ramekins instead of one large dish? Absolutely, divide the mixture among 6 to 8 buttered ramekins and reduce the baking time to 15 to 20 minutes until the tops are golden.
What’s the best way to reheat leftover mac and cheese without it drying out? Add a splash of milk or cream before reheating, cover with foil, and warm in a 325°F oven rather than using the microwave for best results.
Can I prepare the breadcrumb topping ahead of time? Yes, prepare the buttered breadcrumb mixture up to 3 days ahead and store it in an airtight container, then add it just before baking.
Why This Recipe Works
The magic of this baked mac and cheese lies in its simplicity combined with carefully selected ingredients. First, the combination of three cheeses creates a complex flavor profile that tastes more sophisticated than single-cheese versions. Additionally, the roux-based sauce ensures a silky, creamy texture that coats every pasta piece without becoming heavy. Furthermore, the golden, crispy breadcrumb topping provides textural contrast that makes each bite interesting and satisfying. Meanwhile, the baking step transforms the dish from stovetop creamy to oven-baked comfort food that feels more substantial and special.
This recipe respects the traditions of classic baked mac and cheese while elevating it with quality ingredients and careful technique. The result is a dish that satisfies both comfort food cravings and sophisticated palates. Whether served to family or guests, this baked mac and cheese delivers consistent, impressive results that will have people asking for your recipe.
Final Thoughts
Making baked mac and cheese from scratch is an incredibly rewarding experience that yields far superior results compared to boxed versions. The entire process, from cooking the pasta to pulling the golden dish from the oven, takes less than an hour. Furthermore, the recipe is forgiving enough for beginners but elegant enough for entertaining. As you become familiar with the technique, you’ll feel confident experimenting with different cheeses and add-ins to make it your own.
This classic comfort food never goes out of style because it addresses something fundamental in all of us: the desire for warmth, flavor, and satisfaction on a plate. Next time you’re planning dinner, consider making this baked mac and cheese and watch as it becomes a requested favorite in your household. The combination of creamy sauce, tender pasta, and golden crust creates something truly special that brings people together around the table.
Did you enjoy this recipe? If you loved making this Baked Mac and Cheese, please save this recipe for future use, pin it to your favorite board, or share it with friends and family who would appreciate a delicious comfort food dinner. Your support means everything to us and helps us continue creating more amazing recipes that make home cooking easier and more enjoyable. We’d love to hear how your baked mac and cheese turned out—your feedback inspires us to keep bringing you quality recipes that deliver real results.