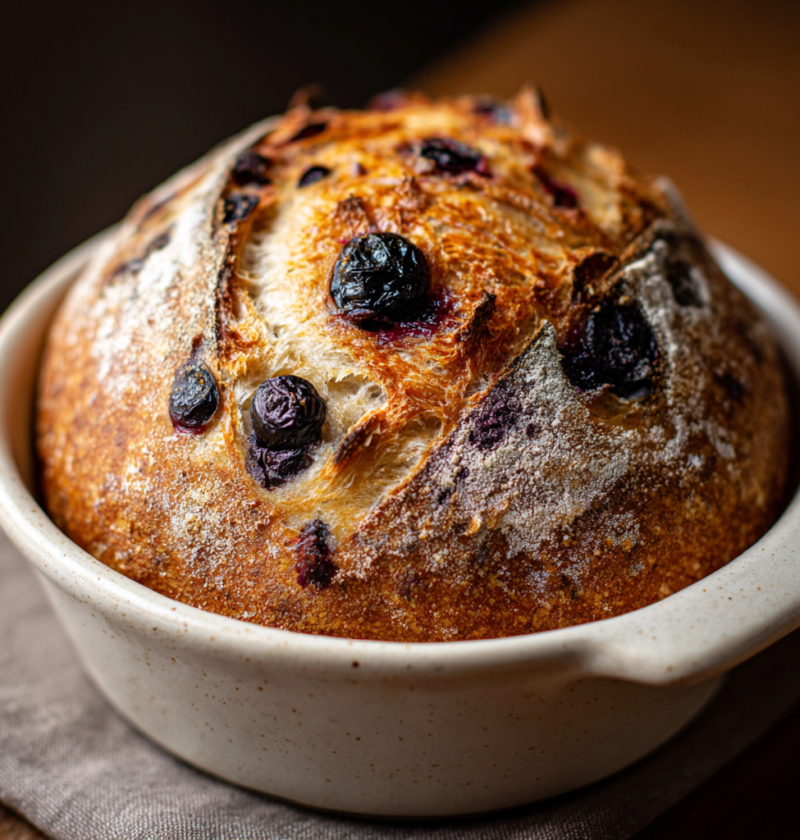
There’s something genuinely magical about slicing into a loaf of tangy sourdough studded with plump, juicy blueberries that burst with sweet flavor, creating a beautiful contrast between the complex, fermented bread and the bright, fruity bursts that surprise you with every bite. This Blueberry Sourdough Bread Recipe combines traditional sourdough techniques with fresh blueberries to create an artisanal loaf that tastes incredibly complex and sophisticated while remaining achievable for home bakers at any skill level. What makes this bread truly extraordinary is how it celebrates the intersection of classic sourdough craftsmanship and fruity indulgence, proving that traditional fermented bread can be both elegant and playfully delicious at the same time. Whether you’re baking for special breakfasts, planning to give handmade gifts to people you love, creating memorable meals with family and friends, or simply treating yourself to something absolutely delicious and nourishing, this blueberry sourdough bread delivers pure joy and genuine satisfaction. The combination of tanginess from long fermentation, subtle sweetness from blueberries, and beautiful texture from proper technique creates a loaf that tastes like you spent weeks perfecting your craft when really, the process simply requires patience and proper method rather than complicated steps. Your loved ones will be absolutely enchanted by the beautiful purple-speckled crumb, impressed by how delicious homemade sourdough tastes compared to store-bought versions, and utterly satisfied with every tender, flavorful, absolutely perfect slice of this absolutely stunning bread.
Ingredients
This recipe makes one beautiful, artisanal loaf.
For the Sourdough Starter:
- 1 cup active sourdough starter (fed 4 to 8 hours prior, at room temperature)
- ½ cup water, room temperature
For the Dough:
- 1¾ cups bread flour
- ¼ cup whole wheat flour
- ¾ teaspoon salt
- ¼ teaspoon instant yeast (optional, helps with rising)
- ¾ cup water, room temperature
For the Filling:
- 1 cup fresh blueberries (or frozen, thawed and drained)
- 1 tablespoon honey
- ½ tablespoon lemon zest
- ½ tablespoon fresh lemon juice
For Finishing:
- 1 tablespoon water mixed with ½ teaspoon honey (for egg wash)
- Sea salt flakes (optional)
- Extra fresh blueberries for topping (optional)
Instructions
Prepare Your Sourdough Starter
- Four to eight hours before mixing your dough, feed your sourdough starter with equal parts flour and water, setting it in a warm location to activate.
- The starter is ready when it shows visible bubbles throughout and rises to nearly double its original volume, indicating active fermentation.
- Verify your starter is active by performing the float test—drop a small spoonful into water; if it floats, it’s ready to use for baking.
Prepare the Blueberries
- If using fresh blueberries, rinse them gently and pat completely dry using paper towels, as excess moisture can cause them to bleed into the dough excessively.
- If using frozen blueberries, thaw them completely and drain any accumulated liquid using a fine-mesh strainer.
- In a small bowl, toss the dried blueberries with honey, lemon zest, and fresh lemon juice, allowing them to macerate for 10 to 15 minutes.
- This macerating process allows the blueberries to absorb flavors and prevents them from being completely plain against the tangy sourdough.
Mix the Dough
- In a large mixing bowl, combine the active sourdough starter and room temperature water, stirring together with a wooden spoon until partially combined.
- Add the bread flour, whole wheat flour, salt, and optional instant yeast to the starter mixture, stirring with the wooden spoon until all flour is incorporated.
- The dough will be shaggy and rough at this point, which is completely normal and expected at this stage of mixing.
- Cover the bowl with a damp kitchen towel and allow the dough to rest for 30 to 60 minutes in a warm location, a process called autolyse.
- This resting period allows the flour to fully hydrate and the gluten to develop naturally without additional mixing.
First Fold and Bulk Fermentation
- After the autolyse resting period, perform the first set of stretch and folds by grabbing one side of the dough, stretching it upward, and folding it over the center.
- Rotate the bowl 90 degrees and repeat this stretching and folding motion four times, working your way around the entire bowl.
- Allow the dough to rest for 20 minutes, then repeat the stretch and fold process two more times at 20-minute intervals.
- These folds build gluten structure without traditional kneading, creating a strong, elastic dough perfect for artisanal bread.
- After completing all stretch and fold sets, cover the dough and allow it to undergo bulk fermentation at room temperature for 4 to 6 hours.
- The dough is ready to shape when it has increased in volume by approximately 50 to 75 percent and shows visible bubbles throughout.
Incorporate the Blueberries
- About 30 minutes before the end of bulk fermentation, gently turn the dough out onto a lightly floured work surface.
- Gently flatten the dough into a rough rectangle without deflating all the air bubbles completely.
- Distribute the macerated blueberries evenly across the dough surface, then fold the dough over itself several times to incorporate the berries throughout.
- Work gently to avoid squashing the blueberries excessively, as you want them intact enough to burst individually rather than creating purple dough.
- Return the dough to the bowl and allow it to complete its bulk fermentation, rising another 30 to 60 minutes as the blueberries fully integrate.
Shape the Dough
- Turn the fermented dough out onto a lightly floured work surface, gently preforming it into a round shape without deflating excessively.
- Grab the top edge of the dough and fold it toward the center, then rotate and repeat around the entire circle, creating surface tension.
- Continue rotating and folding until you’ve gone completely around the dough, creating a tight, cohesive round with a seam on the bottom.
- Allow the shaped dough to rest for 5 minutes on the work surface, allowing the gluten to relax slightly.
- Place the shaped dough seam-side up into a banneton basket or bowl lined with a floured kitchen towel for the final proof.
Final Proof and Scoring
- Cover the banneton with a plastic bag or damp towel and allow the dough to undergo final proof for 2 to 4 hours at room temperature, or overnight in the refrigerator.
- For overnight proofing, refrigerate the shaped dough for 8 to 16 hours, which develops deeper flavor and makes scoring easier.
- When ready to bake, preheat your oven to 450°F and place a Dutch oven inside to preheat for at least 30 minutes.
- Remove the cold dough from the refrigerator and carefully invert it onto parchment paper, seam-side down, revealing the beautiful top.
- Using a very sharp knife or bread lame, score the top of the dough with a single deep slash or decorative pattern, about ¼-inch deep.
- Pour the water and honey mixture over the top of the dough using a pastry brush, creating a light wash that adds shine and helps browning.
Bake to Golden Perfection
- Carefully transfer the scored dough on parchment paper into the preheated Dutch oven, being cautious of steam and hot surfaces.
- Cover the Dutch oven with its lid and bake at 450°F for 25 minutes, allowing steam to create a beautiful, crispy crust.
- Remove the lid and bake for another 20 to 25 minutes until the bread is deeply golden brown on all visible surfaces.
- The internal temperature should reach 205 to 210°F when measured with an instant-read thermometer inserted into the thickest part of the loaf.
- Remove the bread from the oven and transfer it to a wire cooling rack, allowing it to cool completely before slicing, at least 1 hour.
- Cooling is essential as it allows the interior structure to set properly—cutting into warm bread causes it to compress and become gummy.
Serving and Storing Tips
How to Serve This Beautiful Bread
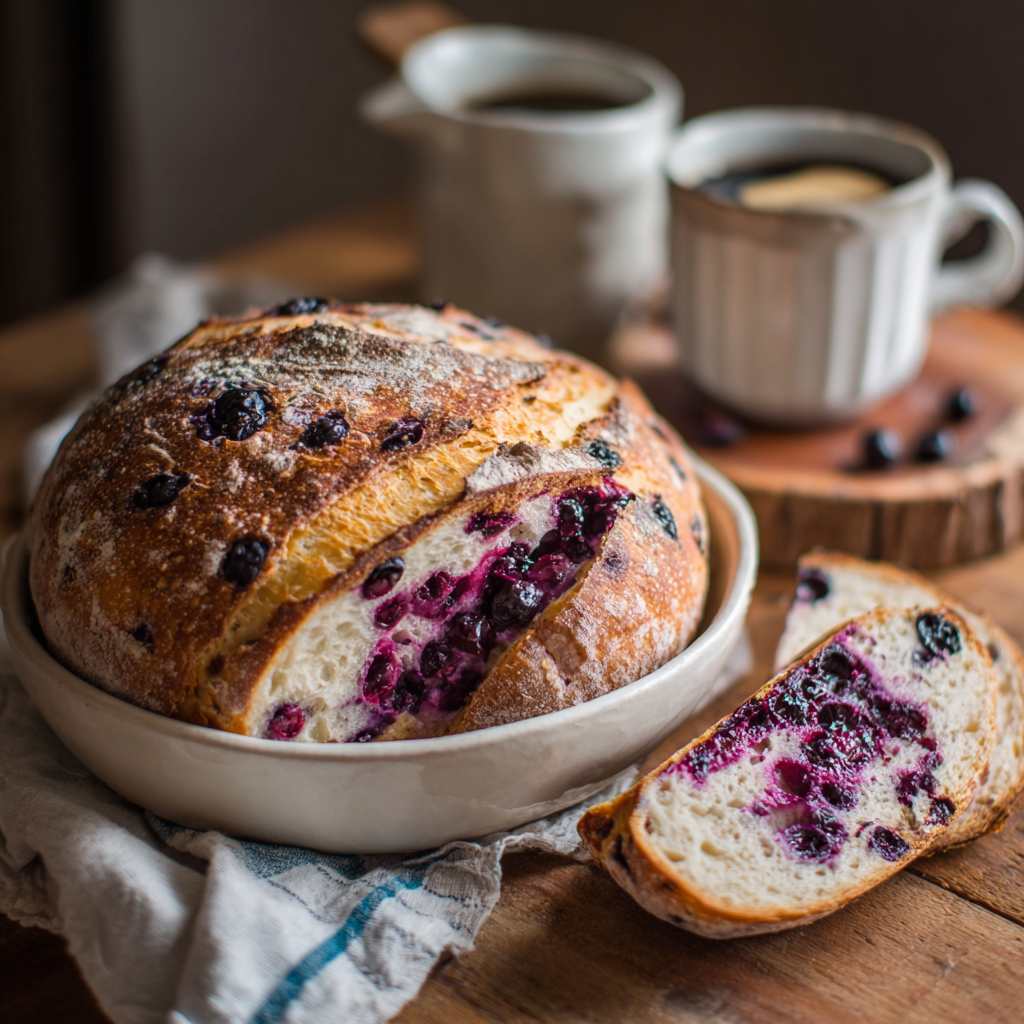
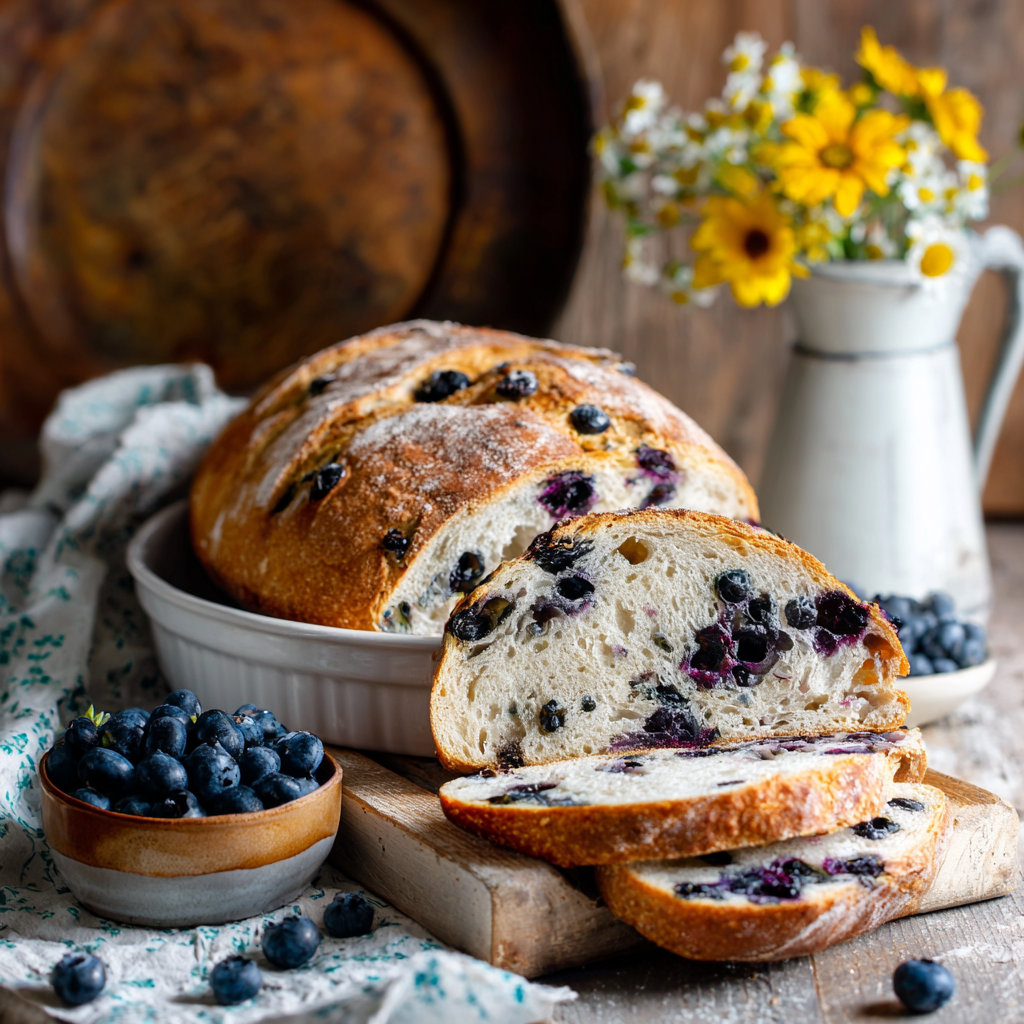
Present your gorgeous blueberry sourdough bread on a beautiful cutting board or bread board that showcases its stunning golden-brown crust and purple-speckled interior. First, slice it using a serrated bread knife with a gentle sawing motion rather than pressing down, which preserves the beautiful crumb structure. Additionally, serve alongside cultured butter, cream cheese, or ricotta for breakfast or brunch enjoyment. Meanwhile, consider serving with honey, jam, or lemon curd for sweet applications, or with olive oil and sea salt for savory presentations. For special occasions, create a beautiful bread and cheese board that celebrates the artisanal quality of your homemade creation. Furthermore, toasting the bread briefly brings out the crust’s crackling texture while warming the soft interior beautifully.
Storage Instructions for Maximum Freshness
Keep your blueberry sourdough bread in a bread box, paper bag, or wrapped lightly in a kitchen towel at room temperature for up to 3 days, allowing it to maintain its texture and crust crispness. Never store bread in plastic bags while still warm, as condensation creates a soggy crust; wait until completely cool. For longer storage, wrap the completely cooled loaf in plastic wrap and then foil, freezing for up to 3 months in a freezer-safe container. To use frozen bread, thaw it overnight at room temperature wrapped in its packaging, which prevents moisture loss during thawing. Individual slices can be frozen and toasted directly from frozen for quick breakfast or snack options without full thawing needed.
Helpful Notes and Pro Tips
Tips for Successful Sourdough Baking
Start by ensuring your sourdough starter is genuinely active and bubbly before using it, as inactive starter will result in dense, poorly risen bread. Additionally, temperature significantly impacts fermentation speed—warmer kitchens see faster fermentation while cooler kitchens require longer rise times, so adjust timing accordingly. The stretch and fold technique replaces traditional kneading while being gentler on the dough, so don’t skip these crucial steps even though they seem simple. Furthermore, bulk fermentation timing is flexible—if your dough rises faster or slower than expected, adjust based on visual cues rather than strict timing. The key to proper fermentation is understanding that sourdough relies on wild yeast and bacteria rather than commercial yeast, creating complex flavors that develop over time. Meanwhile, scoring the dough allows controlled expansion during baking, creating that beautiful “ear” that develops along the slash.
Tips for Perfect Blueberry Integration
Pat the blueberries completely dry before adding, as excess moisture can cause them to bleed purple throughout the dough. Additionally, tossing them with lemon juice and honey prevents them from being completely bland while building layer of flavor. Incorporate the berries gently during the final stages of bulk fermentation so they don’t leach color excessively into the dough. Furthermore, frozen blueberries that have been thawed and drained work just as well as fresh, though they may bleed slightly more color. The blueberries should remain mostly intact, creating beautiful purple bursts rather than becoming completely pulverized into the crumb.
Ingredient Substitutions and Variations
If you don’t have whole wheat flour, you can use all bread flour for a slightly different texture, though the complexity will be less pronounced. In contrast, for nuttier flavor, you could replace up to ¼ cup of bread flour with spelt or einkorn flour for unique taste profiles. For different fruit variations, raspberries, blackberries, or even dried cranberries work beautifully when substituted in equal amounts. You could also create a seeded version by adding sunflower seeds, pumpkin seeds, or sesame seeds to the dough before shaping. Alternatively, adding 1 tablespoon of honey or sugar directly to the dough creates slightly sweeter bread that balances the tartness of sourdough more prominently.
Shaping and Proofing Variations
Beyond traditional round boules, you can shape the dough into batards or oblong loaves for different aesthetics and slightly faster baking. Additionally, you could divide the dough into smaller rolls for individual portions that bake more quickly and create beautiful presentations. For longer fermentation and deeper flavor, overnight cold proofing in the refrigerator develops complex tastes that shorter room temperature proofing cannot achieve. You could also create a faster version by reducing bulk fermentation to 2 to 3 hours and skipping the overnight proof, though the flavor development will be less pronounced.
Chef Tips
Professional bakers always mark their dough with the time it was mixed and shaped, tracking fermentation progress and adjusting baking times based on visual cues rather than strict timing alone. Additionally, using a Dutch oven for the first half of baking traps steam, which creates a crispy, crackling crust that’s impossible to achieve without this technique in home ovens.
Frequently Asked Questions
Can I make this bread without a sourdough starter or banneton basket? Yes, you can use a combination of all-purpose flour with a small amount of instant yeast if you don’t have a starter, though the flavor will be different; a bowl lined with a floured towel works fine instead of a banneton.
What should I do if my dough isn’t rising enough during bulk fermentation? Your kitchen may be too cool—try placing the dough in a warm location like an oven with just the light turned on, or extend the fermentation time by several hours.
Can I use frozen blueberries that I don’t thaw ahead of time? Frozen blueberries will work but may bleed more color into the dough; thawing and draining them first prevents excessive discoloration while maintaining berry integrity.
How do I know when my sourdough is fully baked, and how can I avoid overbaking? Use an instant-read thermometer to verify the internal temperature reaches 205 to 210°F, and watch for deep golden-brown color; every oven is different, so adjust timing accordingly.
Is there a way to make this bread with less fermentation time if I’m in a hurry? You can slightly increase the amount of instant yeast to ½ teaspoon and reduce bulk fermentation to 3 hours and final proof to 1 hour, though flavor complexity will be less developed.
Conclusion
Blueberry Sourdough Bread represents the perfect marriage of traditional sourdough craftsmanship and fruity indulgence that creates an artisanal loaf absolutely worthy of celebration and genuine admiration. This recipe proves that traditional fermented bread doesn’t require years of experience or mysterious techniques—instead, it simply needs quality ingredients, patience, and proper method combined with genuine care. Whether you’re baking for special breakfasts, creating gifts for people you love, sharing with family and friends, or treating yourself to something absolutely delicious and nourishing, this blueberry sourdough bread delivers on every level. From the moment you begin building your dough and those wonderful fermented aromas fill your kitchen to the final bite of tender, flavorful bread studded with burst blueberries, every aspect of this experience feels completely special and thoroughly satisfying. The straightforward instructions mean that even inexperienced bakers can create something that looks professionally made and tastes absolutely incredible through proper technique and patience. Most importantly, the time and attention you invest in crafting this beautiful loaf shines through in every gorgeous slice and delicious bite. This is more than just bread—it’s an expression of dedication, artistry, and genuine affection served warm and beautiful.
Did you absolutely love making this Blueberry Sourdough Bread as much as we loved sharing this recipe with you? We’d genuinely adore hearing about your bread-baking experience! Please save this recipe to your favorites, pin it to your Pinterest board, and share it with friends and family who deserve delicious, artisanal bread that proves homemade is infinitely better than store-bought. Your shares, comments, and feedback inspire us to keep developing delicious recipes that bring joy and celebration to your kitchen and table. Don’t forget to tag us on social media if you make this stunning bread—we can’t wait to see your gorgeous loaves and hear how much your loved ones cherished this thoughtful, delicious, and absolutely beautiful blueberry sourdough bread!