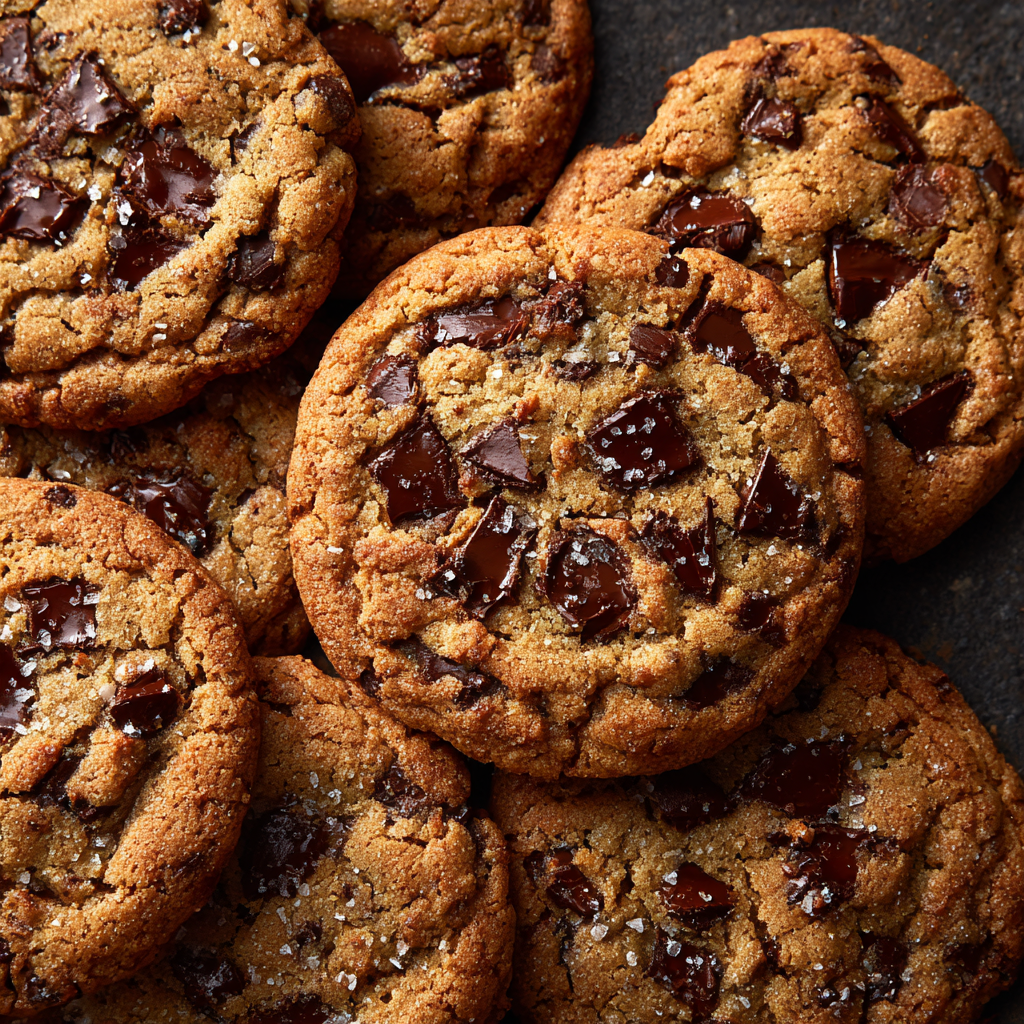
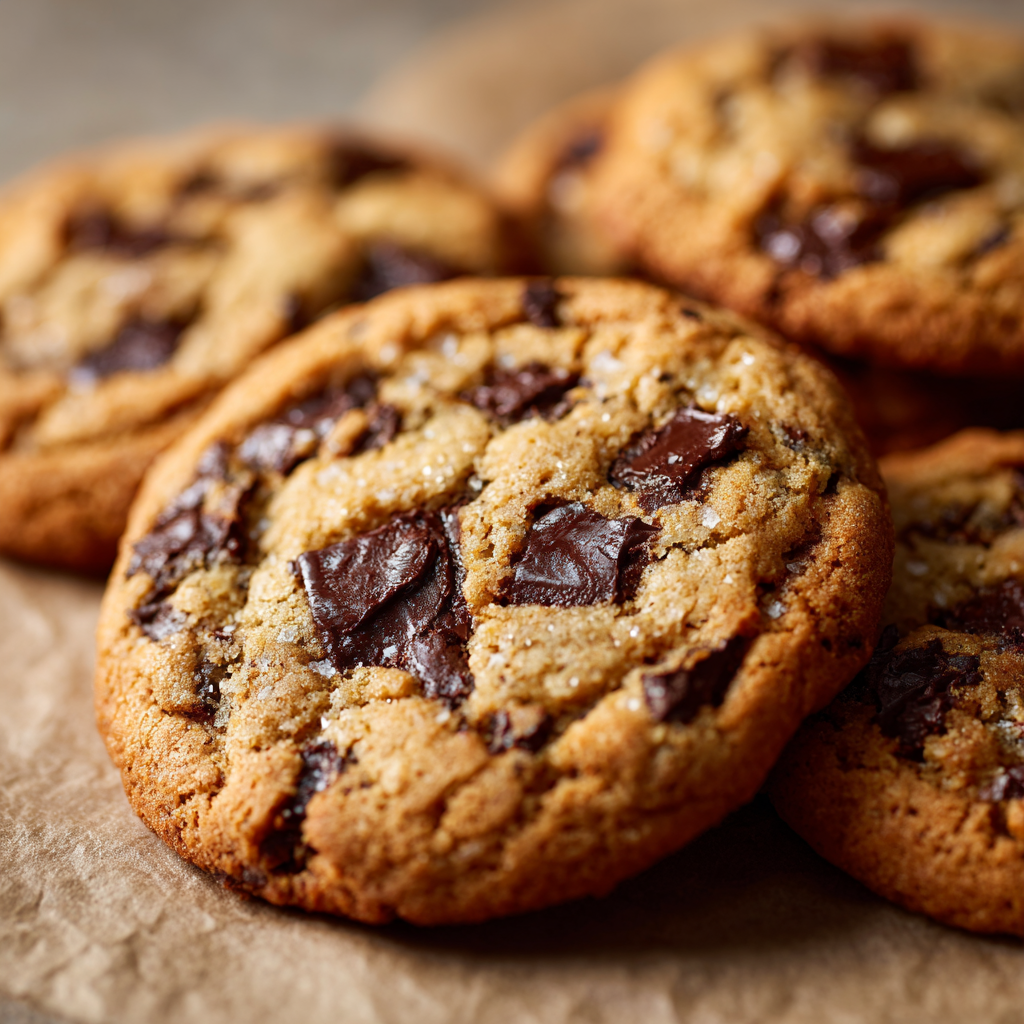
These absolutely incredible brown butter chocolate chip cookies represent the ultimate evolution of the classic cookie, delivering nutty, caramelized depth that transforms ordinary chocolate chip cookies into something genuinely sophisticated and unforgettable. First, browning the butter before mixing creates a subtle nuttiness and complexity that makes every bite taste far more interesting than traditional cookies made with regular butter. Next, the ingredient list contains only pantry staples you likely already have on hand, eliminating any reason to postpone creating these absolutely delicious treats. Additionally, the straightforward preparation method requires no special equipment or advanced baking knowledge, making these accessible to bakers of all skill levels. The combination of brown butter’s nutty richness with premium chocolate chips creates a flavor profile that’s simultaneously comforting and sophisticated. Furthermore, these cookies deliver that perfect texture: crispy edges with chewy, almost gooey centers that make every bite genuinely satisfying and impossible to stop eating.
Why Brown Butter Chocolate Chip Cookies Are the Ultimate Cookie Evolution
Brown butter chocolate chip cookies represent what happens when a classic recipe receives thoughtful improvement through a single technique that elevates everything about the final product. The browning process transforms ordinary butter into something with caramelized notes, nutty complexity, and toasty richness that regular butter simply cannot provide. Meanwhile, this depth of flavor complements chocolate perfectly, creating a combination that feels far more sophisticated than the sum of its parts. Furthermore, brown butter cookies have a visual appeal—they brown slightly darker than regular cookies—that makes them look absolutely professional and intentional. Additionally, the improved flavor means these cookies taste genuinely special without requiring additional ingredients or complicated preparation. The technique is straightforward enough for beginners yet delivers results that impress even experienced bakers and serious cookie enthusiasts. For anyone seeking to elevate their cookie game from ordinary to genuinely outstanding, brown butter chocolate chip cookies are absolutely the answer.
Ingredients (Makes About 24 Cookies)
- 1 cup unsalted butter
- ¾ cup granulated sugar
- ¾ cup brown sugar, packed
- 1 large egg
- 1 teaspoon vanilla extract
- ½ teaspoon almond extract (optional, adds sophistication)
- 2¼ cups all-purpose flour
- 1 teaspoon baking soda
- ¾ teaspoon salt
- 2 cups semi-sweet chocolate chips (or combination of semi-sweet and dark)
- ½ cup chopped pecans or walnuts (optional, but recommended)
- Fleur de sel or sea salt for topping (optional, enhances chocolate flavor)
Step-by-Step Instructions
Browning the Butter
- Cut the unsalted butter into tablespoon-sized pieces and place them in a medium saucepan over medium heat.
- Allow the butter to melt completely, which takes about 2-3 minutes, stirring occasionally with a wooden spoon.
- Once melted, continue cooking the butter, stirring frequently and watching carefully as it transforms.
- The milk solids will begin to settle at the bottom of the pan and gradually turn golden brown—this is exactly what you want.
- Continue cooking for another 2-4 minutes, swirling the pan occasionally and listening for a gentle crackling sound.
- The butter will progress from golden to amber colored, releasing a beautiful nutty, caramelized aroma.
- Watch carefully to prevent the butter from burning—you want deep golden brown, not black or burnt.
- Remove the saucepan from heat immediately when the butter reaches deep golden brown color and the aroma is rich and toasty.
- Pour the brown butter into a small bowl, including all the browned milk solids at the bottom, which contain tremendous flavor.
- Allow the brown butter to cool for about 10-15 minutes at room temperature before using—it should still be warm but not piping hot.
Creating the Cookie Dough
- In a large mixing bowl, combine the cooled brown butter with the granulated sugar and brown sugar.
- Using an electric mixer on medium speed, beat the mixture for about 3-4 minutes until well combined.
- The mixture should look slightly different from traditional creamed butter and sugar—it may appear slightly separated or speckled with browned milk solids, which is perfectly normal and desirable.
- Add the egg to the butter mixture, beating on medium speed for about 1 minute until fully incorporated.
- Pour in the vanilla extract and almond extract if using, beating on medium speed for another minute until everything combines smoothly.
- The mixture should look fluffy and well-blended at this point.
Adding Dry Ingredients
- In a separate medium bowl, whisk together the all-purpose flour, baking soda, and salt until evenly distributed.
- Reduce the mixer speed to low and gradually add the dry ingredient mixture to the butter mixture.
- Stir just until the dry ingredients are incorporated and no streaks of flour remain visible.
- Avoid overmixing, which develops gluten and creates tougher cookies instead of tender, chewy ones.
- Stop mixing immediately once the dough comes together—there should be no visible dry ingredients but also no excessive mixing.
Adding Chocolate and Mix-Ins
- Fold the chocolate chips gently into the dough using a spatula, stirring until evenly distributed throughout.
- If using chopped nuts, fold them into the dough at the same time as the chocolate chips for even distribution.
- Ensure the chocolate chips and any optional add-ins distribute throughout the dough as evenly as possible.
- The dough should look like chocolate chips suspended throughout, not a smooth paste.
Preparing for Baking
- For the best texture and flavor development, cover the dough tightly with plastic wrap and refrigerate for at least 2 hours, or up to overnight.
- Chilling allows the flavors to meld, prevents excessive spreading during baking, and makes the dough easier to work with.
- If you’re short on time, you can skip refrigeration, though chilling genuinely improves texture and flavor.
- Remove the dough from the refrigerator about 10 minutes before you plan to bake, allowing it to soften slightly for easier portioning.
Shaping and Arranging Cookies
- Preheat your oven to 350°F and position the racks so one sits in the upper-middle and one in the lower-middle.
- Line two large baking sheets with parchment paper or silicone baking mats, which prevent sticking and ensure even browning.
- Using a cookie scoop or rounded tablespoon, portion the dough into balls about the size of a walnut.
- Roll each dough ball gently between your palms to smooth it, creating a uniform sphere shape.
- Place the dough balls on the prepared baking sheets, spacing them about 2 inches apart to allow room for spreading.
- Gently flatten each dough ball slightly with your fingertips or the bottom of a glass—about ¼ inch thick is perfect.
- For uniform cookies, use the same scoop size for each portion, creating consistent sizing.
Baking to Perfection
- Transfer one baking sheet to the upper-middle rack and one to the lower-middle rack in the preheated 350°F oven.
- Bake for 11-14 minutes until the edges are light golden brown but the centers still appear slightly underdone.
- The cookies should look set around the edges but the centers should still look slightly soft—they’ll continue cooking as they cool.
- Remove both baking sheets from the oven and immediately sprinkle a tiny pinch of fleur de sel or sea salt on the warm cookies if desired—the salt enhances the chocolate flavor beautifully.
- Allow the cookies to cool on the baking sheets for 3-4 minutes, which allows them to firm up without becoming hard.
- After cooling briefly on the sheets, transfer the cookies to a wire cooling rack using a spatula.
- Arrange them in a single layer on the cooling rack for even air circulation as they cool completely.
- Allow the cookies to cool for at least 20 minutes before enjoying—this allows them to reach perfect chewy texture.
Serving and Storing Tips
How to Serve and Enjoy
These sophisticated brown butter chocolate chip cookies are perfect for nearly every occasion where elevated, absolutely delicious treats are appreciated and celebrated. First, serve them warm or at room temperature with cold milk, hot coffee, or specialty hot chocolate for the ultimate cookie experience. Next, arrange them on a beautiful platter for impressive dessert displays at parties, gatherings, or special occasions. Additionally, package individual cookies in cellophane bags tied with ribbon to create memorable homemade gifts that communicate genuine thoughtfulness. Furthermore, these cookies work beautifully as part of elegant dessert spreads, afternoon tea service, or cookie platters at celebrations. You might also include them in gourmet gift baskets, include them in care packages for loved ones, or serve them at special events where impressive homemade treats are appreciated. Consider setting them out alongside other treats for visually stunning presentations that immediately communicate the care invested in their preparation. These cookies are equally perfect for casual entertaining, quiet moments enjoying treats with coffee, or whenever you want something genuinely delicious and sophisticated.
Storage for Maximum Freshness
To preserve these brown butter chocolate chip cookies at peak flavor and texture, allow them to cool completely before storing in an airtight container at room temperature. Layer cookies with parchment paper between them to prevent sticking and maintain individual shape. Properly stored, these cookies stay fresh for up to 8 days at room temperature, maintaining their soft, chewy centers and crispy edges throughout. For extended storage, place the airtight container in the refrigerator for up to two weeks, though the cookies may become slightly firmer. Freezing is entirely acceptable for these cookies; place them in a freezer-safe container or freezer bag for up to 3 months—thaw them at room temperature for about 20 minutes before serving, and they’ll taste nearly as fresh as the day they were baked. The dough can be made ahead and refrigerated for up to 4 days before baking, or frozen for up to 2 months. To bake chilled dough, add 1-2 minutes to the baking time; frozen dough needs an additional 2-3 minutes. Alternatively, scoop the dough onto a baking sheet, freeze until solid, then transfer to a freezer bag—this allows you to bake fresh cookies anytime without thawing the entire batch. For gift-giving, store cookies in decorative tins or boxes with parchment paper between layers. Include a note mentioning the cookies are best enjoyed within five days for optimal texture and freshness.
Helpful Notes and Tips
Several practical considerations will help you create absolutely perfect brown butter chocolate chip cookies that turn out beautifully every single time. First, the brown butter is genuinely crucial—don’t skip this step or use pre-browned butter substitute, as the browning process is where all the magic happens. Next, watch the butter carefully while browning; timing varies depending on heat level, so observing the color and aroma is more reliable than following exact timing. Additionally, including all the browned milk solids at the bottom of the pan is essential; these contain tremendous flavor and shouldn’t be discarded. Meanwhile, allowing the brown butter to cool to room temperature before mixing prevents it from cooking the egg and ensures proper dough texture. The combination of granulated and brown sugar creates optimal flavor balance and texture; don’t substitute one for the other. For deeper chocolate flavor, use dark chocolate chips instead of semi-sweet, though this creates a less sweet final product. Those preferring nuts can use any variety—pecans and walnuts are traditional, but almonds, macadamia nuts, and pistachios all work beautifully. The optional almond extract enhances the brown butter flavor beautifully without tasting obviously almond-flavored, so it’s genuinely worth including. For a more sophisticated flavor, sprinkle a tiny pinch of fleur de sel or sea salt on warm cookies just after removing from the oven—the salt amplifies chocolate flavor in surprising ways. If cookies spread too much during baking, your oven may run hot; try reducing the temperature by 25°F and checking at the minimum baking time. For cookies that don’t spread enough, ensure your butter was properly browned and your dough wasn’t over-chilled. The chilling step genuinely improves texture and flavor, so don’t skip it if time allows—overnight chilling produces noticeably superior cookies.
Chef Tips
Brown the butter until it reaches deep golden color with a rich, nutty aroma—this step is non-negotiable and creates the sophisticated flavor that distinguishes these cookies from ordinary chocolate chip cookies.
Remove cookies from the oven when the edges are golden but the centers still appear slightly underdone—they’ll continue cooking on the hot pan and reach perfect chewy texture as they cool completely.
Frequently Asked Questions
What if my butter burns instead of browns? If butter goes from golden to black, it’s burned and bitter; unfortunately it’s unusable; brown butter requires attentive watching and medium heat to prevent burning.
Can I use salted butter instead of unsalted? It’s better to use unsalted so you control the salt amount, though salted butter works if you reduce the added salt to ½ teaspoon.
How do I know when the butter is properly browned? The butter should smell rich and toasty with a nutty aroma, and appear deep golden brown—not pale gold and not black or burnt.
What if I don’t have a cookie scoop? A rounded tablespoon works perfectly; they’ll be slightly less uniform in size but equally delicious, or you can use a small ice cream scoop.
Why are my cookies cakey instead of chewy? You may be overbaking them; remove when centers still appear slightly underdone, and ensure you’re using the brown sugar, which adds moisture and chewiness.
The Sophistication of Elevated Classic Cookies
These brown butter chocolate chip cookies represent the beautiful intersection of classic comfort food with sophisticated flavor development that transforms an iconic recipe into something genuinely special. From the moment you begin browning the butter and the kitchen fills with a rich, nutty aroma through that first bite of perfectly chewy, chocolate-studded perfection, you’ll understand why brown butter cookies are genuinely superior. The recipe delivers consistent, impressive results that feel both familiar and elevated, satisfying at every level.
What makes these cookies truly special is the thoughtful technique of browning butter that elevates every aspect of the final product. First, the browned butter provides nutty, caramelized complexity that enriches chocolate flavor beautifully. Next, the toasted milk solids contribute depth that regular butter simply cannot provide. Additionally, the slightly darker color of brown butter cookies creates visual appeal that makes them look intentional and professionally made. Furthermore, the flavor development from chilling the dough ensures maximum impact from the brown butter and chocolate combination.
Whether you’re baking for special occasions, gift-giving, impressive entertaining, or simply because you want cookies that taste genuinely extraordinary, brown butter chocolate chip cookies deliver absolute magic from your own kitchen. The combination of browned butter, quality chocolate chips, and straightforward preparation creates something truly memorable that impresses everyone fortunate enough to enjoy them. Every batch promises crispy edges, chewy centers, and the warm satisfaction that comes from creating homemade treats that taste far more sophisticated than their simple ingredient list suggests.
We’d absolutely love to hear if you try these brown butter chocolate chip cookies! Did they become your new favorite cookie recipe for elevating the classic? Please save this recipe for future baking sessions, share it with friends and family members who appreciate sophisticated, delicious cookies, and pin it to your favorite cookie and treats boards. Your feedback, comments, and shares truly motivate us to continue creating delicious, accessible recipes that bring people together and make home baking feel joyful and achievable. Drop a comment below telling us if you added any special variations, how you served them, or how your loved ones reacted to these sophisticated cookies—we absolutely cherish hearing about your baking adventures and the joy our recipes bring to your kitchen!