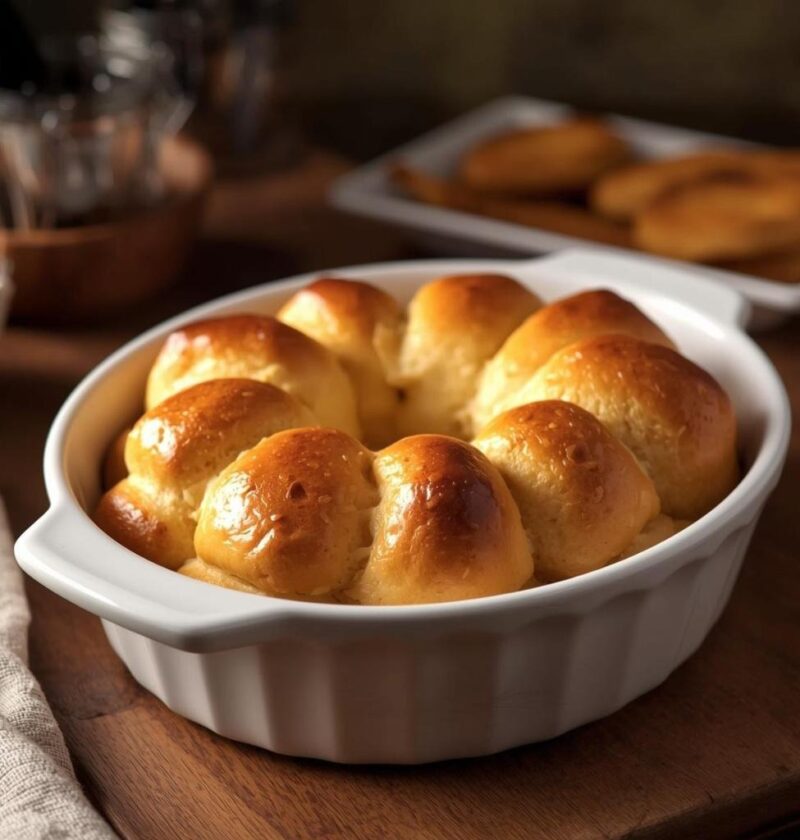
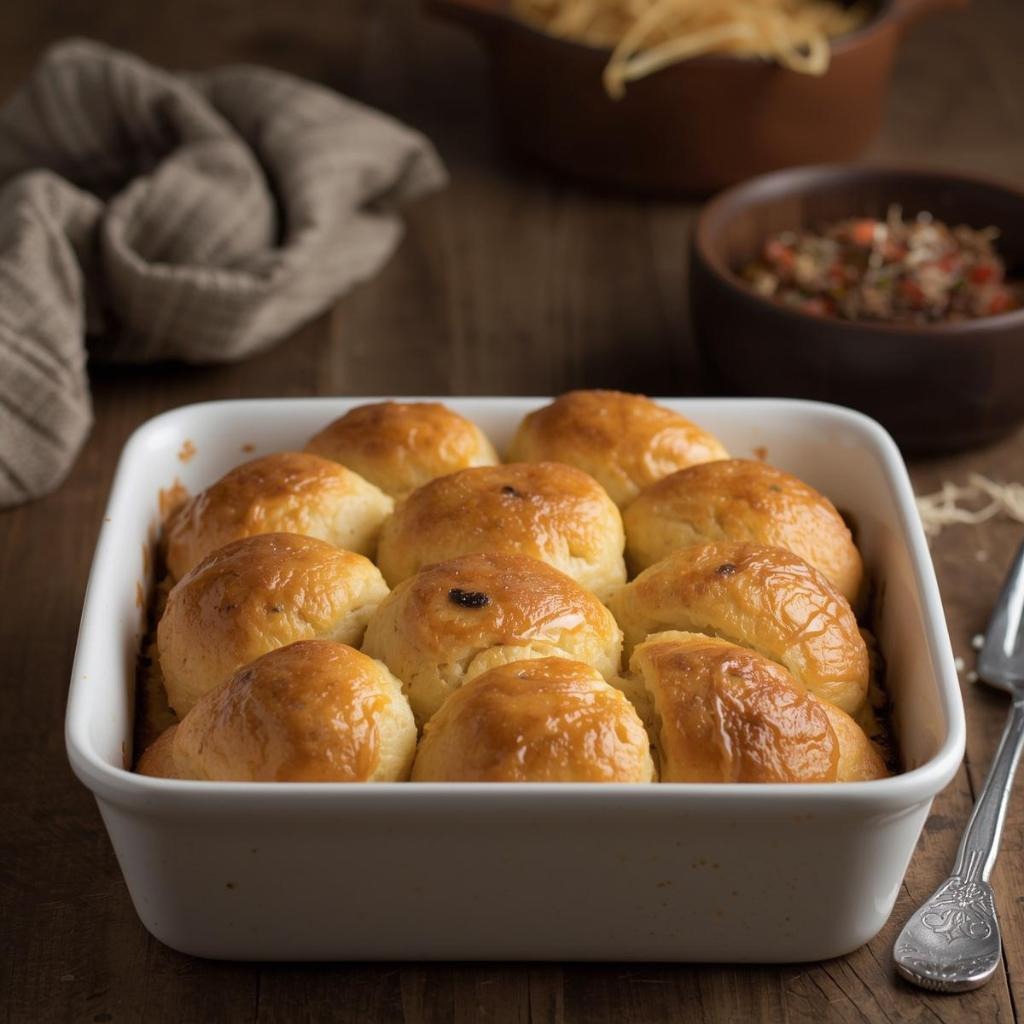
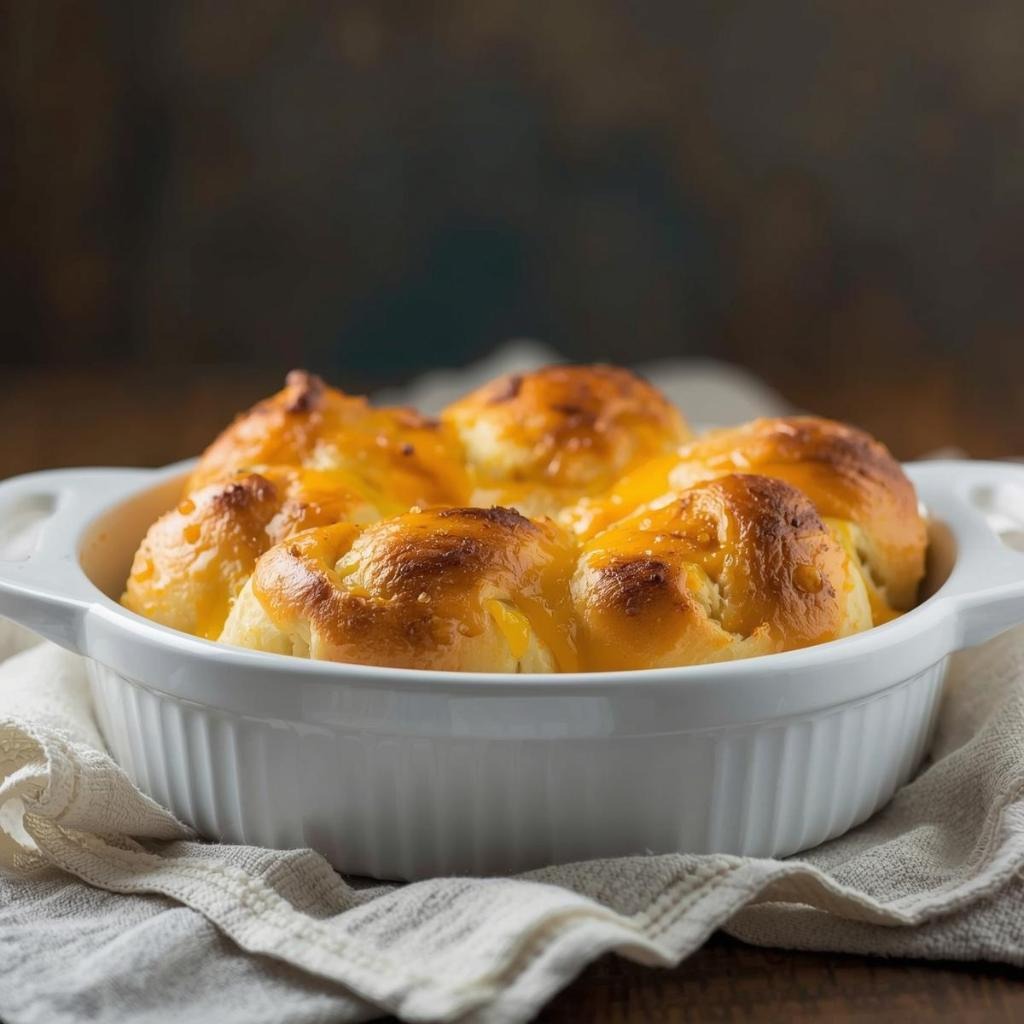
Cheesy pull apart bread is the ultimate crowd-pleasing appetizer that combines warm, buttery, soft bread with melted cheese and aromatic seasonings into one irresistibly shareable creation that disappears within minutes of hitting the table. This stunning bread ball arrives looking impressive and mysterious, then transforms before your guests’ eyes as they peel away the individual pieces, revealing gooey cheese and savory flavors hidden within each tender morsel. What makes this recipe so special is the way it combines the comfort of warm bread with the indulgence of melted cheese, creating a dish that feels both sophisticated and genuinely comforting at the same time. Additionally, cheesy pull apart bread works equally well as a sophisticated appetizer at dinner parties, casual game day fare at gatherings, a showstopping contribution to potlucks, or an impressive side dish alongside soups and salads that elevates any meal. The beauty of this recipe lies in its incredible visual impact and the way the interactive, shareable nature of pulling apart individual pieces creates a fun, engaging eating experience that brings people together. Furthermore, despite its restaurant-quality appearance and indulgent taste, this bread is remarkably straightforward to prepare, making it perfect for busy home cooks who want to serve impressive appetizers without spending hours in the kitchen.
Ingredients
This recipe makes one large pull apart bread loaf (serves 8–12 people as appetizer or side)
- 2 pounds frozen bread dough (thawed) or two 1-pound loaves of store-bought bread dough
- 6 tablespoons unsalted butter, melted
- 4 cloves garlic, minced
- 1 cup shredded mozzarella cheese
- ½ cup shredded cheddar cheese
- ½ cup grated Parmesan cheese
- ¼ cup fresh parsley, chopped
- 1 teaspoon dried Italian seasoning
- ½ teaspoon garlic powder
- ¼ teaspoon black pepper
- ¼ teaspoon salt
- ⅛ teaspoon red pepper flakes
- Optional: ¼ cup crispy cooked bacon, crumbled
- Optional: ¼ cup green onions, chopped
- Optional: 1 tablespoon fresh basil, chopped
- Optional: ¼ cup sun-dried tomatoes, chopped
Step-by-Step Instructions
1. Remove the frozen bread dough from the freezer and allow it to thaw at room temperature for approximately 2–3 hours until it becomes pliable and workable.
2. Preheat your oven to 375°F and position the oven rack to the middle setting for even browning throughout.
3. Line a large baking sheet with parchment paper or lightly coat it with cooking spray to prevent sticking.
4. Divide the thawed bread dough into 16–20 equal-sized pieces, rolling each one gently between your palms to create a ball approximately the size of a golf ball.
5. In a small bowl, combine the melted butter with the minced garlic, stirring until the garlic is evenly distributed throughout the melted butter.
6. In another bowl, combine the shredded mozzarella cheese, shredded cheddar cheese, grated Parmesan cheese, fresh parsley, Italian seasoning, garlic powder, black pepper, salt, and red pepper flakes, mixing well.
7. If using optional bacon or green onions, fold these into the cheese mixture until evenly distributed throughout.
8. Dip each dough ball into the garlic butter, coating it completely and ensuring every surface is covered.
9. Roll the garlic butter-coated dough ball in the cheese mixture, pressing gently so the cheese adheres evenly and creates a well-coated exterior.
10. Arrange the coated dough balls in the prepared baking sheet, nestling them together tightly to create a compact, cohesive loaf shape.
11. Continue dipping and rolling the remaining dough balls, arranging them closely together until all pieces are used and the entire sheet is filled with a tightly packed ball of coated dough.
12. Brush any remaining garlic butter over the top and sides of the assembled dough ball.
13. Sprinkle any remaining cheese mixture over the top of the bread ball, pressing gently so it adheres.
14. Cover the baking sheet loosely with plastic wrap or aluminum foil to allow the dough to proof without drying out.
15. Allow the bread to rise at room temperature for approximately 45 minutes to 1 hour until noticeably puffed and light.
16. Remove the plastic wrap or foil carefully without deflating the dough.
17. Bake at 375°F for 25–35 minutes until the exterior turns golden brown and the internal temperature reaches 190°F when measured with a cooking thermometer inserted into the center.
18. Remove from the oven and allow the bread to cool for 5–10 minutes, as it will be extremely hot.
19. If desired, brush additional melted butter over the warm bread and sprinkle with fresh parsley or additional Parmesan for extra flavor and visual appeal.
20. Transfer the pull apart bread to a serving platter, ensuring it’s positioned so guests can easily grab individual pieces.
Serving Tips
Next, serve this cheesy pull apart bread warm, preferably straight from the oven while the cheese is still melted and gooey and the bread maintains its optimal texture. Additionally, place the entire loaf on a beautiful serving platter and encourage guests to pull apart individual pieces and enjoy them straight from the communal bread. These pair wonderfully with soups like tomato bisque, minestrone, or creamy mushroom soup for a complete comfort meal. Meanwhile, you can serve alongside garden salads, pasta dishes, or grilled meats where warm bread complements the main course beautifully. Furthermore, consider setting out small dishes of marinara sauce, garlic butter, or herbed olive oil for dipping if desired, allowing guests to customize their experience. They work beautifully as sophisticated appetizers at dinner parties, casual game day fare where handheld food is appreciated, impressive side dishes at family dinners, or as a showstopping contribution to any gathering where warm, cheesy comfort food is celebrated and appreciated.
Storage Tips
To store leftover pull apart bread, allow it to cool completely to room temperature before placing it in an airtight container in the refrigerator, where it’ll keep for up to four days. However, it’s best enjoyed within the first two days while the bread maintains optimal softness and the cheese retains its perfect texture. When reheating, wrap the bread loosely in aluminum foil and warm it in a 350°F oven for about 10–15 minutes until heated through and the cheese softens again. Alternatively, you can place individual pieces on a baking sheet and heat them at 375°F for 5–7 minutes for faster reheating that recrisps the exterior slightly. For freezing, wrap the cooled bread tightly in plastic wrap and aluminum foil, then place in a freezer-safe container for up to three months. To use frozen bread, thaw it overnight in the refrigerator and reheat using one of the methods mentioned above. Additionally, you can freeze individual pieces in a freezer-safe container for up to three months, then reheat just what you need on a baking sheet at 375°F for 8–10 minutes for perfect convenience.
Helpful Notes
Bread Dough Selection: To begin with, using frozen bread dough is the quickest and most reliable option for this recipe, eliminating the need to make dough from scratch and ensuring consistent results every time. However, you can absolutely use homemade pizza dough, bread dough, or even refrigerated crescent roll dough if you prefer more control over ingredients. Additionally, ensure the dough is fully thawed before dividing into pieces, as cold dough is difficult to work with and may not cook through evenly.
Creating the Perfect Coating: Next, ensure you dip each dough ball completely in the garlic butter before rolling in the cheese mixture, as this helps the cheese adhere evenly and creates a flavorful exterior. Additionally, pressing the cheese mixture gently onto the coated dough balls ensures even coverage and prevents the cheese from falling off during baking. Furthermore, don’t be timid about pressing firmly—the cheese will adhere beautifully when pressed with gentle confidence.
Cheese Selection: Meanwhile, the combination of three cheeses creates more complex flavor than using a single variety. However, mozzarella is essential as the base for its melting properties—don’t skip it, as it’s what creates the gooey interior that makes this special. Additionally, freshly shredded cheese melts more smoothly than pre-shredded varieties, which contain anti-caking agents that can affect the final texture.
Ingredient Substitutions: However, you can replace the cheese combination with any melting cheeses you prefer—try smoked gouda, gruyere, or pepper jack for different flavor profiles. Additionally, if you don’t have fresh parsley, dried parsley works as a substitute though fresh is preferred for color and brightness. Furthermore, the optional additions like bacon, green onions, or sun-dried tomatoes add wonderful variations without requiring changes to the basic technique.
Arranging the Dough Balls: To achieve the proper pull apart effect, arrange the coated dough balls tightly together so they bake as one cohesive loaf rather than individual rolls. Additionally, ensure the dough balls are touching each other completely, as this helps them rise together and create the connected structure necessary for proper pulling apart. Furthermore, positioning them in a roughly spherical shape creates better visual presentation and ensures even baking.
Proofing the Dough: To understand proper proofing, the dough should noticeably puff up during the resting period, becoming light and airy but not overly puffy. Additionally, using a plastic wrap or foil covering allows the dough to rise without drying out, which is essential for maintaining tender bread texture. Furthermore, if your kitchen is particularly cool, the proofing may take longer—simply allow the dough additional time until it appears visibly puffed.
Temperature Control: Meanwhile, using a cooking thermometer ensures the bread has baked completely through to the center without overbaking the exterior. Additionally, 190°F is the target internal temperature for properly baked bread—this indicates the dough has fully cooked while remaining tender. Furthermore, if the exterior is browning too quickly while the interior remains cool, cover the bread loosely with foil during the final minutes of baking.
Common Mistakes to Avoid: However, don’t arrange the dough balls loosely, as this results in individual rolls rather than pull apart bread. Additionally, don’t skip the proofing time, as this allows the dough to rise properly and become light and airy. Furthermore, avoid using cold ingredients when possible, as this slows the proofing process and can result in dense, heavy bread.
Time-Saving Tricks: To streamline preparation, prepare the garlic butter and cheese mixture the night before and store them separately in airtight containers in the refrigerator. Additionally, you can assemble the bread completely up to four hours in advance, cover it with plastic wrap, and refrigerate until ready to proof and bake. Meanwhile, you can even proof the bread for 30 minutes and then refrigerate it for up to 8 hours, allowing it to finish proofing in the oven—simply add 10–15 minutes to the baking time.
Chef Tips
Tip 1: Add one tablespoon of fresh basil, one tablespoon of sun-dried tomato paste, and an extra half teaspoon of Italian seasoning to the garlic butter for Mediterranean-inspired depth that transforms this from good to absolutely extraordinary, creating sophisticated flavor that feels intentional and impressive.
Tip 2: Brush the warm, freshly baked bread with additional garlic butter and sprinkle with fresh parsley and extra Parmesan immediately after removing from the oven for extra indulgence and visual appeal that makes the bread look restaurant-quality and irresistible.
Frequently Asked Questions
Can I make cheesy pull apart bread with store-bought naan or focaccia instead? Yes, slice the naan or focaccia into chunks, coat with garlic butter and cheese, then bake at 375°F for 10–12 minutes. The result is slightly different but equally delicious and much faster to prepare.
How do I prevent the cheese from burning on the outside? Watch the bread carefully during baking and cover it loosely with foil if the exterior is browning too quickly. The cheese should melt and slightly caramelize but not blacken.
Can I make this bread ahead and freeze it? Absolutely—assemble and bake the bread, then cool completely and wrap tightly in plastic wrap and foil for freezing up to three months. Reheat at 350°F wrapped in foil for 15–20 minutes.
What dips pair best with cheesy pull apart bread? Marinara sauce, garlic butter, herbed olive oil, ranch dressing, and hot sauce all complement this beautifully. Additionally, pesto and roasted red pepper spread add exciting flavor variations.
Can I make mini pull apart breads instead of one large loaf? Definitely—divide the dough balls among muffin tins instead of baking on a sheet, and reduce baking time to 15–20 minutes. These create perfect individual servings for parties.
Why This Recipe Works
The magic of cheesy pull apart bread comes from the way individual dough balls bake together into one unified, interactive creation that’s both fun to eat and genuinely delicious. Additionally, the garlic butter coating on each piece ensures every bite is flavorful and aromatic, while the three-cheese combination provides complexity and depth. Meanwhile, the proofing step allows the dough to rise properly and become light and airy, creating the tender crumb necessary for true comfort food appeal. Furthermore, the communal, shareable nature of pulling apart individual pieces creates a fun, engaging eating experience that brings people together and encourages interaction. The beauty of this recipe also lies in its incredible make-ahead flexibility—you can prepare it ahead, refrigerate it, and bake it fresh when needed, making entertaining completely stress-free and practical.
Variations to Try
Italian Herb Version: Next, add fresh basil, oregano, and sun-dried tomatoes to the cheese mixture for Mediterranean-inspired flavor that feels completely different yet equally delicious.
Pepperoni and Mozzarella Style: To try something different, add chopped pepperoni and extra mozzarella cheese to the coating mixture for pizza-inspired flavor that’s absolutely irresistible.
Cajun Spiced Version: However, replace the Italian seasoning with Cajun spice blend and add cooked crumbled andouille sausage to the cheese mixture for bold, spicy flavor.
Everything Bagel Version: As an alternative, coat the dough balls with everything bagel seasoning instead of Italian herbs, creating a completely different flavor profile.
Spinach and Artichoke Version: For a completely different approach, add chopped spinach, artichoke hearts, and white cheddar cheese to the mixture for a sophisticated, vegetable-forward creation.
Bacon Cheddar Scallion Version: To create a savory variation, use sharp cheddar, crispy bacon crumbles, and green onions for a combination that feels more substantial and hearty.
Dipping Sauce Recipes
Garlic Butter Dip: Mix one cup melted butter with six minced garlic cloves, one tablespoon fresh parsley, salt, and pepper for a simple yet luxurious accompaniment.
Marinara with Fresh Basil: Heat two cups marinara sauce with two tablespoons fresh basil, one minced garlic clove, and a pinch of red pepper flakes for classic Italian flavor.
Roasted Garlic Aioli: Blend one cup mayonnaise with four roasted garlic cloves, one tablespoon lemon juice, salt, and pepper for a creamy, garlicky option.
Herb-Infused Olive Oil: Combine one cup quality olive oil with three tablespoons fresh herbs like basil, oregano, and parsley, plus one minced garlic clove and red pepper flakes for dipping.
Pro Serving Ideas
For impressive entertaining, place the warm cheesy pull apart bread on a wooden board or beautiful platter, surrounding it with small bowls of marinara sauce, garlic butter, and herbed olive oil. Additionally, garnish the bread with fresh parsley, additional Parmesan, and perhaps some red pepper flakes for visual appeal and extra flavor dimension. Furthermore, for casual entertaining, simply place the bread on the table and let guests enjoy pulling pieces apart and dipping them in their sauce of choice.
Flavor Pairing Suggestions
These pull apart breads work wonderfully when paired with soups and main dishes that complement their cheesy, garlicky profile. Next, creamy soups like tomato bisque, broccoli cheddar, or butternut squash provide excellent contrast to the richness of the bread. Additionally, light pasta dishes or fresh salads balance the indulgence beautifully. Meanwhile, serving alongside grilled chicken, roasted vegetables, or lean proteins creates complete, well-rounded meals where the bread plays a supporting role.
Final Thoughts
Cheesy pull apart bread represents the perfect intersection of impressive presentation, genuine comfort, and practical ease of preparation that makes it ideal for any entertaining situation, dinner party, or casual gathering. Whether you’re hosting a sophisticated dinner, preparing a side dish for family dinner, or looking for a showstopping contribution to any gathering, this bread delivers consistently delicious results that become memorable highlights of any occasion. Additionally, the endless customization possibilities for seasonings, cheeses, and optional additions mean you can make this exactly as you prefer, adjusting flavors to suit your palate and available ingredients. Next time you’re planning a meal that needs to impress without requiring complicated techniques or extensive prep time, remember that cheesy pull apart bread is just 90 minutes away from becoming the standout dish everyone raves about long after the meal ends.
Did you love this recipe? If you enjoyed making this Cheesy Pull Apart Bread, we’d be thrilled if you’d save this recipe to your favorites, pin it to your Pinterest board, or share it with a friend who’d appreciate it! Your support means everything to us and helps us keep creating delicious recipes to share. Tell us in the comments what dipping sauces you loved and whether you experimented with any fun variations like adding bacon or sun-dried tomatoes—we’d absolutely love to hear about your experience and see how you made this bread your own!