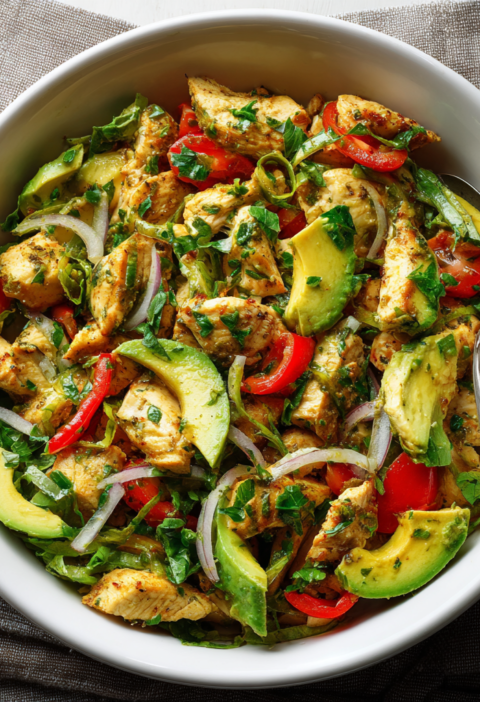
There’s a reason chicken chili has become a beloved favorite in kitchens across the country, and it all comes down to its incredible versatility, vibrant flavors, and surprisingly simple preparation. Unlike traditional beef chili that simmers for hours, this lighter version delivers bold, satisfying results in under an hour, making it perfect for busy weeknight dinners. Chicken absorbs the spices beautifully while remaining tender and moist, creating a chili that feels both wholesome and indulgent simultaneously. First, what truly sets this recipe apart is how it balances the warmth of chili spices with the natural mildness of chicken, creating something that appeals to diverse palates and preferences. Additionally, white beans and green chiles add creaminess and subtle heat, transforming simple ingredients into something genuinely memorable. Whether you’re cooking for your family, meal prepping for the week ahead, or hosting a casual gathering, this chicken chili delivers impressive results that have everyone asking for seconds and requesting the recipe.
Ingredients
This recipe yields 6 to 8 servings, making it ideal for families and meal prep enthusiasts.
- 2 tablespoons olive oil
- 2 pounds boneless, skinless chicken breasts, cubed into bite-sized pieces
- 1 large yellow onion, diced
- 1 red bell pepper, diced
- 1 yellow bell pepper, diced
- 4 cloves garlic, minced
- 2 tablespoons chili powder
- 1 tablespoon cumin
- 1 tablespoon smoked paprika
- 1 teaspoon dried oregano
- ½ teaspoon cayenne pepper
- 4 cups chicken broth
- 2 cans (15 ounces each) great northern beans or cannellini beans, drained and rinsed
- 2 cans (4 ounces each) diced green chiles, undrained
- 1 can (14.5 ounces) diced tomatoes, undrained
- ½ cup sour cream
- ½ cup heavy cream or half-and-half
- 1 cup sharp cheddar cheese, shredded
- 1 teaspoon salt
- ½ teaspoon black pepper
- Optional toppings: jalapeños, cilantro, lime wedges, tortilla strips, green onions, avocado
Instructions
Preparing Your Ingredients and Equipment
Begin by gathering all your ingredients and preparing them before you start cooking, which ensures a smooth, stress-free experience. Cut the chicken breasts into bite-sized pieces, roughly ¾ to 1 inch, which allows them to cook quickly and evenly throughout the cooking process. Next, dice the onion and both bell peppers into small, uniform pieces to promote consistent cooking. Mince the garlic cloves finely and set them aside on a small plate. In a small bowl, combine the chili powder, cumin, smoked paprika, dried oregano, and cayenne pepper, mixing them together thoroughly so the spices distribute evenly throughout your chili. Having every component prepared and organized before you begin cooking makes the actual process smooth and efficient.
Searing the Chicken for Depth of Flavor
Heat the olive oil in a large, heavy-bottomed pot or Dutch oven over medium-high heat until it shimmers and begins to smoke slightly. Working in batches to avoid overcrowding the pot, add the cubed chicken and cook for approximately 4 to 5 minutes per batch until the exterior develops a light golden-brown color. However, remember that the chicken doesn’t need to cook through at this stage, as it will continue cooking in the chili base. Transfer the seared chicken to a clean plate and set it aside, reserving the flavorful browned bits at the bottom of the pot. This browning process, called the Maillard reaction, creates deeper, more complex flavors that elevate your chili beyond anything ordinary or one-dimensional.
Building the Aromatic Base
Reduce the heat to medium and add the diced onion and bell peppers to the pot, stirring frequently for approximately 4 to 5 minutes until the vegetables soften slightly. The residual heat and the flavorful browned chicken bits will help season these vegetables as they cook. Furthermore, add the minced garlic to the pot and cook for about 1 minute, stirring constantly to prevent burning and release its wonderful aromatic oils. Next, sprinkle your spice mixture over the softened vegetables, stirring continuously for approximately 1 minute to allow the spices to bloom and release their full flavor potential. The kitchen will fill with an incredible aroma that signals you’re on the right path to creating something truly delicious and satisfying.
Building the Chili Base
Pour the chicken broth into the pot gradually while stirring to incorporate it smoothly with the spiced vegetables. Add the seared chicken back to the pot, followed by the drained and rinsed beans, which add creaminess and protein to the chili. Next, stir in the cans of diced green chiles with their liquid, which provides both flavor and subtle heat. Additionally, add the can of diced tomatoes with their juice, as the acidity balances the richness of the other ingredients beautifully. Stir everything together thoroughly, ensuring the liquid covers all the ingredients. Bring the mixture to a gentle simmer, then reduce the heat to medium-low and allow it to simmer uncovered for approximately 20 to 25 minutes, stirring occasionally.
Creating Creamy Richness
After the initial simmering period, reduce the heat to low and stir in the sour cream gradually, blending it smoothly into the chili without creating lumps. Pour in the heavy cream or half-and-half slowly while stirring gently to incorporate it evenly throughout. As a result, your chili will transform into something incredibly creamy and luxurious while maintaining its hearty, satisfying character. Add the shredded cheddar cheese in small handfuls, stirring after each addition until completely melted and incorporated. The cheese adds richness, depth, and a subtle savory note that complements all the spices and ingredients beautifully.
Seasoning and Final Adjustments
Taste your chili and season with salt and black pepper, adjusting to suit your personal preferences. Furthermore, if you prefer a spicier chili, add more cayenne pepper gradually, tasting between additions to avoid making it uncomfortably hot. Conversely, if you prefer milder flavors, reduce the chili powder or add a splash of additional broth to mellow the spice intensity. Allow the chili to simmer gently for another 5 to 10 minutes, which allows the flavors to meld together beautifully and the cream to incorporate fully.
Serving Your Masterpiece
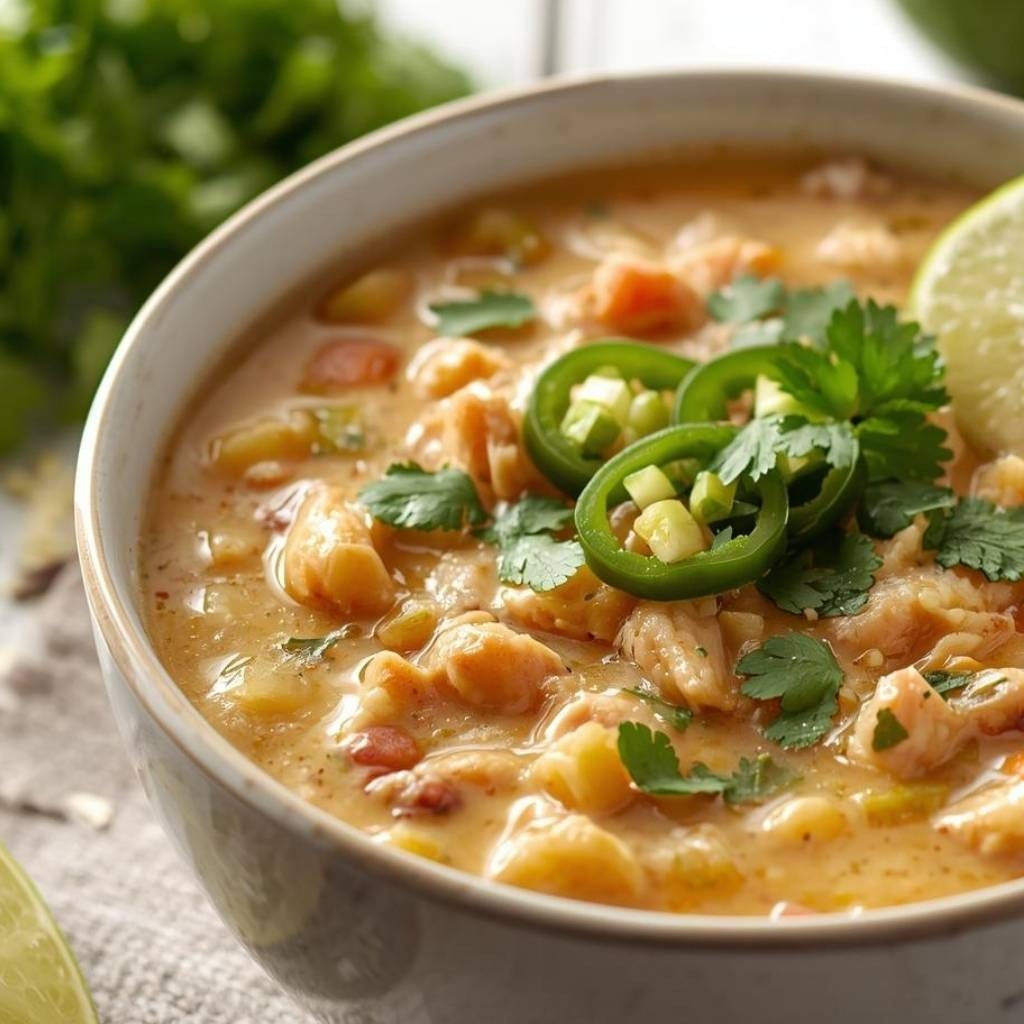
Remove the pot from heat and ladle the chili into deep bowls, serving it while it’s hot and the cheese is perfectly melted. Top each serving generously with your choice of toppings: sliced jalapeños for heat, fresh cilantro for brightness, a squeeze of lime juice for acidity, tortilla strips for crunch, sliced green onions for sharpness, or creamy avocado slices for richness. The beauty of chili lies in how you can customize each bowl to suit individual preferences and tastes.
Serving and Storage Tips
How to Serve This Chicken Chili
Serve this chicken chili piping hot in deep bowls, topped with a combination of your favorite garnishes that complement your personal taste preferences. Additionally, cornbread pairs beautifully with chili, offering a slightly sweet contrast to the savory spiced flavors. Furthermore, serve it alongside Mexican rice, a simple green salad, or Mexican street corn for a complete meal experience. For casual gatherings, consider setting up a chili bar where guests can choose their own toppings and customize their bowls exactly as they prefer. This interactive approach makes serving easier while allowing everyone to enjoy the chili exactly how they like it best.
Additionally, this chicken chili works wonderfully as a topping for baked potatoes, nachos, or hot dogs, giving you multiple ways to enjoy it throughout the week. It’s equally suitable for casual family dinners, game day gatherings, dinner parties, or meal prep containers for grab-and-go lunches.
Storage and Make-Ahead Instructions
Allow leftover chili to cool to room temperature before transferring it to airtight containers for storage in the refrigerator. Refrigerate leftovers for up to 5 days in glass or plastic containers with secure lids, and the flavors actually improve after a day as the ingredients meld together. For longer storage, freeze the chili in freezer-safe containers or heavy-duty freezer bags for up to 3 months. When reheating, thaw frozen chili overnight in the refrigerator and then warm it gently on the stovetop over medium-low heat, stirring frequently. Add a splash of broth or cream if the chili seems too thick after reheating, as the liquid may have been absorbed during storage. Alternatively, reheat individual portions in a microwave-safe bowl in 2-minute intervals, stirring between each interval until heated through completely.
Helpful Notes and Creative Variations
Ingredient substitutions allow you to adapt this recipe to your dietary preferences and what you have available. If you prefer a lighter version, substitute the heavy cream and sour cream with Greek yogurt or plain yogurt stirred in at the end, which adds creaminess without excess fat. Additionally, you can use half-and-half or evaporated milk for a lighter but still rich result. For those following dairy-free diets, substitute the cream with coconut cream and use dairy-free cheese alternatives.
Furthermore, you can customize the beans to your preference by using black beans, pinto beans, or kidney beans instead of great northern beans, each adding slightly different flavors and textures. Additionally, you might add corn kernels for sweetness, diced jalapeños for extra heat, or incorporate shredded zucchini for additional vegetables. Next, fresh herbs like cilantro or parsley can be stirred in just before serving for brightening flavors that offset the richness beautifully.

A common mistake involves overcooking the chicken until it becomes dry and stringy rather than tender and moist. Resist the urge to cook the chicken for extended periods; it needs only enough time to become opaque and cooked through, which happens relatively quickly. Furthermore, another frequent error involves adding the dairy products at too high a temperature, which can cause curdling or separation. Always reduce your heat before adding cream and sour cream, stirring gently to incorporate them smoothly throughout.
Time-saving tips include using a rotisserie chicken shredded into bite-sized pieces instead of cooking chicken from scratch, which cuts your active cooking time dramatically. Additionally, you can prep all your vegetables the night before and store them in separate containers, allowing you to assemble and cook the chili in about 45 minutes on busy evenings. Next, if you have an Instant Pot, you can prepare this entire recipe in approximately 25 minutes using the sauté function for searing the chicken and aromatics, then pressure cooking everything together.
Chef’s Professional Tips
Bloom your spices in the hot pot before adding the liquid, which intensifies their flavors and prevents them from tasting flat or one-dimensional in the final chili. Furthermore, for maximum depth, consider toasting the spices in a dry skillet over medium heat for about 1 minute before adding them to the pot, which releases their essential oils and creates more pronounced flavor.
Additionally, if your chili tastes too thin or watery after cooking, you can thicken it by mixing a tablespoon of cornstarch with two tablespoons of cold water to create a slurry, then stir this mixture into the simmering chili and cook for another 2 to 3 minutes until it reaches your desired consistency.
Frequently Asked Questions
Can I use ground chicken instead of chicken breasts for this chili? Absolutely, ground chicken works well and cooks faster; brown it thoroughly with the aromatics and skip the initial searing step, proceeding directly to building the chili base.
What’s the best way to adjust the spice level to suit different preferences? Start with the recipe as written, then taste and add more cayenne for heat or reduce it for milder results; remember that flavors intensify as the chili simmers longer.
Can I make this chili ahead of time for a party or gathering? Yes, prepare it completely and refrigerate for up to 3 days before serving, then reheat gently on the stovetop just before guests arrive for the freshest taste and texture.
Is this recipe suitable for slow cooker or Instant Pot preparation? Yes, sear the chicken and aromatics using the sauté function, then use high pressure for 12 minutes and quick release, or use a slow cooker on low for 6 to 8 hours with all ingredients combined.
What dairy-free alternatives work best for this creamy chicken chili? Coconut cream or cashew cream substitute the heavy cream beautifully, and nutritional yeast or dairy-free cheese alternatives provide richness, though the flavor profile will differ slightly from the original.
Final Thoughts on This Satisfying Favorite
Chicken chili represents everything wonderful about comfort food that doesn’t compromise on nutrition or satisfaction. The tender chicken, creamy beans, bright green chiles, and warming spices combine in a bowl that feels like a warm hug on any day of the year. Moreover, this recipe proves that you don’t need hours of simmering or complicated techniques to create something truly memorable and delicious.
What makes this chicken chili truly special is how adaptable it is to your preferences and what you have available in your pantry. Additionally, it serves as an excellent meal prep option, actually tasting better on the second or third day as flavors continue to develop and meld. Whether you’re cooking for your family, entertaining friends, or preparing meals for the week ahead, this chili delivers consistent, impressive results that satisfy on every level.
Did this chicken chili recipe become an instant favorite in your kitchen? We would absolutely love to hear about your experience with it! If this recipe brought warmth, flavor, and satisfaction to your table, please save it to your recipe collection or pin it for future reference. Sharing this recipe with friends, family, and your social media community helps us continue creating more tested, delicious recipes just for you. Your support through saves, pins, and shares truly encourages us to keep developing new content that brings joy and flavor to your cooking adventures. Thank you for cooking with us today, and we hope this chicken chili becomes a regular rotation favorite in your home!