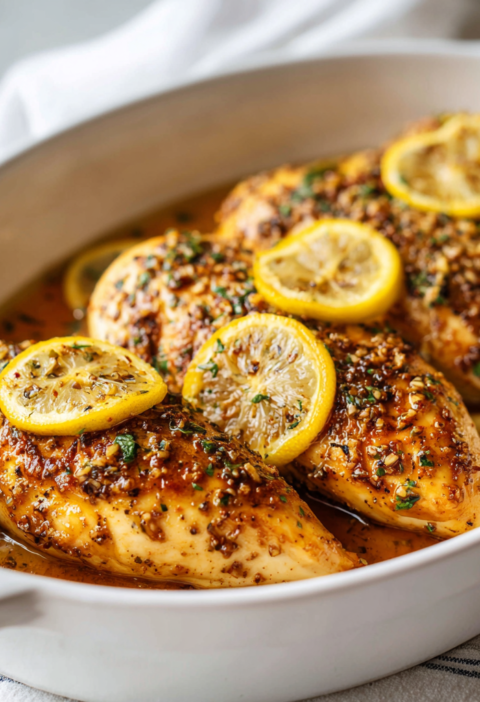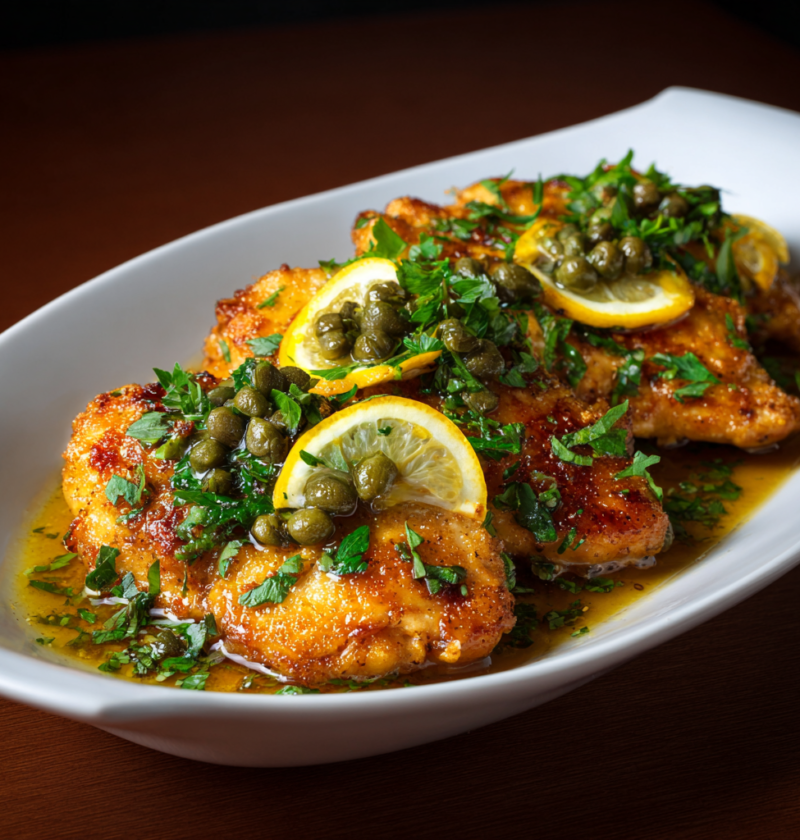
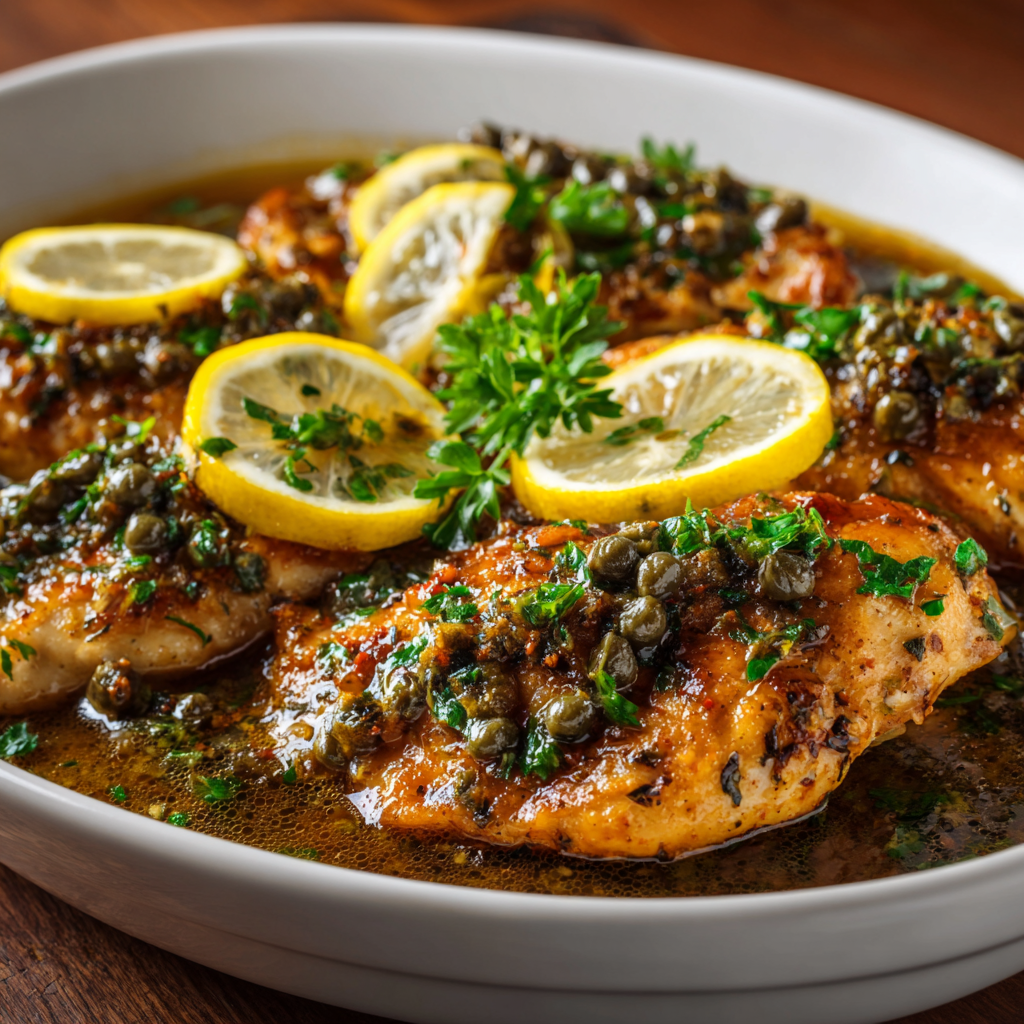
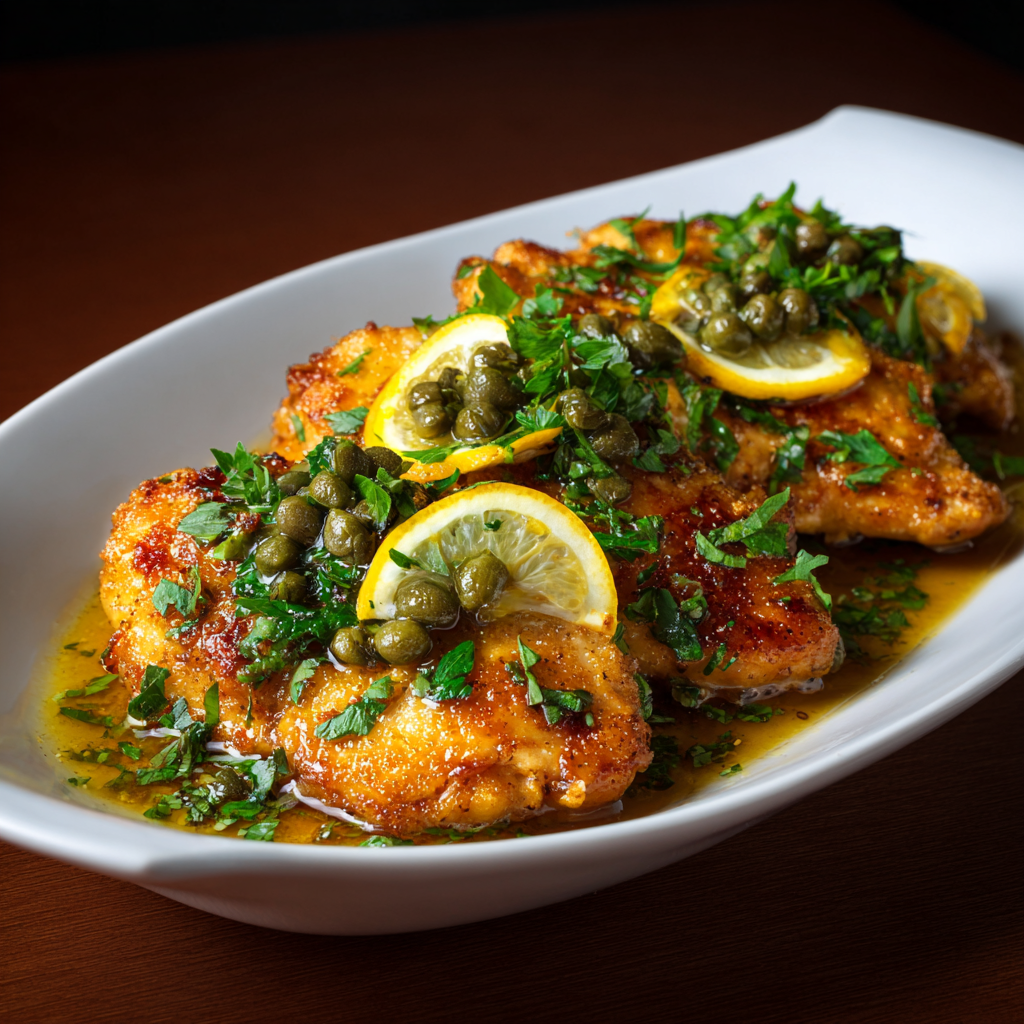
There’s something absolutely elegant about tender, perfectly-breaded chicken cutlets topped with a bright, tangy sauce studded with briny capers and fresh lemon that tastes like authentic Italian cuisine despite requiring less than twenty minutes of actual cooking time. First time I made chicken piccata instead of ordering it at restaurants, I was amazed at how simple the technique actually is—just quality ingredients, proper pounding, and careful attention to timing create something genuinely restaurant-quality without requiring professional training or complicated procedures. The beauty of this classic Italian dish lies in its remarkable balance of flavors: bright acidity from lemon juice and white wine, salty richness from capers and Parmesan, and tender chicken that absorbs all these incredible flavors while staying impossibly moist and flavorful. Additionally, this recipe proves that impressive, sophisticated weeknight dinners don’t require hours of preparation or stress; straightforward cooking methods combined with quality ingredients create results that taste like they came from a fine dining establishment. Whether you’re cooking an elegant dinner for someone special, preparing an impressive weeknight meal, entertaining guests who appreciate genuine Italian cooking, or simply craving something light yet absolutely satisfying, this chicken piccata delivers bright, fresh flavors with a sophisticated presentation that reminds you why this dish has remained beloved for generations.
Ingredients
This recipe makes 4 servings.
• 4 boneless, skinless chicken breasts (about 6-8 ounces each) • 1/2 cup all-purpose flour • 1/2 teaspoon kosher salt • 1/4 teaspoon black pepper • 1/4 teaspoon garlic powder • 1/4 teaspoon paprika • 4 tablespoons unsalted butter, divided • 3 tablespoons olive oil, divided • 5 cloves fresh garlic, minced • 1/2 cup fresh lemon juice (about 3-4 fresh lemons) • Zest of 2 lemons • 1/2 cup dry white wine • 3/4 cup chicken broth • 1/4 cup capers, drained and rinsed • 1/4 cup pitted green olives, halved (optional) • 1 tablespoon fresh lemon zest • 1 tablespoon cornstarch mixed with 2 tablespoons water (optional, for thickening) • 1 teaspoon Dijon mustard • 1/2 teaspoon honey or sugar (to balance acidity) • 1 teaspoon fresh thyme leaves (or 1/2 teaspoon dried) • 2 bay leaves • 1/4 cup grated Parmesan cheese • 3 tablespoons fresh parsley, finely chopped • 2 tablespoons fresh chives, finely chopped (optional) • Zest of 1 additional lemon for serving
Step-by-Step Instructions
Preparing Your Chicken and Breading Station
- Pat the chicken breasts completely dry using paper towels, ensuring every surface is moisture-free—this is absolutely crucial for proper pounding and breading.
- Place each chicken breast between two pieces of plastic wrap or parchment paper.
- Using a meat mallet or the bottom of a heavy skillet, gently pound each chicken breast to an even thickness of about 1/4 inch throughout.
- Be careful not to pound too aggressively, as you want tender, thin cutlets rather than paper-thin shredded chicken.
- In a shallow bowl, combine the all-purpose flour, kosher salt, black pepper, garlic powder, and paprika, mixing thoroughly.
- Zest the lemons using a microplane grater, setting the zest aside for finishing the dish.
- Juice the lemons to collect the fresh lemon juice, straining out seeds if necessary for the clearest juice possible.
Breading the Chicken Cutlets
- Working with one piece at a time, place the pounded chicken breast into the flour mixture.
- Coat both sides thoroughly, shaking off excess flour and ensuring an even, thin coating across the entire surface.
- Transfer the breaded chicken to a plate, arranging the cutlets in a single layer without overlapping.
- Repeat this process with all remaining chicken breasts, ensuring each is properly coated and ready for cooking.
- Let the breaded chicken sit for about 5 minutes—this allows the coating to adhere properly and prevents it from falling off during cooking.
Cooking the Chicken Cutlets
- Heat 2 tablespoons of butter and 1.5 tablespoons of olive oil in a large skillet over medium-high heat until the butter foams and just starts to brown slightly.
- Carefully place two breaded chicken cutlets into the hot skillet, avoiding overcrowding which prevents proper browning.
- Cook the cutlets for 3-4 minutes on the first side without moving them around, allowing a beautiful golden-brown crust to develop across the entire surface.
- Flip each cutlet using tongs and cook the other side for another 3-4 minutes until light golden brown and cooked through.
- Transfer the cooked chicken to a plate, arranging the cutlets in a single layer.
- Add the remaining 2 tablespoons of butter and 1.5 tablespoons of olive oil to the same skillet.
- Repeat the cooking process with the remaining two chicken cutlets, cooking them for 3-4 minutes per side until golden brown.
- Transfer these cutlets to the plate alongside the first batch.
Building the Piccata Sauce
- Reduce the heat to medium and add the minced garlic to the drippings in the skillet.
- Cook the garlic for about 1 minute, stirring constantly until it becomes fragrant and light golden without burning.
- Pour in the white wine and use a wooden spoon to gently scrape up any browned bits stuck to the bottom of the pan—these flavorful bits are liquid gold for your sauce.
- Add the chicken broth and bring the mixture to a gentle simmer over medium heat, stirring occasionally.
- Stir in the bay leaves and fresh thyme, distributing the herbs evenly throughout the sauce.
- Reduce the heat to medium-low and allow the sauce to simmer gently for about 2 minutes.
- Taste the sauce and adjust seasonings with additional salt and pepper as needed.
Adding Brightness and Balance
- Gradually pour in the fresh lemon juice while stirring constantly, adding it slowly to achieve the perfect balance of bright citrus.
- Stir in the capers and green olives if using, mixing gently to distribute them throughout the sauce.
- Add the Dijon mustard and honey, stirring gently—the honey helps balance the brightness of the lemon without making the sauce sweet.
- Stir in the grated Parmesan cheese until completely incorporated.
- Taste the sauce and make any necessary adjustments to seasonings, adding more lemon juice for brightness or more salt for depth.
- If the sauce seems too thin, mix the cornstarch slurry and stir it into the warm sauce for 1-2 minutes over medium-low heat until thickened.
- If the sauce seems too thick, gradually stir in additional chicken broth a tablespoon at a time until you reach your desired consistency.
Bringing Everything Together
- Return the cooked chicken cutlets to the skillet, arranging them in a single layer.
- Spoon the piccata sauce generously over each cutlet, ensuring all pieces are well-coated with the bright, flavorful sauce.
- Reduce the heat to low and allow everything to warm together for about 2 minutes, being careful not to overheat and toughen the chicken.
- Remove and discard the bay leaves from the sauce.
- Taste the finished dish and make any necessary adjustments to seasonings—the sauce should taste bright, tangy, and perfectly balanced.
Final Presentation
- Transfer the chicken piccata to a serving platter or individual plates, arranging the cutlets attractively.
- Spoon additional sauce over and around each cutlet to ensure generous coating.
- Sprinkle the fresh parsley and chives over the top for brightness and fresh herbal notes.
- Add the reserved lemon zest over the entire dish, which provides visual appeal and an extra burst of fresh lemon flavor on each bite.
Serving and Storing Tips
How to Serve This Classic Italian Dish
This chicken piccata is excellent served alongside pasta, rice, polenta, or crusty bread for soaking up the incredible bright sauce. However, if you prefer different accompaniments, consider pairing it with roasted potatoes, creamy mashed potatoes, or cauliflower rice for different textures and flavor experiences. Next, fresh vegetables like roasted asparagus, steamed broccoli, sautéed green beans, or roasted zucchini provide wonderful textural contrast and additional nutrition without overwhelming the bright, fresh flavors. Additionally, a simple arugula salad dressed in light vinaigrette works beautifully alongside this dish for cutting through the richness and adding fresh greens. For a lighter presentation, serve alongside steamed or sautéed spinach tossed with garlic for added vegetables and nutrition without heaviness. A crisp white wine like Pinot Grigio, Sauvignon Blanc, or Albariño pairs beautifully with the bright lemon, tangy capers, and buttery sauce flavors.
Storing Your Leftovers Properly
Store any leftover chicken piccata in an airtight container in the refrigerator for up to 3 days, keeping it completely covered to prevent the sauce from drying out or oxidizing. To reheat, place the chicken and sauce in a skillet over medium-low heat, stirring occasionally and adding a splash of chicken broth if the sauce has thickened too much—this gentle stovetop method preserves the delicate flavors and tender texture beautifully. Alternatively, microwave individual portions in a microwave-safe container for 1-2 minutes, stirring halfway through, though the stovetop method produces noticeably superior results. For freezing, let the chicken piccata cool completely before transferring to a freezer-safe container or zip-top bag for up to 2 months. Thaw frozen portions overnight in the refrigerator and reheat gently on the stovetop over medium-low heat, tasting and adjusting the lemon and caper balance as needed since flavors can shift during freezing.
Helpful Tips and Tricks
Ingredient Substitutions and Variations
If you don’t have fresh lemon juice, bottled lemon juice works adequately though fresh always produces superior brightness and complex flavor development. Swap white wine for dry vermouth, additional chicken broth, or even a splash of champagne for different subtle flavor profiles. For a lighter version, simply reduce the butter to 2 tablespoons and use additional olive oil—the sauce remains equally delicious with the bright lemon shining through. Fresh herbs can be replaced with dried herbs at half the quantity, though fresh herbs provide noticeably more vibrant, aromatic flavor and visual appeal. Consider adding sun-dried tomatoes, roasted red peppers, or artichoke hearts to the sauce for additional flavor complexity and visual interest. For a spicier version, increase the amount of red pepper flakes or add a dash of hot sauce to the finished sauce for extra heat and depth.
Common Mistakes to Avoid
Many home cooks skip pounding the chicken to even thickness, which results in uneven cooking where thinner areas overcook while thicker sections remain undercooked. Don’t use too much flour for breading; excessive coating prevents the chicken from cooking evenly and creates a heavy, doughy crust rather than crispy. Another common mistake is overcrowding the skillet when cooking, which drops the temperature and causes steaming rather than proper browning and crust development. Adding all the lemon juice at once can make the sauce overly tart rather than bright and balanced—add gradually while tasting frequently. Finally, overcooking the chicken after pounding and breading is problematic; these thin cutlets cook quickly so watch carefully to prevent toughness and dryness.
Time-Saving Strategies
Prepare your minced garlic and fresh herbs the night before, storing them separately in the refrigerator for quick assembly. Juice and zest your lemons the morning of cooking, storing the juice and zest separately in the refrigerator until needed. Consider pounding your chicken breasts to even thickness the night before, then refrigerating until ready to bread and cook. Another useful tip is mixing your flour coating the morning of cooking and storing it in an airtight container so breading happens quickly. Pre-measure all your seasonings into a small bowl the night before, making the breading and cooking process require only quick, efficient steps on cooking day.
Chef Tips for Perfect Results
The secret to perfect chicken piccata is pounding the chicken to consistent, thin thickness and not overcooking the delicate cutlets—these thin pieces cook very quickly so watch carefully and remove from heat the moment they turn golden. Always use freshly squeezed lemon juice rather than bottled varieties, as fresh juice provides the superior brightness and complexity that makes this classic dish truly special and distinguishes it from mediocre versions.
Frequently Asked Questions
Can I prepare the chicken ahead of time? Absolutely—pound the chicken, bread the cutlets, and refrigerate them uncovered up to 24 hours ahead; this allows the coating to adhere better before cooking.
What if my sauce is too acidic or sour? Add a touch more honey or a splash of heavy cream to balance the acidity; this mellows the tartness while maintaining the bright lemon character.
Can I use other fish or proteins instead of chicken? Absolutely—veal cutlets, pork medallions, or thin fish fillets work beautifully with this sauce; adjust cooking times based on thickness and density.
How do I prevent the breading from falling off during cooking? Pat the chicken dry completely, let breaded cutlets rest 5 minutes before cooking, and avoid moving them around constantly in the skillet.
Can I make this sauce without capers? Yes, capers are optional; the dish is equally delicious without them or with substitutes like olives, sun-dried tomatoes, or artichoke hearts.
Conclusion
This chicken piccata recipe represents the perfect balance of classic Italian elegance and accessible home cooking, delivering authentic restaurant-quality results that taste far more complicated than the straightforward technique actually requires. Moreover, the combination of tender, golden-breaded chicken and bright, tangy piccata sauce creates a flavor profile that feels light and sophisticated while remaining deeply satisfying and elegant. The magic of this dish lies in respecting proper technique: pounding the chicken to consistent thickness, creating a proper golden crust, and balancing the sauce flavors through gradual addition of lemon juice and careful seasoning adjustments. Additionally, this recipe is incredibly adaptable, allowing you to customize it with different vegetables, proteins, or sauce variations without compromising the fundamental excellence of the classic dish. I genuinely believe this will become a go-to recipe in your cooking rotation because it’s fast enough for busy weeknights, elegant enough for special occasions, and authentically delicious enough that everyone asks for the recipe. The combination of crispy-breaded chicken, bright lemon, briny capers, and luxurious butter creates a complete meal that tastes impressive without requiring the stress or time investment usually associated with restaurant-quality cooking.
Did you love this recipe? Please save it, pin it, and share it with your friends and family! Your support means the world to us and motivates us to keep creating more delicious, easy recipes for you to enjoy. Let us know in the comments how your chicken piccata turned out—we’d absolutely love to hear about your experience and any creative variations you tried to make this classic Italian dish your own!