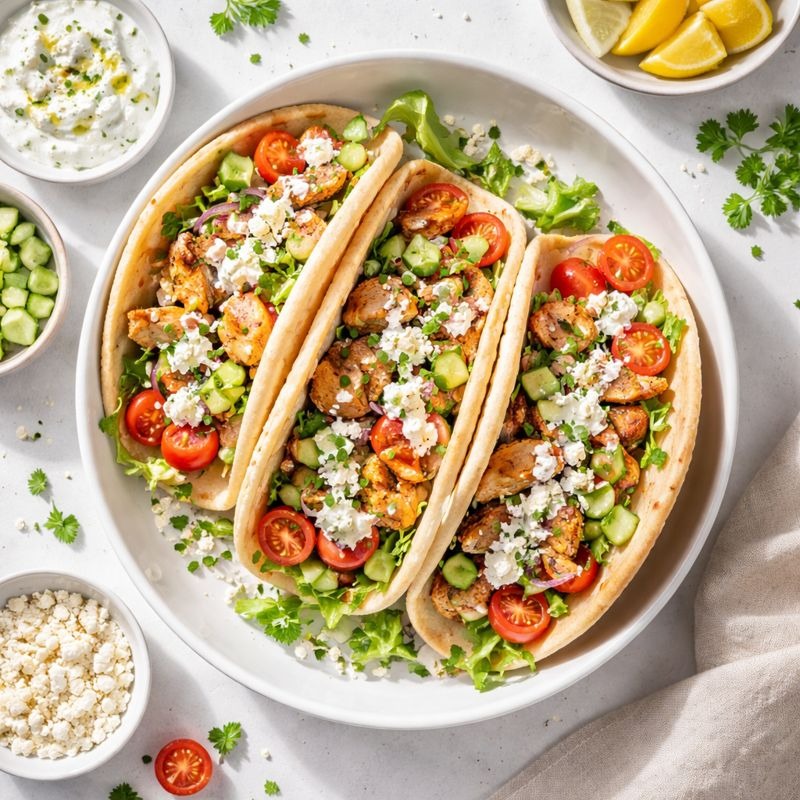
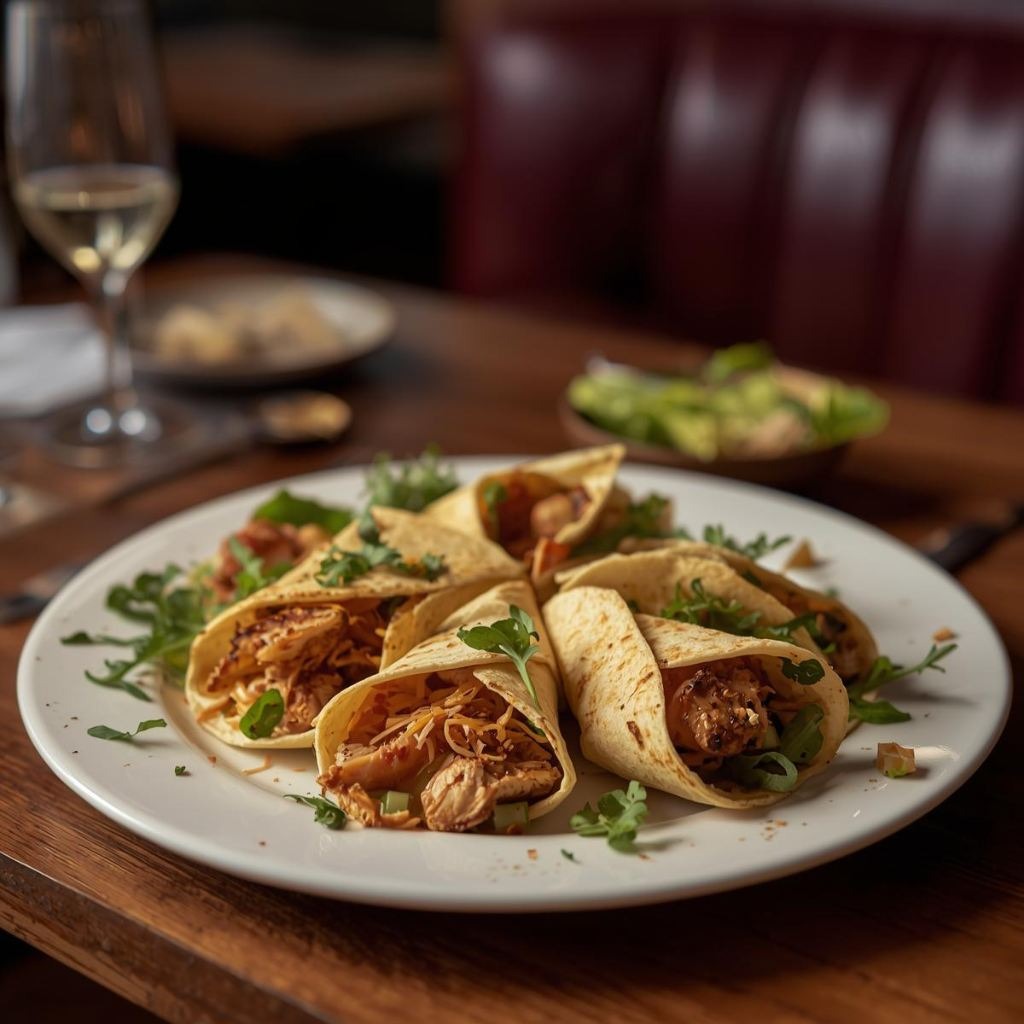
There’s something irresistibly appealing about the simplicity and elegance of chicken pita wraps. These Mediterranean-inspired pockets burst with tender, flavorful chicken, cool fresh vegetables, and creamy yogurt-based sauces that transport your taste buds straight to the shores of Greece or the bustling streets of a Middle Eastern marketplace. Unlike traditional sandwiches that fall apart after a few bites, pita bread provides the perfect structure, creating a self-contained meal that’s both sophisticated and comfortingly casual. The beauty of this recipe lies in its incredible versatility; you can prepare it with Mediterranean flavors, Greek-inspired toppings, or lean toward a healthier approach with fresh herbs and light dressings. What makes these wraps truly special is how they come together in approximately twenty minutes, transforming simple ingredients into something restaurant-worthy that tastes homemade and genuine. Whether you’re seeking a quick weeknight dinner, planning a casual lunch, or hosting a Mediterranean-themed gathering, chicken pita wraps deliver impressive results with minimal stress. Best of all, everyone can customize their own wrap with their preferred toppings, making this an interactive and inclusive meal solution that brings people together.
Ingredients
This recipe makes 4 wraps.
- 1.25 pounds boneless, skinless chicken breasts
- 3 tablespoons olive oil
- 2 tablespoons lemon juice
- 2 cloves garlic, minced
- 1 teaspoon dried oregano
- 1/2 teaspoon dried thyme
- 1/2 teaspoon salt
- 1/4 teaspoon black pepper
- 1/4 teaspoon red pepper flakes (optional)
- 4 whole wheat or white pita breads (6-inch)
- 1 cup Greek yogurt
- 2 tablespoons tahini
- 1 tablespoon lemon juice (for sauce)
- 1 clove garlic, minced (for sauce)
- 2 cups fresh spinach or mixed greens
- 1 large tomato, diced
- 1 cucumber, diced
- 1/4 red onion, thinly sliced
- 1 red bell pepper, sliced
- 1/2 cup Kalamata olives, pitted and halved
- 1 cup crumbled feta cheese
- 1/4 cup fresh parsley, chopped
- 1/4 cup fresh mint, chopped
- 1/2 cup roasted red peppers
- Lemon wedges for serving
Step-by-Step Instructions
Marinating and Preparing the Chicken
- Begin by patting the chicken breasts completely dry with paper towels, removing any excess moisture that prevents proper browning.
- Combine three tablespoons of olive oil, two tablespoons of lemon juice, minced garlic, dried oregano, dried thyme, salt, black pepper, and red pepper flakes in a small bowl.
- Whisk the marinade ingredients together until well combined, creating an aromatic mixture that smells distinctly Mediterranean.
- Place the chicken breasts in a shallow dish and pour the marinade over them, ensuring all surfaces become thoroughly coated.
- Cover the dish with plastic wrap and refrigerate for at least fifteen minutes, though thirty minutes produces even deeper flavor penetration.
- Remove the chicken from the refrigerator about ten minutes before cooking, allowing it to come closer to room temperature.
Cooking the Chicken
- Heat a large skillet over medium-high heat until it becomes hot enough that a water droplet sizzles on contact.
- Carefully transfer the marinated chicken breasts to the hot skillet, reserving the remaining marinade for basting.
- Allow the chicken to cook undisturbed for about six to seven minutes, developing a golden-brown crust on the first side.
- Flip the chicken using tongs and cook for an additional six to seven minutes on the second side until fully cooked through.
- Check doneness by inserting a meat thermometer into the thickest part; it should read 165 degrees Fahrenheit.
- During the final minute of cooking, baste the chicken with the reserved marinade for extra flavor and moisture.
- Transfer the cooked chicken to a clean cutting board and allow it to rest for five minutes before slicing.
- Slice the rested chicken into strips about half an inch thick, cutting against the grain for maximum tenderness.
Preparing the Yogurt-Tahini Sauce
- While the chicken cooks, combine Greek yogurt and tahini in a bowl, creating the base for your Mediterranean sauce.
- Add one tablespoon of fresh lemon juice and the minced garlic clove to the yogurt mixture, stirring until well combined.
- Season the sauce with a pinch of salt and black pepper, tasting and adjusting the flavors to your preference.
- If the sauce seems too thick, thin it with a tablespoon of water at a time until you reach your desired consistency.
- The finished sauce should be creamy, tangy, and pourable, coating vegetables and chicken beautifully.
Preparing Your Vegetables and Toppings
- Wash and dry the fresh spinach or mixed greens thoroughly, removing any excess moisture that could make pitas soggy.
- Dice the tomato into small, uniform pieces that distribute easily throughout each pita pocket.
- Dice the cucumber similarly, keeping pieces small for even distribution and easier eating.
- Thinly slice the red onion and separate the layers slightly so they spread throughout the wrap evenly.
- Slice the red bell pepper into thin strips that fit comfortably within the pita bread.
- Pit and halve the Kalamata olives, which adds briny Mediterranean flavor without overwhelming the other ingredients.
- Chop the fresh parsley and mint, handling them gently to preserve their delicate flavors and appearance.
- Have all toppings arranged in separate bowls or on a cutting board for easy assembly and self-service.
Warming and Assembling Your Pitas
- Warm the pita breads by wrapping them in foil and placing them in a warm oven at three hundred twenty-five degrees for three to five minutes.
- Alternatively, warm them individually over a gas flame or in a dry skillet for just a few seconds on each side.
- Remove the warm pitas from the oven or heat source and carefully cut each one in half horizontally, creating two pockets.
- Gently open the pita pockets carefully, working from the cut edge to avoid tearing the bread.
- Spread about two tablespoons of the yogurt-tahini sauce inside each pita pocket, distributing it along the bottom.
- Layer a handful of fresh spinach or mixed greens into each pocket, creating a bed for your other ingredients.
- Divide the sliced grilled chicken evenly among the four pitas, filling each pocket with approximately one-quarter of the total.
- Add diced tomato, cucumber, sliced bell pepper, and thinly sliced red onion into each pocket, layering them evenly.
- Sprinkle Kalamata olives and crumbled feta cheese into each pocket, providing briny and creamy elements.
- Top with roasted red peppers and a generous sprinkle of fresh parsley and mint.
- If desired, add an extra drizzle of the yogurt-tahini sauce inside the pocket or serve it on the side.
- Wrap each pita loosely in foil or parchment paper for easy handling and eating.
Serving and Storing Tips
Serving Suggestions
These chicken pita wraps taste absolutely best served immediately while the pita bread remains warm and the fresh vegetables stay crisp and refreshing. Serve alongside a simple Mediterranean salad featuring olives, tomatoes, and feta for a more complete meal experience. A cold beverage such as iced tea, Greek coffee, or sparkling water complements these wraps beautifully without overshadowing the delicate flavors. Consider pairing with hummus as a dipping sauce, providing an additional creamy element that guests can enjoy. For entertaining, arrange the pitas on a platter with lemon wedges and small bowls of extra yogurt-tahini sauce for guests to customize as they wish. A side of tzatziki sauce or additional fresh herbs allows people to personalize their wraps according to their preferences.
Storage and Reheating
Assembled pita wraps keep in the refrigerator for up to two days when wrapped tightly in foil or stored in airtight containers. However, to maintain the best texture and prevent sogginess, store the grilled chicken, fresh vegetables, and sauce separately, then assemble the pitas fresh just before eating. The cooked chicken keeps refrigerated for three to four days, making it perfect for meal prep or multiple meals throughout the week. To reheat, warm the chicken gently in a skillet over medium heat for one to two minutes, or microwave it wrapped loosely in a damp paper towel for thirty to forty-five seconds. Pita bread warms beautifully wrapped in foil in a three hundred twenty-five degree oven for three to five minutes without drying out. Cold pita wraps taste delicious straight from the refrigerator if you prefer not to reheat them before eating.
Helpful Notes
First, Greek yogurt provides much better texture and tang than regular yogurt, so it’s worth seeking out if you don’t already have it on hand at home. Additionally, tahini can be replaced with additional Greek yogurt or a smooth hummus if you prefer a different flavor profile or don’t have tahini available. However, tahini adds authentic Mediterranean character, so try to use it when possible for the best results. Feel free to substitute the chicken with grilled shrimp, falafel, or seasoned tofu for vegetarian or different protein options. Meanwhile, the herb choices dramatically affect the overall flavor; fresh parsley and mint are traditional, but dill, basil, or cilantro work wonderfully if you prefer those flavors. The pita bread quality matters significantly; fresh pitas from the bakery section taste far superior to those that have been on shelves for weeks. As a result, you’ll notice a tremendous difference in texture and flavor when using fresher bread. A common mistake involves overstuffing the pita pockets, which causes them to tear and fall apart when eating. Instead, aim for generous but balanced filling that keeps everything intact. Another helpful tip involves warming the pita immediately before assembly; warm pitas are more pliable and less likely to tear than cold ones. Additionally, if you’re preparing these for a lunch box, assemble them the morning of eating rather than the night before, as the fresh vegetables will maintain their crispness and the bread won’t become soggy overnight.
Chef Tips
The secret to authentic Mediterranean flavor lies in using fresh herbs rather than dried ones; the brightness and aromatic quality of fresh parsley and mint cannot be replicated by their dried counterparts, elevating the entire dish.
Additionally, resist the urge to refrigerate the yogurt-tahini sauce before serving; serving it at room temperature allows the flavors to shine through fully, whereas cold sauce mutes the delicate garlic and lemon notes.
Frequently Asked Questions
Can I make these pita wraps ahead of time? Cook the chicken and prepare fillings the day before, storing everything separately in airtight containers. Assemble the pitas fresh just before eating to prevent the bread from becoming soggy and losing its texture.
What’s a good substitute for Greek yogurt in the sauce? Sour cream or regular yogurt works fine as an alternative, though the flavor profile changes slightly. For a lighter option, try using silken tofu blended with lemon juice.
Can I use store-bought rotisserie chicken to save time? Absolutely! Shred two cups of rotisserie chicken and warm it gently in a skillet with a bit of lemon juice and oregano for five minutes. This shortcut cuts your preparation time significantly.
Are these wraps suitable for meal prepping? Yes, store the cooked chicken and fresh ingredients separately in containers, then assemble pitas fresh each morning. This prevents sogginess while maintaining maximum flavor and freshness throughout the week.
How do I prevent the pita bread from tearing when filling? Warm the pita breads just before assembly so they become more pliable and flexible. Cut carefully from the edge, and avoid overstuffing the pockets, which is the most common cause of tearing.
If you loved this recipe for Chicken Pita Wraps, we’d be absolutely thrilled if you’d save it to your favorite recipe collection, pin it to your Pinterest board, or share it with a friend who needs an easy Mediterranean-inspired meal solution. Your support means the world and helps us continue creating delicious, accessible recipes that bring joy to your kitchen and dining table! Please let us know in the comments below what you thought of these wraps or share any Mediterranean ingredients you’ve added to make them your own. We can’t wait to hear how this recipe becomes a favorite in your home and inspires your next Mediterranean dinner night!