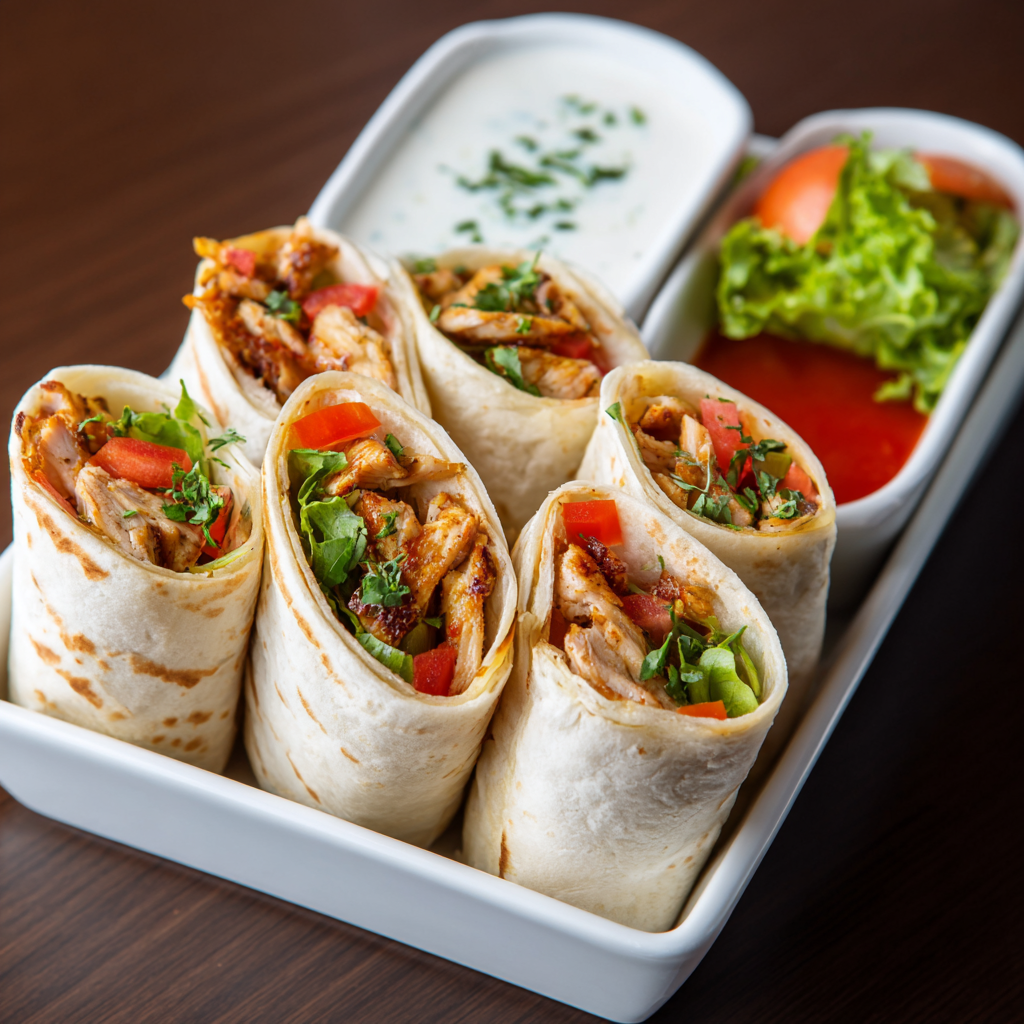
There’s something undeniably comforting about biting into a perfectly assembled wrap filled with tender chicken and your favorite toppings. These handheld meals have become a staple in busy households everywhere, and for good reason. First, they’re incredibly versatile—you can fill them with virtually any combination of ingredients that appeal to your taste buds. Whether you’re packing lunch for work, preparing a quick weeknight dinner, or hosting a casual gathering, chicken wraps deliver satisfaction every single time. Additionally, the preparation is so straightforward that even novice cooks can master them within minutes. No complicated techniques or hard-to-find ingredients required. Instead, you get restaurant-quality results in your own kitchen without the fuss. The best part? These wraps are adaptable to any dietary preference, making them perfect for feeding a diverse group. From spicy versions to mild options, from loaded with veggies to protein-packed variations, there’s a chicken wrap out there for everyone.
Ingredients
Servings: 4 wraps
• 1.5 pounds boneless, skinless chicken breasts • 4 large flour tortillas (10-inch) • 1 cup shredded lettuce • 1 medium tomato, diced • 1/2 red bell pepper, sliced thinly • 1/2 cucumber, julienned • 1/2 cup shredded cheddar cheese • 1/4 cup plain Greek yogurt • 2 tablespoons mayonnaise • 1 tablespoon fresh lime juice • 1 teaspoon garlic powder • 1 teaspoon paprika • 1/2 teaspoon cumin • Salt and pepper to taste • 1 tablespoon olive oil • Optional: fresh cilantro, avocado slices, jalapeños, or hot sauce
Preparing the Chicken
To begin, season your chicken breasts generously on both sides with garlic powder, paprika, cumin, salt, and pepper. Make sure to coat them evenly so that every bite will be flavorful. Heat the olive oil in a large skillet over medium-high heat until it shimmers slightly. Once the pan is hot, carefully place the seasoned chicken breasts into the skillet. Cook them for 6 to 7 minutes on the first side without moving them around—this allows a golden crust to form. Next, flip the chicken breasts and cook the other side for another 6 to 7 minutes until the internal temperature reaches 165°F when measured with a meat thermometer. Transfer the cooked chicken to a cutting board and let it rest for 5 minutes. This resting period is crucial because it helps the juices redistribute throughout the meat, ensuring tender, moist chicken. Afterward, slice the cooled chicken into strips or bite-sized pieces, depending on your preference.
Making the Sauce and Assembly Base
Meanwhile, prepare the signature sauce that brings everything together beautifully. In a small bowl, combine the Greek yogurt and mayonnaise as your creamy base. Add the fresh lime juice and stir until smooth and well incorporated. This tangy, creamy sauce adds incredible flavor without being overly heavy. Additionally, it serves as a binding agent that keeps all your ingredients together in each wrap. You can taste-test and adjust the lime juice if you prefer more or less tanginess. Set the sauce aside in a convenient location for quick assembly.
Preparing Your Vegetables and Toppings
Rather than rushing through vegetable prep, take a moment to cut everything into appropriate sizes for easy eating. Wash and slice the lettuce into bite-sized pieces that won’t be too bulky when wrapped. Dice your tomato into small chunks, removing excess seeds if you prefer less moisture in your wraps. Thinly slice the red bell pepper into strips that are easy to bite through. Julienne your cucumber so the pieces are thin and delicate. Having all vegetables prepped and ready makes the assembly process much faster and more enjoyable. Keep the shredded cheese close by as well since it adds a wonderful creamy texture.
Assembling Your Wraps
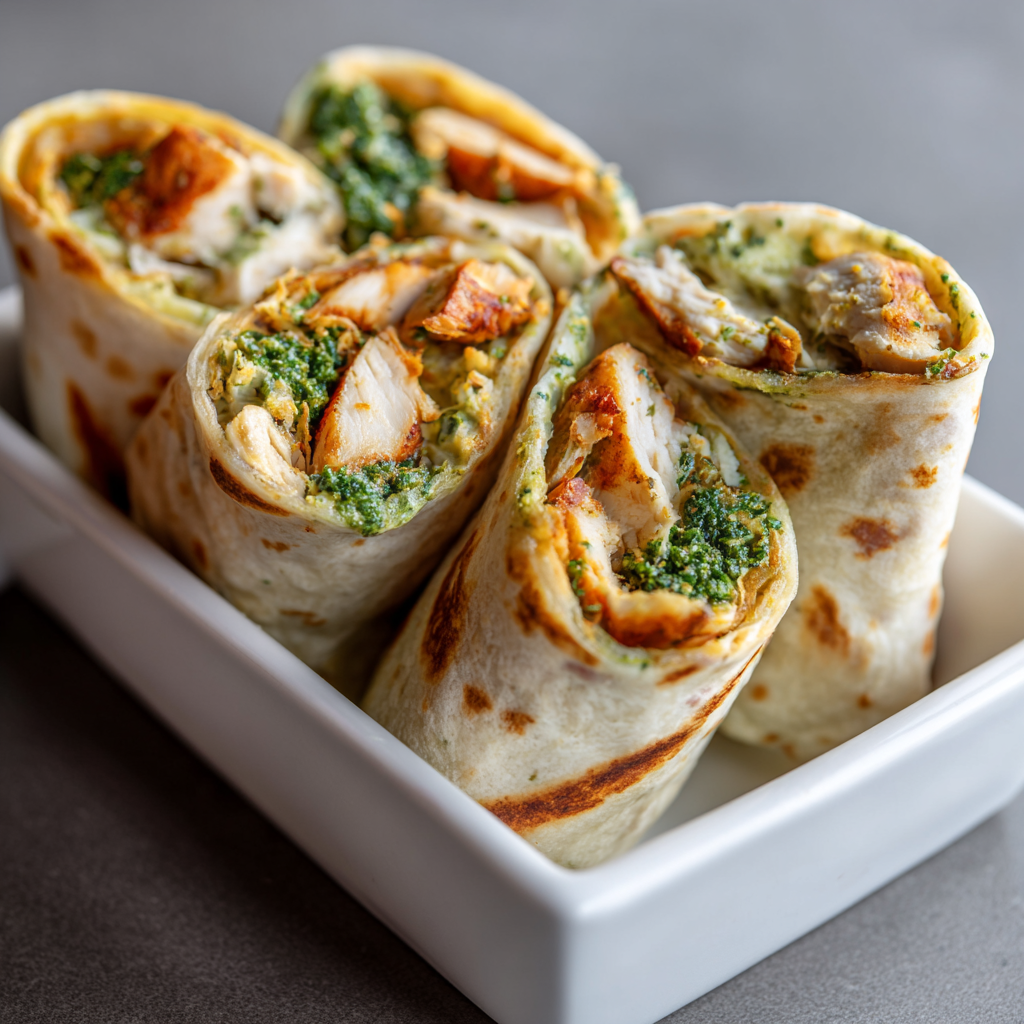
Now comes the fun part—bringing everything together into delicious, handheld parcels. Lay one flour tortilla flat on a clean work surface or cutting board. Spread approximately 2 tablespoons of your yogurt-lime sauce across the center of the tortilla, leaving about an inch of space on all sides. Layer one-quarter of your sliced chicken directly over the sauce. Following the chicken, add one-quarter of the shredded lettuce, creating an even distribution. Next, add the diced tomato, sliced bell pepper, and julienned cucumber in separate sections. This method keeps the flavors organized and prevents the wrap from becoming too wet. Sprinkle one-quarter of the cheddar cheese over the top. In contrast to adding toppings haphazardly, this organized approach ensures each bite contains a perfect balance of ingredients.
Rolling and Securing Your Wraps
To create a tight, secure wrap, fold the left and right sides of the tortilla inward, covering about an inch of your ingredients. Then, starting from the bottom edge closest to you, roll the tortilla away from you firmly but gently. The key is maintaining enough tension to keep everything contained without tearing the tortilla. As you roll, tuck the ingredients in with your fingers to prevent them from spilling out. Continue rolling until you reach the top edge, then press gently to seal. If desired, wrap the finished wrap in aluminum foil or parchment paper for easy handling and portability. However, this step is optional if you plan to serve them immediately.
Serving and Storing Tips
Serving Suggestions
These chicken wraps taste absolutely wonderful served as they are, but pairing them with complementary sides elevates the entire meal experience. Consider serving alongside crispy tortilla chips with guacamole or salsa for a satisfying crunch. A refreshing side salad with vinaigrette dressing balances the richness of the wrap beautifully. Alternatively, pair them with a cold coleslaw for added freshness and texture contrast. For a more substantial meal, serve with seasoned rice or roasted vegetables on the side. Fresh fruit like watermelon or berries provides a light, refreshing finish to the meal. These wraps also work wonderfully as part of a lunch spread with other finger foods and appetizers.
Storage and Reheating
Store any leftover wrapped chicken wraps in an airtight container in the refrigerator for up to 3 days. The tortilla may become slightly softer over time, but the wraps will still taste delicious. If you’ve assembled wraps but haven’t added toppings yet, wrap them individually in plastic wrap or aluminum foil before refrigerating. Additionally, you can prepare all components separately and assemble wraps fresh on the day you want to eat them—this method prevents the tortillas from becoming soggy. For a warm wrap option, heat it gently in a microwave for 15 to 20 seconds or warm it in a skillet over medium heat for about 1 minute per side. Freezing is possible, though the texture of raw vegetables may change slightly upon thawing, so consider freezing only the cooked chicken and assembling fresh wraps when needed.
Helpful Tips for Success
Ingredient Substitutions and Variations
First, if you don’t have Greek yogurt, regular sour cream or mayonnaise works equally well as your sauce base. To make these wraps vegan, substitute the chicken with seasoned chickpeas, tofu, or tempeh cooked the same way. Furthermore, whole wheat tortillas can replace flour tortillas for added fiber and nutrition. If you’re avoiding dairy, use dairy-free cheese or simply omit it altogether. The lime juice can be swapped for lemon juice or vinegar if you prefer a different tang. Additionally, spinach or arugula can replace lettuce for a peppery flavor profile. Adding black beans, corn, or avocado creates heartier wraps with more substance.
Time-Saving Tricks
To save time during busy weeknights, purchase pre-cooked rotisserie chicken from your grocery store and skip the cooking step entirely. Moreover, buying pre-shredded cheese and pre-cut vegetables eliminates significant prep time. Preparing your sauce the night before and storing it in the refrigerator means you’re ready to assemble quickly. You can also batch-cook the chicken ahead and refrigerate it until you’re ready to assemble wraps.
Common Mistakes to Avoid
Overstuffing your wraps is the most common error that leads to ingredients spilling out during eating—resist the temptation to add too much filling. Additionally, using cold chicken straight from the refrigerator can make your wraps less enjoyable, so warm it slightly or bring it to room temperature beforehand. Another frequent mistake involves not securing the wrap tightly enough, which causes it to fall apart when picked up. Furthermore, forgetting to spread sauce throughout the tortilla creates dry spots that taste bland compared to saucy sections.
Chef Tips
The secret to restaurant-quality wraps lies in preparing a flavor-packed sauce that complements every ingredient rather than simply assembling random components together. Additionally, warming your tortillas slightly before assembly makes them more pliable and less likely to tear when rolling.
Frequently Asked Questions
Can I make these wraps ahead of time? Yes, you can assemble wraps several hours ahead and wrap them tightly in foil or plastic wrap, then refrigerate until ready to eat.
What’s the best way to reheat a wrap? Unwrap it partially and heat it in a microwave for 20 seconds or in a skillet over medium heat for about 1 minute per side until warmed through.
Can I use different proteins instead of chicken? Absolutely—turkey, shrimp, or seasoned tofu work wonderfully as excellent protein alternatives in this recipe.
How do I prevent my wraps from getting soggy? Keep wet ingredients like tomatoes and cucumber separate until assembly, or add them just before eating if the wraps have been sitting for several hours.
Are there nut-free sauce alternatives? Yes, the yogurt-lime-mayo sauce is naturally nut-free, but if you need a completely different option, try hummus mixed with a bit of lemon juice for a Mediterranean twist.
Final Thoughts
These chicken wraps represent the perfect balance between convenience and deliciousness, making them an excellent choice for anyone seeking quick, satisfying meals. Whether you’re cooking for yourself, your family, or guests, this recipe consistently delivers impressive results with minimal effort. The versatility means you can enjoy different flavor combinations throughout the week without ever getting bored. Best of all, these wraps prove that healthy eating doesn’t mean sacrificing taste or satisfaction. Once you master this basic technique, you’ll find yourself creating countless variations tailored to your preferences and available ingredients.
Did you love this recipe? We’d be thrilled if you saved it to your collection, pinned it to your favorite Pinterest board, or shared it with friends and family who might enjoy it too! Your support means everything to us and encourages us to keep creating delicious recipes that bring joy to your table. Thank you for cooking with us!