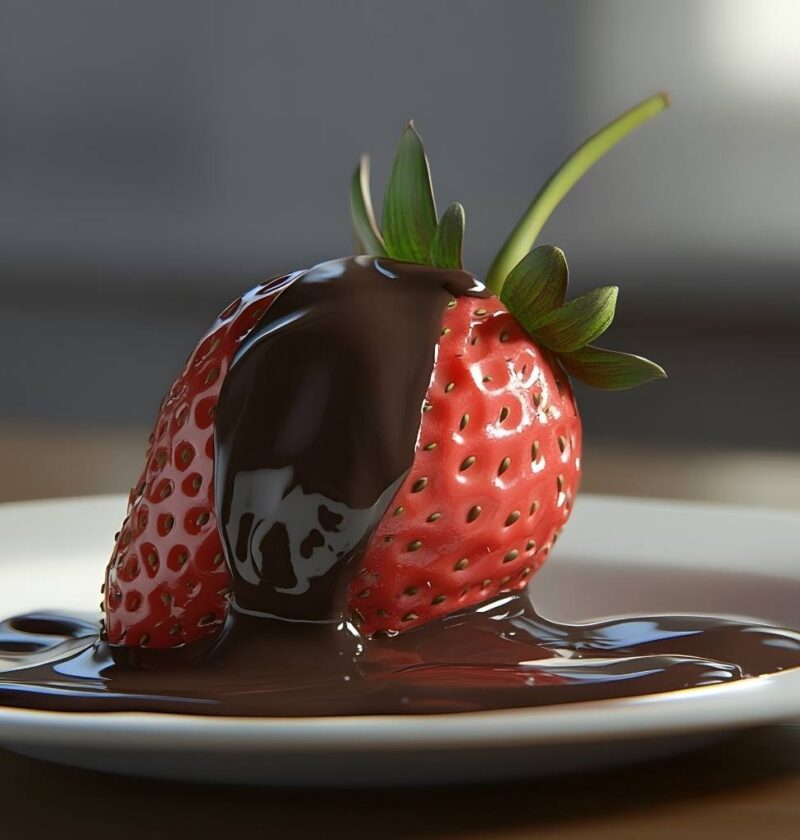
There’s an undeniable elegance and romance to offering someone a chocolate covered strawberry—it’s the kind of simple gesture that feels simultaneously indulgent and thoughtful. Chocolate Covered Strawberries represent the perfect intersection of fresh fruit and rich chocolate, creating a dessert that tastes fancy yet requires almost no culinary skill to master. What makes this treat truly remarkable is how the bright tartness of fresh strawberries perfectly balances the decadent sweetness of chocolate, creating a flavor combination that feels both timeless and sophisticated. Whether you’re preparing a romantic gesture, creating an elegant dessert for a special occasion, building a stunning dessert platter for entertaining, or simply treating yourself to something special, these treats deliver impressive results with minimal effort. The beauty of chocolate covered strawberries lies in their simplicity and versatility; you can customize them with different types of chocolate, add creative toppings, and prepare them at the last minute or several hours ahead. Beyond their delicious taste and beautiful presentation, these treats offer the satisfaction of creating something homemade that rivals any bakery or gourmet chocolate shop. From the moment you dip the first strawberry, you’ll understand why this recipe has remained a timeless favorite for decades.
Ingredients
Servings: 12-16 strawberries
Basic Ingredients: • 1 pound fresh strawberries (about 12-16 medium berries) • 8 ounces chocolate, chopped or chips (milk, dark, or white chocolate) • 1 tablespoon coconut oil or shortening • 2 tablespoons unsalted butter
For Decoration (Optional): • 2 ounces white or dark chocolate for drizzle • 1/4 cup chopped nuts (almonds, pistachios, or hazelnuts) • 2 tablespoons sprinkles or pearl sugar • 1 tablespoon crushed freeze-dried berries • 1/4 teaspoon sea salt flakes • 1 tablespoon edible gold leaf or shimmer dust • Dried rose petals or fresh mint
Equipment: • Parchment paper or silicone mat • Shallow bowl or dipping dish • Wooden skewers or forks for dipping
Step-by-Step Instructions
Prepare the Strawberries
- Rinse fresh strawberries under cool running water and pat them dry thoroughly with paper towels or a clean kitchen cloth.
- Drying the strawberries completely is crucial, as any moisture will cause the chocolate coating to separate and become streaky rather than smooth.
- Remove the green leafy tops from each strawberry by twisting them off gently or using a small sharp knife.
- Leave the strawberries at room temperature after washing and drying, as cold berries can cause the chocolate to seize and become grainy.
- Line a baking sheet or large plate with parchment paper or a silicone baking mat to prevent the strawberries from sticking.
Prepare Your Workspace
- Gather all your decorative toppings and place them in small individual bowls or dishes within easy reach of your dipping station.
- Have several wooden skewers, strawberry dipping forks, or regular forks ready for holding the strawberries while dipping.
- Set up your work area with the melted chocolate bowl, the lined baking sheet, and decoration bowls all within arm’s reach for efficient assembly.
Melt the Chocolate
- Break or chop the chocolate into small, uniform pieces to ensure even and consistent melting.
- Fill a medium saucepan with about 2 inches of water and bring it to a gentle simmer over medium heat.
- Place a heat-safe bowl on top of the saucepan, ensuring the bottom of the bowl doesn’t touch the water—this creates a double boiler.
- Add the chopped chocolate and coconut oil to the bowl, stirring occasionally with a rubber spatula.
- Continue stirring gently until the chocolate is completely melted and smooth, which typically takes 3 to 5 minutes depending on the chocolate type.
- Remove the bowl from the heat and stir in the butter, mixing until fully incorporated and the chocolate reaches a glossy consistency.
- Allow the chocolate to cool slightly for about 1 minute before dipping to prevent it from being too hot and running off the strawberries.
- Test the temperature by dipping a strawberry—it should coat smoothly without being runny.
Dip the Strawberries
- Holding a strawberry by the leafy top or using a dipping fork, submerge it into the melted chocolate coating.
- Slowly rotate the strawberry in the chocolate, ensuring it’s completely coated on all sides.
- Lift the strawberry out of the chocolate and allow excess to drip back into the bowl for 2 to 3 seconds.
- Gently place the chocolate covered strawberry onto the prepared parchment paper or silicone mat, holding it briefly to ensure it stays in place.
- Continue dipping strawberries one at a time, working efficiently before the chocolate begins to set.
Add Decorative Toppings (Optional)
- While the chocolate coating is still wet and tacky, immediately add your desired toppings to each strawberry.
- You can sprinkle chopped nuts, pearl sugar, or sprinkles directly onto the wet chocolate, allowing them to stick naturally.
- For chocolate drizzle, wait until the base chocolate sets slightly, then drizzle additional melted chocolate over the top using a fork or squeeze bottle.
- Press edible gold leaf or shimmer dust gently onto the wet chocolate for an elegant, luxurious appearance.
- Scatter dried rose petals or fresh mint leaves on top for a botanical, gourmet presentation.
Let the Chocolate Set
- Allow the chocolate to set at room temperature for about 30 minutes, or until the coating is completely firm to the touch.
- For faster setting, you can refrigerate the strawberries for 10 to 15 minutes, though room temperature setting produces the best texture.
- Avoid placing them in the freezer, as rapid temperature changes can cause the chocolate to crack and become dull.
- Once fully set, the strawberries are ready to serve or store for later enjoyment.
Serving and Storing Tips
Serving Tips
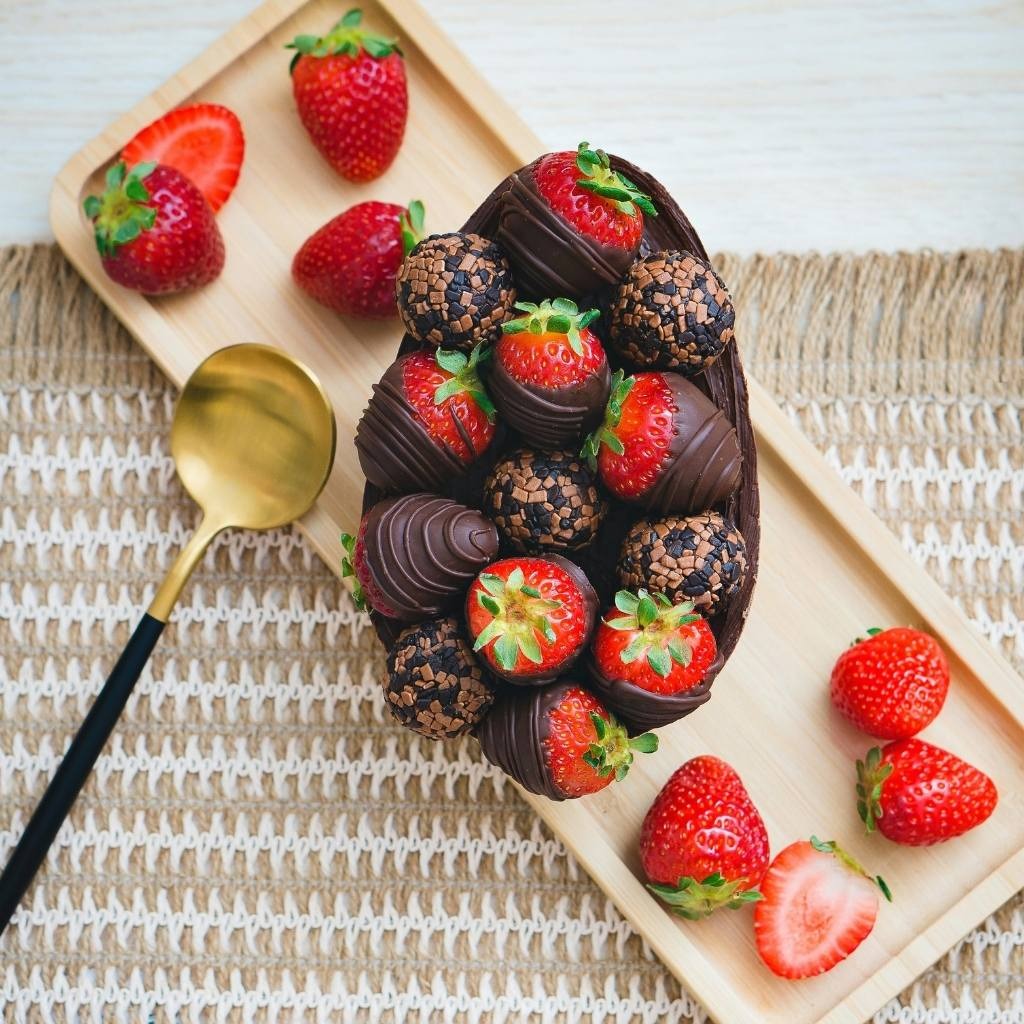
First, serve these strawberries at room temperature or slightly chilled for the most enjoyable eating experience and optimal chocolate texture. Next, present them on a beautiful platter, arranging them with varied heights and positions for visual appeal and elegance. Additionally, you can serve them in individual paper liners or on a tiered cake stand for a more formal, sophisticated presentation. These treats pair wonderfully with champagne, sparkling wine, dessert wine, or coffee for an elegant pairing that enhances the overall experience. Furthermore, creating a dessert platter by combining chocolate covered strawberries with other gourmet treats like truffles, macarons, or cheese creates a stunning display for entertaining. For a romantic gesture, package individual strawberries in beautiful boxes with tissue paper for a thoughtful, homemade gift that rivals any luxury chocolaterie. Consider serving them immediately after preparing for the freshest taste and most beautiful appearance, though they maintain their quality for several hours.
Storage Tips
Store your chocolate covered strawberries in an airtight container in the refrigerator for up to 2 days, placing parchment paper between layers to prevent them from sticking together. However, removing them from the refrigerator about 15 minutes before serving allows the chocolate to reach optimal eating temperature and the strawberry flavor to shine through. Meanwhile, you can also store them at room temperature for up to 4 hours in a cool environment, though refrigeration extends their freshness considerably. Additionally, do not freeze chocolate covered strawberries for extended storage, as the moisture content in the fruit causes texture issues and the chocolate becomes grainy when thawed. The best approach is to prepare them no more than 1 day before serving to enjoy them at their absolute peak of freshness and appearance. For special occasions, plan to make them the morning of your event or the evening before, keeping them covered in the refrigerator until serving time. If the chocolate coating becomes dull during storage, you can refresh it slightly by placing the strawberries in a warm room for a few minutes, which helps restore the chocolate’s natural shine.
Helpful Notes
Chocolate Selection and Types
The quality of chocolate you choose directly impacts the final result, so investing in good quality chocolate makes a noticeable difference in taste and appearance. First, milk chocolate creates a sweeter, more traditional coating that appeals to those with milder chocolate preferences. Next, dark chocolate with 60 to 70 percent cocoa content provides a more sophisticated, balanced flavor that complements strawberries beautifully without overwhelming the fruit. Meanwhile, white chocolate offers a creamy, vanilla-forward coating that creates a striking visual contrast with red strawberries, though it’s not technically chocolate. Additionally, you can experiment with specialty chocolates like sea salt dark chocolate, espresso chocolate, or raspberry-infused dark chocolate for gourmet variations. For the smoothest melting and coating, use couverture chocolate or quality chocolate chips rather than budget brands, as they contain higher cocoa butter content. Furthermore, adding coconut oil or shortening to the chocolate lowers the melting point and creates a thinner coating that’s easier to work with while still setting to a beautiful finish.
Topping and Flavor Variations
The beauty of chocolate covered strawberries lies in endless customization possibilities that allow you to match any occasion or personal preference. For a classic approach, skip toppings entirely and let the pure chocolate and strawberry shine through without distraction. Additionally, chopped nuts like almonds, pistachios, or hazelnuts add crunch and sophistication that elevates the treat considerably. Meanwhile, sprinkles create a fun, festive appearance perfect for parties or celebrations, while pearl sugar adds an elegant sparkle that catches the light beautifully. For holiday variations, add crushed candy canes to white chocolate covered strawberries for a peppermint version, or use red and green sprinkles for Christmas. Furthermore, drizzling contrasting chocolate over the base coating creates beautiful patterns and adds complexity to the flavor profile. Consider adding a light sprinkle of sea salt flakes to dark chocolate covered strawberries to enhance the chocolate flavor and create a sophisticated sweet-salty combination. For a romantic touch, dust with edible gold leaf or shimmer dust to create a luxurious, gourmet appearance.
Common Mistakes to Avoid
One of the most frequent mistakes is not drying the strawberries thoroughly before dipping, which causes the chocolate coating to separate and become streaky and uneven. Always use paper towels to remove all surface moisture from each strawberry. Additionally, using cold strawberries fresh from the refrigerator causes the chocolate to seize and become lumpy, so allow them to reach room temperature before dipping. Furthermore, melting the chocolate at too high a temperature or overheating it causes it to become thick and grainy, losing the smooth, glossy appearance everyone expects. Meanwhile, dipping the strawberries too deeply into the chocolate or holding them in the chocolate too long results in an overly thick coating that’s heavy and unpleasant to eat. Finally, refrigerating the strawberries too quickly or in the freezer causes the chocolate to crack and become dull rather than maintaining its beautiful shine.
Time-Saving and Make-Ahead Tips
These strawberries can be prepared up to 24 hours in advance, making them perfect for entertaining and stress-free planning. First, wash, dry, and de-top the strawberries several hours before dipping to prepare them ahead. Next, you can prepare and melt the chocolate up to 1 hour before dipping, keeping it at room temperature and stirring gently if it begins to set. Additionally, all your decorative toppings can be measured and arranged in bowls the day before, streamlining the dipping process considerably. For efficiency, complete the dipping and decorating for all strawberries before the chocolate fully sets, allowing you to work quickly without pressure. Furthermore, if you need to make these for a special occasion, preparing them the day before and storing them refrigerated gives you one less thing to worry about on the day itself. You can also prepare the chocolate and strawberries just before guests arrive, as the dipping process is quick and impressive to watch.
Professional Tips for Perfect Results
The secret to beautiful, professional-looking chocolate covered strawberries lies in using a double boiler and paying attention to temperature—chocolate that’s too hot or too cold produces inferior results. Additionally, the addition of coconut oil or shortening to the chocolate is not just optional; it makes a significant difference in creating a smooth, thin coating that’s easy to apply and beautiful to look at. Meanwhile, using a dipping fork or wooden skewer rather than holding the strawberry by the leaf ensures complete coverage and prevents fingerprints on the chocolate. Furthermore, working efficiently and setting the strawberries on cool parchment paper helps them set faster and more evenly. Finally, allowing chocolate to set at room temperature rather than in the refrigerator produces the most beautiful finish with a natural shine that looks far more professional than refrigerated results.
Frequently Asked Questions
Can I make chocolate covered strawberries ahead of time, and how far in advance is safe? Yes, prepare them up to 24 hours ahead and refrigerate in an airtight container with parchment paper between layers; remove about 15 minutes before serving for optimal flavor.
Why did my chocolate coating turn out streaky or dull, and how can I prevent it? This happens when strawberries are wet or cold when dipped; always ensure they’re completely dry and at room temperature before dipping.
What’s the best way to melt chocolate to avoid it becoming grainy or seized? Use a double boiler and melt slowly over gentle heat, never allowing water to splash into the chocolate; add coconut oil to prevent seizing.
Can I use different types of chocolate together, like layering white chocolate over dark chocolate? Absolutely—let the first layer set completely, then dip into the contrasting chocolate for beautiful two-tone effects and complex flavor combinations.
How can I make chocolate covered strawberries shiny if they look dull? Allow them to reach room temperature gradually, as cold strawberries appear dull; the shine returns naturally as they warm up slightly.
Conclusion
Chocolate Covered Strawberries represent elegance, simplicity, and pure indulgence all wrapped into one timeless treat that never goes out of style. This remarkably straightforward recipe requires just a few quality ingredients and minimal time, yet produces results that feel impressive, romantic, and absolutely delicious. Whether you’re preparing them for Valentine’s Day, a special celebration, a gourmet dessert platter, or simply treating yourself to something special, these strawberries deliver sophisticated satisfaction.
The versatility of this recipe lies in its endless customization possibilities, allowing you to create variations that match any occasion, season, or personal preference. Furthermore, the make-ahead nature of these treats means you can prepare them hours in advance, keeping your schedule flexible while always having an impressive dessert or gift option available. The opportunity to elevate humble strawberries through minimal effort creates a dessert that feels gourmet yet approachable, impressing guests and loved ones without requiring advanced baking skills.
Next time you want to create something beautiful and delicious, express love and appreciation through a homemade gesture, or simply enjoy a moment of indulgence, remember that chocolate covered strawberries are always the perfect choice. Your family and friends will appreciate the thoughtfulness and flavor, and you’ll love how simple the entire process truly is.
If you loved making these Chocolate Covered Strawberries and found this recipe helpful, we’d absolutely love it if you’d save it, pin it to your Pinterest board, or share it with friends and family who might enjoy making it too! Your support and feedback inspire us to keep creating elegant yet simple recipes and helpful guides that bring joy and sophistication to home kitchens everywhere. We can’t wait to hear about your experience making these strawberries, so please come back and let us know if you tried any creative variations or special decorating techniques. Happy dipping!