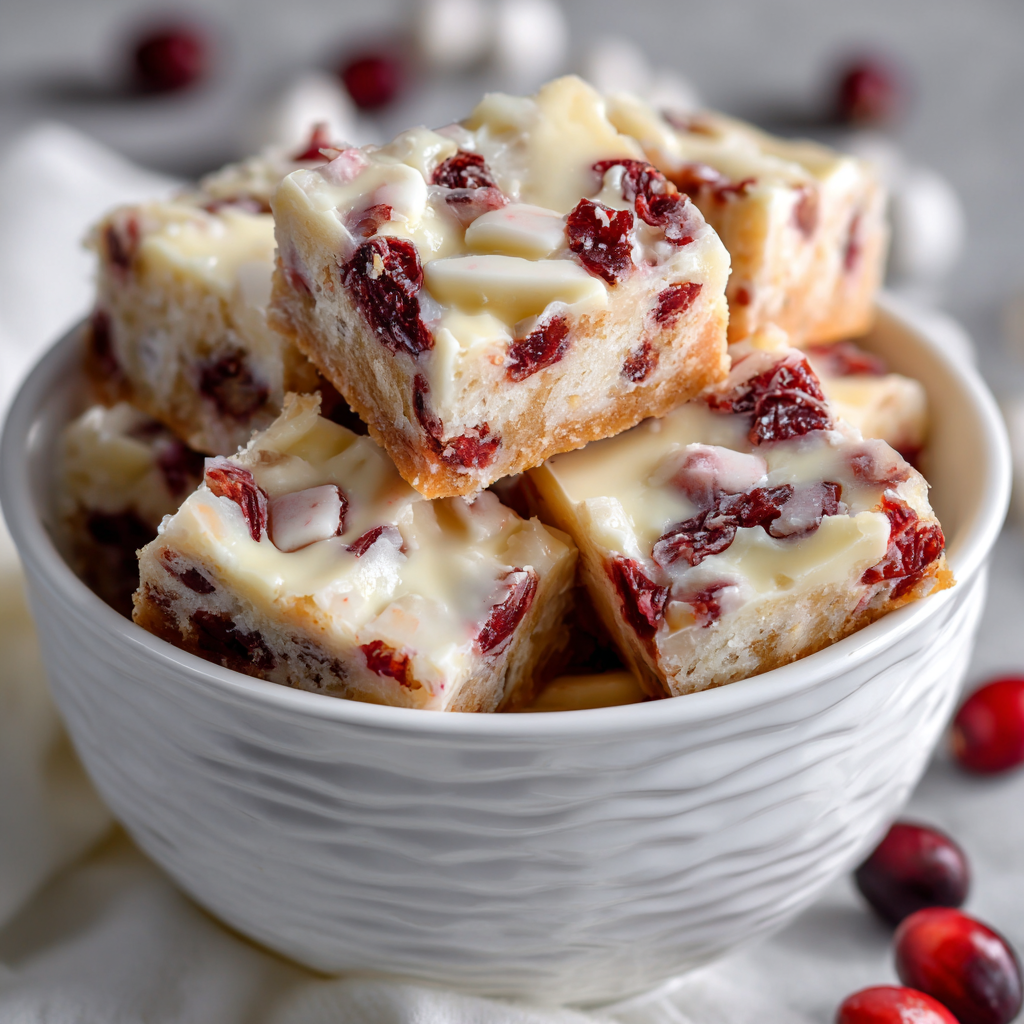
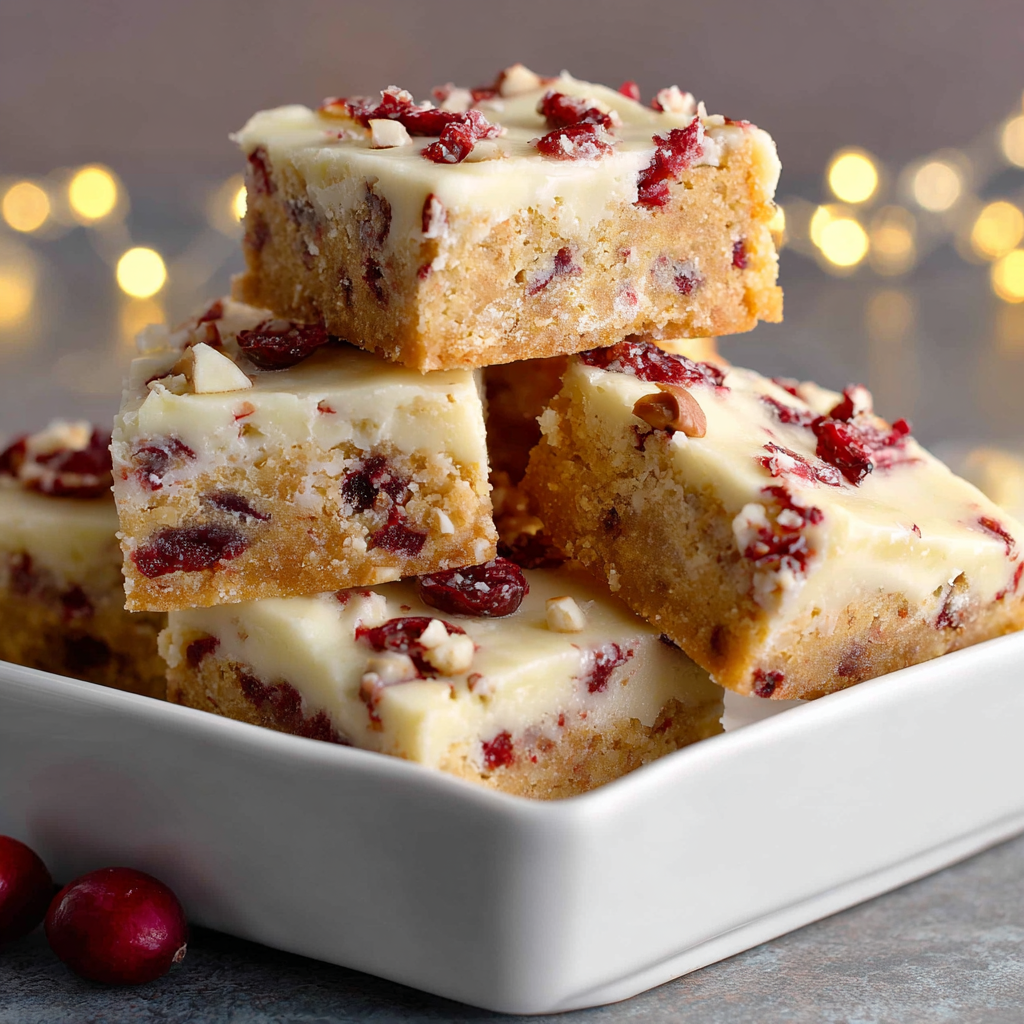
If you’ve ever enjoyed a Cranberry Bliss Bar from your favorite coffee shop, you know that magical combination of tart cranberry, buttery shortbread, and dreamy white chocolate frosting creates an almost addictive treat. The good news is that you can recreate this beloved bakery favorite right in your own kitchen, and honestly, homemade versions often taste even better than the original. This copycat recipe captures every element that makes those bars so special—the crumbly, buttery base, the vibrant cranberry filling, and the luxurious white chocolate topping that makes each bite feel like an indulgence. The beautiful part about making these at home is that you control the quality of every ingredient, and you can customize them to suit your exact preferences. Whether you want to surprise your family with a homemade treat, impress guests with a sophisticated dessert, or simply satisfy a craving without leaving the house, this recipe delivers bakery-quality results that taste absolutely authentic. Get ready to elevate your baking game and discover why these bars deserve a permanent spot in your recipe collection.
Ingredients
Makes 16 bars
For the shortbread base:
- 1 1/2 cups all-purpose flour
- 1/2 cup powdered sugar
- 1/2 teaspoon sea salt
- 3/4 cup cold unsalted butter, cubed
- 1/4 teaspoon vanilla extract
For the cranberry filling:
- 2 cups fresh or frozen cranberries
- 3/4 cup granulated sugar
- 1/4 cup water
- 2 tablespoons fresh orange juice
- 1 tablespoon orange zest
- 1/4 teaspoon ground ginger
- Pinch of sea salt
For the white chocolate frosting topping:
- 1/2 cup heavy cream
- 8 ounces white chocolate, finely chopped
- 2 tablespoons unsalted butter
- 1/2 teaspoon vanilla extract
- Pinch of sea salt
- 2 tablespoons powdered sugar
For garnish (optional):
- Dried cranberries for decoration
- Candied orange peel (optional)
Instructions
- Preheat your oven to 350°F and line an 8×8-inch square baking pan with parchment paper, allowing the edges to hang over the sides for easy removal. This setup makes it much simpler to lift out the entire baked block before cutting into individual bars.
- For the shortbread base, combine the flour, powdered sugar, and sea salt in a medium mixing bowl by whisking them together until evenly distributed. Next, add the cold cubed butter to this dry mixture and use a pastry cutter, two knives, or your fingertips to work the butter into the flour until the mixture resembles coarse breadcrumbs with pea-sized pieces of butter still visible.
- Stir in the vanilla extract and mix until the dough just comes together when pressed—it should be crumbly rather than completely smooth. Press this mixture firmly and evenly into the bottom of your prepared baking pan, using the flat bottom of a measuring cup to create an even surface.
- Bake the shortbread base for 10 to 12 minutes until it’s set but still pale blonde in color; you want it cooked through but not browned. Remove it from the oven and set it aside while you prepare the cranberry filling.
- In a medium saucepan, combine the fresh cranberries, granulated sugar, water, fresh orange juice, orange zest, ground ginger, and sea salt. Bring this mixture to a simmer over medium heat, stirring occasionally to prevent sticking.
- Continue cooking the cranberry mixture for 8 to 10 minutes, stirring frequently, until the cranberries burst and the mixture thickens to a jam-like consistency. The color will deepen to a rich burgundy, and most of the liquid should evaporate, leaving behind a thick, spoonable sauce.
- Remove the cranberry filling from heat and allow it to cool for about five minutes before spreading it evenly over the baked shortbread base. Use an offset spatula or the back of a spoon to create an even layer across the entire surface.
- Return the pan to the oven and bake for an additional 12 to 15 minutes until the filling is set but still slightly soft in the center. The cranberry layer should look jam-like and hold together when you gently press it with a spoon.
- Remove the entire pan from the oven and place it on a wire cooling rack to cool completely—this is important because the frosting needs a cool, stable surface. Additionally, allow at least 30 to 45 minutes for complete cooling before adding the white chocolate topping.
- While the bars cool, prepare the white chocolate frosting by heating the heavy cream in a small saucepan over medium heat until it just begins to steam and small bubbles form around the edges. Next, remove it from heat and pour the hot cream over the finely chopped white chocolate in a separate bowl, letting it sit undisturbed for one minute so the residual heat softens the chocolate.
- After one minute, stir the white chocolate and cream together until completely smooth and silky. Then add the softened butter, vanilla extract, and sea salt, stirring until everything is fully incorporated and the frosting is glossy and beautiful.
- Whisk in the powdered sugar to achieve the perfect spreading consistency—the frosting should be thick enough to hold its shape but pourable enough to spread easily. If it seems too thick, let it cool for a few minutes, and if it seems too thin, add a bit more powdered sugar.
- Spread the white chocolate frosting evenly over the cooled cranberry layer, using an offset spatula to create a smooth, professional-looking surface. Work quickly but carefully, as white chocolate sets faster than other frostings.
- If you’d like, garnish the frosting with a few dried cranberries or candied orange peel before the frosting completely sets. Allow the bars to set at room temperature for at least one hour, or refrigerate for 20 to 30 minutes for faster setting.
- Once the frosting is completely set, use a sharp knife dipped in hot water and wiped clean between cuts to slice the bars into 16 equal pieces. Cut into four strips in one direction, then four strips in the perpendicular direction to create uniform squares.
What Makes These Bars So Irresistible
First, the layered composition creates different textures in every bite—the buttery, crumbly shortbread provides the foundation, the tart cranberry filling adds brightness and complexity, and the smooth white chocolate frosting brings luxurious sweetness. This combination is the exact formula that makes the original bakery version so beloved and craveable.
The cranberry filling is particularly important because it’s made from fresh berries rather than a canned product, giving it a authentic, vibrant flavor that tastes noticeably fresher and more sophisticated. Meanwhile, the white chocolate frosting acts like the cherry on top—literally—transforming the bars from nice into absolutely divine.
In contrast to store-bought versions that may contain additives or artificial flavors, homemade bars let you taste the quality of real cranberries, real butter, and real white chocolate. Additionally, the orange zest in the filling brings a subtle brightness that elevates these bars beyond basic and into genuinely special territory.
Serving and Storing Tips
How to Serve
These bars deserve to be showcased because they look almost as good as they taste. For elegant entertaining, serve them on a white ceramic platter or wooden board where the white frosting really pops visually. Next, consider pairing them with hot coffee, tea, or hot chocolate for a sophisticated afternoon treat.
Additionally, individual bars make wonderful additions to gift baskets or favor boxes during the holiday season or any special occasion. At brunch gatherings, arrange them alongside other pastries and treats for a beautiful, bakery-style display. Furthermore, you can serve them slightly chilled—the cold frosting takes on an almost mousse-like texture that many people find even more delicious than room temperature bars.
Storage Instructions
Store your finished bars in an airtight container at room temperature for up to three days, though the frosting holds up best when they’re kept in a cool environment. However, for longer storage, refrigerate them for up to one week in a covered container, and the bars will actually stay fresher and moister in the cold.
For freezing, wrap individual bars carefully in plastic wrap and place them in a freezer bag for up to two months. When you’re ready to enjoy a frozen bar, let it thaw at room temperature for about 30 to 45 minutes, and the frosting will return to its normal creamy texture.
Helpful Notes and Tips for Success
Before you begin, make sure your butter is truly cold for the shortbread base—this creates the flaky, crumbly texture that makes this layer so special and delicious. If your kitchen is very warm, you can even freeze the cubed butter for 15 minutes before using it.
Here’s an important tip about the cranberry filling: don’t skip the orange zest and juice because they’re what gives this filling its distinctive, sophisticated flavor that separates it from ordinary cranberry sauce. The citrus brightness is actually what makes people say “wow, that’s different and amazing” when they taste these bars.
Regarding the white chocolate frosting, quality matters tremendously because white chocolate can sometimes taste waxy and artificial. Look for real white chocolate that contains cocoa butter rather than vegetable oil, as this will give you a much better-tasting, smoother frosting.
If your frosting is too thin after mixing, place the bowl in the refrigerator for five to ten minutes to firm it up slightly before spreading it over the bars. Conversely, if it’s too thick and difficult to spread, you can microwave it for five seconds at a time, stirring between intervals, until it reaches the perfect consistency.
For cleaner cuts between bars, use a very sharp knife that you’ve dipped in hot water and wiped dry before each cut. This simple step makes an enormous difference in the presentation of your finished bars.
Chef Tips
First, the secret to bars that look professionally made is to take your time with the frosting layer and ensure the white chocolate mixture is the right temperature and consistency before spreading. Using an offset spatula rather than a regular knife gives you much more control and creates a smoother, more polished appearance.
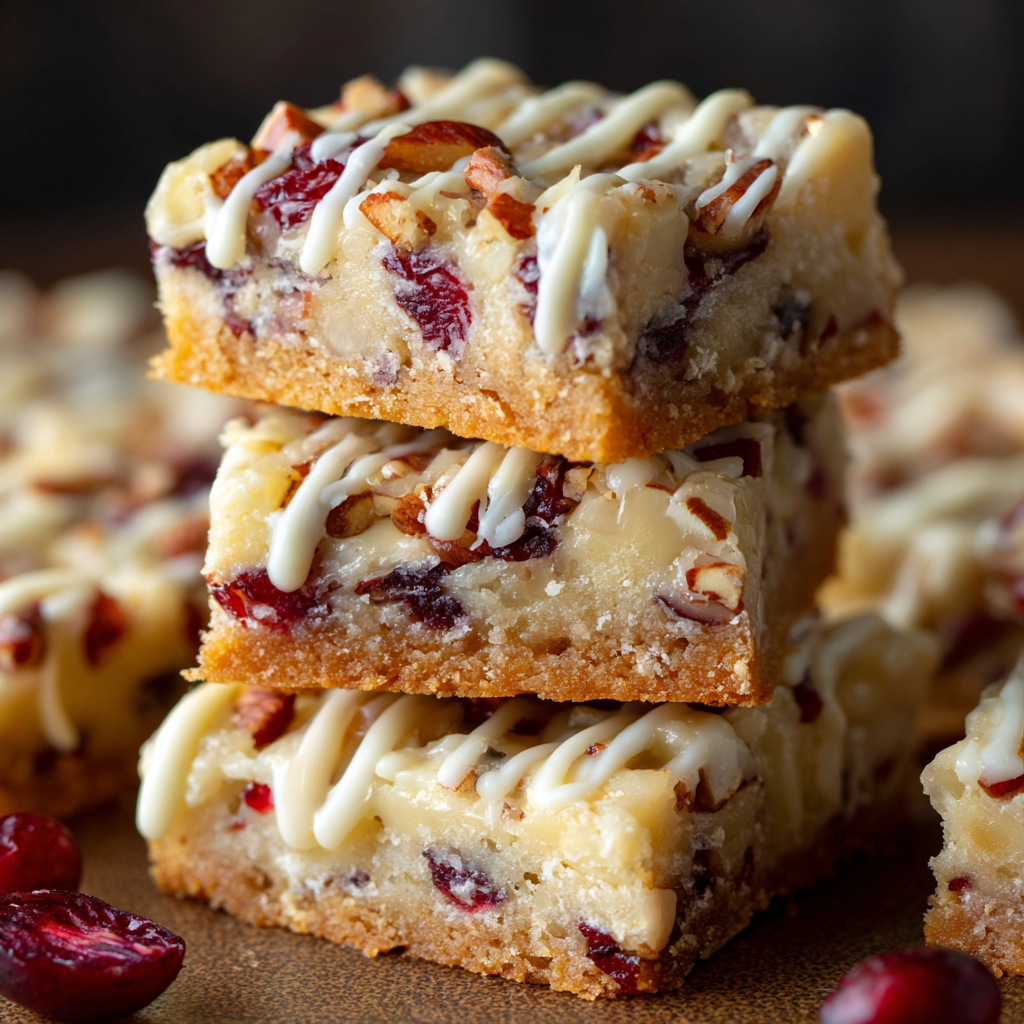
Additionally, if you want to add extra sophistication, make a simple white chocolate drizzle by melting an ounce of white chocolate and drizzling it delicately across the frosted bars before serving. This touch makes them look completely bakery-quality and restaurant-ready while requiring only an extra minute of effort.
Frequently Asked Questions
Can I make these bars without white chocolate frosting? Yes, these bars are delicious with just the shortbread and cranberry layers, though the frosting really does make them feel more special and bakery-authentic.
What if I don’t have fresh cranberries? Frozen cranberries work perfectly in this recipe—use them straight from the freezer with no thawing needed, and the finished filling will be essentially identical.
Can I substitute the orange zest with lemon? Absolutely—lemon zest and juice create a slightly different but equally delicious flavor profile that works beautifully with the cranberries.
How do I prevent the frosting from cracking? Make sure the bars are completely cooled before adding frosting, and let the white chocolate mixture cool to about room temperature before spreading it on for the smoothest finish.
Are these bars naturally gluten-free? No, they contain regular all-purpose flour, though you could experiment with a one-to-one gluten-free flour blend to create a gluten-free version.
Creating Your Own Bakery at Home
There’s something genuinely special about recreating a beloved bakery item in your own kitchen—it’s like having a little piece of that cafe experience whenever you want it. Next time you’re craving those famous Cranberry Bliss Bars, skip the line and spend an afternoon baking instead.
The process of making these bars from scratch is surprisingly therapeutic and rewarding, and the house-filling aroma of cranberries and white chocolate is honestly part of the appeal. Furthermore, once you’ve mastered this recipe, you’ll realize how much money you save by baking at home instead of buying similar treats at premium coffee shops.
Additionally, homemade versions make absolutely outstanding gifts during the holiday season or any time you want to show someone you care. Package them beautifully in a bakery box with tissue paper, tie it with a ribbon, and you have a present that feels far more thoughtful and special than anything store-bought.
As you become comfortable with this recipe, you might experiment with slight variations—perhaps adding a touch of almond extract to the frosting, or trying different citrus zests in the filling. The wonderful thing about copycat recipes is that they give you a solid foundation, and then you get to make them your own by adding your personal touches and preferences.
With these bars in your baking repertoire, you’ll have an elegant, impressive dessert that works beautifully for entertaining, special occasions, or simply satisfying a craving for something bakery-quality and homemade. The three distinct layers, the gorgeous presentation, and the absolutely delicious taste make these bars worth the small amount of effort they require—and once you taste your homemade version, you’ll never look at the coffee shop version quite the same way again.