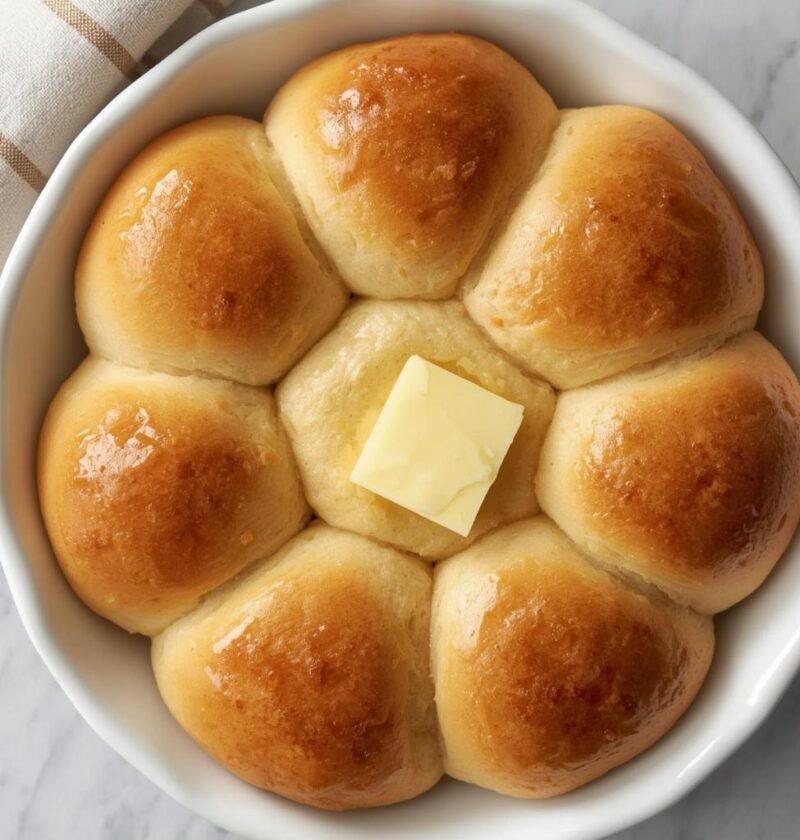
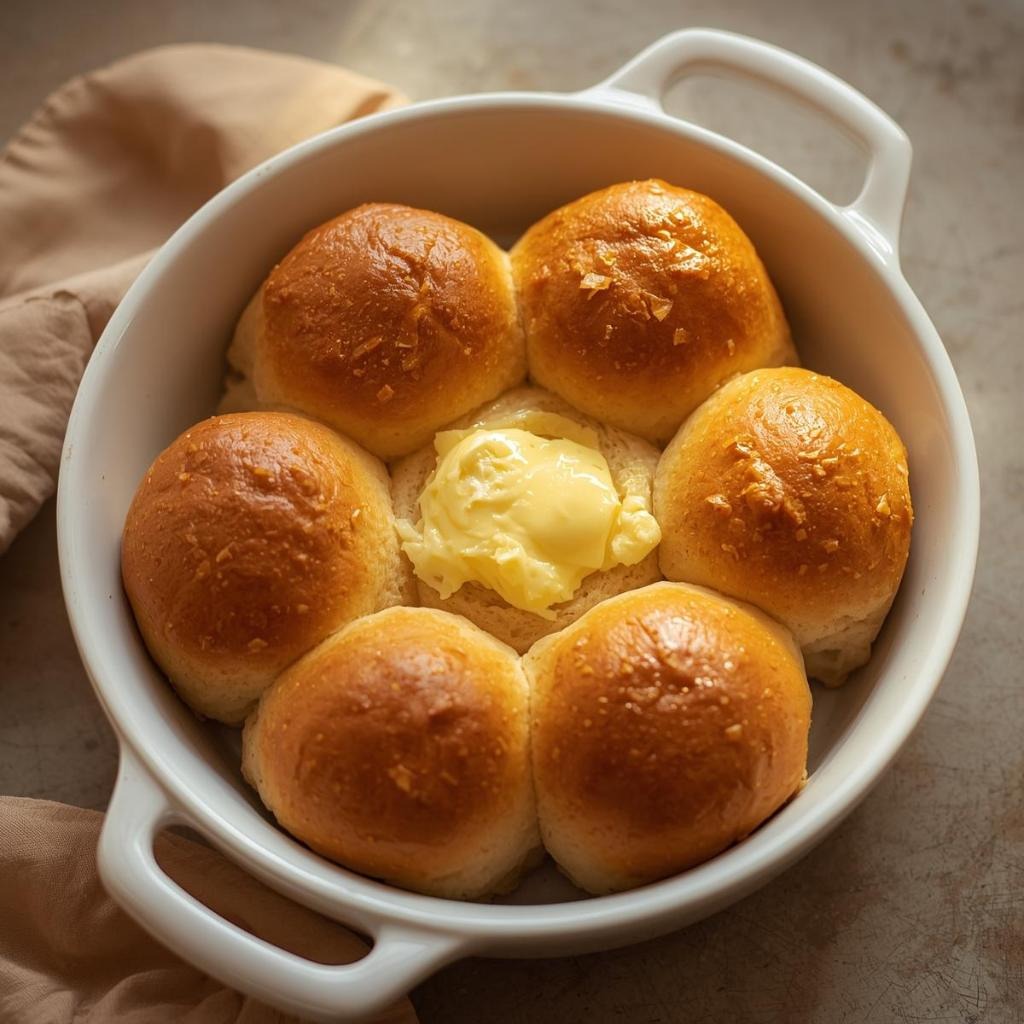
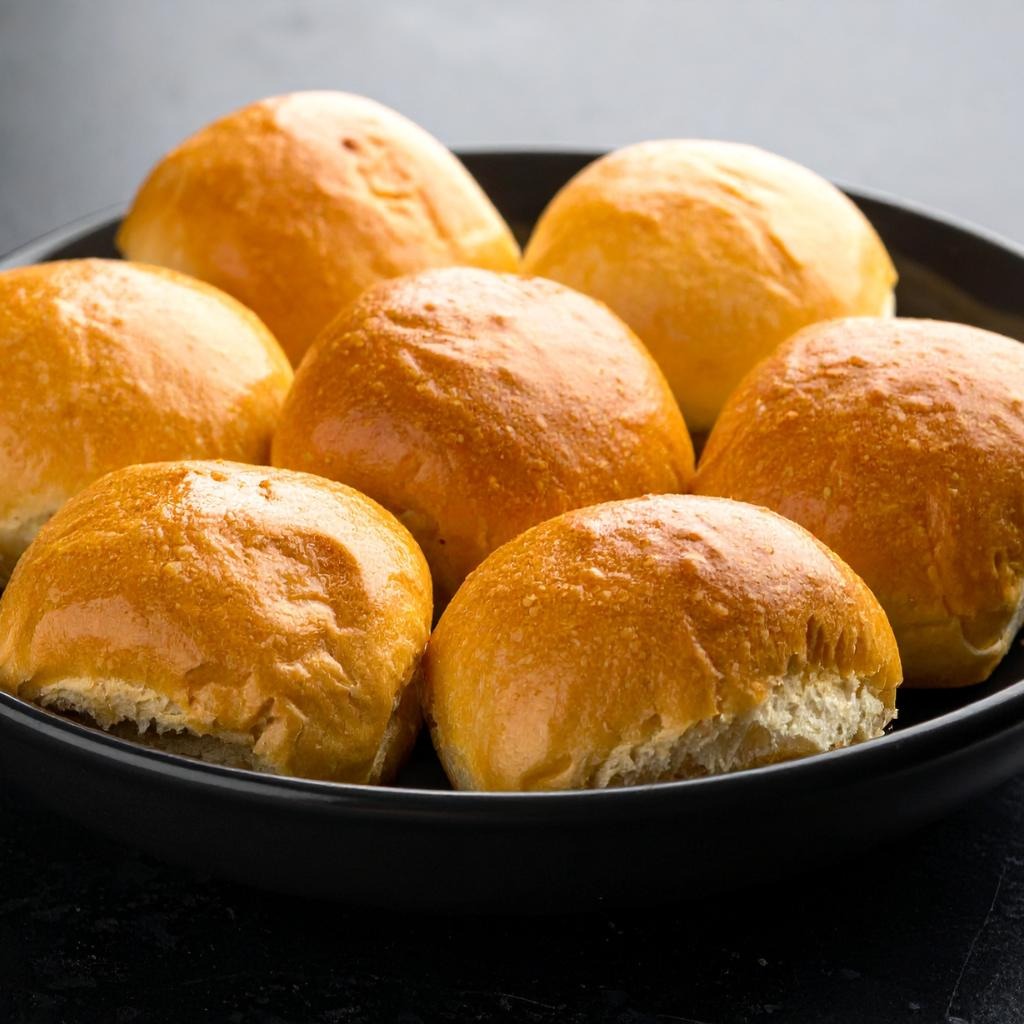
Dinner rolls with butter represent one of life’s simple pleasures, combining warm, pillowy homemade bread with golden melted butter to create something absolutely irresistible and genuinely memorable. First, this classic preparation transforms basic ingredients like flour, yeast, and butter into something truly spectacular that fills your kitchen with an aroma that rivals any bakery. The beauty of homemade dinner rolls lies in their ability to elevate any meal, whether you’re preparing a casual family dinner or hosting an impressive gathering where every detail matters. Additionally, freshly baked dinner rolls with butter bring warmth and abundance to any table, creating an atmosphere of comfort and care that guests remember long after the meal ends. These rolls work perfectly as the foundation for sandwiches, as sophisticated sides for elegant dinners, or simply enjoyed warm from the oven with nothing but a generous spread of butter. Next, you’ll appreciate how this recipe, despite requiring rise time for the dough, takes approximately two hours from start to finish with minimal hands-on effort. Furthermore, the versatility of this preparation allows for endless variations with different herbs, seeds, and shapes while maintaining the classic appeal that makes fresh bread so universally beloved. Whether you’re an experienced baker or someone just beginning their bread-making journey, dinner rolls with butter deliver consistently impressive results that taste bakery-quality yet completely homemade and authentic.
Ingredients
Serves: 12-16 rolls
For the Dough:
- 1 cup whole milk, warmed
- 3 tablespoons unsalted butter, melted
- 2 tablespoons granulated sugar
- 2¼ teaspoons instant yeast (one ¼-ounce packet)
- 1 teaspoon salt
- 1 large egg
- 3 to 3.5 cups all-purpose flour
- 1 tablespoon unsalted butter, softened (for greasing bowl)
For the Topping:
- 3 tablespoons unsalted butter, melted
- ½ teaspoon coarse sea salt
- 1 tablespoon fresh parsley, finely chopped (optional)
- ½ teaspoon garlic powder (optional)
For Serving:
- ½ pound unsalted butter, softened to room temperature
- Fleur de sel or flaky sea salt (optional)
- Additional fresh herbs like thyme or rosemary (optional)
Preparation and Cooking Instructions
Activating the Yeast
First, pour the warmed milk into a large mixing bowl. The milk should be warm to the touch, approximately 110°F, as water that’s too hot kills the yeast while water that’s too cold prevents activation. Next, add the melted butter, granulated sugar, instant yeast, and salt to the warm milk, stirring gently to combine. Allow this mixture to sit undisturbed for approximately 5 minutes, during which time the yeast begins to activate and small bubbles should appear on the surface, indicating the yeast is alive and ready to work.
Building the Dough
Add the egg to the yeast mixture and whisk thoroughly until well combined. Next, gradually add the flour one cup at a time, stirring with a wooden spoon or rubber spatula after each addition. Start with 3 cups of flour and add additional flour as needed to create a soft dough that comes together and pulls away from the sides of the bowl. The dough should feel soft and slightly sticky rather than stiff or dry.
Transfer the shaggy dough to a lightly floured surface and knead for approximately 8 to 10 minutes until the dough becomes smooth, elastic, and springs back when poked with a finger. During the kneading process, the gluten develops, creating structure that allows the rolls to rise properly. If the dough seems too sticky, dust with a small amount of additional flour. If it seems too dry, wet your hands slightly and continue kneading.
First Rise
Lightly grease a large mixing bowl with softened butter, then place the kneaded dough in the bowl, turning it to coat all sides with the thin layer of butter. This prevents a crust from forming on the dough surface. Cover the bowl with a damp kitchen towel or plastic wrap and place it in a warm, draft-free location. Allow the dough to rise for approximately 1 to 1.5 hours until it doubles in size, which indicates sufficient fermentation and development.
Shaping the Rolls
Punch down the risen dough gently to release excess gas, then transfer it to a lightly floured surface. Next, divide the dough into 12 equal pieces by first cutting the dough in half, then cutting each half into thirds, then cutting each third in half again, creating uniform portions. Alternatively, you can pinch off pieces and weigh them on a kitchen scale for consistency.
Shape each piece into a smooth ball by pulling the edges under and tucking them underneath, creating tension on the surface. Place each shaped roll seam-side down into a buttered 9-by-13-inch baking dish, arranging them in rows. The rolls should nestle together snugly but not be packed so tightly that they cannot expand.
Second Rise
Cover the baking dish with a damp kitchen towel or plastic wrap and place it in a warm location. Allow the rolls to rise for 30 to 45 minutes until they become puffy and spring back slowly when poked with a finger. The rolls should have increased in size by approximately 50 percent, indicating sufficient rise without overproofing.
Baking the Rolls
Meanwhile, preheat your oven to 375°F and position a rack in the center. Once the rolls have risen appropriately, brush the tops generously with melted butter and sprinkle with coarse sea salt and optional garlic powder and fresh parsley if using. Place the baking dish in your preheated oven and bake for 18 to 22 minutes until the rolls become golden brown on top. The bottoms should also be golden, and the rolls should be baked through completely.
Remove from the oven and let rest for 5 minutes in the pan, which allows the structure to set while remaining soft and warm. Next, brush the hot rolls immediately with additional melted butter, which creates a luxurious exterior and adds richness. Transfer the rolls to a serving basket or platter, optionally covering with a clean kitchen towel to keep them warm during serving.
Serving Tips
Dinner rolls with butter shine as a universally beloved accompaniment to virtually any meal imaginable. First, serve them warm from the oven alongside roasted chicken or herb-baked poultry, where the soft interior and buttery exterior provide perfect textural contrast to any protein. Additionally, they pair beautifully with roasted beef, beef tenderloin, or steak for classic steakhouse-style meals that feel both comforting and elegant. Next, try dinner rolls with any roasted pork preparation, ham, or seafood for versatile pairing options that work with countless menu combinations.
Furthermore, these rolls work wonderfully as the foundation for elegant sandwiches, particularly with roasted turkey, prime rib, or ham for special luncheons. Meanwhile, dinner rolls make perfect accompaniments to soups and stews, where they soak up delicious broths and gravies beautifully. For holiday gatherings, serve them warm alongside turkey, gravy, and all the traditional sides that define festive meals.
For casual family dinners, dinner rolls transform simple meals into something special without requiring additional effort beyond the baking time. Additionally, they work beautifully for breakfast or brunch when served warm with jam, honey, or fresh cheese spreads. Furthermore, dinner rolls hold their own as a companion to virtually any vegetable-forward meal, grain-based dishes, or vegetarian preparations where bread adds necessary substance and satisfaction.
Storage and Make-Ahead Tips
Room Temperature Storage
Allow the dinner rolls to cool to room temperature before storing in an airtight container or resealable plastic bag at room temperature. They will keep for up to 2 days when stored properly, maintaining reasonable texture though gradually becoming drier. To refresh, wrap the rolls in foil and warm in a 300°F oven for about 10 minutes, which restores softness and warmth without over-baking.
Refrigerator Storage
Next, dinner rolls can be refrigerated in an airtight container for up to 4 days when stored properly. To reheat, wrap the rolls in foil and warm in a 325°F oven for about 15 minutes until warmed throughout. Alternatively, microwave individual rolls wrapped in a damp paper towel for 20 to 30 seconds until warm, though the oven method preserves texture better.
Freezing Instructions
Additionally, dinner rolls freeze beautifully for up to 3 months when baked and properly stored. Cool the rolls completely, then layer them in a freezer-safe container or freezer bag, separating layers with parchment paper. When ready to use, thaw at room temperature for about 30 minutes, then wrap in foil and warm in a 325°F oven for about 15 to 20 minutes until heated throughout. Alternatively, unwrap and place the frozen rolls on a baking sheet, cover loosely with foil, and bake at 350°F for about 25 to 30 minutes until warmed and soft.
Make-Ahead Strategy
Furthermore, you can prepare the dough through the first rise, then refrigerate it overnight before shaping and completing the second rise. When ready, shape the cold dough directly and allow it to rise at room temperature for 45 to 60 minutes, which accounts for the cooler dough temperature. Alternatively, shape the rolls and refrigerate them overnight, then bring to room temperature and bake as directed, adding about 5 minutes to the baking time.
Helpful Notes and Variations
Flour and Yeast Considerations
First, all-purpose flour works beautifully for these rolls, though bread flour creates slightly chewier texture due to higher protein content. Meanwhile, instant yeast activates quickly and reliably, though active dry yeast works equally well if soaked in the warm milk for a few minutes before mixing. Additionally, fresh yeast can be used but requires different proportions, so stick with instant yeast for consistent, reliable results.
The quality of flour affects texture and rise; unbleached, unbromated flour produces superior flavor and texture compared to heavily processed alternatives. Store flour in an airtight container away from heat and moisture to maintain quality throughout the year.
Milk and Dairy Variations
If you prefer different flavors, substitute the whole milk with buttermilk for tangier rolls with slightly different texture. Next, coconut milk or oat milk works for dairy-free versions, though the flavor profile shifts slightly. Additionally, a combination of milk and potato water creates especially soft, tender rolls due to the starch content in potato water.
For dairy-free butter topping, use plant-based butter as a direct substitute, though the flavor will be slightly different from traditional butter. The rolls will still taste delicious though perhaps less rich.
Herb and Spice Customization
First, add fresh herbs like rosemary, thyme, or oregano to the dough or sprinkle on top before baking for herbaceous complexity. Next, incorporate garlic powder, onion powder, or paprika into the dough for savory depth. Additionally, everything bagel seasoning scattered on top creates interesting flavor and textural contrast. Furthermore, sesame seeds, poppy seeds, or nigella seeds add visual appeal and nutty flavor.
For sweet variations, increase the sugar to ¼ cup and add ½ teaspoon of vanilla extract to create slightly sweeter rolls perfect for breakfast or dessert applications.
Shaping Variations and Presentations
While round rolls are traditional, you can shape the dough into oval rolls, pull-apart rolls in muffin tins, or spiral shapes by rolling the dough and creating swirls before baking. Next, Parker House rolls can be created by folding each round in half and placing seam-side down in the baking pan. Additionally, cloverleaf rolls are created by placing three small balls of dough in each section of a muffin tin for an elegant, traditional presentation.
Common Mistakes to Avoid
First, avoid using water that’s too hot or too cold when activating the yeast; 110°F is ideal for reliable activation without killing the yeast. Additionally, do not over-knead the dough excessively, as this creates tough rolls rather than soft, tender ones. Next, resist allowing the dough to rise in a drafty location, as this creates uneven rising and inconsistent results.
Furthermore, do not skip the second rise; this rise is crucial for creating light, tender rolls with proper texture. Finally, ensure the oven is properly preheated before baking, as a cool oven extends baking time and prevents proper browning and crust development.
Chef Tips
First, for extra soft, tender rolls, add a tablespoon of honey or a mashed potato to the dough, which adds moisture and creates incredibly luxurious texture. Next, to achieve perfectly golden-brown rolls with beautiful color contrast, brush with egg wash before baking and finish with additional butter immediately after removing from the oven for enhanced shine and flavor.
Frequently Asked Questions
Can I make the dough ahead of time? Yes, prepare the dough through the first rise, then refrigerate overnight, shape the next day, and allow the second rise before baking as directed.
What should I do if my rolls don’t rise properly? Ensure the yeast is fresh and was activated in properly warmed milk; old yeast or too-hot water kills yeast activity, preventing proper fermentation.
Can I use a stand mixer to make this dough? Yes, mix using the dough hook attachment on low speed for about 6 to 8 minutes until the dough comes together and becomes smooth and elastic.
How do I know when the dough has risen enough? The dough should double in size and spring back slowly when poked with a finger; if the impression remains, it needs more time to rise.
Can I freeze the dough before shaping? Yes, freeze the dough after the first rise, then thaw overnight in the refrigerator, shape, and proceed with the second rise and baking as directed.
Why This Recipe Works
The magic of dinner rolls with butter lies in understanding how yeast fermentation, gluten development, and steam in the oven create exceptional texture and flavor. First, the combination of warm milk, sugar, and yeast activates fermentation, which creates flavor compounds and creates lift in the dough. Additionally, kneading develops gluten structure that traps gas bubbles, creating light, airy texture that makes these rolls so desirable.
Furthermore, the two-rise method allows flavor development during the first rise while the second rise creates the final lift needed for optimal texture. Meanwhile, brushing with butter immediately after baking creates a luxurious, golden exterior while the interior remains soft and tender. The coarse salt on top adds textural contrast and enhances the butter flavor beautifully.
This recipe respects the traditional bread-making process while remaining accessible to home bakers of all skill levels. The result is rolls that taste bakery-quality yet completely homemade and authentic.
Variations Worth Exploring
Next time you prepare dinner rolls, consider these creative variations that build on the classic foundation. First, try a honey whole wheat version by substituting half the all-purpose flour with whole wheat flour and increasing the honey to a tablespoon for nuttier, more complex flavor.
Additionally, create an everything bagel roll variation by topping with everything bagel seasoning before baking for trendy, flavorful rolls. Furthermore, experiment with a cinnamon roll version by rolling the dough with cinnamon and brown sugar before shaping for sweet breakfast rolls. Meanwhile, try an herb-focused version by adding fresh rosemary and thyme to the dough and topping with additional herbs for sophisticated flavor.
Perfect Pairings and Meal Planning
Dinner rolls work beautifully as part of complete meals in virtually infinite combinations. First, pair them with roasted chicken and mashed potatoes for classic, comforting dinners. Next, serve alongside grilled steak and roasted vegetables for elegant steakhouse presentations. Additionally, they complement baked fish and fresh salads for lighter yet satisfying meals. Furthermore, dinner rolls work perfectly with soups and stews where they soak up delicious broths.
For holiday gatherings, dinner rolls deserve prominent placement on the table. Meanwhile, they work beautifully as part of breakfast spreads when paired with eggs and fresh fruit. Additionally, they make perfect companions to virtually any meal where bread adds necessary substance and satisfaction.
Final Thoughts
Homemade dinner rolls prove that fresh, quality ingredients combined through proper technique create truly memorable results that surpass commercial bakery offerings. The combination of simple ingredients transformed through fermentation and baking creates rolls that are warm, tender, and utterly irresistible. The entire process takes approximately two hours, though most of that time is inactive rising, making these rolls practical for any meal without requiring excessive hands-on work.
This classic recipe has remained beloved for good reason: it delivers consistent, impressive results every single time when prepared with attention and care. Whether you’re cooking for family or entertaining guests, homemade dinner rolls with butter bring warmth, abundance, and genuine satisfaction to the table, making them an indispensable part of countless meals and cherished family traditions.
Did you love making these Dinner Rolls with Butter? If this recipe brought joy to your kitchen and delight to your table, please save this recipe for future use, pin it to your favorite board, or share it with friends and family who appreciate the simple pleasures of warm, homemade bread. Your support means everything to us and helps us continue creating more amazing recipes that make home cooking easier, more enjoyable, and genuinely delicious. We’d love to hear how your dinner rolls turned out—your feedback inspires us to keep bringing you quality recipes that deliver real, satisfying results every single time you cook.