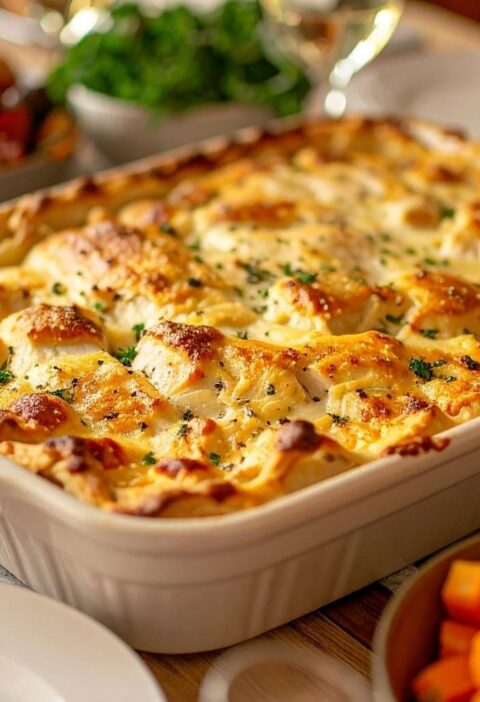
Easter dinner rolls represent one of the most cherished baked goods at springtime celebrations, bringing warmth, freshness, and homemade goodness to holiday tables across the country. There’s something truly magical about pulling a basket of golden, pillowy rolls from the oven, filling your kitchen with yeasty, buttery aroma that signals celebration and family gathering. These soft, tender rolls are deceptively simple to make yet deliver impressive results that taste infinitely superior to store-bought versions, transforming your Easter dinner into something genuinely special. What makes this recipe so beloved is its versatility—you can prepare it in advance, customize shapes and sizes, and create beautiful presentations that complement any table setting. Whether you’re hosting a formal Easter feast, a casual family brunch, or celebrating spring with friends, homemade dinner rolls elevate the entire meal experience. The beauty of this recipe lies in how few ingredients you actually need and how forgiving the dough truly is, allowing beginner bakers to achieve bakery-quality results with basic techniques and patience.
Ingredients
This recipe makes 24 dinner rolls, serving approximately 8 to 10 people with generous portions.
- 1 cup whole milk, warmed
- ½ cup unsalted butter, melted
- 3 tablespoons granulated sugar
- 1 package (2¼ teaspoons) instant yeast
- 1½ teaspoons salt
- 1 large egg, beaten
- 3½ cups all-purpose flour
- 2 tablespoons unsalted butter, melted, for brushing tops
- 1 tablespoon coarse sea salt, for garnish (optional)
- 1 tablespoon fresh rosemary or thyme, finely chopped (optional)
Step-by-Step Instructions
Combine the warmed milk, melted butter, and sugar in a large mixing bowl, stirring gently until the sugar dissolves completely. The milk should feel warm to the touch but not hot, as temperatures above 120 degrees Fahrenheit can kill the yeast. Meanwhile, sprinkle the instant yeast over the mixture and let it sit for about one minute to activate and bloom slightly.
Add the beaten egg and salt to the yeast mixture, stirring thoroughly to combine all ingredients. Next, gradually add the flour one cup at a time, stirring with a wooden spoon or the dough hook attachment on your stand mixer. Continue adding flour until a shaggy dough forms that pulls away from the sides of the bowl, though it may still feel slightly sticky at this stage.
Transfer the dough to a lightly floured work surface and knead by hand for about 8 to 10 minutes, working the dough until it becomes smooth, elastic, and no longer sticky. Alternatively, use your stand mixer with the dough hook attachment for 5 to 6 minutes at medium speed. You’ll know the dough is ready when it springs back quickly when you poke it and feels soft and pillowy beneath your hands.
Place the kneaded dough in a lightly greased bowl, turning it once to coat all sides with oil. Cover the bowl loosely with plastic wrap or a clean kitchen towel, then place it in a warm, draft-free location for the first rise. Allow the dough to rise for about 60 to 90 minutes until it has roughly doubled in size, which indicates the yeast has activated and the dough is ready for shaping.
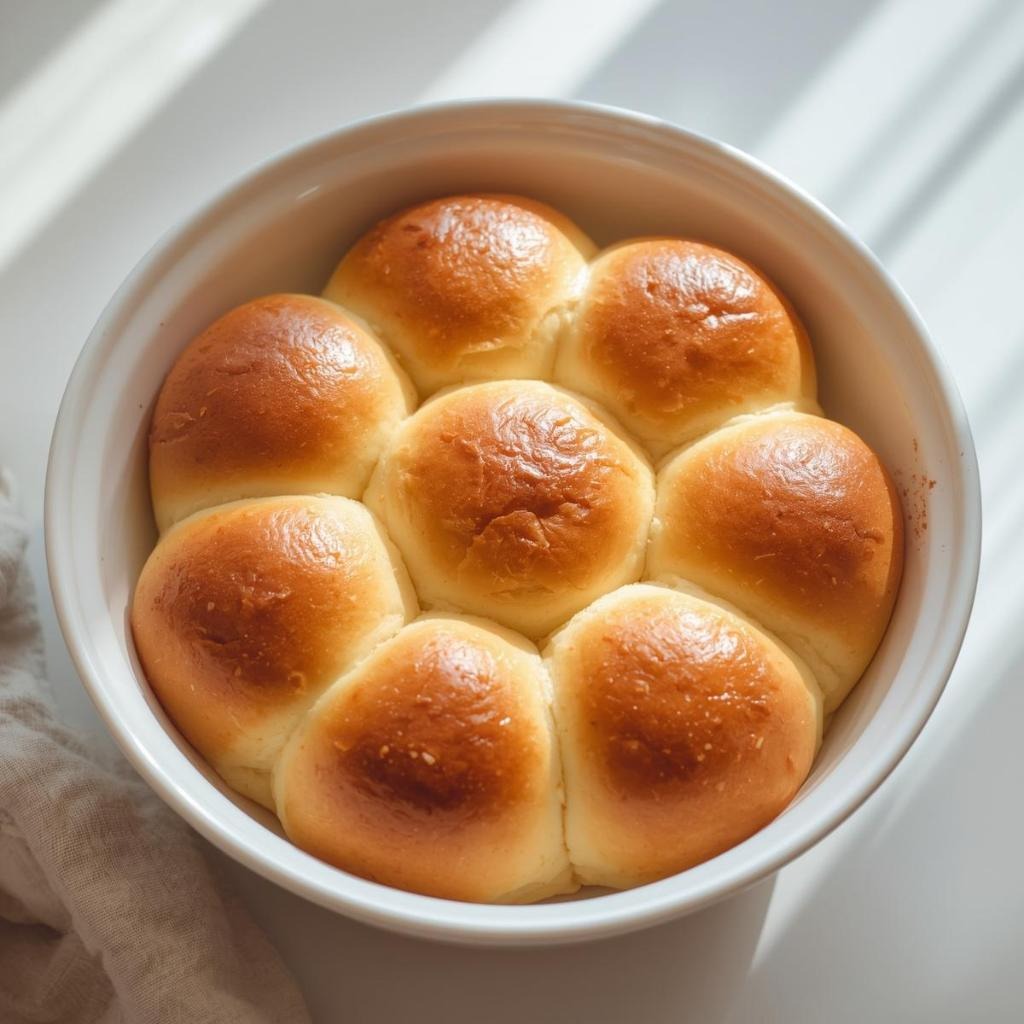
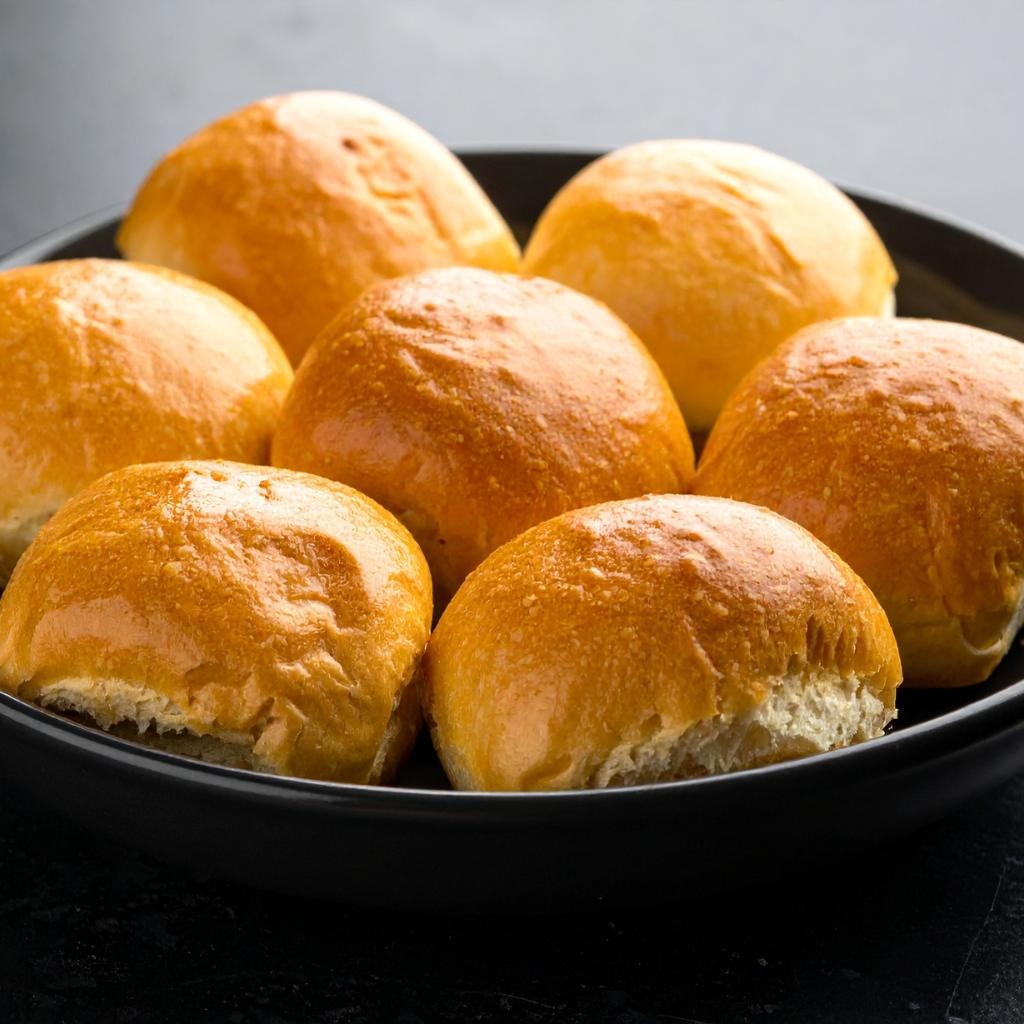
Gently punch down the dough to release excess gas, then transfer it to your work surface. Divide the dough into 24 equal pieces by first cutting it in half, then quarters, then continuing to divide evenly. Furthermore, rolling each piece into a smooth ball and placing them in a greased 9×13 inch baking dish creates traditional dinner roll shapes. However, you can also shape them into crescent rolls or braids for more elegant presentations if desired.
Cover the shaped rolls loosely with plastic wrap and allow them to rise in a warm location for 30 to 45 minutes until they’re puffy and nearly doubled in size. Meanwhile, preheat your oven to 375 degrees Fahrenheit so it’s ready when your rolls finish their second rise. Next, brush the tops of the rolls generously with melted butter, creating a glossy finish that will brown beautifully during baking.
Bake the rolls for 15 to 18 minutes until they turn a beautiful golden brown color on top and feel set when you gently press them. The rolls should smell wonderfully yeasty and buttery, filling your kitchen with irresistible aroma. Remove the rolls from the oven and immediately brush them again with melted butter while they’re still hot, which adds richness and keeps the crust soft and tender.
If using optional garnishes, sprinkle coarse sea salt and fresh herbs over the warm rolls immediately after removing them from the oven, allowing the seasonings to adhere to the buttery surface. Allow the rolls to cool for 2 to 3 minutes in the baking dish before transferring them to a wire cooling rack or serving basket. However, they’re best enjoyed warm or at room temperature, so serve them within a few hours of baking for the most tender, flavorful results.
Understanding Your Yeast and Dough
Activating Your Yeast Properly
The foundation of successful dinner rolls starts with properly activated yeast, which creates the lift and structure throughout your dough. First, use instant yeast or active dry yeast—both work equally well in this recipe when properly hydrated. Additionally, the milk temperature matters significantly, so aim for between 110 and 120 degrees Fahrenheit, which feels warm but not hot to your finger. Meanwhile, allowing the yeast to sit in the warm liquid for about one minute before adding other ingredients gives it time to begin activating and blooming.
Achieving the Perfect Dough Consistency
Developing proper dough texture requires adding flour gradually and paying attention to how the dough feels rather than strictly following measurements. First, flour varies in moisture content depending on humidity levels, so you may need slightly more or less flour than the recipe calls for. Additionally, properly mixed dough should be smooth, elastic, and slightly sticky, never dry or stiff. Next, the poke test helps determine readiness—press your finger into the dough and it should spring back quickly if it’s properly developed.
Shaping and Rising Your Rolls
Dividing Dough for Even Baking
Creating uniform roll sizes ensures even baking and professional appearance on your serving plate. First, divide your dough into 24 equal pieces by using a kitchen scale if precision matters to you, aiming for about one ounce per roll. Alternatively, you can divide the dough visually, though this requires more practice for consistency. Additionally, dividing the dough in halves, then quarters, then eighths helps you create even sections without overthinking the process.
Shaping Techniques for Beautiful Presentation
Rolling each dough piece into a smooth ball creates classic dinner roll shapes that look elegant on any table. Meanwhile, holding a piece of dough in your cupped hand and pushing it toward you in circular motions creates surface tension that helps the rolls rise evenly. Furthermore, placing shaped rolls close together in a baking dish allows them to rise into each other, creating soft sides and a cohesive loaf presentation that’s both beautiful and practical.
Serving and Storage Tips
How to Serve Your Easter Dinner Rolls
Present your Easter dinner rolls in a beautiful basket lined with a clean linen cloth, keeping them warm and inviting for your guests. These soft, buttery rolls pair beautifully with honey butter, herb-infused butter, or flavored spreads that complement your Easter menu perfectly. Additionally, serve them alongside roasted turkey, baked ham, grilled lamb, or other springtime proteins that celebrate the holiday season. They work wonderfully as an essential component of any Easter brunch, formal dinner, or casual family gathering.
Furthermore, Easter dinner rolls feel equally at home on elegant formal tables with fine china or casual gatherings on picnic blankets. Whether you’re hosting a church potluck, family reunion, or intimate dinner party, homemade rolls always earn compliments and empty plates. For buffet-style serving, keep rolls warm by placing them in a slow cooker on the warm setting or wrapping them in a kitchen towel to retain heat throughout your meal service.
Storage Instructions for Fresh Rolls
Allow leftover rolls to cool completely before storing them in an airtight container or resealable plastic bag. Refrigerate the container for up to three days, ensuring your leftover rolls stay fresh and safe to eat. When you’re ready to enjoy the leftovers, wrap them loosely in foil and reheat them in a 300-degree oven for 8 to 10 minutes until warmed through. Alternatively, reheat individual rolls in the microwave for 15 to 20 seconds to restore softness and warmth without overcooking.
Freezing for Make-Ahead Convenience
For longer storage, freeze your baked rolls in a freezer-safe container or bag for up to three months. Allow the rolls to cool completely before freezing to prevent condensation and ice crystal formation. Thaw them at room temperature for about one hour before reheating, which ensures even warming throughout. Furthermore, you can freeze shaped, unbaked rolls on a baking sheet, then transfer them to a freezer bag for convenient baking anytime—simply add 5 to 10 extra minutes to the second rise time and proceed with baking as normal.
Helpful Notes and Creative Tips
The foundation of Easter dinner rolls is beautifully straightforward, yet small adjustments transform them into personalized creations perfectly suited to your preferences. First, you can easily enhance the dough by adding one-half teaspoon of lemon zest or orange zest for subtle citrus brightness that complements spring celebrations. Next, incorporating one-quarter teaspoon of cardamom or nutmeg into the dough creates warm, aromatic spice that works beautifully with Easter traditions.
Fresh herbs transform dinner rolls wonderfully, so try incorporating one tablespoon of fresh rosemary, thyme, or dill into the dough itself rather than just topping. Meanwhile, adding finely minced garlic or garlic powder to the dough creates savory dinner rolls perfect for serving alongside roasted meats. Furthermore, a small amount of honey instead of sugar creates subtle sweetness that works beautifully with ham or other holiday proteins.
For make-ahead convenience, prepare the entire dough, divide it into rolls, then freeze them in a sealed container for up to one week. This technique allows you to refrigerate the rolls overnight, which develops deeper flavor through slow fermentation. To bake frozen rolls, simply remove them from the freezer and allow them to rise at room temperature for 3 to 4 hours until puffy, then bake as directed. However, if you’re making rolls the day of your event, prepare the dough in the morning and bake them in the late afternoon for warm, fresh rolls at dinner time.
Avoid skipping the second rise, as this step develops flavor and ensures rolls are light and fluffy rather than dense and heavy. Additionally, if your rolls seem to be browning too quickly before they’re fully puffed, tent them loosely with foil during the final minutes of baking. As a result, you’ll achieve golden rolls with perfect texture throughout rather than burnt exteriors and undercooked centers.
The type of milk you use affects the final flavor and texture significantly, so use whole milk for richer results. In contrast, low-fat milk creates slightly drier rolls, while non-dairy milk alternatives work but may produce slightly different texture. Experiment to find your preferred version, though whole milk delivers the most traditional, tender results that most people expect from homemade Easter dinner rolls.
Chef Tips for Bakery-Quality Results
First, keeping your kitchen environment warm during rising produces faster, more consistent fermentation and better flavor development. If your kitchen is cool, place the dough in an oven with just the light on, in a warm corner near a sunny window, or in a turned-off but sun-warmed oven. Cold environments slow fermentation significantly, extending rise times and potentially requiring an extra 30 to 60 minutes.
Second, using a stand mixer with a dough hook reduces your hands-on work and produces more consistent results than hand-kneading alone. If you don’t have a stand mixer, hand-kneading works beautifully but requires patience and proper technique—knead for a full 8 to 10 minutes, not less, to develop adequate gluten structure for light, tender rolls.
Frequently Asked Questions
Can I make the dough the night before and bake rolls fresh in the morning? Absolutely—prepare the dough, refrigerate it overnight, then shape and do the second rise in the morning before baking for fresh Easter rolls at breakfast or brunch time.
What should I do if my dough isn’t rising properly? Check that your yeast is fresh and hasn’t expired, ensure your kitchen is warm enough, and verify that your milk wasn’t too hot and killed the yeast during mixing.
How can I tell when rolls are completely baked through? Tap the bottom of a roll with your knuckle—it should sound hollow if fully baked, and the internal temperature should read 190 degrees Fahrenheit with a quick thermometer.
Can I use a bread machine for mixing and kneading the dough? Yes, use your bread machine’s dough cycle to mix and knead the ingredients, then proceed with the rising and baking steps as directed in the recipe.
Are these rolls naturally vegan-friendly? Not in the original form due to milk, butter, and eggs, but you can substitute non-dairy milk, vegan butter, and applesauce for eggs to create a vegan version with similar results.
Popular Variations to Explore and Enjoy
Sweet Honey Rolls with Cream Cheese Frosting
Create a sweeter variation by replacing sugar with honey and reducing it to two tablespoons, then top baked rolls with simple cream cheese frosting. First, mix four ounces softened cream cheese with two tablespoons butter and one cup powdered sugar, then spread generously over warm rolls. Meanwhile, drizzling the frosting over warm rolls allows it to melt slightly and meld beautifully. Furthermore, this variation appeals to those who prefer slightly sweet brunch-style rolls that work for both breakfast and dessert occasions.
Herb and Garlic Easter Rolls
Enhance the dough by folding in one-quarter cup of minced fresh herbs like parsley, chives, and thyme, plus one minced garlic clove. Additionally, brush baked rolls with garlic butter instead of plain melted butter for extra flavor. Furthermore, topping finished rolls with additional fresh herbs creates visually stunning presentation that celebrates spring’s fresh flavors beautifully.
Lemon Poppy Seed Spring Rolls
Add one tablespoon of lemon zest and one tablespoon of poppy seeds to the dough for subtle citrus brightness. Meanwhile, brush finished rolls with a glaze made from powdered sugar, fresh lemon juice, and a touch of butter. Furthermore, this elegant variation works beautifully at brunch gatherings and pairs wonderfully with salmon, egg dishes, and spring vegetables.
Hot Cross Bun Style Rolls
Transform your rolls by adding one-half teaspoon of cinnamon, one-quarter teaspoon of allspice, and one-quarter cup of dried currants to the dough. Next, before baking, pipe a simple flour and water paste in a cross pattern on top of each roll using a small piping bag. Furthermore, this traditional Easter variation carries deep historical and cultural significance while delivering warming spice and festive appearance.
Everything Bagel Seasoning Rolls
Top unbaked rolls with everything bagel seasoning—a blend of sesame seeds, poppy seeds, onion, garlic, and salt. Meanwhile, brush rolls with egg wash before adding the seasoning to help it adhere during baking. Furthermore, this savory version works beautifully with brunch spreads featuring cream cheese, lox, or other bagel-style toppings alongside traditional Easter dishes.
Understanding Why Homemade Rolls Matter
The enduring appeal of homemade Easter dinner rolls comes from their incomparable freshness, warmth, and the genuine care represented by baking from scratch. Moreover, homemade rolls deliver flavor complexity and tender texture that store-bought versions simply cannot replicate, even premium bakery options. Next, the aroma of baking bread fills your home with ambiance and anticipation, creating emotional connections to celebration and family gathering.
Additionally, homemade rolls work wonderfully across different occasions and menu styles because they complement virtually any protein or side dish. Furthermore, the combination of soft interior, slightly crispy exterior, and rich buttery flavor creates genuine satisfaction that nourishes both body and spirit. As a result, serving homemade rolls signals love, effort, and the importance you place on your guests and their experience.
Beyond their practical advantages, Easter dinner rolls represent tradition and continuity, appearing at springtime celebrations with deep cultural and religious significance. The act of baking bread connects us to countless generations who performed this essential task before modern conveniences existed. Furthermore, sharing warm rolls at the table creates memorable moments and strengthens bonds between family members and friends.
Troubleshooting Common Problems
Your Dough Won’t Rise or Rises Too Slowly
This typically happens if your kitchen is too cool, your yeast is old or expired, or the milk was too hot and killed the yeast. Next time, ensure your yeast is fresh, keep your kitchen warm during rising, and test milk temperature before using it. Additionally, rising in an oven with just the light on provides consistent warmth that speeds fermentation.
Rolls Come Out Dense or Heavy Instead of Light
This usually results from insufficient kneading, too little rising time, or overmixing with flour added too quickly. Make sure you knead for the full 8 to 10 minutes and allow proper rising time—don’t rush this step. Furthermore, adding flour gradually while mixing prevents overdevelopment of gluten that can create toughness.
Rolls Brown Too Much or Burn Before Cooking Through
If your rolls brown too quickly, your oven may run hot or you may need to lower the temperature slightly. Next time, try 350 degrees instead of 375 degrees and tent rolls loosely with foil if they’re browning too much. Additionally, use an oven thermometer to verify actual temperature, as many ovens run hotter than the dial indicates.
Final Thoughts and Culinary Inspiration
Easter dinner rolls represent more than just bread—they’re a celebration of springtime, family tradition, and the joy that homemade baking brings to holiday tables. Whether you stick strictly to the classic recipe or venture into the creative variations we’ve shared, you’ll find these rolls always deliver genuine satisfaction and warmth. The combination of soft interior, buttery richness, and homemade aroma creates an experience that transcends simple eating and becomes a cherished memory.
In conclusion, mastering Easter dinner rolls opens doors to countless entertaining possibilities and baking confidence. However, the foundation remains beautifully straightforward: quality ingredients, proper technique, and patience for fermentation. This timeless recipe proves that sometimes the most impressive dishes come from respecting simple ingredients and allowing natural processes to work their magic.
When you’re looking for a baked good that impresses without requiring advanced baking skills, that feels special without exotic ingredients, or that brings genuine warmth to any table, Easter dinner rolls are your answer. They bridge the gap between everyday bread and celebration-worthy special occasion foods, making everyone at your table feel valued through the gift of homemade goodness.
We’d Love to Hear From You!
Did you enjoy making these Easter Dinner Rolls? We’d be thrilled if you’d save this recipe to your collection, pin it to your Pinterest board, or share it with your friends and family who love homemade bread, Easter traditions, and baking projects that fill the kitchen with wonderful aroma. Your feedback and engagement truly encourage us to keep creating more delicious recipes and helpful cooking guides that make baking easier, more enjoyable, and more rewarding for everyone. Please leave a comment below letting us know how your Easter rolls turned out, which variation you tried, or if you added special family touches to make them your own—we read and genuinely appreciate every single one! Share your beautiful rolls on social media and tag us so we can celebrate your baking success together and cheer on your kitchen adventures!