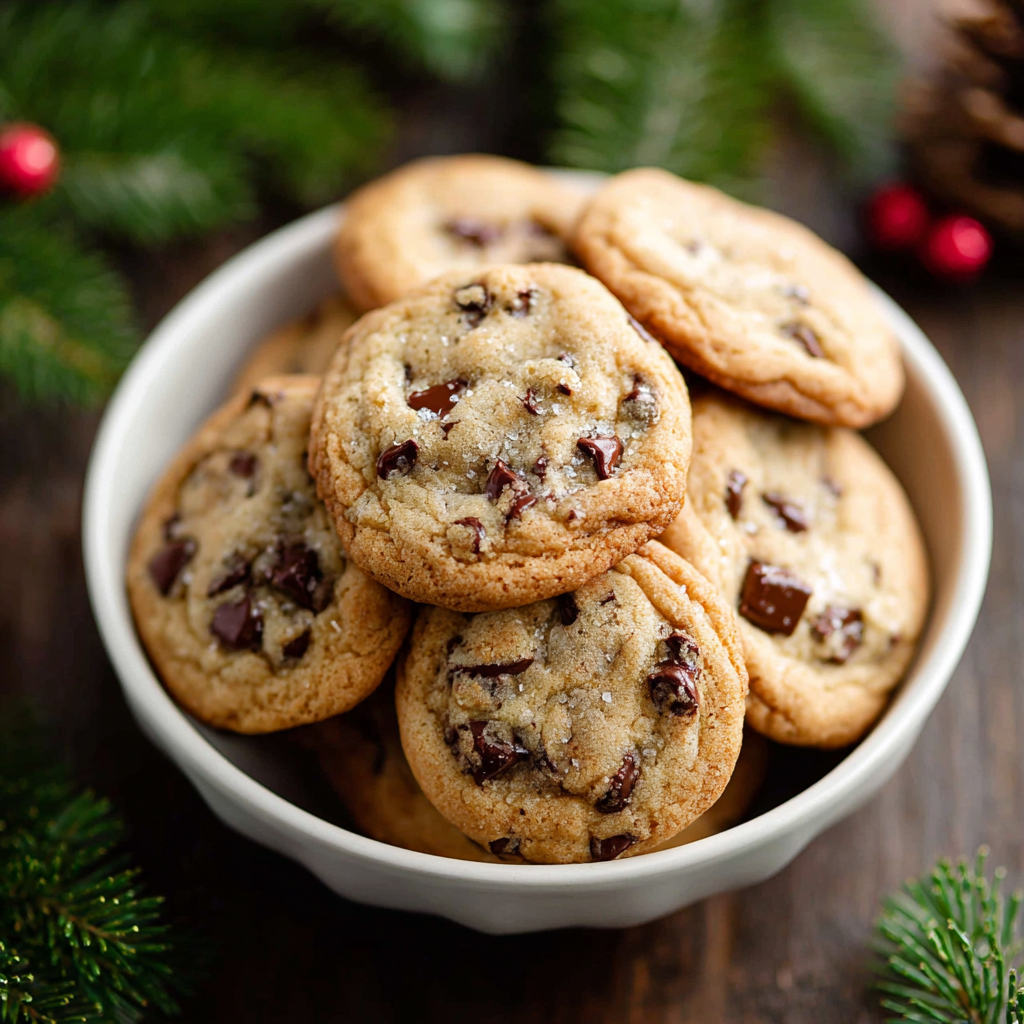
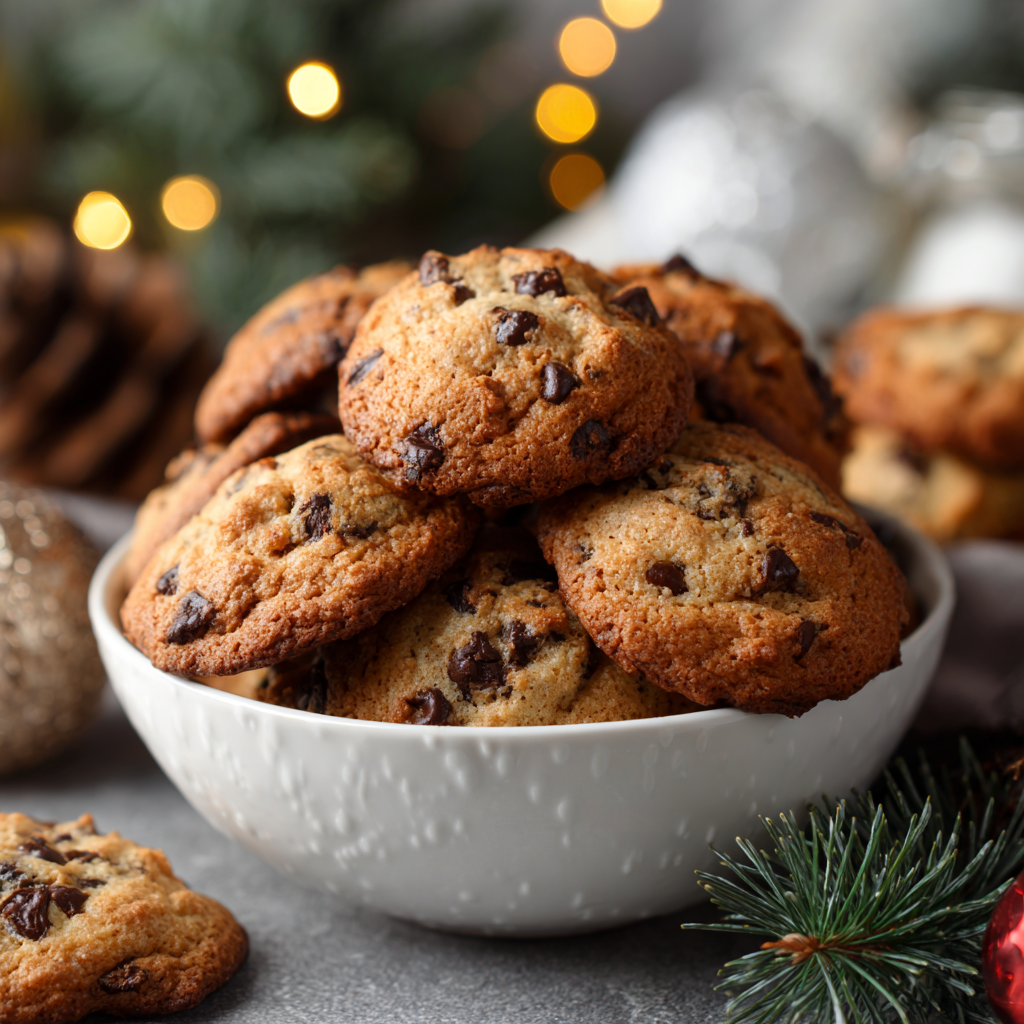
When December arrives with its relentless schedule of holiday parties, family gatherings, and festive obligations, the last thing you need is a complicated cookie recipe that demands precision and patience you simply don’t possess. Easy Christmas Chocolate Chip Cookies deliver genuine perfection without requiring special techniques, finicky ingredients, or time-consuming steps that derail your holiday chaos. These aren’t dry, overly dense cookies that disappear into stale regret; instead, they’re buttery, tender masterpieces loaded with melted chocolate that taste absolutely incredible whether you’ve been baking for decades or you’re picking up a mixer for the very first time. First, this recipe comes together in under 15 minutes of active work, leaving you more time to enjoy the season rather than slaving away in your kitchen. Next, they require no special ingredients or equipment beyond basics you already have in your pantry, making spontaneous baking accessible whenever the mood strikes. Additionally, these cookies remain delicious for days when stored properly, making them perfect for advance baking during your busy season or sharing with friends and neighbors throughout December. Most importantly, this recipe produces consistently excellent results—no failed batches, no overworked dough, no mystery variables that ruin your baking confidence. Whether you’re a seasoned baker seeking a foolproof recipe for busy holiday weeks or a beginner hoping to create impressive cookies without intimidation, this recipe delivers results that make you look like a baking expert while requiring minimal effort or experience.
Ingredients
This recipe makes approximately 24 to 30 cookies depending on size.
For the Cookie Dough:
- 2 1/4 cups all-purpose flour
- 1 teaspoon baking soda
- 1 teaspoon sea salt
- 1 cup unsalted butter, softened to room temperature
- 3/4 cup granulated sugar
- 3/4 cup packed brown sugar
- 2 large eggs, room temperature
- 2 teaspoons vanilla extract
- 2 cups chocolate chips or chunks, quality preferred
- 1/2 cup chopped walnuts or pecans, optional
- 1/4 cup white chocolate chips, optional
For Baking:
- Parchment paper or silicone baking mats
- Baking sheets
- Cooling racks
Mixing Your Cookie Dough
To begin, preheat your oven to 375 degrees Fahrenheit and position the racks to the upper-middle and lower-middle settings. Meanwhile, in a small bowl, whisk together the all-purpose flour, baking soda, and sea salt, combining them thoroughly and breaking up any lumps that might create dense, unpleasant texture. Set this dry mixture aside while you focus on building your wet ingredients.
In a large mixing bowl, combine the softened unsalted butter, granulated sugar, and packed brown sugar. Using an electric mixer on medium speed, beat these ingredients together for approximately two to three minutes until the mixture becomes pale and fluffy. First, the brown sugar adds moisture and chewiness while granulated sugar creates crispness—together they create the perfect balance of textures. Next, don’t stress about achieving picture-perfect consistency; approximately two minutes of mixing creates sufficient creaminess without requiring obsessive attention to detail.
Add the room-temperature eggs one at a time, beating well after each addition until each egg fully incorporates before adding the next. First, adding eggs individually ensures even distribution rather than creating lumps or streaks in your dough. Next, beat in the vanilla extract, stirring for approximately 30 seconds until everything combines into a smooth, cohesive mixture. The finished wet mixture should look like thick cake batter that’s pale, light, and slightly fluffy—not dense or grainy.
Gradually add your flour mixture to the wet ingredients, mixing on low speed and stopping frequently to scrape down the bowl with a rubber spatula. First, add flour gradually to prevent overmixing that develops too much gluten and creates tough cookies instead of tender ones. Next, stop mixing the moment the flour disappears—don’t continue stirring once everything has combined, as additional mixing makes cookies tough and dense rather than soft and delicious.
Using a wooden spoon or sturdy spatula, fold in your chocolate chips and optional nuts, stirring gently until they distribute evenly throughout the dough. First, folding rather than beating incorporates these ingredients without overworking the dough further. Next, don’t worry about achieving perfectly uniform distribution—random chocolate pockets make cookies more delicious and interesting anyway.
Scooping and Baking Your Cookies
Line your baking sheets with parchment paper or silicone baking mats, which prevents sticking and promotes even browning on the cookie bottoms. Using a cookie scoop or spoon, drop rounded portions of dough onto your prepared baking sheets, spacing them approximately two inches apart to allow for spreading. First, consistent scoop sizes produce cookies that bake evenly without some burning while others remain underdone. Next, don’t flatten or shape the dough—leave rounded, rustic mounds that bake into cookies with maximum height and chewy centers.
Place one baking sheet in the upper-middle oven position and one in the lower-middle position, switching them halfway through baking to ensure even cooking in your oven’s hot and cold spots. Bake for approximately 11 to 13 minutes, watching carefully as your cookies near completion. First, the exact baking time depends on your oven’s individual quirks, so checking at the 11-minute mark prevents overdoing them. Next, perfectly baked chocolate chip cookies should have golden edges with centers that still look slightly underdone—they’ll continue cooking from residual heat even after you remove them from the oven.
Remove from the oven when the cookies are set on the edges but the centers still jiggle slightly if you gently shake the pan—this creates chewy centers surrounded by crispy, buttery edges that define exceptional chocolate chip cookies. First, underbaking slightly produces cookies that soften and become chewier as they cool and age, which most people prefer. Next, these slightly underbaked cookies taste buttery and tender rather than hard or stale-feeling, making them infinitely more enjoyable than perfectly crisp cookies.
Allow the cookies to cool on the baking sheet for approximately five minutes, which firms them up just enough for safe handling without becoming brittle or overcooked. Next, transfer them to a wire cooling rack using a thin spatula or small cake server, being gentle to avoid cracking them. Allow them to cool completely before stacking or storing—warm cookies contain moisture that creates steam in containers and can soften neighboring cookies’ textures.
Serving and Storing Tips
Serving Tips
Present your Christmas chocolate chip cookies on beautiful platters, festive tiered cake stands, or charming cookie jars positioned prominently where guests naturally gravitate while visiting. Additionally, arrange them with fresh greenery, ribbon, or festive napkins that enhance their visual appeal without requiring elaborate decorating. Serve alongside cold milk, hot cocoa, coffee, or mulled cider for the ultimate comfort experience that engages multiple senses.
Furthermore, package cookies into festive tins, boxes, or decorative paper bags tied with ribbon for giving to neighbors, friends, teachers, and colleagues throughout the season. Consider creating mixed assortments combining these chocolate chip cookies with other varieties for more elegant gift presentations. For holiday parties, arrange cookies on tiered stands or decorative platters positioned where they encourage casual snacking while mingling and socializing.
Storage Tips
First, store completely cooled cookies in airtight containers at room temperature for up to one week, placing parchment between layers to prevent sticking. Next, these cookies also freeze beautifully for up to three months—layer them in freezer-safe containers with parchment between layers, allowing you to enjoy fresh cookies throughout the season.
Keep cookies in cool, dry conditions away from direct sunlight and heat sources that can cause chocolate to bloom or cookies to become soft and lose their appealing texture. Additionally, you can store baked but undecided cookies in the freezer and frost or decorate them later if desired, though these cookies shine brightest served simply without additional embellishment. Store cookie dough in the refrigerator for up to three days or freeze it for up to three months, allowing you to bake fresh cookies whenever inspiration strikes without advanced planning.
Helpful Notes and Ingredient Substitutions
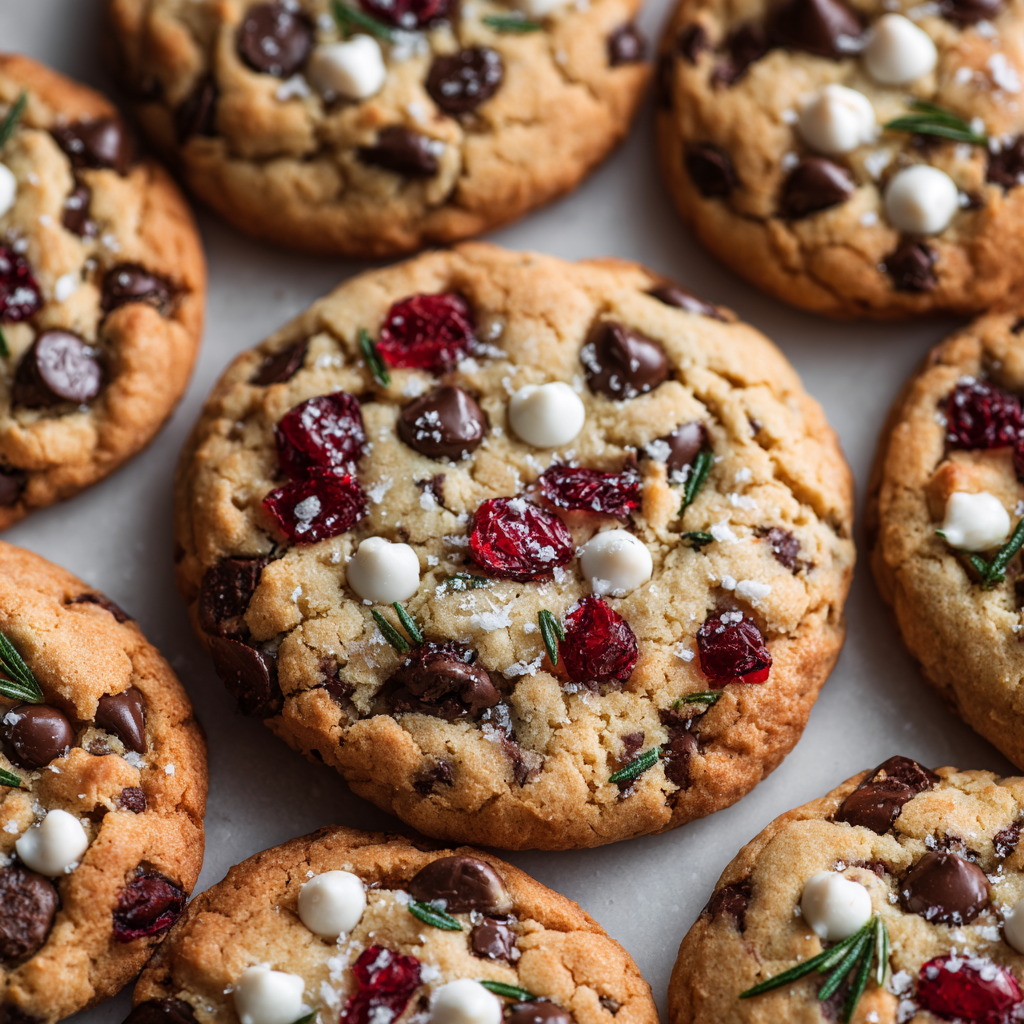
The beauty of this recipe lies in its remarkable flexibility—you can adapt virtually every component based on your preferences, dietary needs, and what you have available without compromising quality. For chocolate, use quality chocolate chips that taste delicious on their own since they’re the star ingredient—consider dark chocolate, semi-sweet, milk chocolate, or a combination for different flavor profiles. Additionally, substitute chips with chopped high-quality chocolate bars, white chocolate chunks, or even peanut butter chips depending on your preferences.
For nuts, any variety works beautifully—try almonds, macadamias, hazelnuts, or pecans depending on your taste preferences. Next, if you prefer nut-free cookies for allergen concerns, simply omit nuts entirely without making any other adjustments. Furthermore, add dried fruit like dried cranberries, dried cherries, or chopped dried apricots for fruity brightness that contrasts beautifully with chocolate. Next, a pinch of cinnamon, cardamom, or espresso powder adds subtle depth and complexity without being identifiable as a specific ingredient.
To save time during busy weeks, prepare your dough in advance and refrigerate it for up to three days—cold dough actually produces slightly chewier cookies that bake more evenly. Moreover, you can freeze cookie dough in portions on baking sheets and pop the frozen portions into bags for freezing, allowing you to bake just a few fresh cookies whenever cravings strike. Next, prep by measuring dry ingredients in advance and combining them in containers, which allows dough assembly in minutes when you’re ready to bake.
Avoid common mistakes by not opening your oven door during baking, as temperature fluctuations cause uneven cooking and cookies to spread unpredictably. Additionally, don’t skip allowing cookies to cool on the baking sheet for the full five minutes—removing them too early causes them to break apart while they’re still too soft. Next, resist the urge to overbake these cookies—they’re finished when the edges turn golden and the centers still look slightly underdone, as they continue cooking from residual heat.
Chef Tips
First, create more interesting flavor profiles by browning your butter slightly before creaming it with sugars—this adds subtle nutty depth that makes people wonder about your secret technique. Next, add fleur de sel or another excellent finishing salt sprinkled on top of cookies immediately after removing them from the oven, which enhances chocolate flavor and creates sophisticated flavor complexity.
Frequently Asked Questions
Can I use melted butter instead of softened butter? Melted butter creates denser, greasier cookies—softened butter is essential for the tender, fluffy texture that defines these cookies, so allow time for butter to reach room temperature.
How far in advance can I prepare these cookies? Baked cookies freeze for up to three months, while cookie dough keeps in the refrigerator for three days or freezer for three months, allowing flexible advance preparation.
What if my cookies spread too much and become too thin? Chill your dough for 30 minutes before baking, use less butter, or reduce your oven temperature slightly—these adjustments help cookies maintain their height and chewy centers.
Can I double this recipe easily? Yes, simply double all ingredient quantities and bake in batches, following the same process and timing—your oven might require additional switching between racks for even baking.
What should I do if my cookies came out too cakey instead of chewy? You likely overbaked them—next time, remove cookies when centers still look slightly underdone and the edges are just barely golden for maximum chewiness.
Why Easy Christmas Chocolate Chip Cookies Belong in Your Holiday Routine
These cookies represent the perfect balance between simplicity and exceptional quality that makes holiday baking accessible and genuinely enjoyable rather than stressful or intimidating. First, they require no advanced baking skills, special equipment, or finicky techniques—just straightforward mixing and standard oven baking. Next, the minimal ingredients list means you likely have everything needed right now, allowing spontaneous baking without special shopping trips.
The ease of this recipe doesn’t compromise quality or taste—these cookies rival those from specialized bakeries while requiring a fraction of the time and complexity. Most importantly, these cookies prove that Christmas baking doesn’t need to steal your entire season; instead, you can create genuine perfection in the margins of your busy December without sacrificing peace or sanity.
The joy of sharing warm chocolate chip cookies with people you care about creates memory and goodwill that extends far beyond the cookies themselves. Whether you’re baking for yourself as a moment of self-care, creating memories with children and grandchildren, or sharing with your community, these cookies facilitate connection and joy without requiring elaborate planning or exhausting effort.
First-time bakers find this recipe encouraging because every step is straightforward and forgiving—mistakes are nearly impossible and success is virtually guaranteed. Experienced bakers appreciate the reliable consistency and foolproof nature that makes this recipe perfect for busy seasons when detailed attention becomes impossible. From the first bite of warm, melted chocolate to the final crumb, these cookies deliver comfort, nostalgia, and genuine deliciousness that defines holiday baking at its finest.
These cookies will inevitably become your default recipe throughout the season—the one you reach for when unexpected guests arrive, holiday gifts require last-minute preparation, or you simply need comfort and warmth. Whether this is your first time making them or you’ve perfected this recipe through countless December batches, each batch offers opportunity to create something delicious and share joy with everyone around you.
Did you love this Easy Christmas Chocolate Chip Cookies Recipe? If so, we’d absolutely adore it if you’d save this recipe for later, pin it to your favorite Pinterest board, or share it with friends and family who appreciate straightforward, delicious cookies that taste incredible without requiring advanced baking skills. Your support means everything to us and inspires us to keep creating recipes that make holiday baking feel achievable, enjoyable, and genuinely delicious. Thank you for baking with us this Christmas season!