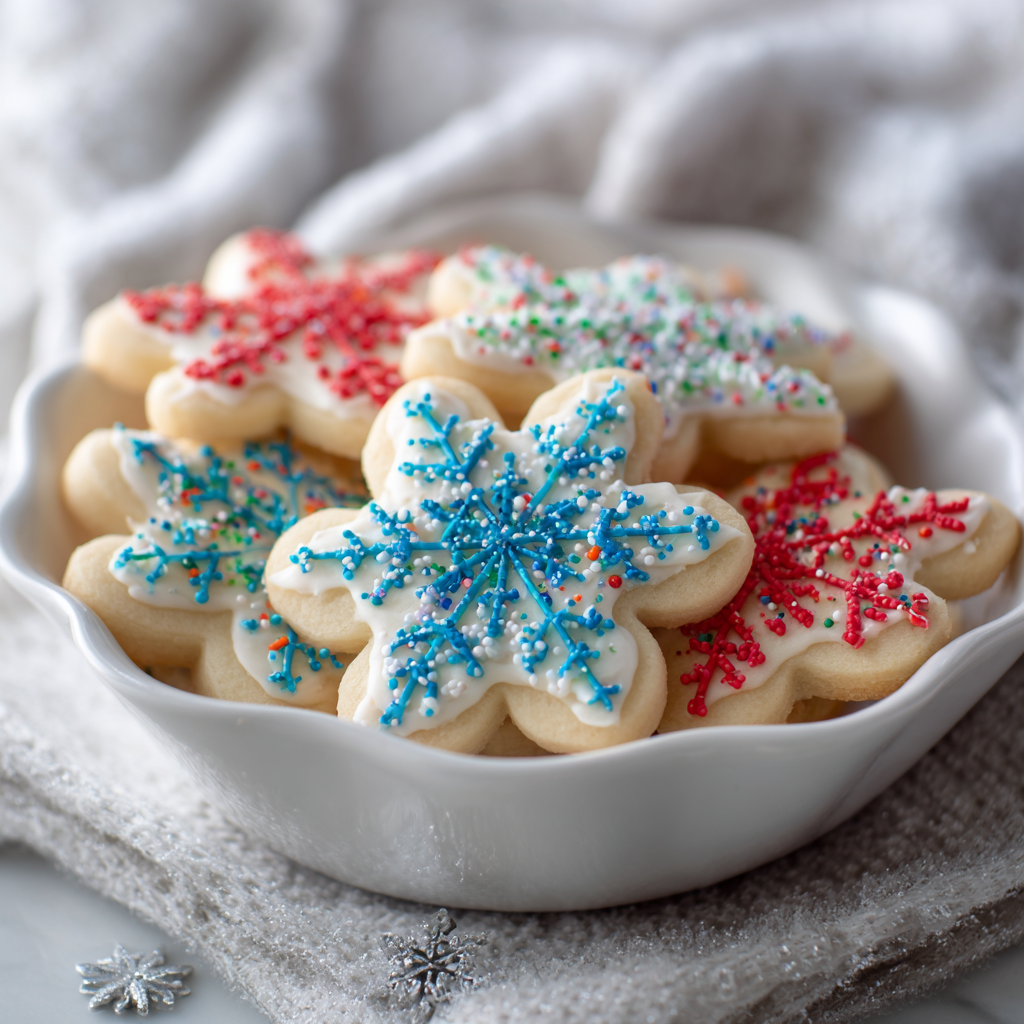
There’s something genuinely magical about creating cookies that serve as blank canvases for artistic expression and creative vision. First, these easy sugar cookies for decorating represent the perfect solution for anyone wanting to make stunning edible art without requiring professional baking skills or complicated techniques. The beauty of this recipe lies in how it delivers sturdy, perfectly flavored cookie bases that hold decorations beautifully while remaining tender and delicious to bite. What makes this dish truly special is how the cookies maintain their shape during baking, allowing clean edges and smooth surfaces ideal for intricate icing designs and creative embellishments. Additionally, these cookies work beautifully as gifts, party favors, holiday decorations, or even edible artwork because their versatility suits virtually any creative vision imaginable. Whether you’re preparing them for holiday gatherings, children’s parties, baking projects, or simply creative expression, the result remains the same—absolutely delicious blank-canvas cookies that transform into whatever your imagination envisions. The combination of simple ingredients, forgiving technique, and foolproof results creates accessible baking that encourages creativity without intimidation or failure risk.
Ingredients
Makes approximately 24-30 cookies depending on size
For the Sugar Cookie Dough:
- ¾ cup unsalted butter, softened to room temperature
- 1 cup granulated sugar
- 1 large egg
- 1 teaspoon vanilla extract
- ½ teaspoon almond extract (optional but recommended)
- 2¼ cups all-purpose flour
- 1 teaspoon baking powder
- ¼ teaspoon sea salt
For Rolling and Cutting:
- Additional all-purpose flour for dusting
- Cookie cutters in various shapes and sizes
Understanding the Science of Decorating Cookies
Creating cookies specifically designed for decorating requires understanding how ingredients and techniques affect the final product. Next, the flour-to-butter ratio in this recipe creates dough sturdy enough to hold its shape during baking while remaining tender when bitten. Additionally, proper chilling time prevents spreading that would distort shapes and create uneven edges unsuitable for detailed decorating. Meanwhile, avoiding additional liquid keeps the dough workable without becoming sticky or greasy, which would make rolling and cutting unnecessarily difficult.
Step-by-Step Instructions
- Combine softened unsalted butter and granulated sugar in a large mixing bowl, beating together on medium speed for approximately 2-3 minutes until light and fluffy. First, this beating incorporates air into the mixture, creating lighter cookies rather than dense versions. Subsequently, properly creamed butter and sugar should appear pale and noticeably lighter than when you began beating.
- Add the large egg to the mixture, beating on medium speed for approximately 30-45 seconds until fully incorporated and the mixture becomes smooth and homogeneous. Next, ensure the egg is completely combined before proceeding, as unincorporated eggs create separated texture rather than smooth dough.
- Pour vanilla extract and optional almond extract into the mixture, beating for an additional 15-20 seconds until the extracts distribute throughout the dough evenly. Additionally, this brief beating ensures all ingredients combine thoroughly without overdeveloping gluten that would make cookies tough.
- In a separate medium bowl, whisk together all-purpose flour, baking powder, and sea salt to combine evenly. Next, this whisking distributes leavening agents uniformly, ensuring even rise throughout all cookies. Subsequently, sifting this mixture prevents lumps that would create uneven texture in finished cookies.
- Add the dry ingredient mixture to the wet ingredients gradually, folding gently with a rubber spatula until just combined. First, avoid using an electric mixer for this step as it develops excessive gluten that creates tough cookies rather than tender ones. Subsequently, stop folding the moment you no longer see visible flour streaks, even if the dough appears slightly uneven.
- Cover the cookie dough with plastic wrap and refrigerate for at least 1 hour, preferably up to 3 hours, allowing flavors to develop and dough to firm. Additionally, chilled dough is dramatically easier to roll and cut without becoming sticky or difficult to work with. Meanwhile, proper chilling prevents excessive spreading during baking, creating clean edges suitable for decorating.
- Preheat your oven to 375°F and position racks to the upper-middle and lower-middle positions, allowing proper heat circulation around cookies. Subsequently, line baking sheets with parchment paper, which prevents sticking while facilitating easy cleanup afterward.
- Remove dough from refrigeration and allow it to sit at room temperature for exactly 5 minutes, making it more workable without becoming overly soft or difficult to cut. First, this brief rest prevents the dough from being so cold that it cracks or breaks apart during rolling. Subsequently, overly warm dough becomes sticky and difficult to work with, so resist the urge to warm it further.
- On a lightly floured work surface, roll out dough to approximately ¼-inch thickness using a rolling pin, working from the center outward. Additionally, consistent thickness ensures all cookies bake evenly without some areas becoming overdone while others remain underbaked. Meanwhile, occasionally rotate the dough as you roll to ensure even thickness and prevent sticking.
- Using cookie cutters in your desired shapes and sizes, cut shapes from the rolled dough, pressing firmly but not twisting the cutters. First, twisting cutters seals the edges and prevents proper rising; press and lift straight up. Subsequently, gather dough scraps and gently reroll them, repeating the process until all dough is utilized.
- Transfer cut cookies to your parchment-lined baking sheets, spacing them approximately 1 inch apart to allow for minimal spreading during baking. Additionally, cookies baked closer together can touch slightly, but excessive crowding prevents even browning. Meanwhile, even spacing ensures uniform baking and allows adequate air circulation.
- Place baking sheets in your preheated 375°F oven and bake for 8-11 minutes until cookie edges turn pale golden brown while centers remain light colored. First, watch carefully during the final minutes as cookies brown quickly once browning begins. Subsequently, cookies should feel set when gently touched, indicating proper doneness.
- Remove cookies from the oven and allow them to cool on the baking sheet for exactly 3-5 minutes, during which time they firm up slightly without becoming brittle. First, this brief cooling period allows cookies to set structure and become firm enough to transfer. Subsequently, cookies removed from pans too quickly may fall apart; cooling slightly prevents this issue.
- Transfer cooled cookies to wire cooling racks and allow them to cool completely to room temperature, approximately 15-20 minutes, before decorating. Additionally, completely cooled cookies provide stable bases for royal icing or buttercream frosting that won’t melt or slide. Meanwhile, warm cookies absorb icing unevenly, creating uneven appearance unsuitable for detailed designs.
- Once cookies cool completely, they’re ready for decorating with royal icing, buttercream frosting, edible markers, or any creative embellishments your imagination envisions. First, ensure cookies are completely cool and at room temperature before applying frostings or icings. Subsequently, warm cookies cause frosting to melt and spread unevenly, creating messy appearance.
Mastering the Decorating-Friendly Cookie Base
Understanding how to create cookies specifically designed for decorating removes concerns about whether your cookies will hold shapes and provide suitable surfaces. Next, the proper flour-to-butter ratio creates dough sturdy enough to hold precise shapes during baking. Meanwhile, adequate chilling prevents spreading that would distort carefully cut shapes. Additionally, avoiding excess moisture keeps dough workable without creating sticky mess that requires excessive flour, which affects final texture.
Serving and Storing Tips
Serving Suggestions
Display your decorated cookies on ceramic plates, wooden boards, tiered stands, or glass platters that showcase their artistic beauty attractively. First, present undecorated cookies before decorating if you want to serve them quickly, or allow decorated versions to impress guests with your artistic effort. Additionally, pairing cookies with hot coffee, herbal tea, or milk creates comforting flavor combinations that enhance enjoyment. Meanwhile, these cookies work beautifully as gifts, party favors, holiday decorations, children’s party foods, or even gallery-quality edible art because their handheld nature and artistic nature suit any occasion imaginable.
The versatility means cookies suit virtually any occasion from casual family gatherings to sophisticated entertaining because they deliver impressive presentation requiring minimal technical skill. Subsequently, packaging decorated cookies beautifully in clear cellophane bags tied with ribbon creates impressive gifts demonstrating thoughtfulness. Furthermore, these cookies travel beautifully in containers lined with parchment paper, making them perfect for sharing with friends, family, coworkers, or as part of dessert tables.
Storage Tips
Store undecorated baked cookies in an airtight container at room temperature for up to 5 days, keeping them fresh without drying out. However, undecorated cookies taste best within the first 2-3 days after baking while texture remains optimal. Subsequently, if cookies begin to soften slightly, add a slice of bread to the container and replace it daily; bread absorbs moisture preventing hardening. Alternatively, layer cookies between parchment paper in airtight containers to prevent sticking.
Store decorated cookies separately from undecorated versions to prevent frosting from transferring or becoming damaged. Additionally, store them in airtight containers at room temperature for up to 3 days once decorated, though they taste and look best within 24 hours. Furthermore, do not refrigerate decorated cookies as cold temperatures can cause condensation that softens frosting and potentially causes colors to run.
To freeze, store completely cooled undecorated cookies in freezer-safe containers for up to three months, allowing quick decorating and serving on future occasions. Additionally, frozen cookies thaw at room temperature in approximately 15-20 minutes, maintaining quality beautifully. Furthermore, you can also freeze the prepared dough in logs wrapped tightly, then thaw, roll, cut, and bake whenever inspiration strikes or gatherings approach.
Helpful Notes and Variations
Ingredient substitutions ensure this recipe adapts to whatever you have available in your kitchen and pantry while maintaining excellent results. Next, if you prefer almond extract omitted, simply use vanilla extract exclusively without affecting cookie structure or success. Meanwhile, those with preferences can experiment with lemon zest, peppermint extract, or rum extract for different subtle flavor profiles. Additionally, if you lack all-purpose flour, cake flour creates slightly more tender cookies, while bread flour creates slightly sturdier versions.
Cookie shape and size can be customized entirely based on your creative vision and decorating preferences. For those preferring large statement cookies, use bigger cutters and reduce the number of cookies accordingly. In contrast, creating multiple small cookies allows decorating variety using the same amount of dough. Subsequently, experimenting with different shapes—traditional circles, holiday-specific shapes, personalized designs—keeps baking fresh and creative throughout the year.
Common mistakes occur when dough is not chilled adequately, resulting in cookies that spread excessively and develop rounded edges unsuitable for detailed decorating. Instead, refrigerate dough for minimum 1 hour before rolling and cutting. Additionally, rolling dough too thick or too thin creates uneven thickness and inconsistent baking; aim for uniform ¼-inch thickness throughout. Furthermore, overbaking cookies creates hard, brittle bases unsuitable for detailed decorating; remove cookies when edges barely turn golden.

Chef Tips for Exceptional Results
First, using a bench scraper while rolling dough prevents sticking and maintains even thickness more effectively than relying on flour dusting. Subsequently, chilling dough adequately is the single most important factor determining decorating-friendly cookies; don’t skip this step.
Frequently Asked Questions
Can I make this dough ahead and refrigerate overnight? Absolutely, wrap dough tightly and refrigerate for up to 3 days before rolling and cutting; allow to sit at room temperature 10 minutes before rolling if very firm.
What’s the best frosting for decorating these cookies? Royal icing creates the most professional appearance with smooth glossy finish suitable for detailed designs, while buttercream offers easier application for less experienced decorators.
Can I use larger cookie cutters to make bigger cookies? Yes, simply increase baking time by 2-3 minutes for larger cookies while maintaining oven temperature; watch carefully as larger cookies brown less visibly.
How do I prevent cookies from spreading during baking? Refrigerate dough adequately, avoid rolling dough too thin, and maintain accurate oven temperature; parchment paper also prevents spreading better than unlined pans.
Can I color the cookie dough before cutting? Yes, add gel food coloring to the creamed butter and sugar before adding flour; this creates colored cookies reducing decorating time if desired.
Exploring Shape and Decorating Variations
This foundational sugar cookie recipe welcomes numerous creative interpretations based on seasonal themes and personal artistic vision. Next, holiday-themed variations include snowflakes, Santa shapes, reindeer, gingerbread people, and festive designs. Meanwhile, spring variations celebrate flowers, butterflies, eggs, and garden themes beautifully. Additionally, summer options include beach themes, ice cream shapes, and colorful designs capturing vacation spirit.
The beauty of cookie decorating lies in its unlimited potential for creative expression and personalization. First, consider your favorite themes, seasonal celebrations, or personal interests and design cookies accordingly. Subsequently, experimenting with different decorating techniques, color combinations, and artistic styles keeps cookie decorating fresh and exciting throughout the year.
Understanding the Art of Cookie Decorating
Recognizing that cookie decorating represents genuine artistic expression removes pressure for perfection. First, professional-looking designs become possible with practice, but beautiful cookies celebrate imperfection naturally. Subsequently, slight variations and unique touches make each cookie special rather than generic. Additionally, encouraging children’s participation in decorating creates memories more valuable than picture-perfect results.
Building a Cookie Decorating Station
Creating a dedicated decorating space transforms simple cookies into personal artistic projects that encourage creativity. First, arrange frosting, sprinkles, edible markers, and decorative elements in small bowls or containers. Subsequently, providing multiple frosting colors and decoration options accommodates different artistic visions. Additionally, laying out parchment paper and supplies facilitates easy cleanup while protecting surfaces from frosting and edible glitter.
Making Cookie Decorating Your Creative Outlet
Understanding why cookie decorating deserves regular rotation into your creative activities removes any lingering belief that baking is merely functional. First, cookie decorating provides genuine artistic outlet accessible to people of all skill levels. Subsequently, the combination of culinary technique and artistic expression creates unique satisfaction impossible to achieve through other activities. Additionally, knowing that decorated cookies become gifts, party features, and cherished memories means you’ll embrace decorating regularly.
Mastering Frosting Application Techniques
Proper frosting application ensures each decorated cookie delivers visually impressive results regardless of decorating experience. First, using adequate frosting creates smooth coverage rather than thin, patchy appearance. Subsequently, piping thin outlines before flooding creates professional-looking designs with defined edges. Additionally, using the right piping tips and bag pressure prevents frosting from becoming too thick or thin.
The technique improves significantly with practice, but even your first attempts will likely succeed because frosting is forgiving compared to other decorating mediums. Next, watching instructional videos or practicing piping before decorating final cookies builds confidence. Meanwhile, recognizing that slight imperfections create charm and character enhances rather than detracts from finished cookies.
Customizing for Dietary Preferences
These decorating-friendly sugar cookies adapt beautifully to various dietary approaches including dairy-free, vegan, gluten-free, and lower-sugar preferences. Next, using dairy-free butter creates completely dairy-free versions while maintaining structure and texture. Meanwhile, using flaxseed eggs or aquafaba in place of regular eggs creates vegan alternatives. Additionally, substituting gluten-free flour blends creates gluten-free versions though texture may vary slightly depending on flour chosen.
The flexibility means these cookies suit virtually any dietary approach family members and guests navigate. First, focus on maintaining structure, stability, and satisfying sweetness regardless of specific dietary substitutions. Subsequently, providing alternative cookie options ensures all guests enjoy decorated treats equally.
Conclusion
Your Easy Sugar Cookies for Decorating await creation, ready to become whatever your imagination envisions through artistic decoration. This recipe provides the perfect sturdy, delicious base for showcasing your decorating creativity and artistic expression. Through proper preparation, adequate chilling, and careful baking, you’ll create cookies with clean edges and smooth surfaces ideal for detailed designs. Gather your ingredients, follow these steps methodically, and prepare yourself for the joy and creativity that cookie decorating brings to your baking experience.
Did you love this Easy Sugar Cookies for Decorating recipe? Please save this recipe to your collection, pin it to your Pinterest board, and share it with friends and family who want to create beautiful, decorated cookies that become cherished gifts and memorable experiences. Your support means everything and encourages us to keep creating more accessible, creative recipes that bring joy and artistic expression to your kitchen!