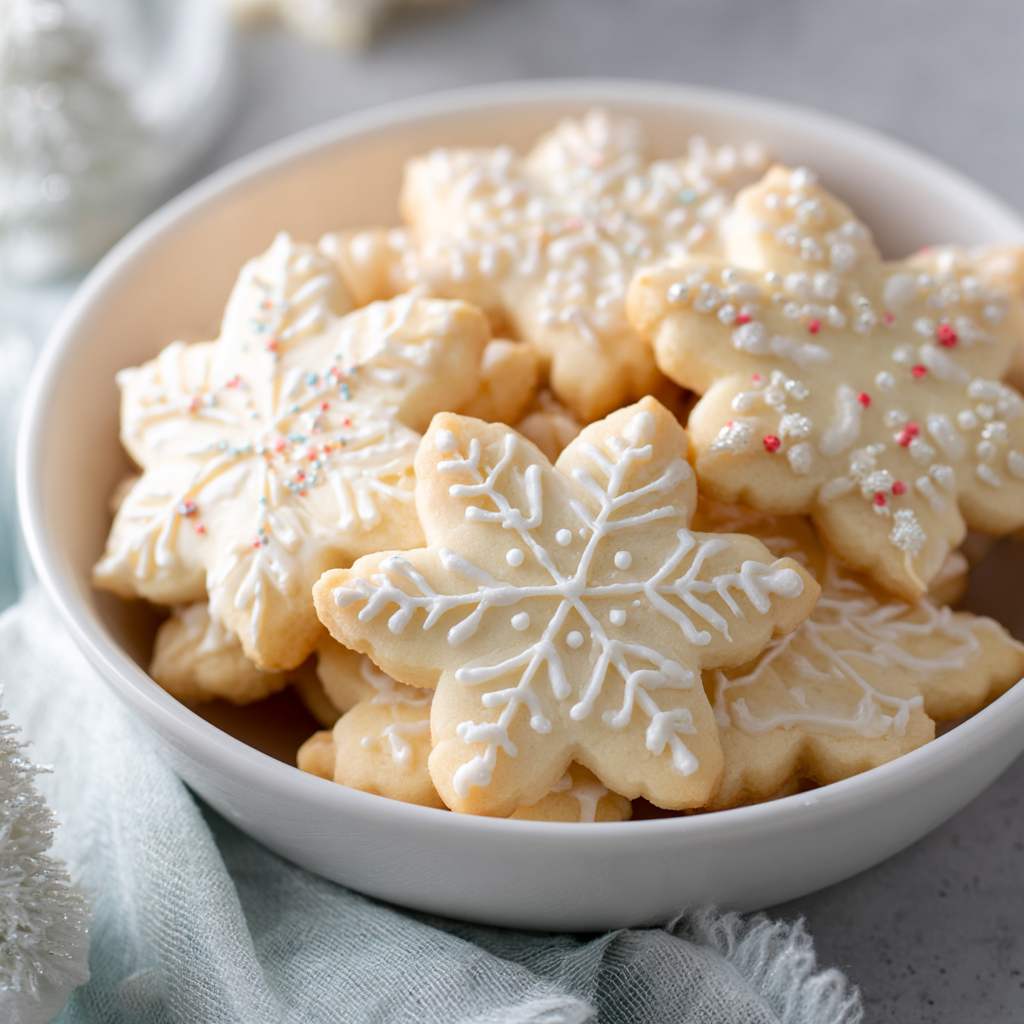
Sugar cookies are the blank canvas of the cookie world, offering endless decorating possibilities and timeless appeal that transcends generations. First, this recipe delivers soft, buttery cookies with a delicate texture that melts on your tongue, making them absolutely irresistible plain or decorated with frosting and sprinkles. Next, the ingredient list contains only pantry staples you likely already have on hand, eliminating any reason to postpone baking. Additionally, the dough comes together in just minutes using straightforward mixing techniques that require no special equipment or advanced baking knowledge. The cookies maintain perfect tenderness throughout storage, staying fresh and delicious for nearly a week without becoming stale or hard. Furthermore, whether you’re baking for holiday gift boxes, children’s birthday parties, special occasions, or simply to have treats on hand, these versatile sugar cookies deliver bakery-quality results from your own kitchen. Their neutral flavor profile pairs beautifully with any frosting color or decorating style you choose, making them the ultimate customizable treat.
Why Sugar Cookies Are the Ultimate Baking Canvas
Sugar cookies have earned their place as baking staples for excellent reasons that go beyond their simple ingredient list. These cookies serve as the perfect foundation for creative decoration, allowing bakers to showcase frosting artistry, sprinkle combinations, and edible glitter without overwhelming flavors. Meanwhile, their tender crumb and delicate sweetness appeal to diverse palates, making them appropriate for serving to children, guests with varying taste preferences, and anyone seeking a classic treat. Furthermore, sugar cookies pair beautifully with any frosting style—royal icing for ornamental precision, buttercream for smooth elegance, or simple powdered sugar glaze for effortless charm. Additionally, these cookies are versatile enough to enjoy plain alongside hot beverages, dunked in milk for dunking, or dressed up as sophisticated party favors. The neutral flavor means you can customize every batch to match any theme, occasion, or seasonal celebration. For bakers seeking kitchen versatility and crowd-pleasing results, sugar cookies are genuinely indispensable.
Ingredients (Makes About 30 Cookies)
- 2¾ cups all-purpose flour
- 1 teaspoon baking powder
- ¼ teaspoon salt
- 1 cup unsalted butter, softened to room temperature
- 1½ cups granulated sugar
- 1 large egg
- 2 teaspoons vanilla extract
- ½ teaspoon almond extract (optional, but recommended for depth)
- Zest of 1 lemon (optional, adds brightness)
- Powdered sugar for dusting (optional)
- Royal icing ingredients for decoration: 2 cups powdered sugar, 2-3 tablespoons egg whites or meringue powder, 1-2 tablespoons water (optional)
- Food coloring, sprinkles, and edible glitter for decorating (optional)
Step-by-Step Instructions
Preparing Your Baking Station
- Preheat your oven to 350°F and arrange the racks so one sits in the upper-middle portion and one in the lower-middle for even baking.
- Line two large baking sheets with parchment paper or silicone baking mats, which prevent sticking and promote even browning.
- In a medium bowl, whisk together the flour, baking powder, and salt until evenly combined.
- Set this dry mixture aside in a convenient location near your mixing station.
- Allow your butter to soften to room temperature by leaving it on the counter for about 20-30 minutes—it should yield easily to pressure but not be melted or greasy.
Creating the Cookie Dough
- In a large mixing bowl, place the softened butter and granulated sugar, beating together with an electric mixer on medium speed for 3-4 minutes.
- Continue beating until the mixture becomes noticeably lighter in color, increased in volume, and fluffy in texture—this aeration creates tender cookies.
- Add the egg to the butter mixture and beat on medium speed for about 1 minute, scraping down the bowl once halfway through.
- Pour in the vanilla extract and almond extract if using, beating on medium speed for another minute until everything combines smoothly.
- If using lemon zest, fold it in gently by hand with a spatula, distributing it evenly throughout the mixture.
- Reduce the mixer speed to low and gradually add the dry ingredient mixture in three equal portions, stirring after each addition until no streaks of flour remain.
- Mix only until the dough just comes together—overmixing develops gluten and creates tougher cookies instead of the tender texture you want.
- Give the dough a final gentle stir by hand with a spatula to ensure all ingredients distribute evenly throughout.
Preparing the Dough for Baking
- For the softest cookies, wrap the dough tightly in plastic wrap and refrigerate for at least 2 hours or up to overnight.
- If you’re short on time, you can skip the refrigeration, though chilling does improve texture and makes the dough easier to work with.
- Remove the dough from the refrigerator about 10 minutes before you plan to bake to allow it to soften slightly for easier portioning.
Shaping and Arranging Cookies
- Using a cookie scoop or rounded tablespoon, portion the dough into balls about the size of a walnut.
- Roll each dough ball gently between your palms, smoothing it and creating a uniform sphere shape.
- Place the dough balls on the prepared baking sheets, spacing them about 2 inches apart to allow room for spreading during baking.
- Gently flatten each dough ball with the bottom of a glass or your fingertips until each cookie is about ¼ inch thick—uniform thickness ensures even baking.
- For uniform cookie shapes, dip the glass bottom in granulated sugar between flattening to prevent sticking and create a subtle sugar coating.
Baking to Perfection
- Transfer one baking sheet to the upper-middle rack and one to the lower-middle rack of your preheated 350°F oven.
- Bake for 9-11 minutes until the edges are very lightly golden brown and the cookies still appear light and tender.
- The centers should still look slightly underdone when you remove them from the oven—this ensures maximum softness as they cool.
- Remove both baking sheets from the oven and allow the cookies to cool on the baking sheets for 3 minutes.
- After 3 minutes, transfer the cookies to a wire cooling rack using a spatula, arranging them in a single layer.
- Allow the cookies to cool completely for at least 30 minutes before decorating or storing—this prevents condensation that would make them soggy.
- Once completely cooled, the cookies are ready to decorate with frosting, sprinkles, or powdered sugar.
Optional: Making Royal Icing for Decoration
- If decorating with royal icing, whisk together the powdered sugar and egg whites or meringue powder in a medium bowl.
- Add water one tablespoon at a time, whisking until the mixture reaches a spreadable consistency that holds its shape but still flows smoothly.
- Divide the icing among bowls and add different food colorings to create your desired palette.
- Use a small offset spatula or butter knife to spread a thin to medium layer of icing on each cooled cookie.
- Apply sprinkles or edible glitter immediately while the icing is still wet so they adhere properly.
- Allow the decorated cookies to set at room temperature for at least 2-3 hours before stacking or storing—this ensures the icing hardens completely.
- For faster setting, place decorated cookies in the refrigerator for 30 minutes until the icing firms up completely.
Serving and Storing Tips
How to Serve and Enjoy
These beautiful sugar cookies are perfect for nearly every occasion imaginable, from casual family gatherings to elegant celebrations and everything in between. First, arrange them on a gorgeous platter or tiered cake stand to create a stunning dessert display at parties and events. Next, package them in clear cellophane bags tied with ribbon to create memorable homemade gifts that friends and family will treasure. Additionally, serve them at holiday parties, bridal showers, baby showers, birthday celebrations, or any gathering where sweet treats enhance the experience. Furthermore, these cookies pair beautifully with cold milk, hot chocolate, coffee, or tea for simple afternoon snacks or after-dinner treats.
You might also set up a decorating station at children’s parties where guests can frost and embellish their own cookies, creating both a fun activity and edible party favors. Consider arranging them on a dessert table with complementary treats like brownies, cake, and candy for visually stunning presentations. Plain sugar cookies work wonderfully for dunking in milk or enjoying alongside cheese and fruit platters for balanced entertaining.
Storage for Maximum Freshness
To preserve these cookies at their peak, allow them to cool completely before storing in an airtight container at room temperature. Layer the cookies with parchment paper between them to prevent sticking and maintain their structure. Properly stored undecorated cookies stay fresh for up to 8 days at room temperature, maintaining their tender texture throughout. For decorated cookies with royal icing, store them in a single layer in an airtight container to prevent the icing from cracking or smudging, and consume within 5-7 days for best results. For extended storage, freeze undecorated baked cookies in a freezer-safe container for up to 3 months—thaw them at room temperature for about 30 minutes before serving, and they’ll taste as fresh as the day they were baked. The cookie dough can be made ahead and refrigerated for up to 4 days before baking, or frozen for up to 2 months. To bake chilled dough, add 1-2 minutes to the baking time; frozen dough needs an additional 2-3 minutes. Alternatively, scoop the dough onto a baking sheet, freeze until solid, then transfer to a freezer bag—this allows you to bake fresh cookies anytime without thawing the entire batch. For gift-giving, store decorated cookies in a box with parchment paper between layers, and include a note mentioning they’re best enjoyed within five days.
Helpful Notes and Tips
Several practical considerations will help ensure you achieve perfect sugar cookies every single time without complications. First, don’t skip the refrigeration step; chilling the dough improves texture, prevents excessive spreading, and makes cookies easier to work with and shape. Next, measuring flour correctly is crucial—spoon flour into your measuring cup and level it off with a knife rather than scooping directly from the bag, which compacts flour and throws off ratios. Additionally, the importance of using proper oven temperature cannot be overstated; slightly too-hot ovens create cookies that brown too quickly, so verify your oven temperature with an instant-read thermometer. Meanwhile, the timing is essential—remove cookies while edges are just barely golden and centers still look slightly underdone, as they continue cooking on the hot pan.
For cookies that spread too much, your oven may run hot; try reducing the temperature by 25°F and checking at the minimum baking time. If cookies don’t spread enough or stay too thick, ensure your butter was properly softened and your dough wasn’t over-chilled. Those preferring crunchier cookies should bake for an additional 2-3 minutes until the edges are more deeply golden brown. To avoid burnt bottoms with pale tops, rotate the baking sheets halfway through baking and switch their rack positions. If you notice edges browning too quickly while centers remain pale, move both sheets to a lower rack position. The optional almond extract adds lovely subtle depth without tasting obviously almond-flavored; use it for superior cookies, but the recipe works beautifully without it. Lemon zest adds brightness that makes cookies taste fresher and more sophisticated, though it’s entirely optional.
Chef Tips
Toast your oven to verify its actual temperature with an oven thermometer; many home ovens run significantly hotter or cooler than the dial indicates, and even slight temperature variations affect whether cookies turn out perfectly tender or slightly overdone.
Chill the dough before baking and refrigerate decorated cookies before serving—these two chilling steps dramatically improve texture, prevent excessive spreading, and ensure cookies maintain beautiful shapes and decorative details.
Frequently Asked Questions
Can I bake the dough without refrigerating it first? Yes, though the dough is easier to work with and produces better texture when chilled; if you skip refrigeration, your cookies may spread slightly more but will still taste delicious.
What can I use instead of royal icing for decoration? Buttercream frosting, simple powdered sugar glaze, cream cheese frosting, or even melted white chocolate all work beautifully for decorating sugar cookies.
How do I prevent my cookies from spreading too much? Ensure your butter was softened but not melted, chill the dough before baking, avoid overbaking, and verify your oven temperature is accurate with a thermometer.
Can I freeze decorated sugar cookies? It’s best to freeze undecorated baked cookies or undyed dough, then decorate after thawing for optimal icing appearance and texture.
Why are my cookies coming out cake-like instead of tender? You may be overbaking them, measuring too much flour, or mixing too much; remove cookies while centers still look slightly underdone and use proper flour measurement techniques.
The Timeless Appeal of Homemade Sugar Cookies
These easy sugar cookies represent one of baking’s greatest gifts—a simple, reliable recipe that opens infinite creative possibilities while remaining accessible to bakers of all skill levels. From the moment you cream together butter and sugar through that first taste of a perfectly decorated cookie, you’ll understand why sugar cookies have remained beloved for generations. The recipe delivers consistent, predictable results that feel like genuine accomplishment without requiring professional baking experience or advanced techniques.
What makes this recipe truly special is its beautiful simplicity combined with remarkable versatility. First, the straightforward ingredient list contains only items most bakers have readily available, eliminating barriers to spontaneous baking. Next, the dough comes together quickly and forgives common beginner mistakes, making it ideal for first-time bakers building confidence. Additionally, the neutral flavor profile serves as the perfect foundation for any decorating vision you can imagine, from elaborate royal icing artwork to simple powdered sugar dusting. Furthermore, the tender, delicate texture appeals to everyone from children to adults, making these cookies genuinely universally beloved.
Whether you’re baking for holiday celebrations, special occasions, or simply because you want homemade treats in your home, these sugar cookies deliver magic from your own kitchen. The combination of buttery richness, delicate sweetness, and beautiful decorating potential creates something truly special. Every batch promises tender centers, golden edges, and the warm satisfaction that comes from creating something beautiful and delicious with your own hands.
We’d absolutely love to hear if you try these easy sugar cookies! Did they become your go-to recipe for decorating and special occasions? Please save this recipe for future baking adventures, share it with friends and family members who would enjoy decorating cookies together, and pin it to your favorite treats board. Your feedback, comments, and shares truly motivate us to continue creating delicious, accessible recipes that bring people together and make home baking feel joyful and achievable. Drop a comment below telling us about your favorite decoration combinations, whether you made any special modifications, or if you enjoyed decorating with children—we absolutely cherish hearing about your baking experiences and the joy our recipes bring to your kitchen and celebrations!