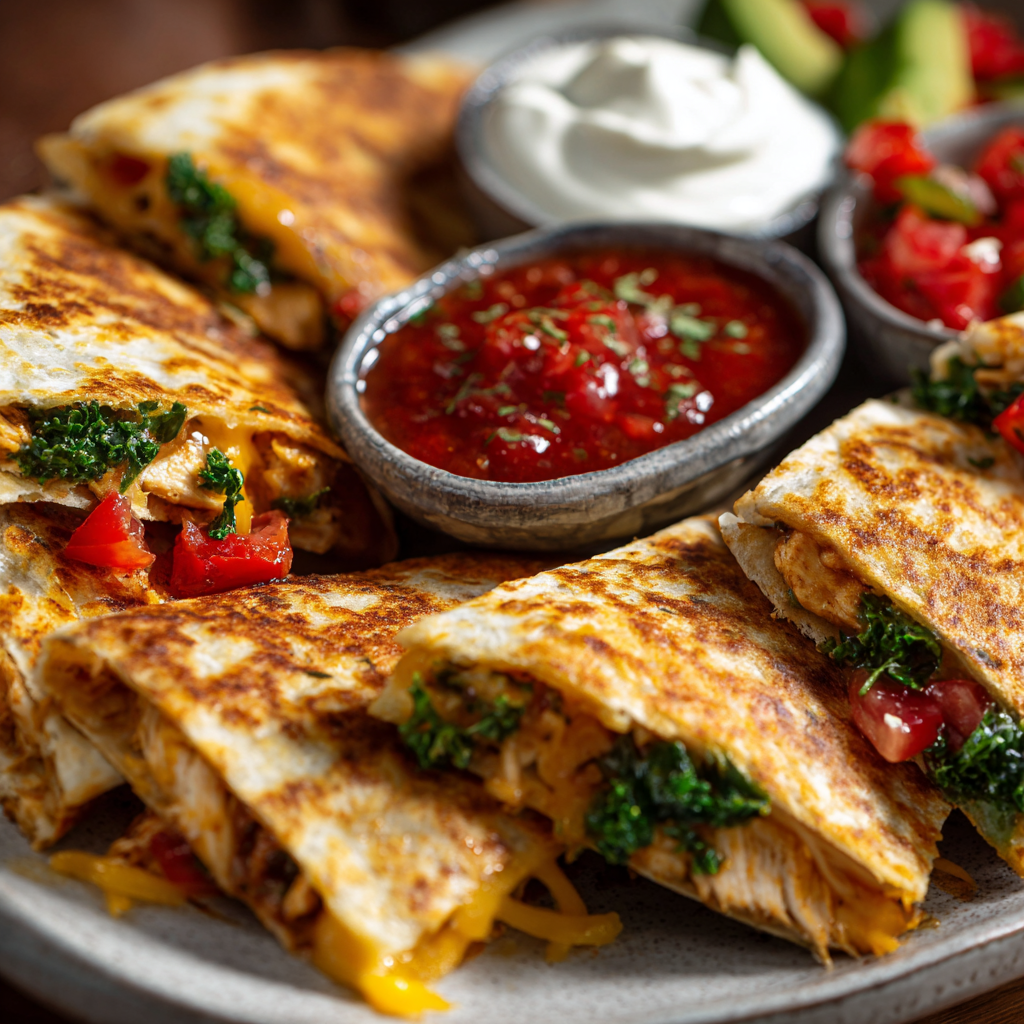
There’s nothing quite like the appeal of crispy, golden quesadilla wedges with melted cheese oozing from every edge and tender, flavorful chicken packed inside, creating the ultimate handheld appetizer that keeps people reaching for more throughout the entire game. These chicken quesadilla wedges deliver that perfect combination of crispy exterior and creamy, cheesy interior that appeals to virtually every palate and preference. Next, what makes this recipe truly special is how it combines simple, quality ingredients prepared with straightforward technique to create something genuinely addictive and unforgettable. Additionally, these wedges come together remarkably quickly without requiring deep-frying or extensive prep work, making them perfect for gameday entertaining when you want impressive results without kitchen stress. Furthermore, the beauty of this recipe lies in how it delivers restaurant-quality results while remaining accessible to cooks of all skill levels. Whether you’re hosting a Super Bowl party, feeding hungry fans during the big game, or looking for a crowd-pleasing appetizer that disappears faster than you can say “go team,” these chicken quesadilla wedges deliver exactly that kind of satisfaction and excellence that keeps guests coming back for more.
Ingredients
Makes: 4-6 servings (12-16 wedges)
For the Chicken Filling
- 1 pound boneless, skinless chicken breasts
- 2 tablespoons olive oil
- 1 medium onion, diced
- 2 bell peppers (any color), diced
- 3 cloves garlic, minced
- 1 teaspoon cumin
- 1 teaspoon chili powder
- 0.5 teaspoon paprika
- 0.5 teaspoon salt
- 0.25 teaspoon black pepper
- 0.25 teaspoon cayenne pepper (optional, for heat)
- 0.5 cup chicken broth
- Juice of 1 lime (about 2 tablespoons)
- 1 tablespoon fresh cilantro, chopped
For the Quesadillas
- 8 large flour tortillas (10-inch size)
- 2 cups shredded Monterey Jack cheese
- 1 cup shredded cheddar cheese
- 1 cup corn kernels (fresh, frozen, or canned)
- 1 can (4 ounces) diced green chiles
- 0.5 red onion, finely diced
- 0.25 cup fresh cilantro, chopped
- 2 tablespoons olive oil for cooking
For Serving
- Sour cream
- Guacamole or sliced avocado
- Fresh salsa (mild or spicy)
- Hot sauce (optional)
- Fresh lime wedges
- Fresh cilantro sprigs for garnish
Preparation and Cooking Instructions
Preparing Your Chicken
First, pat your chicken breasts dry using paper towels, as excess moisture will prevent proper browning and create steam during cooking. Meanwhile, place each chicken breast on a cutting board and, using a sharp knife, carefully cut them into bite-sized pieces approximately three-quarters of an inch. However, try to keep the pieces relatively uniform for even cooking throughout.
Heat two tablespoons of olive oil in a large skillet over medium-high heat until it shimmers gently. Next, add your diced onion and diced bell peppers, cooking for approximately four to five minutes until they begin to soften, stirring occasionally to ensure even cooking.
Add your minced garlic to the skillet and cook for approximately one minute until fragrant, being careful not to let it brown and become bitter. Furthermore, this brief cooking mellows the raw garlic flavor while developing its natural sweetness. Next, add your diced chicken pieces, stirring constantly as they cook.
Continue cooking the chicken for six to eight minutes, stirring frequently to ensure even cooking and proper browning. As a result, you’ll achieve cooked chicken with light color on the exterior while maintaining moisture and tenderness inside. Additionally, the chicken is done when it’s no longer pink in the center and reaches an internal temperature of 165°F.
Building Flavors and Seasonings
Once your chicken is cooked through, sprinkle your cumin, chili powder, paprika, salt, black pepper, and cayenne pepper if using over the top, stirring constantly for about 30 seconds to bloom the spices. As a result, you’ll notice the entire skillet becomes aromatic and the spices coat the chicken beautifully.
Pour in your chicken broth to deglaze the pan and create a light sauce for your filling. Meanwhile, allow the mixture to simmer for three to four minutes, allowing the flavors to meld beautifully together. Next, squeeze your fresh lime juice over the top and sprinkle with fresh cilantro, creating brightness and freshness that balances the savory seasonings.
Taste your filling and adjust the seasonings according to your preference, adding more salt, pepper, or spices as needed. Furthermore, remember that the cheese in your quesadillas provides saltiness, so you may want slightly more seasoned filling to balance everything perfectly.
Let your finished filling cool slightly to room temperature. However, you can prepare this filling completely up to one day in advance and refrigerate it in an airtight container until you’re ready to assemble your quesadillas.
Assembling Your Quesadillas
In a small bowl, combine your shredded Monterey Jack cheese and shredded cheddar cheese, mixing them together evenly. Next, have your corn kernels, diced green chiles, diced red onion, and fresh cilantro ready in separate small bowls for easy access during assembly.
Take one large flour tortilla and lay it flat on a clean work surface. Next, sprinkle approximately one-quarter cup of your cheese mixture across half of the tortilla, creating an even layer. Afterward, top the cheese with approximately one-third cup of your prepared chicken filling, spreading it gently but evenly.
Add a sprinkle of corn kernels, a small amount of diced green chiles, diced red onion, and fresh cilantro over the chicken. Meanwhile, don’t overfill the quesadilla, as too many ingredients make it difficult to cook evenly and cause ingredients to fall out when you bite into the wedges.
Fold the tortilla in half, creating a half-moon shape, and press gently to help all the ingredients meld together. As a result, you’ve created a quesadilla that’s ready to be cooked.
Cooking Your Quesadillas
Heat one tablespoon of olive oil in a large skillet over medium-high heat until it shimmers gently. Next, carefully place one or two of your assembled quesadillas in the hot oil, depending on the size of your skillet.
Cook for approximately two to three minutes until the bottom is golden brown and crispy, and you can see the cheese beginning to melt through the tortilla. However, resist the urge to move the quesadilla around; instead, allow it to sit undisturbed so the bottom develops proper browning.
Using a large spatula, carefully flip the quesadilla and cook the second side for approximately one to two minutes until it’s also golden brown and crispy. Meanwhile, the cheese should be completely melted and starting to show through the tortilla on both sides.
Transfer your finished quesadilla to a cutting board and repeat this process with your remaining quesadillas, adding more oil to the skillet as needed. Furthermore, once all quesadillas are cooked, let them rest for approximately two minutes before cutting.
Cutting and Serving
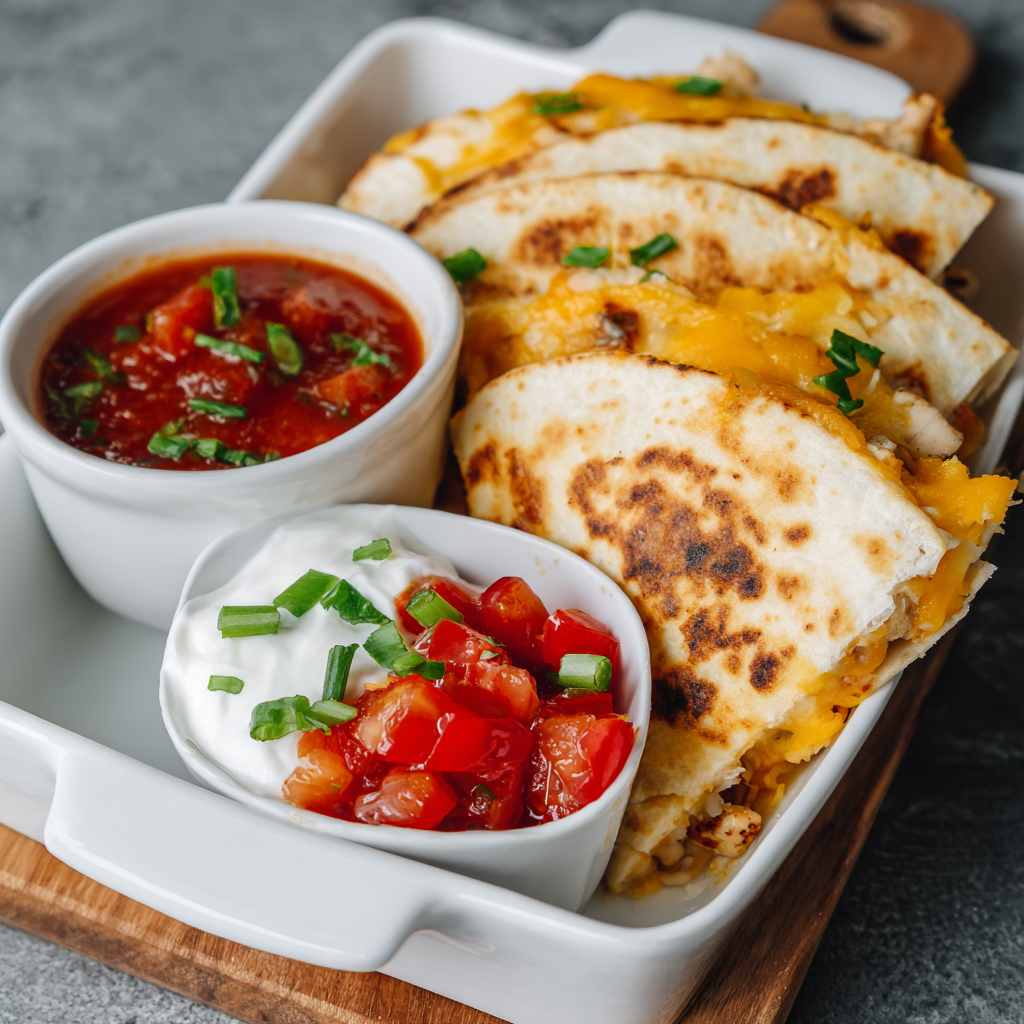
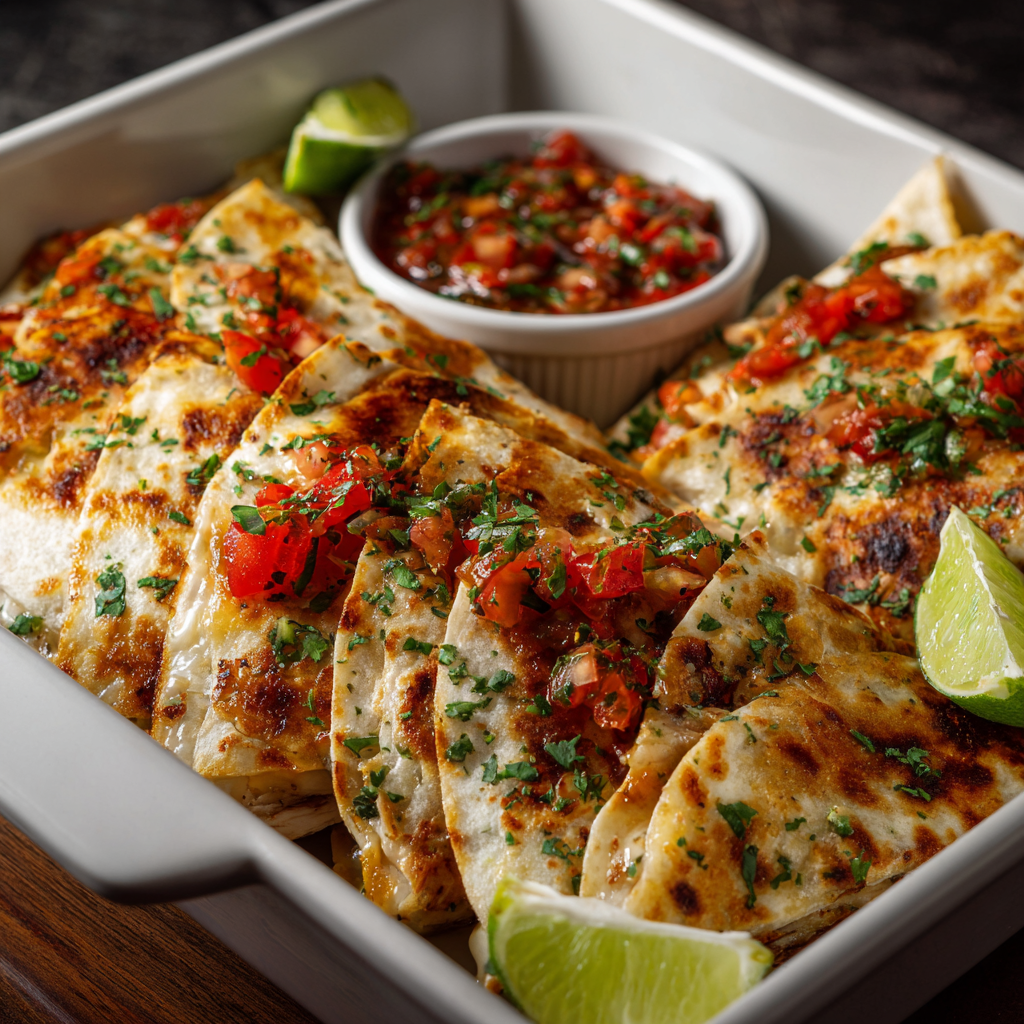
Using a sharp knife or pizza cutter, carefully cut each quesadilla into three or four wedges, depending on your preferred size. Next, arrange the wedges on a large platter or serving board, creating an attractive presentation that invites guests to grab one or two.
Serve immediately while the quesadillas are still warm and the cheese remains melted and creamy. Additionally, position small bowls of sour cream, guacamole, salsa, and any other dipping sauces nearby so guests can customize their wedges according to personal preference.
Garnish your platter with fresh cilantro sprigs and lime wedges positioned throughout for visual appeal and added brightness. Furthermore, these wedges are best enjoyed immediately after cooking, though they remain delicious for up to 30 minutes if necessary.
Serving and Storing Tips
Serving Suggestions
Serve these chicken quesadilla wedges as a main appetizer during your gameday gathering, positioning them on a prominent platter where guests can easily grab them while watching the game. Next, they work beautifully as the centerpiece of a Mexican-themed spread alongside other complementary dishes such as nachos, salsa, or elote-style corn.
Pair them with classic dipping sauces such as sour cream, fresh guacamole, and salsa, allowing guests to customize their wedges according to personal preference and heat tolerance. Additionally, they’re equally delicious enjoyed plain with just a squeeze of fresh lime juice for brightness and acidity.
For gameday entertaining, consider making multiple batches throughout the event and serving them in waves, ensuring late arrivals experience warm, freshly cooked wedges rather than cooled, less-appealing versions. Meanwhile, this approach keeps your guests happy and satisfied throughout the entire game while maintaining their enjoyment of these delicious appetizers.
These wedges work equally well as part of a buffet-style spread, a quick lunch for weekday meals, or a casual family dinner. Furthermore, they’re substantial enough to serve as the main attraction without requiring additional dishes, simplifying your entertaining efforts considerably.
Storage Tips
These chicken quesadilla wedges are best enjoyed immediately after cooking while the cheese remains melted and the tortilla stays crispy. However, if you have leftovers, transfer them to an airtight container and refrigerate for up to three days.
When you’re ready to enjoy the leftovers, you have several reheating options. Next, reheat them in a preheated 350°F oven for five to seven minutes until warmed through, which preserves texture far better than microwaving. Additionally, you can reheat them in a dry skillet over medium heat for one to two minutes per side, creating a crispy exterior while warming the filling.
You can prepare your chicken filling completely up to one day in advance and store it in an airtight container in the refrigerator. Meanwhile, when you’re ready to serve, simply reheat the filling gently and use it to assemble and cook fresh quesadillas, reducing your day-of preparation time significantly.
You can also assemble your quesadillas without cooking and refrigerate them on a baking sheet for up to four hours before cooking. Next, when you’re ready to serve, cook them directly from the refrigerator, adding one to two extra minutes to the cooking time per side.
For longer-term storage, freeze your cooked quesadillas in a freezer-safe container with parchment paper between layers for up to two months. Meanwhile, thaw them overnight in the refrigerator and reheat gently in a 350°F oven for ten to twelve minutes until warmed through completely.
Helpful Notes and Tips
Ingredient Substitutions and Variations
If you prefer ground turkey or beef to chicken breast, use the same amount and cooking method, though ground meat may require slightly different cooking times and produce a different texture. Next, the remainder of the recipe remains exactly the same with no other adjustments necessary.
For a vegetarian version, omit the chicken and increase your corn to two cups, adding diced mushrooms, roasted vegetables, or black beans for substance and protein. Additionally, the remainder of the recipe works beautifully without any other modifications.
You can customize your cheese blend according to personal preference and what you have available. Meanwhile, try using pepper jack for additional heat, smoked gouda for depth, or a combination of cheeses for complexity. Furthermore, dairy-free cheese alternatives work equally well for those avoiding dairy.
The filling vegetables are infinitely customizable based on availability and personal preference. Next, add roasted jalapeños for heat, caramelized onions for sweetness, diced tomatoes for brightness, or sautéed spinach for nutrition. Additionally, you can reduce or eliminate vegetables you don’t enjoy.
For a more indulgent version, add a tablespoon of sour cream or crema to your chicken filling, creating a richer, creamier mixture. Meanwhile, this simple addition produces extra-tender chicken and more luxurious overall texture.
Common Mistakes to Avoid
One frequent error is overfilling the quesadillas with too many ingredients, which makes them difficult to cook evenly and causes fillings to leak out. Instead, use a light hand with fillings, remembering that a little goes a long way in creating a perfectly balanced quesadilla.
Additionally, avoid moving the quesadilla excessively during cooking, which disrupts browning and prevents the development of a proper crispy exterior. Furthermore, allow it to sit undisturbed on the hot skillet for the appropriate cooking time before flipping.
Another common mistake involves using low heat during cooking, which results in soft, pale tortillas instead of crispy, golden ones. Instead, use medium-high heat that creates proper browning while allowing the cheese time to melt completely inside.
Do not skip the cooling period for your chicken filling, which allows it to firm up slightly and makes assembly easier. Furthermore, hot filling can cause the tortilla to become overly soft and difficult to handle.
Avoid using tortillas that are too thin or damaged, which tear easily during cooking and cause filling to escape. Instead, choose thick, pliable flour tortillas that are sturdy enough to hold the fillings without tearing.
Time-Saving Tips
Prepare your chicken filling completely the day before your gameday gathering and store it in an airtight container in the refrigerator. Next, when guests arrive, simply reheat the filling and assemble fresh quesadillas, reducing your active cooking time significantly.
Assemble your quesadillas ahead of time and refrigerate them on a baking sheet covered with plastic wrap for up to four hours before cooking. Meanwhile, this approach eliminates the need to assemble during your entertaining, streamlining your workflow considerably.
Prepare all your topping ingredients in advance, cutting and storing them separately in the refrigerator. Additionally, this simple step eliminates the need to chop vegetables during your entertaining, keeping you focused on cooking and enjoying time with your guests.
You can use rotisserie chicken from your grocery store instead of cooking chicken from scratch, which significantly reduces your active cooking time while delivering excellent results.
Chef Tips for Success
First, the secret to perfectly cooked quesadillas lies in using proper heat and not moving them around excessively during cooking. Additionally, allowing the tortilla to sit undisturbed on the hot skillet creates that crucial crispy exterior while the cheese melts inside.
Furthermore, don’t overfill your quesadillas, as too many ingredients make them difficult to cook evenly and cause the filling to escape during cooking and eating. Meanwhile, a moderate amount of filling creates the best texture, flavor balance, and eating experience.
Next, use high-quality cheese that melts smoothly and evenly, rather than pre-shredded varieties that contain anti-caking agents preventing proper melting. Additionally, freshly shredded or block cheese produces superior results and distributes more evenly throughout the quesadilla.
For the most impressive presentation, serve quesadilla wedges immediately after cooking while the cheese is still warm and melted. Moreover, this timing is crucial for achieving the best texture and the most satisfying eating experience.
Frequently Asked Questions
Can I make these quesadilla wedges in the oven instead of on the stovetop? Yes, assemble quesadillas on a baking sheet, brush lightly with oil, and bake at 425°F for 8 to 10 minutes until golden and crispy, turning halfway through for even cooking.
What’s the best way to reheat these quesadilla wedges if I made them ahead? Reheat in a preheated 350°F oven for 5 to 7 minutes until warmed through, or use a dry skillet over medium heat for 1 to 2 minutes per side, which preserves crispness better than microwaving.
Can I use corn tortillas instead of flour tortillas for these quesadillas? Absolutely! Corn tortillas work beautifully and provide a different texture and authentic Mexican flavor; however, they’re more delicate and may require extra care during flipping.
How do I prevent the cheese from leaking out of my quesadillas while cooking? Don’t overfill the quesadillas, ensure the edges are pressed together firmly before cooking, and avoid moving them around excessively during cooking.
Can I make these quesadilla wedges without cheese for a dairy-free option? Yes, use dairy-free cheese alternatives or omit cheese entirely and increase vegetables and proteins to create hearty, satisfying dairy-free quesadillas.
Final Thoughts
These game day chicken quesadilla wedges represent the perfect balance between indulgent comfort food and accessible simplicity, delivering crispy, cheesy handheld appetizers that appeal to nearly every palate and preference. Next, they prove that impressive gameday food doesn’t require complicated techniques or extensive ingredient lists, but rather a focus on quality components prepared with proper methodology.
Furthermore, the combination of seasoned chicken, melted cheese, fresh vegetables, and crispy tortilla creates an absolutely crave-worthy eating experience that keeps guests satisfied throughout the entire game. The next time you’re hosting a gameday gathering and want to serve something that stands out from typical spreads while remaining comforting and familiar, remember that these chicken quesadilla wedges deliver everything you need: incredible flavor, quick preparation, customizable toppings, and the kind of satisfaction that makes entertaining memorable and genuinely enjoyable.
So gather your ingredients, fire up your skillet, and prepare to become the hero of your event with a beautiful platter of these irresistible, crispy, absolutely unforgettable game day chicken quesadilla wedges.
Did you love this recipe? If Game Day Chicken Quesadilla Wedges has become your new go-to entertaining dish, please save this recipe, pin it to your Pinterest board, and share it with friends and family who would love it! Your support means everything to us and helps us create more delicious recipes that bring people together. Thank you for cooking with us!