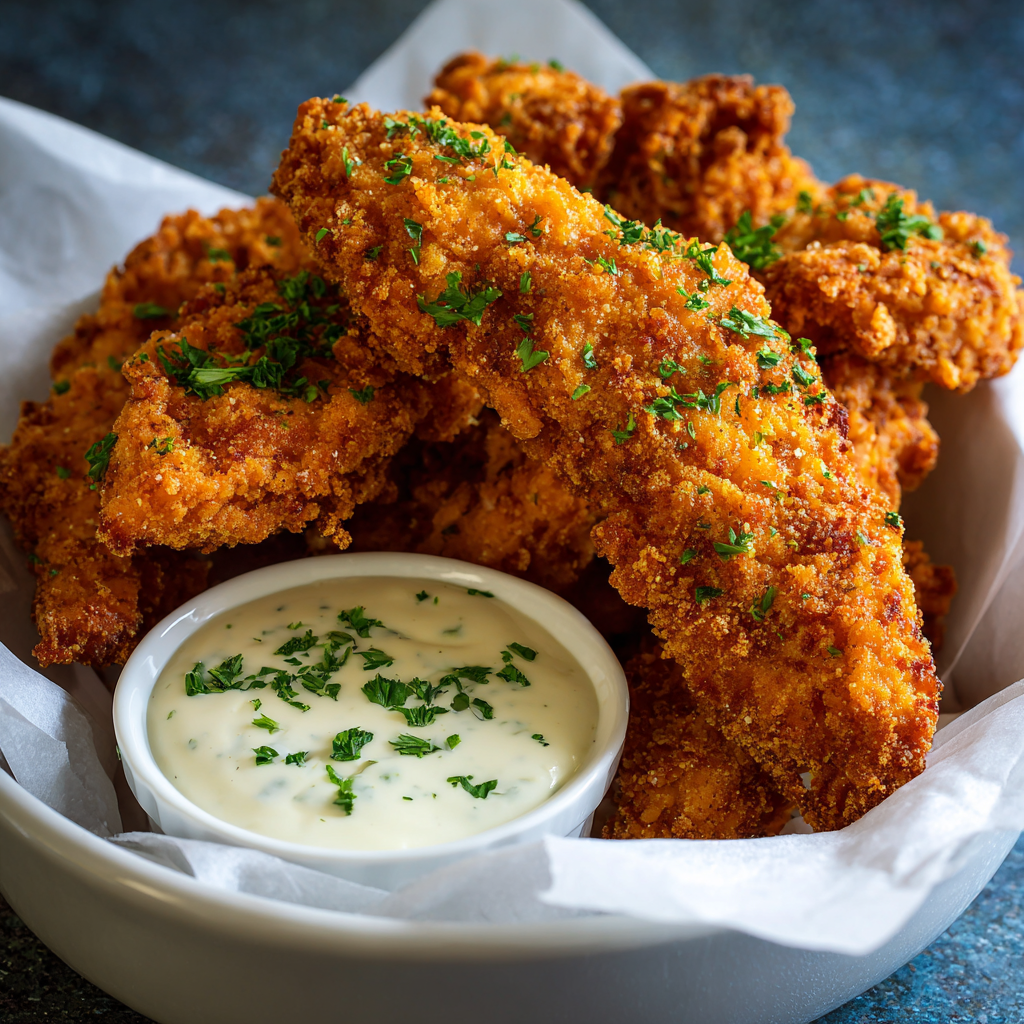
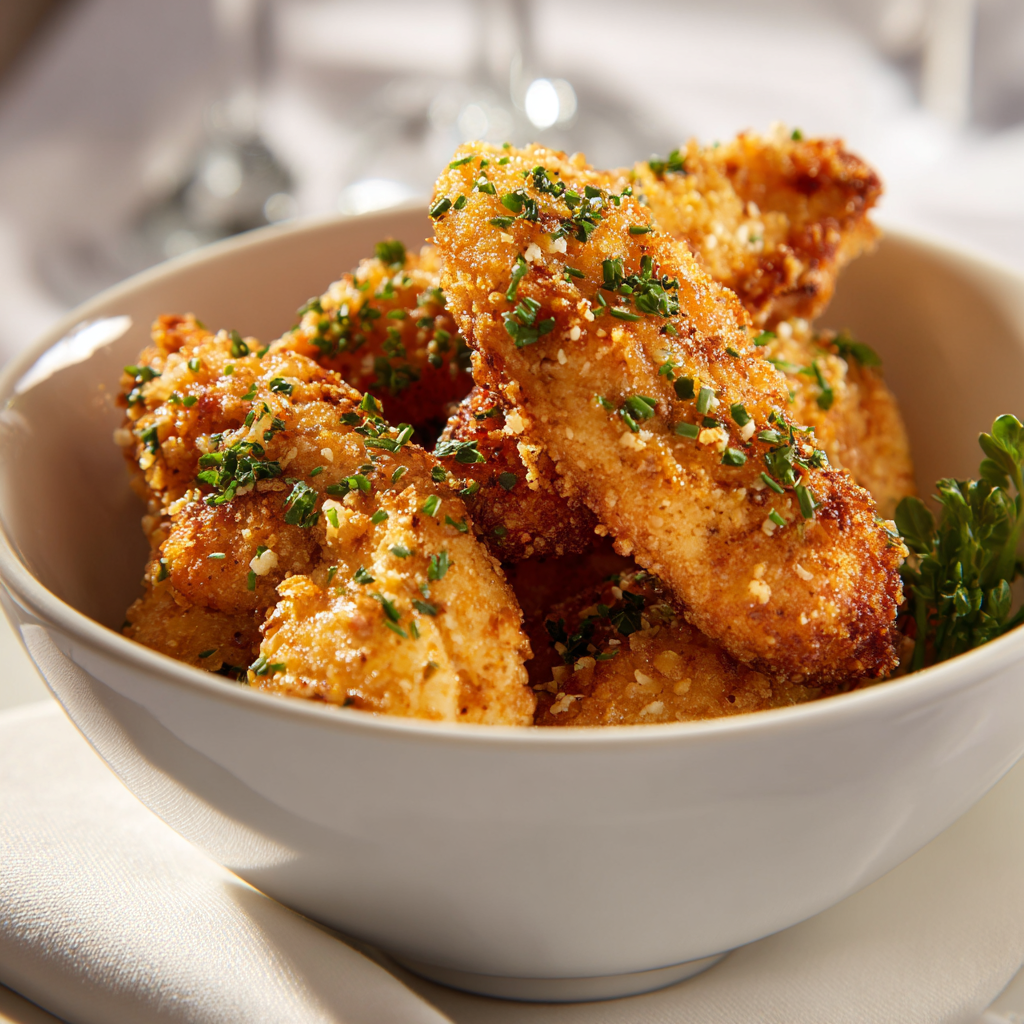
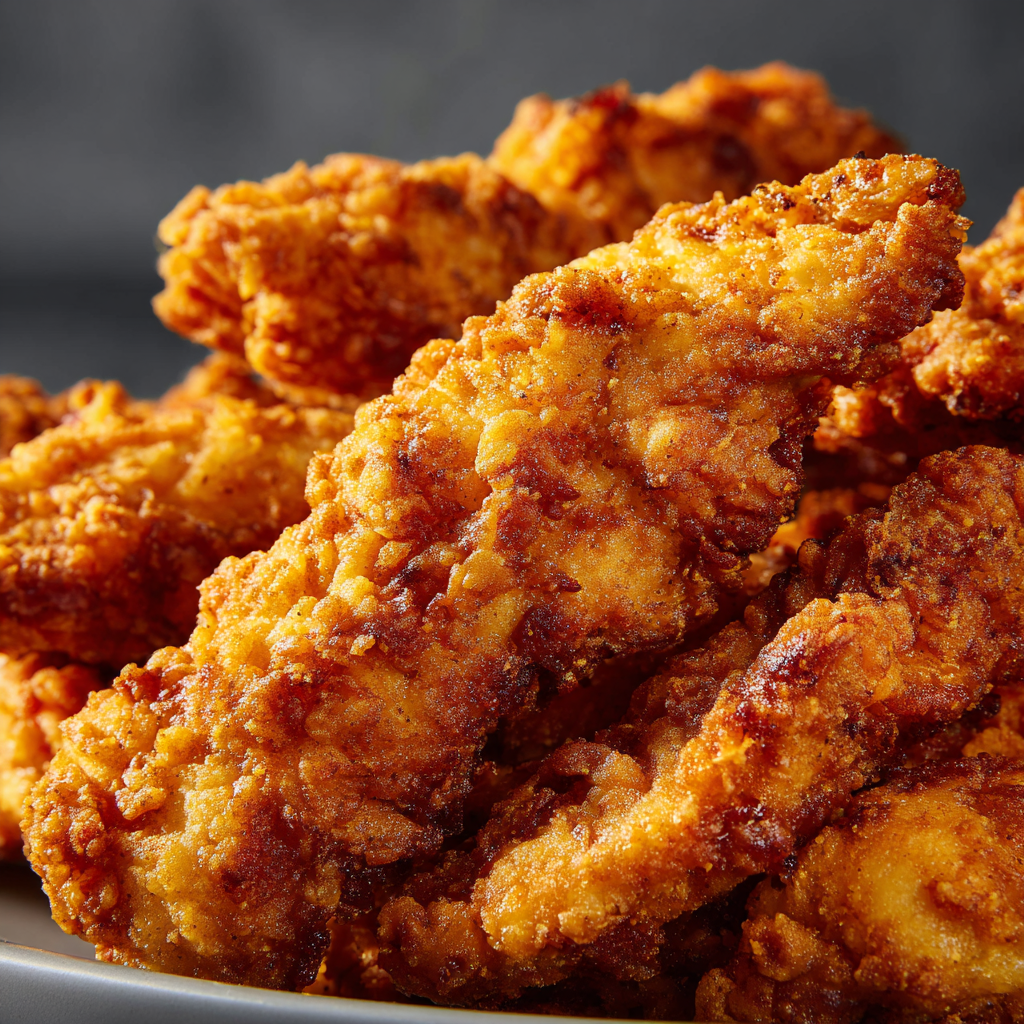
Nothing brings people together on a busy game day like a platter of crispy, juicy chicken tenders that everyone can grab the moment they walk through the door. These tenders offer a balance of comfort, flavor, and excitement, making every bite feel like part of the celebration. Although the dish looks impressive, it stays incredibly simple to prepare, which helps you focus on the moment rather than staying stuck in the kitchen. Families love them because they appeal to both kids and adults, and party guests appreciate how satisfying they feel alongside all the other bold snacks on the table. Meanwhile, the blend of seasonings and the crunchy coating turn a familiar classic into something that feels homemade and heartfelt. You can prepare them ahead of time, cook large batches without stress, and enjoy watching them disappear long before halftime even begins.
Ingredients
Servings: Makes 6–8 servings
- 2 pounds chicken tenders
- 1 cup all-purpose flour
- 1 teaspoon salt
- 1 teaspoon black pepper
- 1 teaspoon paprika
- 1 teaspoon garlic powder
- 1 teaspoon onion powder
- 2 large eggs
- 2 tablespoons milk
- 2 cups seasoned breadcrumbs
- ½ cup grated Parmesan cheese
- 1 teaspoon dried oregano
- 1 teaspoon dried parsley
- ½ teaspoon cayenne pepper (optional for heat)
- Oil for frying or cooking spray for baking
Step-by-Step Instructions
Preparing the Chicken
- Preheat your oven to 400°F (if baking) or heat oil in a deep skillet to 350°F (if frying).
- Pat the chicken tenders dry to remove excess moisture for a crispier finish.
- Mix the flour, salt, black pepper, paprika, garlic powder, and onion powder in a shallow bowl.
- Whisk the eggs and milk together in a separate bowl until smooth.
- Combine the seasoned breadcrumbs, Parmesan, oregano, parsley, and cayenne in a third bowl.
Breading the Tenders
- Dredge each chicken tender in the flour mixture to coat it lightly.
- Dip the floured tender into the egg mixture to help the coating stick.
- Press the tender firmly into the breadcrumb mixture for a thick, even layer.
- Place each breaded tender on a tray while you finish the remaining pieces.
Cooking the Tenders
- Arrange the tenders on a baking sheet lined with parchment if you plan to bake them.
- Spray the tops lightly with cooking spray for extra crispiness.
- Bake for 18–20 minutes, flipping halfway through for an even golden texture.
- Fry the tenders in batches if you prefer the skillet method, cooking each side for 3–4 minutes until golden.
- Transfer cooked tenders to a wire rack to maintain their crunch as they cool slightly.
Serving and Storing Tips
Serving Tips
Game day feels complete when these tenders sit beside a variety of dipping sauces that bring out their savory flavor. Ranch, spicy mayo, honey mustard, chipotle aioli, and barbecue sauce all pair beautifully, especially when guests want different levels of heat and sweetness.
Additionally, arranging them on a large platter with celery sticks, carrot sticks, and waffle fries makes the snack table look full and inviting. For a heartier option, serve them alongside mac and cheese or loaded potato skins so everyone can build their own plate. Afterward, cut leftover tenders into strips and use them in wraps, salads, or sliders for a quick next-day meal.
Storage Tips
Store leftovers in an airtight container and refrigerate them for up to four days. However, make sure they cool completely before sealing them to avoid trapped steam softening the crust. Freeze cooked tenders for up to two months by placing them in a single layer on a baking sheet first, then transferring them to freezer bags. When you want to reheat them, warm them in the oven to bring back their crispness instead of using the microwave, which softens the coating.
Helpful Notes
Choosing uniform-sized chicken tenders ensures they cook evenly, whether you bake or fry them. Additionally, you can substitute seasoned breadcrumbs with panko for an extra-crunchy exterior without changing the flavor balance. If you want something spicier, add a pinch of chili powder or extra cayenne directly into the breadcrumb mixture. For a milder version, simply omit the stronger spices and rely on garlic and Parmesan for a classic flavor profile.
Time-saving shortcuts can also help busy hosts. Prepare the breaded tenders in advance, lay them on a baking sheet, and refrigerate for up to 12 hours before cooking. Meanwhile, using pre-cut chicken strips instead of trimming chicken breasts yourself reduces prep time significantly. To avoid soggy tenders, avoid stacking them while they cool after frying or baking; airflow keeps the crumb coating crisp.
Overcrowding the pan is one of the most common mistakes when frying. As a result, the oil temperature drops and the chicken absorbs too much oil, which impacts texture. In contrast, baking too close together on the sheet prevents proper browning, so space them out for the crispiest finish.
Chef Tips (Optional)
A quick drizzle of melted butter over baked tenders right after they come out of the oven adds a richer flavor without making them greasy. Additionally, marinating the chicken in buttermilk for at least one hour before coating gives the tenders a noticeably softer and juicier bite.
Frequently Asked Questions
Can I use chicken breasts instead of tenders?
Yes, simply slice the breasts into evenly sized strips so they cook at the same rate.
Can I make these tenders gluten-free?
Use gluten-free flour and gluten-free breadcrumbs, and the recipe will work the same way.
How do I reheat leftovers without losing crunch?
Warm them in a 375°F oven for 8–10 minutes, which restores the crispy coating.
Can I air-fry the tenders?
Yes, air-fry them at 390°F for 12–14 minutes, flipping halfway for an even golden finish.
Can I prepare them ahead for parties?
Bread the chicken the night before, store it covered in the refrigerator, and cook it right before serving.
Conclusion
Game day always feels more exciting when the food on the table brings warmth, comfort, and a little bit of crunch. These chicken tenders check every box, from the well-seasoned coating to the juicy center that makes every bite feel satisfying. Although the recipe is easy enough for beginners, it still delivers a flavor that tastes bold and homemade. Additionally, the flexibility to bake, fry, or air-fry means you can adapt it to whatever equipment you have on hand. Afterward, watching friends and family reach for seconds becomes the best reward because it shows how something so simple can bring so much joy.
If you enjoyed this recipe, make sure to save it, pin it, or share it with others. Your support encourages us to keep creating delicious recipes that make every gathering feel special and every meal memorable.