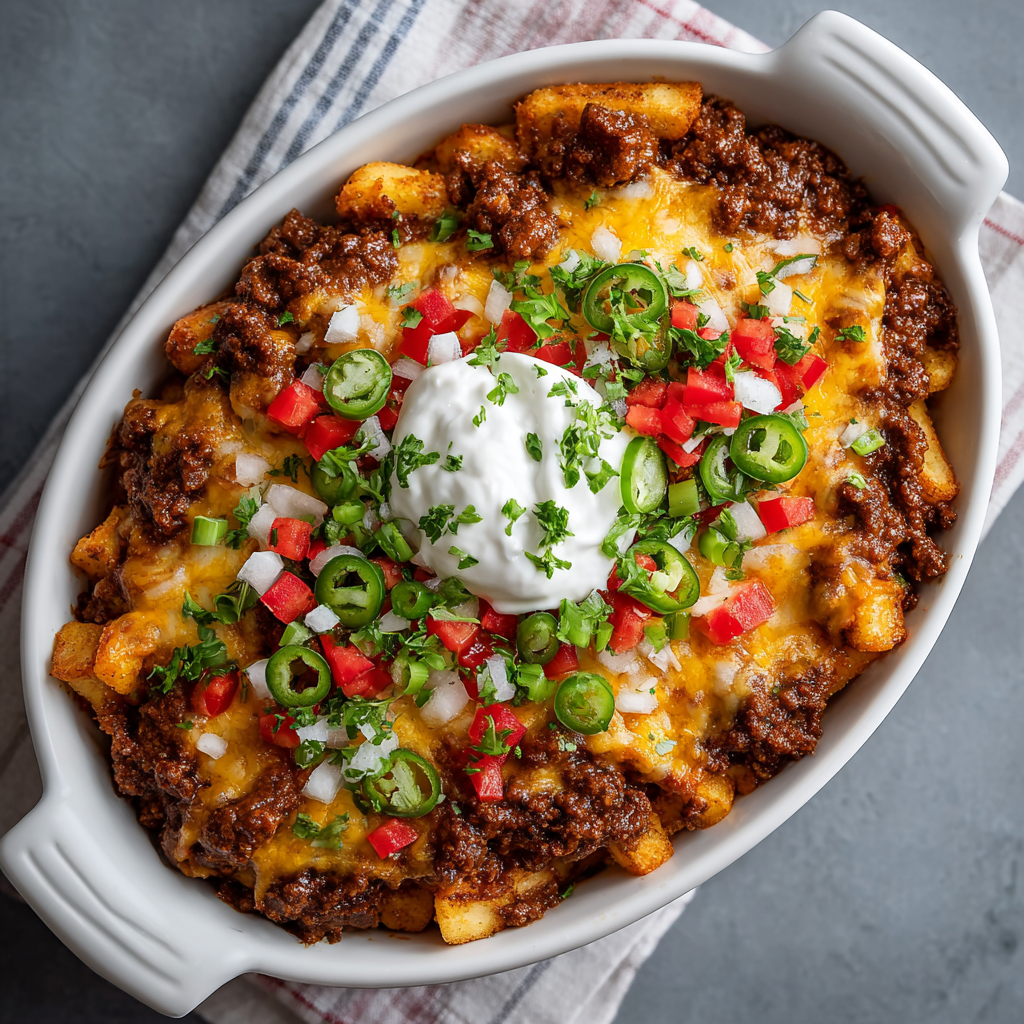
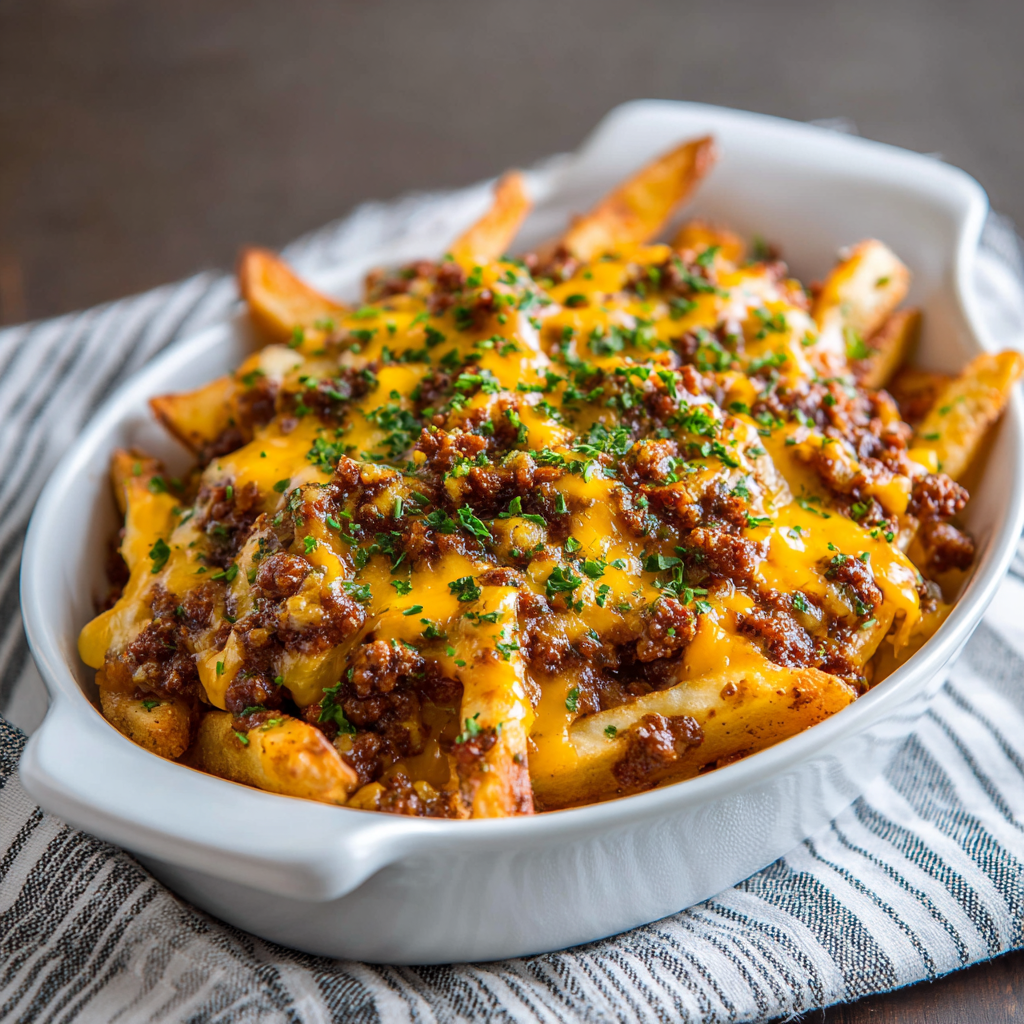
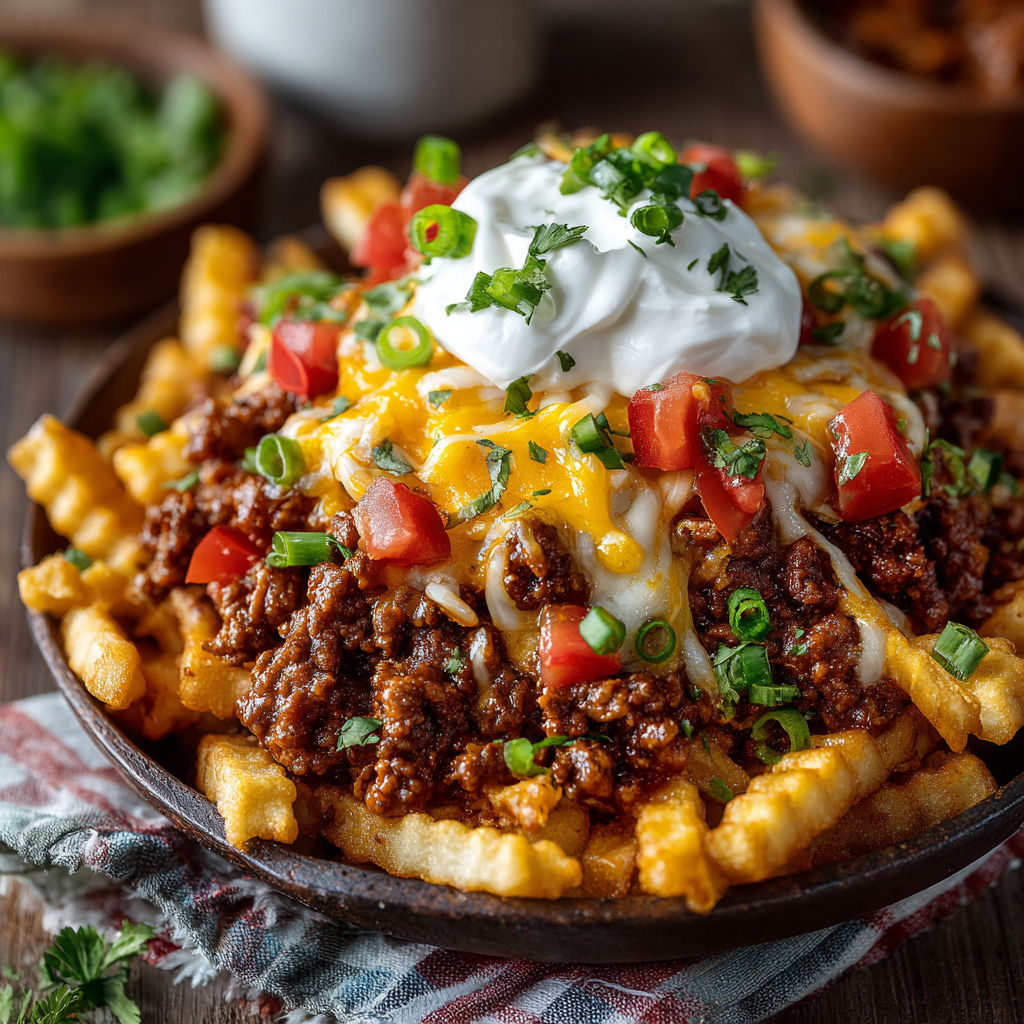
There’s nothing quite like the simple pleasure of crispy, golden fries smothered in rich chili and melted cheese while you’re cheering for your favorite team. This classic gameday comfort food brings people together in a way that few dishes can, and this recipe delivers restaurant-quality results without requiring you to order takeout. Next, what makes these chili cheese fries truly special is the combination of homemade components that elevate them far beyond frozen fries and canned toppings. Additionally, the fragrant, slow-simmered chili provides deep, complex flavors that taste like you’ve been cooking all day, yet it comes together much faster than you’d expect. Furthermore, this recipe is incredibly flexible and forgiving, making it perfect for cooks of all skill levels who want to impress their guests. Whether you’re hosting a watch party, feeding hungry fans during the big game, or simply craving indulgent comfort food, these chili cheese fries deliver that perfect marriage of crispy, creamy, and savory that keeps people reaching for more.
Ingredients
Makes: 4-6 servings
For the Fries
- 2 pounds russet potatoes
- 2 tablespoons olive oil
- 1 teaspoon sea salt
- 0.5 teaspoon black pepper
- 0.5 teaspoon garlic powder
- 0.25 teaspoon paprika
For the Chili
- 2 tablespoons olive oil
- 1 large onion, diced
- 4 cloves garlic, minced
- 1.5 pounds ground beef
- 2 cans (15 ounces each) tomato sauce
- 1 can (28 ounces) crushed tomatoes
- 2 cans (15 ounces each) kidney beans, drained and rinsed
- 1 can (6 ounces) tomato paste
- 2 tablespoons chili powder
- 1 tablespoon cumin
- 1 teaspoon paprika
- 0.5 teaspoon cayenne pepper
- 1 tablespoon Worcestershire sauce
- 1 teaspoon salt
- 0.5 teaspoon black pepper
- 1 cup low-sodium beef broth
For Assembly
- 2 cups shredded cheddar cheese
- 0.5 cup sour cream
- 0.25 cup fresh jalapeños, sliced (optional)
- 0.25 cup fresh cilantro or green onions, chopped
- 0.5 red onion, finely diced
- Hot sauce (optional, for serving)
Preparation and Cooking Instructions
Preparing the Potatoes for Frying
First, preheat your oven to 425°F and line two large baking sheets with aluminum foil for easy cleanup. Meanwhile, scrub your russet potatoes under cold running water to remove any dirt and debris. Next, pat them dry thoroughly with paper towels, as excess moisture will interfere with achieving that coveted crispy exterior.
Using a sharp knife or a mandoline slicer, cut your potatoes into thin fries approximately one-quarter inch thick. However, consistency is key here, as thinner fries cook faster while thicker ones take longer, resulting in uneven textures. Additionally, try to keep all your fries relatively uniform in thickness for consistent cooking throughout.
Place your cut fries in a large bowl and toss them with the olive oil, sea salt, black pepper, garlic powder, and paprika, ensuring every fry is evenly coated with the seasoning mixture. As a result, you’ll achieve fries that are flavorful throughout rather than just on the surface.
Divide the fries evenly between your two prepared baking sheets, spreading them in a single layer without overcrowding. Meanwhile, avoid stacking them, as this prevents proper air circulation and results in steamed potatoes rather than crispy fries. Next, place both sheets in the preheated oven and bake for 25 to 30 minutes, stirring halfway through to ensure even cooking.
Your fries are done when they’re golden brown on the edges and tender in the center, with a crispy exterior and creamy interior. However, if you prefer extra-crispy fries, extend the baking time by another five minutes. Additionally, watch during the final minutes to prevent excessive browning or burning.
Building Your Chili
While your fries bake, prepare the rich, flavorful chili that will transform simple potatoes into something truly spectacular. First, heat two tablespoons of olive oil in a large, heavy-bottomed pot over medium-high heat until it shimmers gently.
Add your diced onion and cook for five to six minutes until it becomes soft and translucent, stirring occasionally to ensure even cooking. Next, add your minced garlic and cook for an additional minute, being careful not to let it brown, which can create bitter flavors.
Crumble in your ground beef, breaking it apart with a wooden spoon as it cooks, and continue cooking for eight to ten minutes until the meat is completely browned and no pink remains. However, once the meat is cooked through, spoon off any excess fat and discard it, leaving just enough for flavor and moisture.
Layering Flavors and Building Depth
Next, add your chili powder, cumin, paprika, and cayenne pepper to the pot, stirring constantly for about 30 seconds to bloom the spices and release their aromatic oils. As a result, you’ll notice the entire pot becomes fragrant and the spices coat the meat beautifully.
Pour in your tomato sauce, crushed tomatoes, tomato paste, Worcestershire sauce, and beef broth, stirring everything together until well combined. Additionally, add your drained kidney beans, which provide both protein and texture to your chili.
Season the chili with salt and black pepper, stirring to distribute evenly. Meanwhile, bring the mixture to a gentle simmer over medium heat, then reduce the heat to low and let it simmer uncovered for 20 to 25 minutes. Furthermore, this simmering time allows the flavors to meld beautifully and the sauce to thicken slightly as excess liquid evaporates.
Taste your chili and adjust the seasonings according to your preference, adding more salt, pepper, or spices as needed. Additionally, remember that you can always add more heat with cayenne or hot sauce, but you can’t remove it, so start conservatively and build from there.
Assembling Your Chili Cheese Fries
Remove your crispy fries from the oven and transfer them immediately to a large platter or serving dish. Next, carefully pour your hot chili over the fries, distributing it evenly so that every fry gets some of the delicious sauce.
Immediately sprinkle your shredded cheddar cheese generously over the top of the chili and fries, allowing the residual heat to melt the cheese into all the crevices. Meanwhile, the warmth from the chili and fries will melt the cheese beautifully without requiring additional cooking.
If your fries have cooled slightly during assembly, you can return the entire platter to the 375°F oven for two to three minutes to warm everything through and ensure the cheese melts completely. However, if everything is still hot from the oven, you likely won’t need this extra step.
Adding Final Garnishes
Remove your finished chili cheese fries from the oven and let them rest for one minute before adding your delicate garnishes. Next, place dollops of sour cream in strategic locations across the platter, creating cool pockets of creaminess throughout the dish.
Sprinkle your fresh cilantro or green onions across the entire surface for color and fresh flavor. Additionally, scatter diced red onion over the top for crunch and a sharp bite that balances the richness of the cheese and chili.
If you’re using fresh jalapeños, distribute them evenly for those who enjoy the heat, allowing guests who prefer milder flavors to simply eat around them. Furthermore, serve your chili cheese fries immediately while everything is hot, with hot sauce available on the side for guests who want additional spice and depth.
Serving and Storing Tips
Serving Suggestions
Serve these chili cheese fries as the star of your gameday spread, presenting them on a large, impressive platter right in the center of your gathering space. Next, provide small plates and forks, though these fries are equally enjoyable eaten by hand if you don’t mind getting a little messy. Additionally, offer napkins generously, as these are definitely a hands-on eating experience.
For gameday entertaining, consider making multiple batches and serving them in waves throughout the game, ensuring that late arrivals experience warm, freshly prepared fries rather than cold, soggy versions. Meanwhile, this approach also prevents the fries from sitting out too long and losing their desirable crispy texture.
These chili cheese fries pair beautifully with cold beverages, whether that’s beer, lemonade, iced tea, or your favorite soft drink. Furthermore, they work wonderfully as a main course for casual dinners or as a substantial appetizer for more formal entertaining.
For a lighter approach, serve the chili and cheese on the side so guests can customize the amount they want on their fries. Additionally, you can offer the sour cream and toppings separately, allowing everyone to build their perfect plate according to their preferences and appetites.
Storage Tips
These chili cheese fries are best enjoyed immediately after assembly while the fries are still crispy and the cheese is melted. However, if you have leftovers, store the chili and fries separately in airtight containers in the refrigerator for up to three days.
When you’re ready to enjoy the leftovers, reheat the chili in a pot over medium heat until warmed through, and bake the fries on a baking sheet at 375°F for five to seven minutes to restore their crispness. Meanwhile, assemble them fresh at serving time for the best texture and overall experience.
You can prepare the chili completely one day in advance and store it in the refrigerator, which actually allows the flavors to deepen and meld even further. Next, simply reheat it when you’re ready to serve. Additionally, the baked fries are best enjoyed freshly cooked, but you can cut and season your potatoes the night before and store them in the refrigerator until you’re ready to bake them.
For longer-term storage, freeze your cooked chili in freezer-safe containers for up to three months, making it incredibly convenient for future gameday gatherings or weeknight dinners.
Helpful Notes and Tips
Ingredient Substitutions and Variations
If you prefer ground turkey to beef, use the same amount and cooking method, though you may need to add an extra tablespoon of olive oil since turkey is leaner and won’t produce as much fat. Next, the cooking time and flavor profile remain essentially the same with this simple swap.
For a vegetarian version, omit the ground beef and increase your kidney beans to three cans, or add lentils, mushrooms, or crumbled tofu for substance and protein. Additionally, vegetable broth works beautifully in place of beef broth without any other adjustments necessary.
The type of cheese is infinitely customizable based on your preferences and what you have available. Meanwhile, try sharp cheddar for extra flavor, pepper jack for heat, smoked gouda for depth, or a combination of cheeses for complexity. Furthermore, if you need a dairy-free option, use your favorite plant-based cheese alternative with no other changes to the recipe.
You can customize the spices in your chili according to your heat preference and flavor profile. Next, add smoked paprika for depth, garlic powder for savory notes, or a pinch of cocoa powder for subtle richness and complexity. Additionally, swap kidney beans for pinto beans, black beans, or white beans depending on your preference.
The potato preparation is flexible based on your preferences and equipment available. Meanwhile, you can hand-cut fries with a knife, use a mandoline slicer, use the fries blade on a food processor, or even purchase pre-cut frozen fries to save time on busy gameday.
Common Mistakes to Avoid
One frequent error is cutting fries with inconsistent thicknesses, resulting in some pieces that cook too quickly and burn while others remain undercooked. Instead, take time to cut fries as uniformly as possible, using a mandoline slicer if you have one available to ensure consistency.
Additionally, avoid crowding the baking sheets with too many fries at once, which prevents proper air circulation and results in steamed potatoes rather than crispy fries. Instead, use two baking sheets or bake in batches if necessary to ensure each fry has adequate space and heat exposure.
Another common mistake involves not patting the potatoes dry before cutting and seasoning them. As a result, excess moisture creates steam during baking and prevents the desired crispy texture from developing. Instead, use paper towels to dry your potatoes thoroughly before cutting.
Furthermore, don’t skip the step of stirring the fries halfway through baking, which ensures even cooking and prevents bottom fries from burning while top fries remain pale.
Time-Saving Tips
Prepare your chili completely the day before and store it in the refrigerator, which allows flavors to develop and deepen overnight. Next, when gameday arrives, simply reheat the chili and bake your fries fresh, reducing your day-of preparation time to less than 30 minutes.
Additionally, consider using frozen oven-baked fries instead of making them from scratch if you’re short on time. Meanwhile, this simple substitution cuts your active kitchen time significantly without sacrificing overall quality and satisfaction.
You can cut and season your potatoes several hours in advance and store them in the refrigerator until you’re ready to bake them. As a result, your gameday preparation becomes incredibly streamlined and stress-free.
Chef Tips for Success
First, the secret to exceptionally crispy fries lies in using russet potatoes, which have higher starch content than other varieties and produce that desirable fluffy interior and crispy exterior. Additionally, soaking your cut fries in cold water for 30 minutes before baking removes excess starch and creates even crispier results.
Furthermore, tossing your fries midway through baking ensures they brown evenly on all sides, preventing any fries from becoming too dark or remaining pale. This simple step makes a significant difference in the final texture and appearance.
Additionally, for the richest, most flavorful chili, use freshly ground spices rather than those that have been sitting in your pantry for months. Moreover, bloom your spices in oil or fat before adding liquid, which intensifies their flavors and creates a more aromatic, deeply satisfying chili.
Frequently Asked Questions
Can I prepare these chili cheese fries completely ahead and just reheat them for gameday? You can prepare the chili completely ahead and reheat it, but fries are best served fresh from the oven; however, you can bake them 30 minutes before serving and keep them warm in a low oven.
What’s the best way to make these if I’m serving a large crowd? Prepare double or triple batches of chili ahead of time, then bake fries in stages throughout the game and assemble them fresh in waves to ensure everyone gets crispy fries.
Can I use sweet potatoes instead of russet potatoes for these fries? Absolutely! Sweet potato fries work beautifully and add a slightly sweet element that complements the savory chili; they may cook slightly faster, so watch them carefully.
How do I prevent the fries from getting soggy if I’m making these for a party? Keep fries and chili separate until just before serving, and serve in batches throughout the event rather than all at once so everything stays warm and crispy.
Can I make the chili in a slow cooker instead of on the stovetop? Yes, prepare the meat mixture, then add it to a slow cooker with remaining ingredients and cook on low for six to eight hours or on high for three to four hours for delicious hands-off chili.
Final Thoughts
These game day chili cheese fries represent the ultimate expression of comfort food excellence, combining crispy, golden fries with rich, complex chili and melted cheese in a way that satisfies both your hunger and your soul. Next, they prove that indulgent gameday foods don’t need to be complicated or require advanced cooking skills. Furthermore, the combination of homemade components elevates these fries far beyond what you’d get from a drive-through or stadium concession stand.
The next time you’re hosting a gameday gathering, looking for an impressive appetizer, or simply craving genuine comfort food that brings people together, remember that these chili cheese fries deliver everything you need: incredible flavor, impressive presentation, convenient preparation, and the kind of satisfaction that keeps guests coming back for more. Additionally, whether you’re a beginner cook or an experienced kitchen pro, this recipe guides you to delicious success every single time.
So gather your ingredients, fire up your oven, and prepare to become the hero of your next event with a generous platter of these irresistible, crispy, creamy, and genuinely unforgettable chili cheese fries.
Did you love this recipe? If Game Day Chili Cheese Fries has become your new go-to entertaining dish, please save this recipe, pin it to your Pinterest board, and share it with friends and family who would love it! Your support means everything to us and helps us create more delicious recipes that bring people together. Thank you for cooking with us!