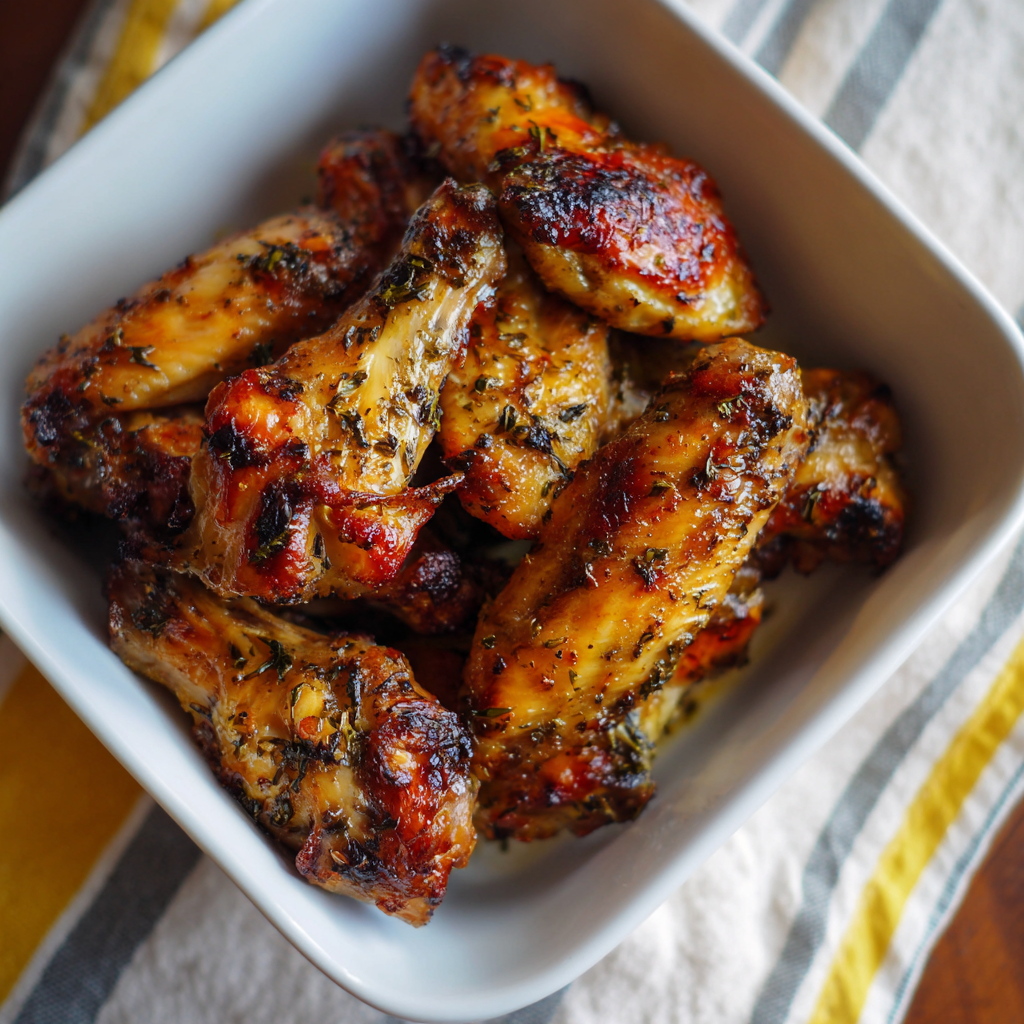
Imagine serving your gameday guests crispy, golden chicken wings with perfectly rendered skin and juicy, tender meat inside, all without the hassle and mess of deep frying in a vat of hot oil. These oven-baked chicken wings deliver that restaurant-quality crispness and flavor that rivals any wing joint, proving that you don’t need a deep fryer to achieve absolutely fantastic results. Next, what makes this recipe truly special is how it combines simple technique with quality ingredients to create something genuinely crave-worthy that keeps people reaching for more throughout the entire game. Additionally, these wings come together with minimal hands-on time and straightforward methodology, making them perfect for gameday entertaining when you want impressive results without kitchen stress or dangerous hot oil. Furthermore, the beauty of this recipe lies in how it delivers incredibly crispy exterior with moist, tender meat inside while remaining accessible to cooks of all skill levels. Whether you’re hosting a Super Bowl party, feeding hungry fans during the big game, or looking for a crowd-pleasing appetizer that absolutely disappears from the platter, these oven-baked chicken wings deliver exactly that kind of magic and satisfaction that makes entertaining memorable and genuinely enjoyable.
Ingredients
Makes: 4-6 servings (about 24-30 wings)
For the Wings
- 3 pounds chicken wings (about 24-30 pieces)
- 2 tablespoons baking powder (aluminum-free)
- 1 teaspoon garlic powder
- 1 teaspoon paprika
- 1 teaspoon smoked paprika
- 0.5 teaspoon cayenne pepper
- 1 teaspoon sea salt
- 0.5 teaspoon black pepper
- 0.5 teaspoon onion powder
- Cooking spray for baking sheets
- 1 tablespoon olive oil (optional, for extra crispness)
For Buffalo Sauce Wings
- 0.5 cup buffalo sauce (Frank’s RedHot or preferred brand)
- 3 tablespoons unsalted butter
- 1 teaspoon hot sauce (optional, for extra heat)
- 1 tablespoon fresh parsley, chopped
For Dry Rub Variation
- 2 tablespoons honey
- 1 tablespoon Dijon mustard
- 2 cloves garlic, minced
- 1 teaspoon fresh thyme
- Sea salt and black pepper to taste
For Serving
- Ranch dressing for dipping
- Blue cheese dressing for dipping
- Celery sticks
- Carrot sticks
- Additional fresh parsley for garnish
- Sea salt flakes
- Fresh lemon wedges
Preparation and Cooking Instructions
Preparing Your Wings
First, preheat your oven to 250°F and line two large baking sheets with aluminum foil for easy cleanup. Meanwhile, pat your chicken wings completely dry using paper towels, as excess moisture will interfere with achieving that coveted crispy exterior.
Next, separate your chicken wings into flats and drums if they’re still attached, creating individual pieces that cook more evenly and crispen better. However, if your wings are already separated, simply pat them dry and proceed. Additionally, ensuring your wings are completely dry is the most important step in achieving maximum crispness.
In a large bowl, combine your baking powder, garlic powder, paprika, smoked paprika, cayenne pepper, sea salt, black pepper, and onion powder, stirring with a fork until evenly mixed. This seasoning blend creates the foundation for incredibly flavorful wings with a crispy, golden exterior.
Coating Your Wings
Place your dried chicken wings in the bowl with your seasoning mixture and toss thoroughly, using your hands or a spoon to ensure every wing is evenly coated with the seasoning blend. As a result, you’ve created perfectly seasoned wings that are ready for baking. Furthermore, complete and even coating is crucial for optimal flavor distribution throughout.
Lightly coat your prepared baking sheets with cooking spray to prevent sticking and ensure crispiness. Next, arrange your coated wings in a single layer on your baking sheets, spacing them apart so they have adequate room for air circulation. However, avoid crowding them together, which prevents proper browning and results in steamed wings rather than crispy ones.
If you’re using the optional tablespoon of olive oil, lightly drizzle it over your wings for additional crispness and to help achieve that golden exterior. Meanwhile, this step is optional but produces notably crispier results.
The Low-Temperature Starting Step
Place your baking sheets in your preheated 250°F oven and bake for 30 minutes. This low-temperature starting step renders the fat and allows the skin to begin crisping without the exterior becoming too dark before the meat cooks through. Additionally, this technique is the secret to achieving perfectly crispy wings with moist, tender meat inside.
Meanwhile, during this 30-minute period, you can prepare your sauce of choice or set up your serving platter with dipping sauces and fresh vegetables.
Increasing Heat for Crispness
After 30 minutes, increase your oven temperature to 425°F and continue baking for an additional 20 to 25 minutes. Next, watch carefully during this higher-temperature phase, as the wings will brown and crisp significantly during this time. Additionally, the higher heat causes the skin to become golden and extremely crispy while finishing the cooking of the meat inside.
Your wings are done when the skin is deep golden brown and crispy, and the meat is cooked through with no pink remaining. However, if your wings are browning too quickly, reduce the heat slightly to 400°F to prevent burning while allowing the interior to finish cooking.
Remove your baked wings from the oven and let them rest on the baking sheets for approximately two minutes. Meanwhile, this brief resting period allows the exterior to set and become maximally crispy.
Tossing with Sauce
If you’re making buffalo wings, combine your buffalo sauce with three tablespoons of unsalted butter in a large bowl over medium heat, stirring until the butter melts completely and everything is well blended. Next, add your optional additional hot sauce if you prefer extra heat.
Transfer your baked wings to the bowl with your buffalo sauce and toss thoroughly, ensuring every wing is well coated with the sauce. As a result, you’ve created delicious buffalo wings with sauce adhering to the crispy exterior. Furthermore, the warmth of the freshly baked wings helps the sauce coat beautifully.
Return your sauced wings to your baking sheets and place them back in the 425°F oven for approximately three to five minutes, allowing the sauce to set slightly and the flavors to meld. Meanwhile, watch carefully to prevent the sauce from burning.
Preparing Your Serving Platter
Remove your finished wings from the oven and transfer them to your serving platter using tongs or a slotted spoon, which helps drain any excess sauce. Next, arrange them attractively on a beautiful serving platter, creating a presentation that invites guests to grab one or two.
Garnish your wings with fresh parsley, sea salt flakes, and a sprinkle of additional paprika if desired. Additionally, position small bowls of ranch dressing and blue cheese dressing nearby for dipping, along with fresh vegetables such as celery and carrot sticks.
Serve immediately while the wings are still warm and the skin remains at peak crispness. Furthermore, these wings are best enjoyed within 30 minutes of leaving the oven, though they remain delicious for up to an hour if necessary.
Serving and Storing Tips
Serving Suggestions
Serve these oven-baked chicken wings as the main attraction during your gameday gathering, positioning them prominently on your entertaining table where guests can easily access them while watching the game. Next, they work beautifully as the centerpiece of a gameday spread alongside other complementary appetizers such as dips, sliders, or loaded potato bites.
Pair them with traditional dipping sauces such as ranch dressing and blue cheese dressing, offering both options so guests can choose their preferred sauce. Additionally, fresh vegetables such as celery and carrots provide a refreshing contrast to the rich, savory wings.
For gameday entertaining, consider preparing multiple batches throughout the event and serving them in waves, ensuring late arrivals experience warm, freshly baked wings rather than cooled, less-appetizing versions. Meanwhile, this approach keeps your guests happy and satisfied throughout the entire game.
These wings work equally well as a casual appetizer for weeknight gatherings, a substantial side dish for dinner, or a main course with additional sides. Furthermore, they’re versatile enough to serve with virtually any accompaniment or sauce combination.
Storage Tips
These oven-baked chicken wings are best enjoyed immediately after baking while the skin remains crispy and the meat is warm. However, if you have leftovers, transfer them to an airtight container and refrigerate for up to three days, though the skin will gradually soften over time.
When you’re ready to enjoy the leftovers, reheat them in a preheated 350°F oven for eight to ten minutes until warmed through and the skin recrisps. Additionally, you can reheat them in a toaster oven for faster results, though a regular oven produces superior crispness restoration.
Avoid microwaving leftover wings, as this method creates soggy skin and uneven heating. Instead, oven reheating preserves texture and allows the skin to crisp up slightly during reheating.
You can prepare your wings completely up to the sauce-tossing step and refrigerate them for up to four hours. Next, when you’re ready to serve, simply toss them with your sauce of choice, place them back in the oven for three to five minutes, and serve warm.
For longer-term storage, freeze your baked wings in a freezer-safe container for up to two months. Meanwhile, thaw them overnight in the refrigerator and reheat gently in a 350°F oven for 10 to 15 minutes until warmed through completely.
You can also freeze cooked wings with sauce already applied, which makes them incredibly convenient for future gameday events or quick meals. Next, thaw and reheat as directed above.
Helpful Notes and Tips
Ingredient Substitutions and Variations
If you can’t find aluminum-free baking powder, use a high-quality aluminum-free brand, as regular baking powder may impart a metallic taste. Next, baking powder is the secret ingredient that creates exceptionally crispy skin without frying, making it essential to the success of this recipe.
For different sauce variations, try honey-Sriracha by combining honey, sriracha sauce, and a touch of butter for sweet heat. Next, lemon pepper by tossing wings with fresh lemon juice, cracked black pepper, and melted butter. Additionally, garlic Parmesan by tossing warm wings with minced garlic, melted butter, and grated Parmesan cheese for a completely different flavor profile.
You can customize your dry rub seasoning according to personal preference and available spices. Meanwhile, try adding dried herbs such as thyme, oregano, or rosemary for Mediterranean flavors. Furthermore, adjust the cayenne pepper for heat level, using less for milder flavors or more for extra spice.
For a completely different approach, skip the seasoning and prepare a honey-mustard glaze by combining honey, Dijon mustard, minced garlic, and melted butter, tossing your baked wings in this mixture at the end. Additionally, this creates a sweet, tangy wing with completely different flavor profile.
The dipping sauce options are infinitely flexible based on preference. Next, try serving with Asian-inspired dipping sauce made from soy sauce, rice vinegar, ginger, and garlic. Additionally, try Korean gochujang sauce for spicy Asian flavors.
Common Mistakes to Avoid
One frequent error is not patting the wings completely dry before seasoning, which creates excess moisture that prevents proper crisping. Instead, use paper towels to dry your wings thoroughly, as this single step makes the biggest difference in achieving maximum crispness.
Additionally, avoid skipping the low-temperature initial baking step, which is crucial for rendering the fat and crisping the skin without burning the exterior. Furthermore, this technique is what sets these wings apart from fried versions and other baking methods.
Another common mistake involves crowding the baking sheets with too many wings at once, which prevents adequate air circulation and results in steamed rather than crispy wings. Instead, use two baking sheets or bake in batches to ensure proper spacing and air circulation.
Do not forget to increase the oven temperature after the initial 30 minutes, which is essential for achieving that final crispy, golden exterior. Furthermore, this two-temperature technique is the secret to perfect wings.
Avoid using regular baking powder that contains aluminum, as this can impart an off-taste. Instead, use high-quality aluminum-free baking powder for the best flavor.
Time-Saving Tips
Pat your wings dry and coat them with seasoning the morning of your gameday gathering, storing them on baking sheets covered with plastic wrap in the refrigerator. Next, when guests arrive, simply pop them in the oven, reducing your active cooking time on the day of the event.
Prepare your sauce completely and store it in the refrigerator for up to two days before your event. Meanwhile, simply reheat it briefly while your wings bake, streamlining your final preparation.
You can bake your wings completely through the initial 250°F step the day before and refrigerate them, then finish with the 425°F step for 20 to 25 minutes just before serving. Additionally, this approach significantly reduces your day-of cooking time while maintaining optimal quality and crispness.
Purchase pre-separated chicken wings from your butcher or grocery store instead of separating them yourself, which saves time on preparation. Meanwhile, this simple shortcut is well worth the minimal extra cost.
Chef Tips for Success
First, the secret to exceptionally crispy wings lies in the combination of baking powder and the two-temperature baking method, which renders fat and crisps skin without deep frying. Additionally, never skip this technique, as it’s what creates the superior texture.
Furthermore, completely drying your wings is absolutely essential for achieving maximum crispness, so take extra time with paper towels before seasoning. Meanwhile, even a small amount of excess moisture will prevent proper browning.
Next, proper spacing on the baking sheets allows adequate air circulation around each wing, which is crucial for even cooking and optimal crispness. Additionally, crowding them together is the most common mistake that results in disappointing results.
For the most impressive presentation, toss your wings with sauce immediately before serving so the coating is fresh and adheres beautifully. Moreover, this timing ensures the best flavor and visual appeal.
Frequently Asked Questions
Can I use chicken drumettes or other chicken pieces instead of wings for this recipe? Absolutely! Drumettes, thighs, and breasts all work beautifully with the same seasoning and cooking method, though larger pieces may require slightly longer baking time.
What’s the best way to reheat leftover wings if I made them the day before? Reheat in a preheated 350°F oven for 8 to 10 minutes until warmed through, which restores crispness far better than microwaving and maintains optimal texture.
Can I prepare these wings completely and freeze them before serving? Yes, bake completely, cool, and freeze in a freezer-safe container for up to two months; thaw overnight and reheat in a 350°F oven for 10 to 15 minutes.
How do I make these wings less spicy for guests who prefer milder flavors? Reduce the cayenne pepper in the dry rub and use mild buffalo sauce if making buffalo wings, or serve hot sauce on the side for customization.
Can I toss these wings with different sauces instead of buffalo sauce? Absolutely! Experiment with honey-sriracha, lemon pepper, garlic Parmesan, or any other sauce combination you prefer for completely different flavor profiles.
Final Thoughts
These game day oven-baked chicken wings represent the perfect balance between crispy exterior and juicy interior, delivering restaurant-quality results without the hassle and mess of deep frying in hot oil. Next, they prove that exceptional gameday food doesn’t require complicated techniques or special equipment, but rather a focus on quality components and proper methodology.
Furthermore, the combination of the baking powder dry rub and the two-temperature baking method creates an absolutely crave-worthy eating experience that keeps guests satisfied throughout the entire game. The next time you’re hosting a gameday gathering and want to serve wings that stand out from typical spreads while remaining simple to execute, remember that these oven-baked wings deliver everything you need: incredible flavor, quick preparation, impressive presentation, and the kind of crowd-pleasing appeal that makes entertaining memorable and genuinely enjoyable.
So gather your ingredients, pat your wings completely dry, and prepare to become the hero of your event with a beautiful platter of these irresistible, crispy, absolutely unforgettable game day oven-baked chicken wings.
Did you love this recipe? If Game Day Oven Baked Chicken Wings has become your new go-to entertaining dish, please save this recipe, pin it to your Pinterest board, and share it with friends and family who would love it! Your support means everything to us and helps us create more delicious recipes that bring people together. Thank you for cooking with us!