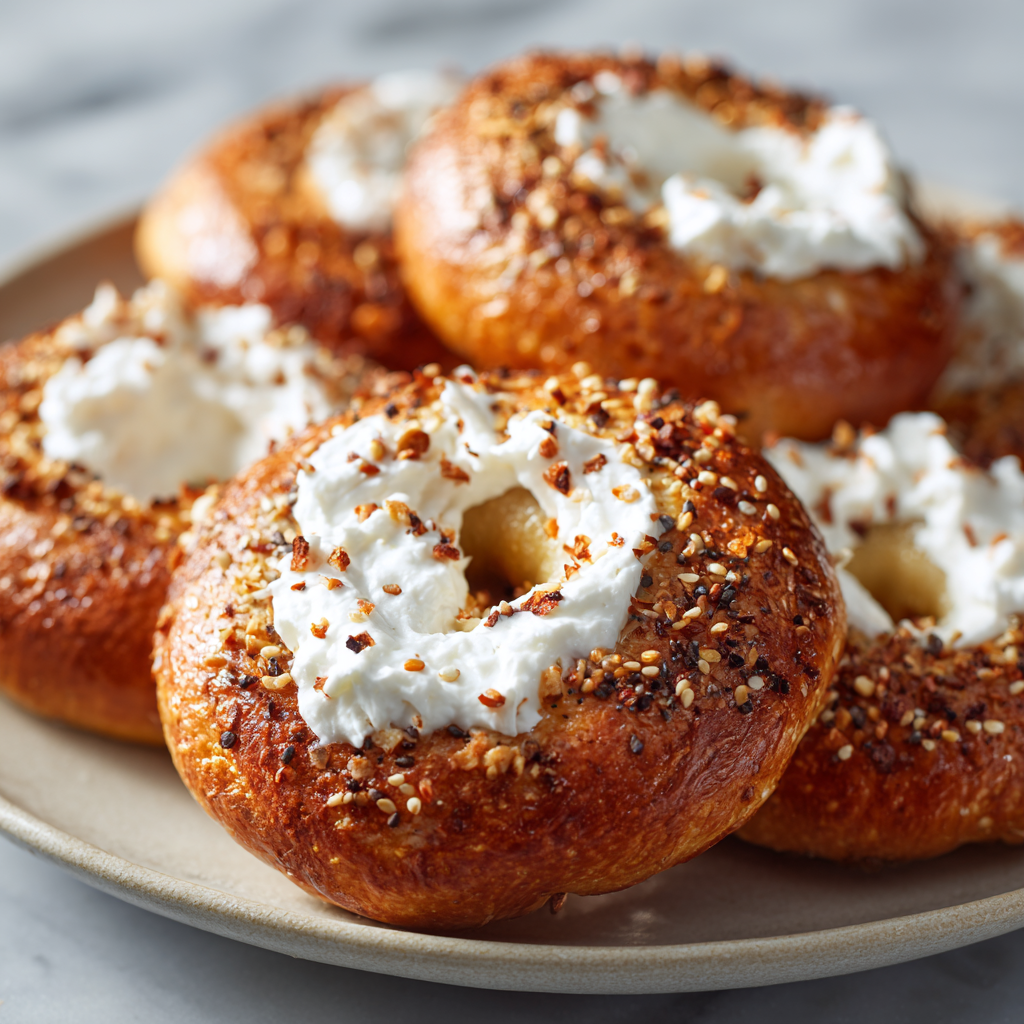
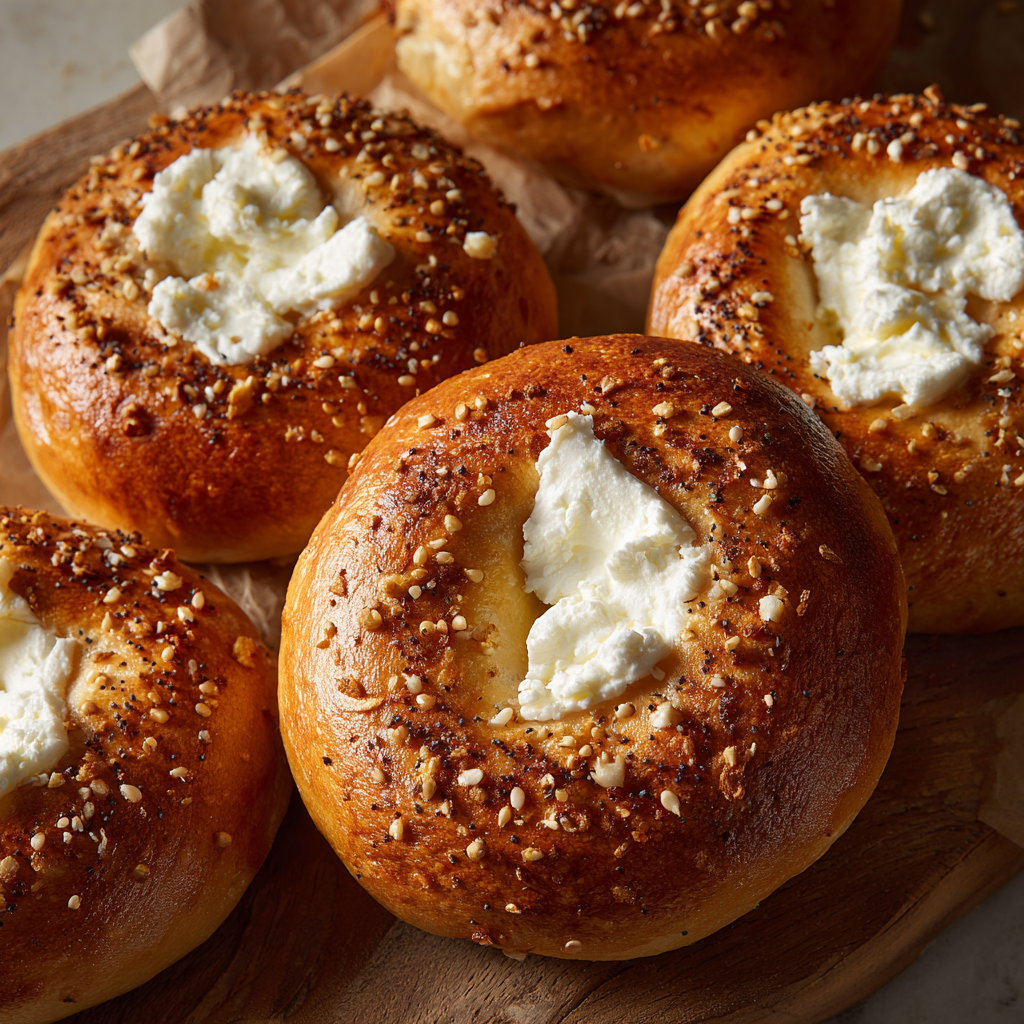
Imagine biting into a warm, chewy bagel with that perfect crispy exterior and pillowy interior, knowing it came straight from your own kitchen—and that it’s loaded with protein from Greek yogurt. These Greek yogurt bagels have revolutionized homemade bagel baking because they require no yeast, no lengthy fermentation, and no special equipment beyond what you already have. This recipe transforms a handful of simple pantry staples into authentic-tasting bagels that rival anything from a professional bagel shop, yet take just over an hour from mixing to enjoying. What makes this recipe truly remarkable is how Greek yogurt eliminates the need for time-intensive proofing while delivering incredible moisture and protein content. Each bagel emerges from the oven with a gorgeous golden exterior and a tender, chewy crumb that practically begs for your favorite toppings. Whether you’re feeding a family, preparing for a weekend brunch, or simply craving fresh bagels without the bakery markup, this recipe accomplishes all three with surprising ease.
Ingredients
Servings: 8 bagels
- 2 cups all-purpose flour
- 1 cup Greek yogurt, plain and unsweetened
- 1 tablespoon granulated sugar
- 1 1/2 teaspoons sea salt
- 1 1/2 teaspoons baking powder
- 1/4 cup water
- 2 tablespoons honey or maple syrup
- 2 tablespoons coarse sea salt (for boiling water)
- Optional toppings: sesame seeds, poppy seeds, everything bagel seasoning, minced garlic, dried onion, or cinnamon sugar
Why Greek Yogurt Creates Perfect Bagels
First, Greek yogurt acts as a moisture provider and structure builder without requiring yeast fermentation. Meanwhile, the tanginess from Greek yogurt adds subtle depth and complexity that elevates these bagels beyond basic flour and water versions. However, the real magic happens because Greek yogurt is already acidic, interacting with baking soda and baking powder to create the light, airy crumb structure you expect in proper bagels. Additionally, the protein content from Greek yogurt contributes to that satisfying chewiness and helps the bagels stay fresh longer than traditional varieties. As a result, you’re creating genuine bagels—not just bagel-shaped bread—with minimal effort and zero yeast waiting time.
Step-by-Step Instructions
1. Gather and prepare your ingredients. To begin, ensure your Greek yogurt is at room temperature, as cold yogurt won’t incorporate smoothly into your dough. Next, measure your flour carefully using the spoon-and-level method rather than scooping directly from the bag, which can compress the flour and throw off your measurements. Having everything prepared before mixing ensures smooth workflow.
2. Combine your dry ingredients in a large bowl. Pour the flour, granulated sugar, sea salt, and baking powder into a large mixing bowl. Whisk these together thoroughly, ensuring the baking powder and salt are evenly distributed throughout the flour. This whisking prevents lumps and ensures your bagels rise evenly during baking.
3. Create a well in your dry ingredients. Using the back of a spoon or your fingertips, create a well in the center of your dry mixture. This well will hold your wet ingredients and makes incorporating them considerably easier. Meanwhile, this technique prevents dry flour from spreading across your counter during mixing.
4. Add your Greek yogurt and water to the well. Pour the room-temperature Greek yogurt into the center well, then add the water. Next, begin stirring with a wooden spoon or sturdy spatula, gradually pulling the dry ingredients from the sides into the wet center. Continue mixing until a shaggy dough forms and no dry flour remains visible.
5. Knead your dough briefly. Transfer your dough to a clean work surface and knead it for about two to three minutes. The dough will initially feel slightly sticky, but it firms up as you work it. However, avoid kneading too long—you’re not developing gluten like you would for traditional yeast bread. Instead, you’re simply bringing everything together into a cohesive mass.
6. Divide the dough into eight equal portions. Flour your work surface lightly, then divide your dough into eight equal pieces. Use a kitchen scale for precise portions if you have one, aiming for about 80 grams per bagel. Alternatively, eyeball the divisions, ensuring they’re roughly the same size for even cooking.
7. Form each portion into a ball. Take one piece of dough and shape it into a tight, smooth ball using your hands. To begin, gently pull the dough surfaces toward the center while rotating it in your palm, creating surface tension. Repeat this process with all eight portions, placing each ball on a floured baking sheet as you finish.
8. Let dough rest briefly. Cover your baking sheet with a clean kitchen towel and allow the dough balls to rest for ten minutes. This brief resting period relaxes the gluten and makes creating the bagel shape considerably easier. Meanwhile, the dough firms up slightly, making it less sticky to handle.
9. Create the bagel hole in each ball. Using your thumb and forefinger, poke a hole through the center of each dough ball. Gently stretch the hole larger, rotating the dough to create an even ring shape. The hole should be about two inches in diameter—remember it will shrink slightly during boiling and baking. In contrast to working with yeast dough, Greek yogurt dough is forgiving and won’t collapse if you handle it gently.
10. Bring water to a boil in a large pot. Fill a large pot about three-quarters full with water, then bring it to a rolling boil. Add the coarse sea salt to the water—this seasoning becomes part of the bagel’s exterior and adds wonderful flavor. Meanwhile, prepare a slotted spoon or small strainer for removing bagels from the water.
11. Boil your bagels in batches. Working in batches of three or four bagels, carefully place them into the boiling water. Next, they’ll sink initially, then float to the surface after about one minute. Once floating, allow them to boil for an additional one to two minutes per side, gently flipping halfway through. Afterward, use your slotted spoon to carefully remove them to a paper towel-lined baking sheet.
12. Prepare your baking sheet and preheat your oven. While your bagels are boiling, preheat your oven to 400 degrees Fahrenheit. Line a baking sheet with parchment paper. Additionally, if you’re using optional toppings, place them in small bowls for easy access.
13. Add optional toppings before baking. As soon as each bagel comes out of the boiling water, place it on your prepared baking sheet. Meanwhile, if you’re adding toppings, do so immediately while the bagels are still wet—this helps them adhere. Use a pastry brush to apply a light wash of water first if your preferred toppings aren’t adhering well.
14. Bake until golden brown. Transfer your toppings-laden bagels to your preheated 400-degree oven and bake for 20-25 minutes. The bagels are done when they’re golden brown on the exterior and sound slightly hollow when tapped on the bottom. First, check doneness at 20 minutes, as oven variations can affect cooking time.
15. Cool before serving. Remove the bagels from the oven and transfer them to a cooling rack. Allow them to cool for at least 10-15 minutes before slicing—this cooling period lets them set properly and makes them easier to slice cleanly. However, they’re still delicious eaten warm, and the slight softness of warm bagels creates a wonderful eating experience.
Serving and Storage Tips
How to Serve Your Greek Yogurt Bagels

First, split your bagels in half and toast them if you prefer a crispier exterior with a soft interior. Next, serve them warm with your favorite spreads—cream cheese, butter, almond butter, or hummus all work beautifully. Additionally, create bagel sandwiches using your favorite deli meats, cheeses, and vegetables for a hearty breakfast. However, plain warm bagels are equally satisfying, especially when still fragrant from the oven. Furthermore, pair them with fresh fruit, hard-boiled eggs, and strong coffee or tea for a complete breakfast experience. As a result, these bagels work equally well as standalone snacks or as the foundation for elaborate breakfast sandwiches.
Proper Storage Methods
To begin, store cooled bagels in an airtight container or paper bag at room temperature for up to two days. Next, they’ll gradually firm up as they age, but remain perfectly delicious for toasting. Additionally, these bagels freeze beautifully for up to one month when wrapped individually in plastic wrap and stored in a freezer-safe container. Furthermore, thaw frozen bagels at room temperature for 30 minutes, then slice and toast before serving for optimal texture. However, if you prefer your bagels completely soft rather than toasted after freezing, wrap them in a damp paper towel and microwave for 20-30 seconds. In contrast to some baked goods, Greek yogurt bagels maintain exceptional texture even after freezing.
Helpful Notes and Tips for Success
Understanding key techniques ensures your Greek yogurt bagels turn out authentic and delicious every single time. First, the yogurt must be at room temperature for proper incorporation. Meanwhile, cold yogurt from the refrigerator won’t mix smoothly into your dough. However, simply letting it sit on your counter for 30 minutes before starting solves this issue.
Next, don’t skip the boiling step, as this is what creates the characteristic bagel texture and chewy exterior. Additionally, the water creates steam that gelatinizes the starch on the bagel’s exterior, resulting in that signature shiny, chewy crust. In contrast to bread dough that rises in the oven, bagels achieve their structure through boiling before baking.
Furthermore, the size of your bagel hole matters for even cooking. To begin, make it large enough that you can easily see through it. Meanwhile, if the hole is too small, the interior won’t cook evenly. However, if it’s too large, your bagel will be more like a bagel-shaped bread. As a result, aim for a hole about two inches in diameter.
Additionally, watch your boiling time carefully. However, don’t obsess over exact seconds—bagels are forgiving. Meanwhile, one to two minutes per side is the ideal range, though a few extra seconds won’t ruin anything.
Finally, room temperature ingredients incorporate more smoothly when creating your dough. To begin, remove your Greek yogurt from the refrigerator 30 minutes before mixing. As a result, your dough will have superior texture and consistency.
Common Mistakes to Avoid
To begin, one frequent error is using flavored Greek yogurt instead of plain. Meanwhile, vanilla or honey-flavored yogurt will impart unwanted sweetness to your bagels. However, plain, unsweetened Greek yogurt is essential for proper flavor.
Additionally, another mistake involves creating bagel holes that are too small, resulting in uneven cooking where the center remains gummy while the exterior is done. In contrast, generously sized holes ensure even heat penetration and consistent texture throughout. Furthermore, some home cooks skip the boiling step entirely, creating bread-like results instead of proper bagels. However, the boiling step is absolutely essential—it’s what makes bagels fundamentally different from bread.
Finally, removing bagels from the boiling water before they float results in dense, gummy interiors. Meanwhile, floating is your signal that they’re cooked through. As a result, patience during the boiling process is crucial for proper results.
Chef Tips
Professional bagel makers recommend using a digital scale for precise flour and yogurt measurements, as this ensures consistent results batch after batch. Additionally, experimenting with different toppings creates endless variety—next time try everything bagel seasoning, fresh herbs, or crushed pretzel pieces for unique flavor combinations.
Frequently Asked Questions
Can I use non-Greek yogurt instead of Greek yogurt? You can use regular yogurt, though you’ll need to use slightly less water—start with 2-3 tablespoons instead of 4 tablespoons and adjust as needed. The texture and protein content won’t be quite the same, but results will still be good.
Do these bagels really require boiling, or can I skip that step? Boiling is absolutely essential for authentic bagel texture. Skipping it results in bread-like texture rather than the characteristic chewy exterior and tender interior bagels should have.
Can I make these bagels ahead of time? Absolutely. You can refrigerate the shaped dough for up to 24 hours before boiling, which actually improves flavor. Boil straight from the refrigerator without thawing.
What toppings work best with these Greek yogurt bagels? Everything bagel seasoning, sesame seeds, poppy seeds, minced garlic, dried onion, and cinnamon sugar all work beautifully. Feel free to experiment with your favorites.
Are these bagels suitable for freezing? Yes, they freeze exceptionally well for up to one month when wrapped individually and stored in freezer-safe containers. Thaw at room temperature before toasting.
Why These Greek Yogurt Bagels Become a Signature Recipe
First, the ability to create fresh, authentic bagels at home in under two hours is genuinely life-changing for bagel enthusiasts. Next, these bagels taste nearly identical to professional bakery versions while costing a fraction of the price. Meanwhile, no yeast means no planning ahead or waiting for fermentation—you decide to make bagels and have them within 90 minutes. Additionally, the Greek yogurt adds meaningful protein content, making these bagels genuinely nourishing rather than just carbs. Furthermore, the recipe is flexible enough for endless topping variations, preventing boredom.
As a result, these Greek yogurt bagels bridge the gap between convenience and quality perfectly. In contrast to store-bought bagels that are often gummy or stale, homemade versions are fresh and flavorful. However, they’re far simpler to make than traditional yeast-based bagels. Additionally, once you master this formula, you’ll find yourself making bagels regularly for weekend breakfasts and quick lunches. Therefore, this recipe deserves a permanent place in your kitchen repertoire.
The Bottom Line
Greek yogurt bagels represent the ideal solution for those seeking authentic, homemade breakfast without the intimidation factor of yeast baking. Next, whether you’re a bagel enthusiast, seeking healthy breakfast options, or wanting to impress family with fresh-baked goods, this recipe delivers professional results every single time. Additionally, the combination of simplicity, speed, and exceptional flavor creates something genuinely memorable and worth repeating frequently.
To begin your Greek yogurt bagel journey, gather your pantry staples this week. Afterward, set aside just 90 minutes on your next weekend morning to create a batch. Furthermore, as you slice into your first warm bagel and taste the chewy exterior and tender interior, you’ll understand why homemade bagels are worth making regularly. The authentic flavor, satisfying texture, and impressive results combine to create something truly special that transforms your breakfast experience.
Did you adore this Greek yogurt bagels recipe? We’d absolutely love to hear about it! Please save this recipe for your next weekend breakfast adventure, pin it to your Pinterest board for easy access, and share it with friends and family who deserve fresh-baked bagels. Your love and support mean everything to us—every save, share, and pin encourages us to create more delicious recipes and helpful baking content. Thank you for being part of our warm, welcoming culinary community!