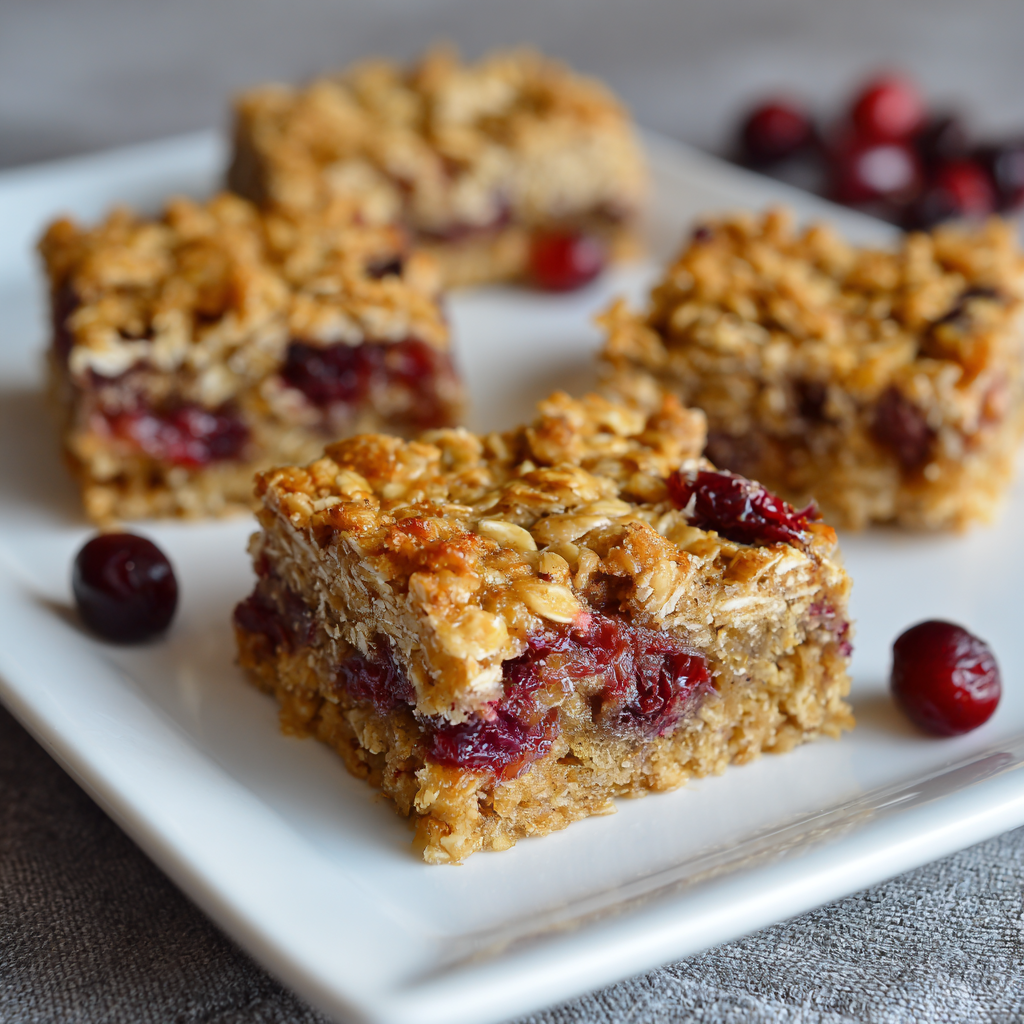
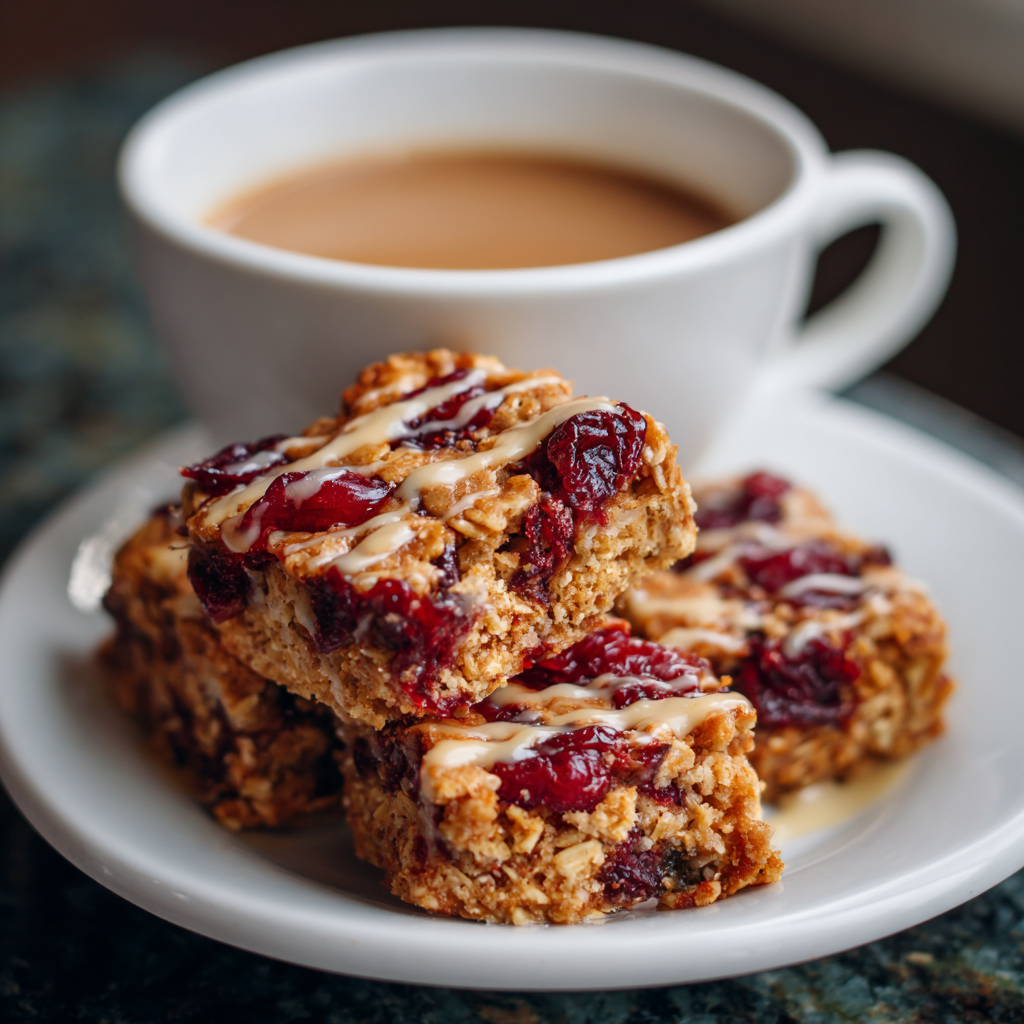
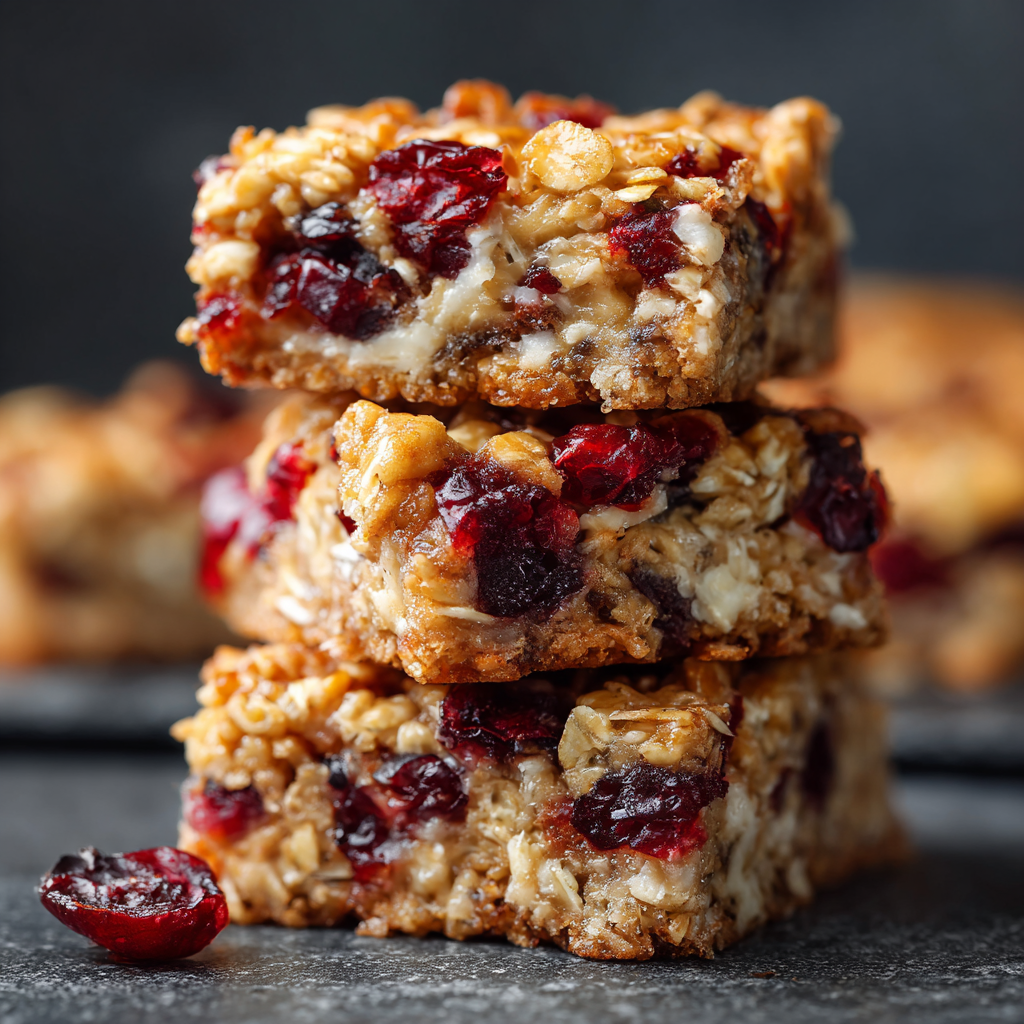
There’s something magical about biting into a homemade bar that’s both nutritious and utterly satisfying. These cranberry oatmeal bars deliver exactly that experience—a perfect balance of wholesome ingredients and indulgent flavor that makes you feel good about treating yourself. Whether you’re packing them into lunch boxes, serving them at brunch, or enjoying a quiet moment with coffee, these bars have a way of brightening your day. The beauty of this recipe lies in its simplicity; you don’t need fancy skills or hard-to-find ingredients. With just a few basic pantry staples and about thirty minutes of your time, you’ll have a batch of golden, chewy bars that taste like you spent hours perfecting them. The tartness of cranberries plays beautifully against the wholesome earthiness of oats, creating a flavor combination that’s both comforting and refreshingly different from typical desserts.
Ingredients
Makes 12-16 bars
- 1 3/4 cups rolled oats (old-fashioned)
- 1 cup all-purpose flour
- 3/4 cup unsalted butter, softened
- 1/2 cup honey or maple syrup
- 1/3 cup brown sugar, packed
- 1/4 cup coconut oil, melted
- 1 teaspoon vanilla extract
- 1/2 teaspoon sea salt
- 1/2 teaspoon baking soda
- 1 teaspoon ground cinnamon
- 1/4 teaspoon nutmeg
- 1 1/2 cups fresh or frozen cranberries
- 1/2 cup chopped walnuts or pecans (optional)
- 2 tablespoons granulated sugar (for topping, optional)
Instructions
- Preheat your oven to 350°F and line an 8×8-inch square baking pan with parchment paper, allowing it to hang over the edges slightly for easy removal later. This step ensures even baking and makes cleanup effortless.
- In a large mixing bowl, combine the softened butter, honey, and brown sugar, then beat them together until the mixture becomes light and fluffy, which should take about two to three minutes. The creaming process is essential because it helps incorporate air into your bars, creating a tender texture.
- Add the vanilla extract to your creamed mixture and stir well until fully incorporated. Next, gently fold in the melted coconut oil until the wet ingredients are combined smoothly.
- In a separate bowl, whisk together the flour, rolled oats, sea salt, baking soda, cinnamon, and nutmeg to create your dry ingredient mixture. Make sure everything is evenly distributed so your flavors are consistent throughout every bite.
- Gradually add the dry ingredients to the wet ingredients, stirring gently with a rubber spatula until just combined. Avoid overmixing, as this can lead to dense, tough bars instead of tender ones.
- Fold the fresh or frozen cranberries into the batter along with the chopped nuts if you’re using them. Additionally, reserve a handful of cranberries to press into the top later for a beautiful presentation.
- Transfer the batter into your prepared baking pan, spreading it evenly with an offset spatula or the back of a spoon. Press down gently to create an even layer that will bake uniformly.
- Scatter the reserved cranberries across the top and press them in lightly so they nestle into the batter. If desired, sprinkle the optional granulated sugar over the top for a subtle sparkle.
- Bake for 22 to 28 minutes, or until the edges turn light golden brown and a toothpick inserted into the center comes out with just a few moist crumbs. The center should still feel slightly soft to the touch when done; the bars will firm up as they cool.
- Allow the bars to cool completely in the pan for at least 45 minutes before cutting. Afterward, use the parchment paper handles to lift the entire block out of the pan and place it on a cutting board.
- Cut into 12 to 16 bars depending on your desired size, wiping your knife with a damp cloth between cuts for clean edges. Serve immediately or store according to your preference.
Why These Bars Are So Special
First, the combination of oats and whole grain flour means you’re getting sustained energy and fiber in every bite. The natural sweetness from honey and maple syrup keeps the sugar content reasonable while maintaining that delicious depth of flavor. Meanwhile, the cranberries provide both nutritional benefits and a gorgeous pop of color that makes these bars visually appealing.
In contrast to store-bought granola bars that often contain mysterious additives, homemade versions put you in complete control of what goes into your body. The cranberry element is particularly important because these tart berries are loaded with antioxidants and natural compounds that support overall wellness. Additionally, oats are known for their heart-healthy properties, making this recipe a guilt-free treat you can enjoy any time of day.
Serving and Storing Tips
How to Serve
These bars are wonderfully versatile in how you can enjoy them. For breakfast, pair them with Greek yogurt and fresh berries for a complete morning meal. Next, consider serving them at afternoon tea with a hot beverage—they’re perfectly portioned for that mid-day energy boost. At brunch gatherings, arrange them on a wooden board with other treats for a casual, inviting display.
Additionally, these bars work beautifully as a lunch box addition for both kids and adults. They’re sturdy enough to travel well and don’t require refrigeration for short periods, making them ideal for picnics and outdoor adventures. Furthermore, you can serve them slightly warmed with a dollop of whipped cream or a drizzle of icing for a more indulgent dessert experience.
Storage Instructions
Store your cooled bars in an airtight container at room temperature for up to five days. However, if you want them to last longer, keep them in the refrigerator where they’ll maintain their freshness for up to two weeks. For freezing, wrap individual bars in plastic wrap and place them in a freezer bag for up to three months.
When you’re ready to enjoy a frozen bar, simply let it thaw at room temperature for about 20 minutes, or warm it gently in the microwave for 15 to 20 seconds. The bars will actually stay fresher longer in the refrigerator compared to the counter because of the butter content, so that’s the optimal storage method if you’re planning to enjoy them throughout the week.
Helpful Notes and Tips for Success
Before you begin mixing, ensure all your ingredients are at the proper temperature, as this makes combining them much easier and creates a more uniform batter. Room temperature butter and eggs incorporate smoothly without creating lumpy mixtures that can lead to uneven baking.
Here’s an important tip about the cranberries: if you’re using frozen ones, don’t thaw them before adding to the batter. Instead, toss them lightly in a tablespoon of flour to prevent them from sinking to the bottom during baking. This simple step helps distribute them evenly throughout your finished bars.
Regarding flour, if you’re interested in making these even healthier, you can substitute up to half the all-purpose flour with whole wheat flour or oat flour. The texture will be slightly denser, but the nutritional profile improves significantly. Conversely, if you prefer a lighter, more delicate crumb, stick with the all-purpose flour as written.
For those with nut allergies, simply omit the walnuts and don’t add anything to replace them—the bars are delicious without the extra crunch. Alternatively, you could substitute the nuts with sunflower seeds or pumpkin seeds for a different flavor and added nutrition.
If your bars seem to be browning too quickly on top but aren’t cooked through in the middle, tent them loosely with aluminum foil for the final few minutes of baking. This prevents the tops from over-browning while allowing the center to continue cooking at the right pace.
Chef Tips
First, the key to perfectly textured bars is not overbaking; they should still have a slight tender crumb in the center when you insert a toothpick. This is because they continue cooking slightly while cooling, so removing them just before they’re completely set results in the ideal texture.
Additionally, if you want to make this recipe extra special, try adding a thin layer of cream cheese frosting on top once the bars are completely cooled. Simply beat together softened cream cheese, butter, powdered sugar, and a touch of vanilla, then spread it evenly over the entire pan before cutting and serving for a more decadent treat.
Frequently Asked Questions
Can I make these bars without nuts? Absolutely—the recipe works perfectly without nuts. Simply omit them from the ingredient list, and you’ll still have delicious, satisfying bars with plenty of texture from the cranberries and oats.
How long will these bars stay fresh? When stored in an airtight container at room temperature, they’ll keep for five days. However, refrigeration extends their shelf life to two weeks, making that your best option for longer storage.
Can I substitute the honey with something else? Yes, you can use maple syrup, agave nectar, or even brown rice syrup in equal amounts as a direct replacement for the honey.
What should I do if my bars turn out too dry? Ensure you’re not overbaking—pull them out when the center still feels slightly soft. Additionally, make sure you’re not packing the dry ingredients too tightly when measuring; spoon them into your measuring cup and level off the top.
Can these bars be frozen? Yes, wrap individual bars in plastic wrap, place them in a freezer bag, and freeze for up to three months. Thaw at room temperature before eating, or enjoy them straight from the freezer for a firmer texture.
Making the Most of Your Baking
Creating these bars at home is genuinely easier than you might think, and the reward is so much greater than store-bought alternatives. Next time you’re in the kitchen, consider setting aside a bit of extra time to make a full batch—they’re perfect for having ready-to-grab treats throughout your week.
The magic of homemade baking lies in knowing exactly what’s in your food and creating something that perfectly matches your taste preferences. Furthermore, these bars make wonderful gifts when packaged nicely in a box or on a simple platter. Whether you’re new to baking or a seasoned home baker, this recipe will deliver impressive, delicious results every single time.
Start with the basic recipe as written, then feel free to experiment with variations once you’ve made it a few times. You might discover that you prefer dried cranberries over fresh, or that adding a splash of orange zest elevates the flavor in ways you didn’t expect. The wonderful thing about baking at home is that you’re never stuck with just one version—you can make it your own.
As you become more comfortable with this recipe, you’ll find that making these bars becomes almost meditative, a simple pleasure that fills your kitchen with warmth and your home with the aroma of cinnamon and wholesome grains. Enjoy every bite, and don’t hesitate to share them with the special people in your life who deserve something made with care and intention.