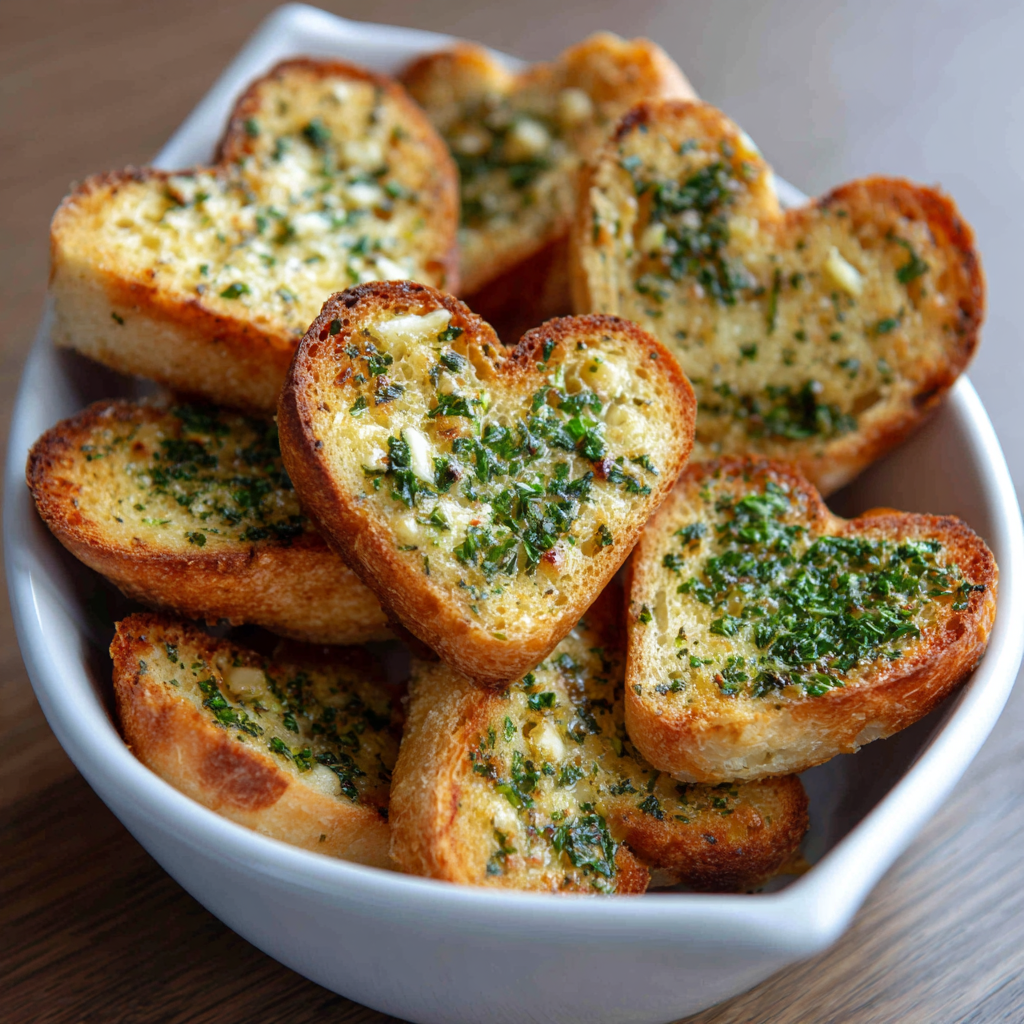
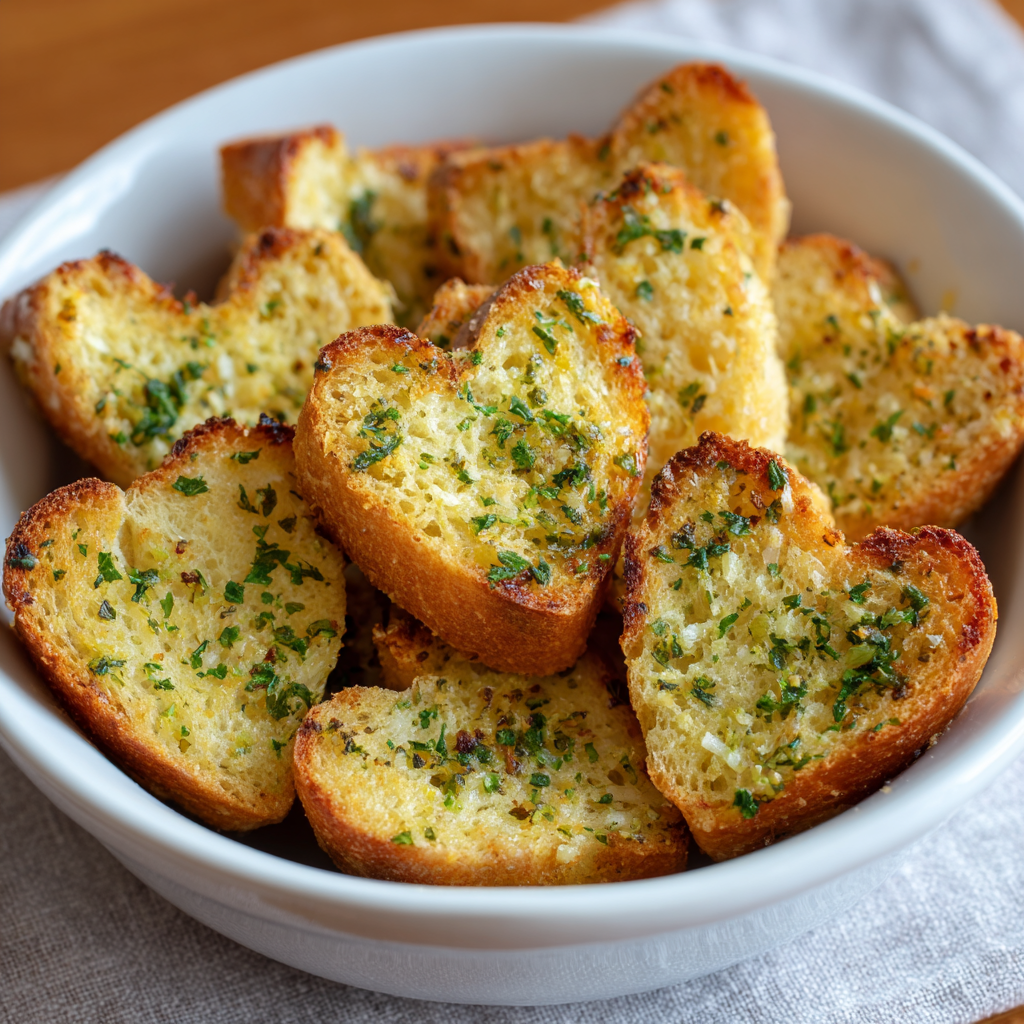
Imagine serving your dinner guests or loved ones warm, golden heart-shaped garlic bread straight from the oven, its surface glistening with herbed butter and fragrant with fresh garlic, creating an appetizer that’s both visually stunning and absolutely delicious. This heart-shaped garlic bread represents the ultimate expression of romance and thoughtfulness at the dinner table, transforming a simple side dish into something genuinely impressive that celebrates the people you’re dining with. Next, what makes this recipe truly special is how it combines the beloved comfort of classic garlic bread with the elegant presentation of heart shapes, creating something that appeals to both traditionalists and those seeking something a little different and genuinely special. Additionally, this garlic bread comes together remarkably quickly with straightforward technique and basic ingredients, making it perfect for Valentine’s Day dinners, anniversaries, date nights, or any occasion when you want to show someone how much they mean to you through thoughtful presentation and delicious flavor. Furthermore, the beauty of this recipe lies in how it delivers restaurant-quality presentation with simple methodology that any home cook can absolutely master. Whether you’re surprising a significant other, delighting your family with something special, or treating yourself to something genuinely exceptional, this heart-shaped garlic bread delivers exactly that kind of romance and indulgence alongside perfectly cooked pasta, soup, or as a standalone appetizer.
Ingredients
Makes: 8-12 heart-shaped pieces
For the Garlic Bread
- 1 loaf of Italian bread, focaccia, or French baguette (approximately 14-16 inches long)
- 6 tablespoons unsalted butter, softened to room temperature
- 6 cloves garlic, minced very finely
- 0.25 cup fresh parsley, finely chopped
- 2 tablespoons fresh basil, finely chopped (or 1 teaspoon dried)
- 1 tablespoon fresh chives, finely chopped (optional)
- 0.25 cup grated Parmesan cheese
- 0.5 teaspoon salt
- 0.25 teaspoon black pepper
- 0.25 teaspoon garlic powder
- 0.125 teaspoon red pepper flakes (optional, for subtle heat)
- 1 tablespoon olive oil
- Zest of 0.5 lemon (optional but recommended)
- Juice of 0.25 lemon (optional)
For Shaping
- Heart-shaped cookie cutter or template
- Parchment paper for baking sheet
- Cooking spray or additional butter for baking sheet
For Serving
- Fresh parsley sprigs for garnish
- Additional Parmesan cheese for sprinkling
- Sea salt flakes
- Fresh lemon wedges
- Red pepper flakes (optional)
Preparation and Cooking Instructions
Preparing Your Garlic Butter
First, remove your softened butter from the refrigerator approximately 15 to 20 minutes before you begin, ensuring it’s soft enough to blend smoothly with other ingredients. Meanwhile, mince your garlic very finely using a sharp knife, being careful to create small, uniform pieces that distribute evenly throughout the butter.
In a small bowl, combine your softened butter, minced garlic, fresh parsley, fresh basil, fresh chives if using, grated Parmesan cheese, salt, black pepper, garlic powder, and red pepper flakes if using. Next, using a wooden spoon or small whisk, mix everything together thoroughly until well combined and smooth.
Add your olive oil, lemon zest, and lemon juice if using, stirring until everything is evenly incorporated. As a result, you’ve created a beautifully fragrant garlic butter mixture that’s bursting with fresh herbs and flavor. Furthermore, this mixture is the heart of your garlic bread, so taking time to combine ingredients thoroughly ensures even flavor distribution.
Taste your garlic butter and adjust seasonings according to your preference, adding more salt, garlic, or herbs as desired. Next, set this finished mixture aside in a small bowl or container, covered loosely so it remains at room temperature for easy spreading.
Preparing Your Bread
Preheat your oven to 375°F and line a large baking sheet with parchment paper for easy cleanup. Meanwhile, select your bread of choice; Italian bread, focaccia, or French baguette all work beautifully and provide sturdy structure for heart-shaped pieces.
Using a sharp serrated knife, carefully slice your bread horizontally into two halves, creating a top and bottom piece. Next, if your bread is particularly thick, you may want to slice it at an angle to create flatter pieces that shape more easily into hearts.
Place your bread halves cut-side up on your work surface. Next, you’ll generously spread your prepared garlic butter mixture across the entire cut surface of both bread halves, using a butter knife or small spatula to create an even, thorough coating. Furthermore, ensure the garlic butter reaches all areas, including the edges, so every piece is evenly flavored.
Shaping Your Garlic Bread Hearts
Using a heart-shaped cookie cutter, carefully press it through your buttered bread halves, cutting out heart shapes. However, if you don’t have a heart-shaped cutter, you can create a cardboard template by drawing a heart shape and carefully cutting around it using a sharp knife.
Work carefully as you cut, ensuring the cutter goes completely through the bread for clean shapes. Meanwhile, if you’re cutting by hand using a template, use a sharp knife and steady pressure, cutting slowly and deliberately for the cleanest edges.
Transfer your heart-shaped pieces to your prepared baking sheet using a spatula, arranging them cut-side up and spacing them slightly apart so heat can circulate evenly around each piece during baking. Furthermore, proper spacing ensures all pieces bake evenly with golden color on the edges.
Baking Your Garlic Bread
Place your baking sheet in your preheated 375°F oven and bake for 12 to 15 minutes until the bread is golden brown and the butter is bubbling around the edges. Meanwhile, watch carefully during the final minutes to prevent the bread from burning, which can happen quickly at this temperature.
Your garlic bread is done when the edges are deep golden brown and the bread is slightly crispy on the exterior while remaining soft inside. However, if your bread is browning too quickly, reduce the oven temperature to 350°F and continue baking for a few additional minutes.
Remove your baking sheet from the oven and let the garlic bread rest on the sheet for approximately two minutes. Meanwhile, this brief resting period allows the garlic butter to set slightly while the bread remains warm and the exterior remains crispy.
Final Presentation
Carefully transfer your heart-shaped garlic bread pieces to a beautiful serving platter or white dish, arranging them in an attractive presentation that immediately tells your guests this meal is special. Next, garnish with fresh parsley sprigs scattered throughout, additional Parmesan cheese sprinkled lightly, and optional sea salt flakes for visual appeal and extra flavor.
Position fresh lemon wedges on the side of your platter for brightness and additional seasoning if desired. Furthermore, serve immediately while the bread is still warm and the exterior remains at peak crispness.
If you’re serving alongside soup or pasta, nestle your heart-shaped garlic bread pieces around the platter edges or arrange them standing slightly upright for an impressive, restaurant-quality presentation that elevates your entire meal.
Serving and Storing Tips
Serving Suggestions
Serve this heart-shaped garlic bread as an elegant appetizer or side dish for Valentine’s Day dinners, anniversary celebrations, date nights, or any special occasion when you want to add romance and thoughtfulness to your table. Next, present each serving with careful attention to presentation, creating a dining experience that feels genuinely luxurious and thoughtful.
Pair with Italian pasta dishes, creamy soups, hearty stews, or serve alongside salads for a complete meal experience. Additionally, heart-shaped garlic bread works beautifully as a standalone appetizer with dipping oils or hummus, offering something special before your main course arrives.
These beautiful bread pieces work equally well for intimate dinners for two, small dinner parties where you want to impress guests, or family gatherings when you want to celebrate together with something thoughtful and special. Furthermore, the impressive presentation makes guests feel genuinely appreciated without requiring hours of preparation.
For a complete entertaining experience, serve alongside fresh salads, Italian wines, and your favorite main courses, allowing the garlic bread to complement rather than overwhelm your menu. Meanwhile, the elegant heart shape adds romance to any dinner table without being overly casual or silly.
Storage Tips
These heart-shaped garlic bread pieces are best enjoyed immediately after baking while the bread is still warm and the exterior remains crispy. However, you can store any leftover pieces in an airtight container at room temperature for up to one day, though the crispness will gradually diminish over time.
When you’re ready to enjoy the leftovers, reheat them in a preheated 350°F oven for five to seven minutes until warmed through and the exterior recrisps. Additionally, you can reheat individual pieces in a toaster oven for faster results, though a regular oven produces superior crispness restoration.
Avoid microwaving leftover garlic bread, as this method creates soggy, unappealing texture instead of the desired crispy exterior. Instead, oven reheating preserves texture and allows the bread to recrisp properly.
You can prepare your garlic butter mixture completely one day in advance and store it in an airtight container in the refrigerator. Next, bring it to room temperature before spreading on bread, which ensures easy application and even coverage.

You can also prepare your bread completely through the spreading stage and refrigerate it for up to four hours before baking. Meanwhile, when you’re ready to serve, simply bake as directed, which allows maximum flexibility in your dinner preparation timing.
For longer-term storage, freeze your baked garlic bread pieces in a freezer-safe container with parchment paper between layers for up to one month. Meanwhile, thaw at room temperature for approximately 15 to 20 minutes and reheat gently in a 350°F oven for eight to ten minutes until warmed through and crispy.
Helpful Notes and Tips
Ingredient Substitutions and Variations
If you don’t have fresh parsley available, use dried parsley using one-third the amount, though fresh herbs provide superior flavor and appearance. Next, basil can be replaced with oregano, thyme, or rosemary for different herb profiles.
For a dairy-free version, replace the butter with dairy-free butter alternative and omit the Parmesan cheese or use a dairy-free Parmesan alternative. Additionally, the garlic bread remains absolutely delicious with these simple substitutions.
You can customize your garlic butter by adding roasted red peppers, sun-dried tomatoes, or fresh anchovies for completely different flavor profiles. Meanwhile, these additions provide exciting variations while maintaining the basic garlic bread structure.
For a spicier version, increase the red pepper flakes or add fresh jalapeños minced finely into your garlic butter mixture. Additionally, a pinch of cayenne pepper adds subtle heat without overpowering the delicate herbs.
The type of bread is flexible based on preference and availability. Next, try focaccia for a more rustic option, sourdough for deeper flavor, or ciabatta for a more structured loaf. Furthermore, any sturdy bread works well for this application.
Common Mistakes to Avoid
One frequent error is using cold butter directly from the refrigerator, which doesn’t blend smoothly with other ingredients and creates lumpy texture. Instead, soften your butter to room temperature for 15 to 20 minutes, which ensures smooth, even mixing.
Additionally, avoid using garlic that’s too coarsely chopped, which results in large chunks that don’t distribute evenly throughout the butter. Furthermore, mincing your garlic very finely ensures it blends smoothly and distributes evenly for consistent flavor in every piece.
Another common mistake involves cutting your bread too thick, which prevents the heart-shaped pieces from cooking evenly and maintaining their shape properly. Instead, slice your bread approximately one-half inch thick, which provides adequate structure while allowing proper cooking and crispness.
Do not skip the resting period after baking, which allows the butter to set and the bread to firm up slightly, creating better structure for serving. Furthermore, this brief pause makes a significant difference in the eating experience.
Avoid baking your garlic bread at too high a temperature, which burns the exterior before the interior cooks through properly. Instead, use moderate heat (375°F) that allows even cooking and proper browning without excessive charring.
Time-Saving Tips
Prepare your garlic butter mixture completely the morning of your special dinner and store it in an airtight container in the refrigerator. Next, spread it on your bread just before baking, which reduces final preparation time significantly.
Purchase pre-sliced bread if available, which eliminates the need to slice your loaf yourself. Meanwhile, this simple shortcut saves preparation time without sacrificing quality or presentation.
Prepare your bread completely through the spreading stage the morning of your event and refrigerate on the baking sheet covered with plastic wrap. Next, when dinner time arrives, simply pop the sheet straight into the preheated oven, reducing your final preparation time to just baking.
Use a food processor to mince your garlic quickly rather than doing it by hand, which saves preparation time significantly. Meanwhile, this simple tool shortcut is well worth the cleanup for the time saved.
Chef Tips for Success
First, the secret to exceptional garlic bread lies in using quality butter and fresh, finely minced garlic that distributes evenly throughout. Additionally, taking time to properly soften butter and mince garlic makes an enormous difference in the final result.
Furthermore, spreading your garlic butter mixture generously and evenly across the entire bread surface ensures every piece receives adequate seasoning and richness. Meanwhile, skimping on the butter mixture results in bland bread that doesn’t meet its potential.
Next, baking at moderate temperature (375°F) allows even cooking that creates golden color without burning the exterior. Additionally, this temperature works well for most home ovens without requiring extensive monitoring.
For the most beautiful presentation, arrange your heart-shaped pieces carefully on the serving platter with attention to visual balance and garnish. Moreover, this attention to detail transforms already impressive bread into something that looks truly restaurant-quality and special.
Frequently Asked Questions
Can I make this heart-shaped garlic bread without fresh herbs? Absolutely! Use dried herbs using approximately one-third the amount of fresh herbs; the bread remains delicious though the flavor profile will be slightly less fresh and aromatic.
What’s the best way to cut clean, perfect heart shapes from bread? Use a sharp heart-shaped cookie cutter and press with steady, firm pressure straight down through the bread, or create a cardboard template and cut carefully with a sharp knife using steady, deliberate motions.
Can I prepare this bread completely ahead and refrigerate it before baking? Yes, prepare through the spreading stage and refrigerate for up to four hours before baking; bake as directed when you’re ready to serve.
How do I prevent my garlic bread from burning while ensuring it’s golden brown? Watch carefully during baking, using a moderate oven temperature (375°F) that allows even cooking without excessive browning; reduce to 350°F if browning too quickly.
Can I freeze heart-shaped garlic bread after baking for later use? Yes, freeze in a freezer-safe container with parchment paper between layers for up to one month; thaw and reheat gently in a 350°F oven until warmed through and crispy.
Final Thoughts
This heart-shaped garlic bread represents the perfect balance between simplicity and elegance, transforming a classic side dish into something genuinely impressive that celebrates love, thoughtfulness, and the joy of sharing something absolutely delicious with people you care about most. Next, it proves that creating something special and memorable doesn’t require complicated techniques or extensive experience, but rather thoughtful presentation and quality ingredients prepared with care.
Furthermore, the combination of aromatic garlic, fresh herbs, golden-brown bread, and distinctive heart shape creates an absolutely inviting appetizer or side dish that makes any occasion feel genuinely special and romantic. The next time you’re planning a special dinner and want to add an extra touch of thoughtfulness and elegance, remember that this heart-shaped garlic bread delivers everything you need: incredible flavor, stunning visual presentation, straightforward preparation, and the kind of romance that makes moments genuinely memorable.
So gather your ingredients, prepare your garlic butter with care, and get ready to create a dining experience that celebrates the special people in your life with this absolutely irresistible, stunningly beautiful, genuinely unforgettable heart-shaped garlic bread.
Did you love this recipe? If Heart Shaped Garlic Bread has become your new special occasion dinner favorite, please save this recipe, pin it to your Pinterest board, and share it with friends and family who would love it! Your support means everything to us and helps us create more delicious recipes that bring people together. Thank you for cooking with us!