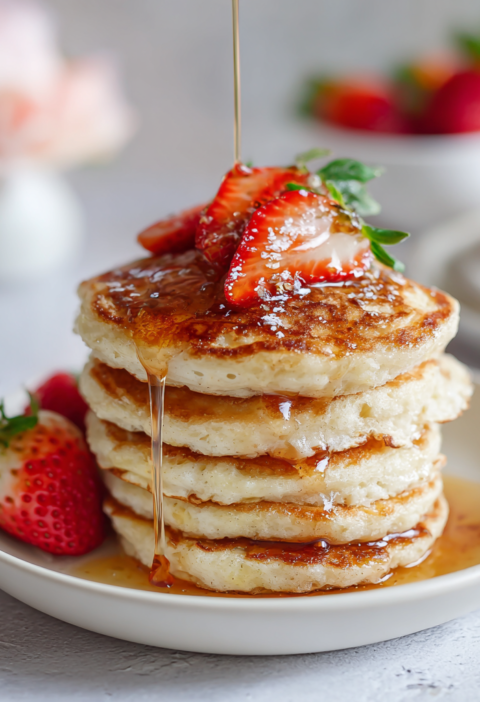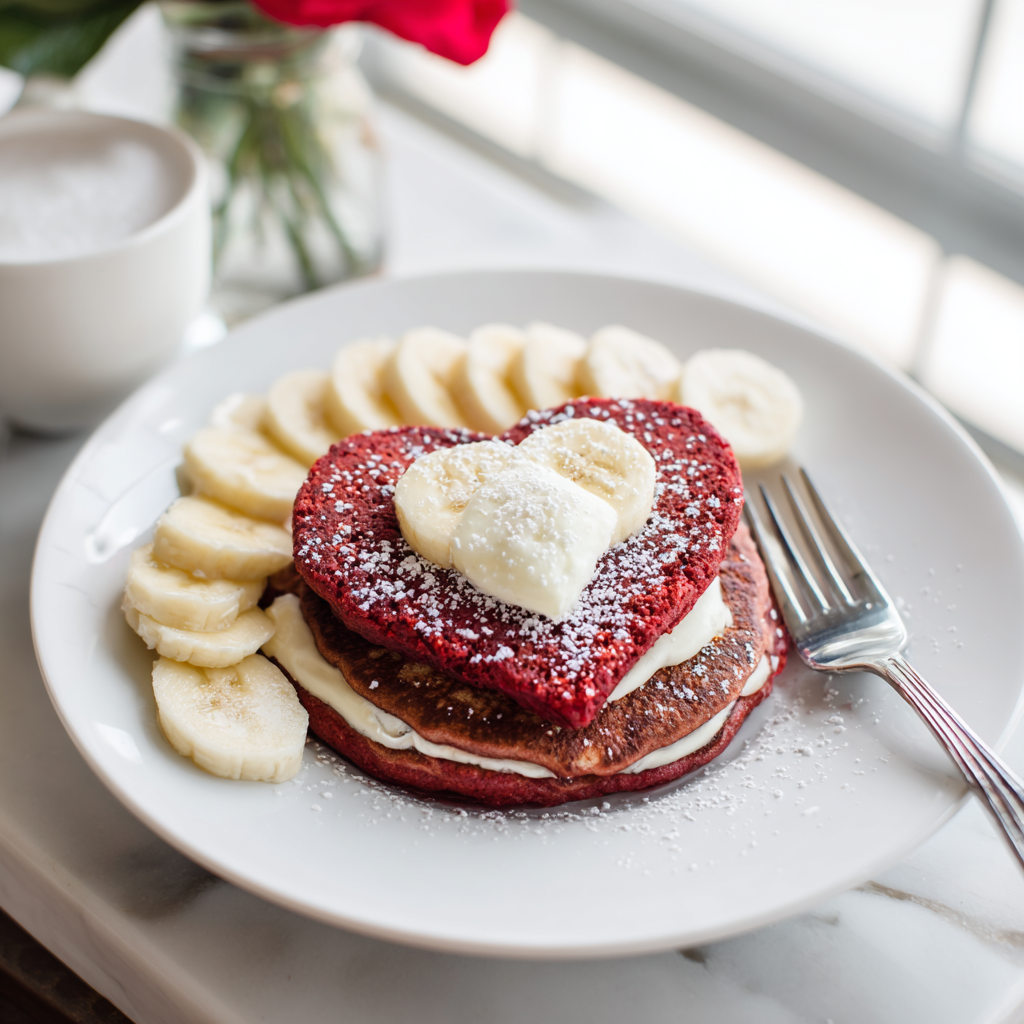
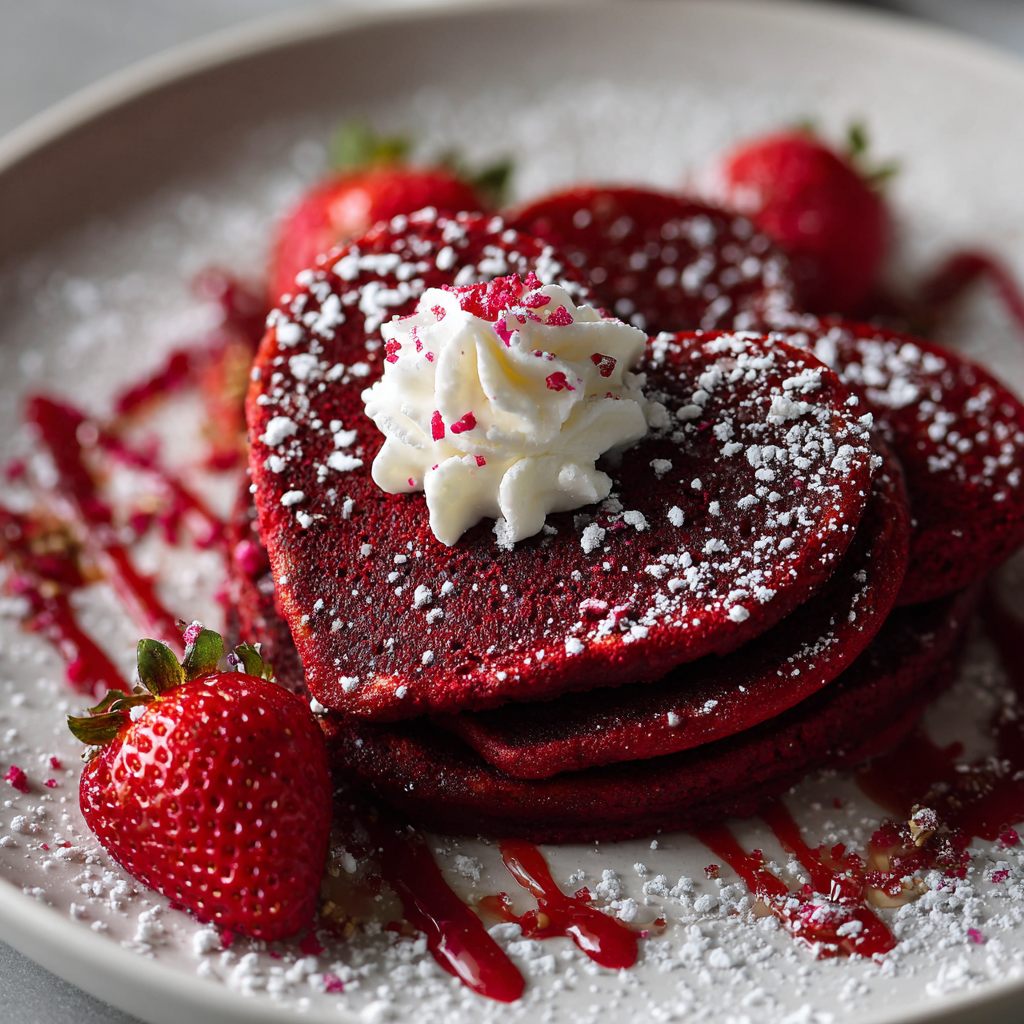
Imagine waking up on a special morning and discovering heart-shaped red velvet pancakes stacked on a plate, their distinctive crimson color absolutely stunning against white cream cheese frosting drizzled delicately across the top, creating a breakfast experience that feels genuinely luxurious and celebratory. These heart-shaped red velvet pancakes represent the ultimate expression of romance and thoughtfulness, transforming a simple breakfast into something genuinely memorable that celebrates the people you love most. Next, what makes this recipe truly special is how it combines the familiar comfort of pancakes with the elegant, slightly tangy sophistication of red velvet cake, creating something that appeals to both traditionalists and those seeking something a little different and special. Additionally, these pancakes come together remarkably quickly with straightforward technique and basic ingredients, making them perfect for celebrating Valentine’s Day, anniversaries, Mother’s Day, or any occasion when you want to show someone how much they mean to you. Furthermore, the beauty of this recipe lies in how it delivers restaurant-quality presentation with simple methodology that any home cook can master. Whether you’re surprising a significant other, delighting your children with something special, or treating yourself to something genuinely exceptional, these heart-shaped red velvet pancakes deliver exactly that kind of love and celebration in every single bite.
Ingredients
Makes: 4-6 servings (about 12-16 pancakes)
For the Red Velvet Pancake Batter
- 2 cups all-purpose flour
- 3 tablespoons unsweetened cocoa powder
- 2 tablespoons sugar
- 2 teaspoons baking powder
- 0.5 teaspoon baking soda
- 0.5 teaspoon salt
- 0.75 teaspoon vanilla extract
- 1.5 cups buttermilk
- 1 cup whole milk
- 2 large eggs
- 2 tablespoons unsalted butter, melted
- 1 to 1.5 teaspoons red food coloring (gel or liquid)
- 0.25 teaspoon lemon juice or white vinegar
- Cooking spray or butter for griddle
For the Cream Cheese Frosting
- 4 ounces cream cheese, softened to room temperature
- 2 tablespoons unsalted butter, softened
- 0.75 cup powdered sugar
- 0.5 teaspoon vanilla extract
- Pinch of salt
- 1 tablespoon whole milk or cream (if needed for consistency)
For Serving
- Fresh strawberries, sliced
- Fresh raspberries
- Whipped cream
- Maple syrup
- Powdered sugar for dusting
- Fresh mint sprigs for garnish
- Chocolate chips (optional)
- White chocolate shavings (optional)
Preparation and Cooking Instructions
Preparing Your Pancake Batter
First, in a large bowl, whisk together your all-purpose flour, unsweetened cocoa powder, sugar, baking powder, baking soda, and salt, stirring until evenly combined and no lumps remain. Next, create a well in the center of your dry ingredients and set the bowl aside temporarily.
In another medium bowl, whisk together your buttermilk, whole milk, eggs, vanilla extract, melted butter, red food coloring, and lemon juice or white vinegar until well combined and smooth. The lemon juice or vinegar reacts with the baking soda to activate the batter while also enhancing the red velvet flavor profile.
Pour your wet ingredients into the well of your dry ingredients and, using a wooden spoon or whisk, gently fold them together until just combined. However, avoid overmixing, as this creates tough, dense pancakes rather than light, fluffy ones. Additionally, some small lumps in the batter are perfectly acceptable and actually desirable for achieving tender pancakes.
Let your pancake batter rest for approximately five minutes. Meanwhile, this resting period allows the flour to fully hydrate and the baking powder to begin working, creating lighter, fluffier pancakes. Furthermore, the batter will continue to thicken slightly as it rests, which is normal and desired.
Creating Your Cream Cheese Frosting
While your batter rests, prepare your cream cheese frosting so it’s ready when you need it. First, place your softened cream cheese and softened butter in a medium bowl and beat together using an electric mixer or vigorously by hand with a wooden spoon until smooth and creamy.
Next, gradually add your powdered sugar, one-quarter cup at a time, beating well after each addition until the frosting is light, fluffy, and well combined. Add your vanilla extract and a pinch of salt, mixing until everything is evenly incorporated.
If your frosting is too thick, add milk or cream one tablespoon at a time until you reach your desired consistency, which should be thick but spreadable. Meanwhile, if it becomes too thin, refrigerate briefly until it firms up slightly. Transfer your finished frosting to a piping bag with a round tip or a squeeze bottle for easy, controlled application.
Heating Your Griddle
Preheat your griddle or large nonstick skillet over medium-high heat until it’s hot but not smoking. Next, test the temperature by flicking a drop of water onto the surface; it should sizzle and evaporate immediately, indicating the griddle is at proper cooking temperature.
Lightly coat your preheated griddle with cooking spray or a small amount of butter, which prevents sticking and ensures your pancakes have a slight golden crust on the exterior while remaining light and fluffy inside. Furthermore, proper heat is crucial for achieving pancakes that are golden brown on the outside and cooked through inside without burning.
Cooking Your Pancakes
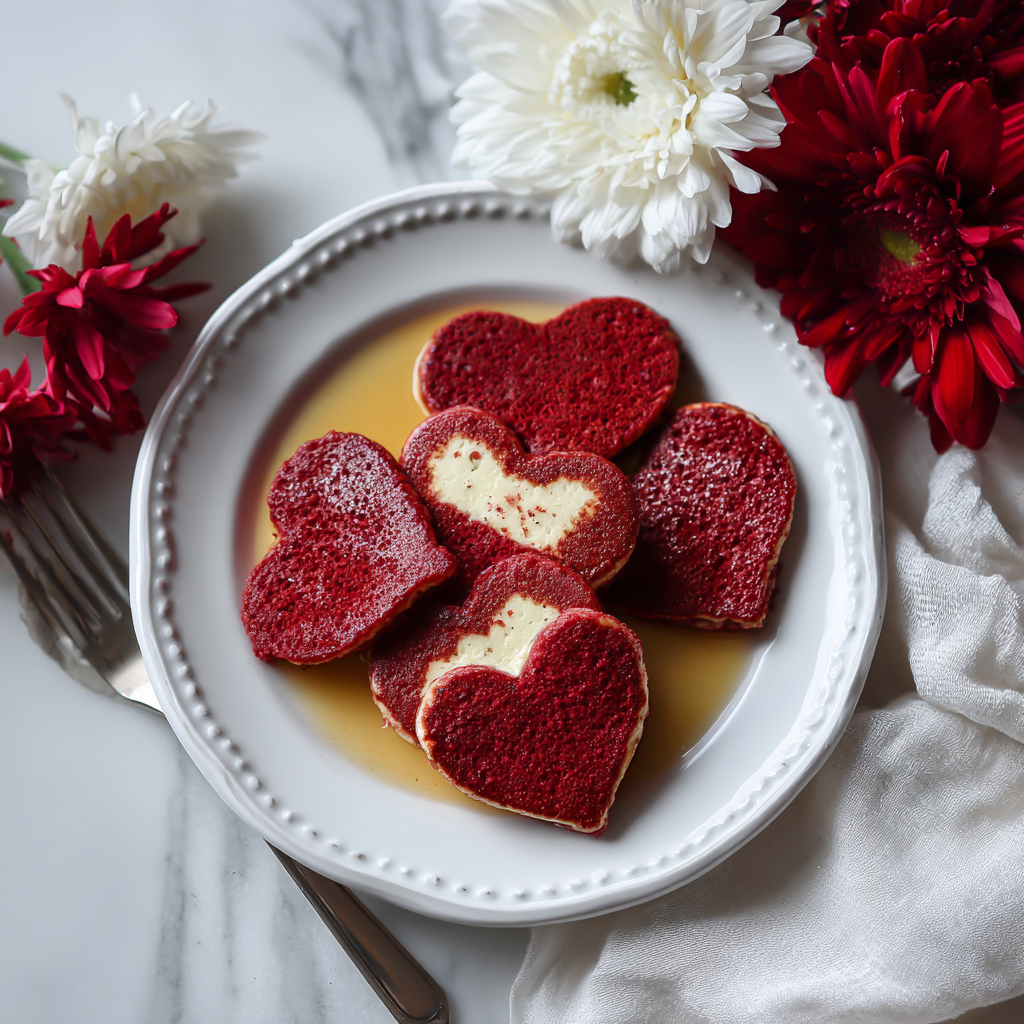
For heart-shaped pancakes, you’ll need a heart-shaped pancake mold or silicone ring. If you don’t have a mold, you can still make these pancakes using a standard round pancake but note they won’t have the distinctive heart shape.
Place your heart-shaped mold on the preheated griddle and lightly coat the interior with cooking spray. Next, carefully pour approximately one-quarter to one-third cup of your red velvet batter into the mold, filling it approximately three-quarters full. Meanwhile, the batter will expand slightly during cooking, so avoid filling it to the very top.
Allow the pancake to cook undisturbed for approximately two to three minutes until the bottom is golden brown and set, and you can see bubbles forming on the surface. However, don’t flip until you see most of the bubbles on the surface pop, which indicates the bottom is properly cooked.
Using a thin spatula and careful handling, gently flip the pancake and the mold together, allowing the pancake to remain in the mold as it cooks on the second side. Cook for an additional one to two minutes until the second side is also golden brown. As a result, you’ve created a perfectly cooked heart-shaped pancake with a slightly crispy exterior and light, fluffy interior.
Remove the mold carefully and transfer your finished pancake to a warm plate. Repeat this process with your remaining batter, wiping your mold with a paper towel between pancakes to prevent sticking and ensure even cooking.
Assembling Your Pancakes
Stack your heart-shaped pancakes on individual plates, creating beautiful presentations that immediately tell guests this breakfast is special. Next, drizzle your cream cheese frosting decoratively over the top of each stack, allowing it to cascade down the sides of the pancakes.
Top with fresh strawberries and raspberries, positioning them artfully for visual appeal. Meanwhile, add a generous dollop of whipped cream to the top of each stack, creating a stunning, Instagram-worthy presentation.
Dust lightly with powdered sugar if desired, and garnish with fresh mint sprigs for color and elegance. Furthermore, optional chocolate chips or white chocolate shavings add additional visual interest and flavor complexity.
Serve immediately while the pancakes are still warm and the cream cheese frosting is soft and creamy. Additionally, provide warm maple syrup on the side so guests can drizzle additional sweetness according to personal preference.
Serving and Storing Tips
Serving Suggestions
Serve these heart-shaped red velvet pancakes for breakfast or brunch on special occasions such as Valentine’s Day, anniversaries, Mother’s Day, or any morning when you want to celebrate the people you love. Next, present them on beautiful plates with careful attention to garnish and presentation, creating a dining experience that feels genuinely luxurious and thoughtful.
Pair them with fresh fruit, whipped cream, and warm maple syrup for a complete, indulgent breakfast experience. Additionally, serve alongside fresh-squeezed orange juice, coffee, or champagne for celebrating in style.
These pancakes work beautifully for intimate breakfast in bed experiences, special family occasions, or brunch gatherings where you want to impress your guests with something genuinely thoughtful and unique. Furthermore, they’re suitable for any celebration that calls for something special and memorable.
For a complete breakfast spread, serve alongside bacon, sausage, or fresh fruit platters, allowing guests to create a well-rounded meal. Meanwhile, the red velvet pancakes can absolutely serve as the star of your breakfast spread.
Storage Tips
These heart-shaped red velvet pancakes are best enjoyed immediately after preparation while they’re still warm and the pancakes maintain their fluffy texture. However, if you need to prepare them in advance, you can stack them on a baking sheet and keep them warm in a low oven at 200°F for up to 30 minutes before serving.
If you have leftover cooked pancakes, transfer them to an airtight container and refrigerate for up to three days. Next, reheat them in a toaster oven at 350°F for five to seven minutes, or warm them individually in a toaster until heated through and slightly crispy on the edges.
You can prepare your pancake batter completely up to one day in advance and store it in an airtight container in the refrigerator. Meanwhile, the batter may be slightly thicker after refrigeration, so add a tablespoon or two of milk if needed before cooking. Furthermore, this advance preparation means you can cook fresh pancakes quickly in the morning.
Your cream cheese frosting can be made completely one day in advance and stored in an airtight container in the refrigerator. Next, bring it to room temperature or soften it slightly before using for easy spreading and piping. Additionally, frosting maintains quality for up to three days when stored properly.
Freeze cooked pancakes in a freezer-safe container with parchment paper between layers for up to two months. Meanwhile, thaw overnight in the refrigerator and reheat gently in a toaster oven at 350°F until warmed through and slightly crispy on the edges. However, freezing is less ideal for these pancakes than serving fresh due to texture changes.
Helpful Notes and Tips
Ingredient Substitutions and Variations
If you don’t have buttermilk, create a substitute by combining one cup regular milk with one tablespoon white vinegar or lemon juice, stirring and letting it sit for five minutes. Next, this creates the acidic component necessary for proper pancake rise and texture.
For a dairy-free version, replace the buttermilk and milk with non-dairy alternatives such as almond milk or oat milk mixed with a tablespoon of lemon juice. Additionally, use dairy-free cream cheese and butter in your frosting for a completely plant-based option.
You can customize the frosting flavor by adding different extracts such as almond or cherry extract, or by adding a touch of cinnamon or nutmeg for warm spice notes. Meanwhile, the cream cheese can be replaced with Greek yogurt for a lighter frosting option that maintains tanginess.
If red food coloring isn’t available or you prefer natural options, use beet juice or red velvet food coloring alternatives for a more natural hue. Furthermore, the color intensity will be slightly different but the flavor remains excellent.
The topping options are infinitely customizable based on preference and availability. Next, try fresh blueberries, blackberries, or diced peaches instead of strawberries. Additionally, whipped cream can be replaced with Greek yogurt, mascarpone cream, or traditional butter for different flavor profiles.
Common Mistakes to Avoid
One frequent error is overmixing the pancake batter, which develops gluten and creates tough, dense pancakes instead of light, fluffy ones. Instead, fold the wet and dry ingredients together gently until just combined, leaving some small lumps in the batter.
Additionally, avoid cooking pancakes at too low a temperature, which results in pale pancakes that don’t cook through properly. Furthermore, too-high heat burns the exterior before the interior cooks. Instead, medium-high heat creates that ideal golden-brown exterior with fluffy interior.
Another common mistake involves flipping the pancakes too early or too many times, which prevents proper browning and cooking. Instead, wait for bubbles to form and pop on the surface before flipping, then flip only once.
Do not skip the resting period for your batter, which is important for proper hydration and texture development. Furthermore, this brief pause makes a significant difference in the final texture and fluffiness of your pancakes.
Avoid removing pancakes from heat too quickly or cooking them insufficiently, which results in raw, gummy centers. Instead, allow adequate time on both sides for complete cooking and proper browning.
Time-Saving Tips
Prepare your pancake batter completely the night before and store it in an airtight container in the refrigerator. Next, in the morning, simply cook the pancakes fresh, reducing your morning preparation time significantly.
Make your cream cheese frosting the day before and refrigerate it, which allows you to focus on cooking pancakes in the morning. Meanwhile, frosting made ahead actually develops deeper, more complex flavor as the ingredients meld together.
Pre-chop and prepare all your fresh fruit toppings the morning of serving and store them in containers in the refrigerator. Additionally, this simple step eliminates the need to prepare anything while cooking, keeping your workflow smooth and focused.
Use a pancake mold with a handle for easier maneuvering on the griddle, which speeds up cooking and makes the process less stressful. Meanwhile, this simple tool investment pays dividends in making the cooking experience more pleasant.
Chef Tips for Success
First, the secret to perfectly fluffy red velvet pancakes lies in not overmixing the batter and allowing it to rest for several minutes before cooking. Additionally, this combination creates light, tender pancakes with excellent texture and rise.
Furthermore, using a combination of buttermilk and regular milk provides the ideal balance of tanginess and richness, which is crucial for authentic red velvet flavor. Meanwhile, the cocoa powder adds subtle chocolate notes without making the pancakes taste strongly of chocolate.
Next, the heart-shaped mold should be placed on the griddle before adding batter, and the batter should be poured carefully to avoid splashing or overflow. Additionally, handling the mold and pancake together during flipping ensures even cooking and proper heart shape maintenance.
For the most beautiful presentation, reserve some of your cream cheese frosting to pipe decoratively over the top of the finished pancakes, creating visual impact that makes every serving feel genuinely special. Moreover, this attention to detail transforms a simple breakfast into something that feels like a celebration.
Frequently Asked Questions
Can I make these pancakes without a heart-shaped mold? Absolutely! Make traditional round pancakes using the same batter, which will be equally delicious even without the distinctive heart shape. The flavor remains excellent regardless of shape.
What’s the best way to keep these pancakes warm while I cook multiple batches? Stack finished pancakes on a baking sheet and keep them warm in a 200°F oven until all pancakes are cooked, then plate and frost just before serving for maximum freshness.
Can I use gel food coloring instead of liquid food coloring? Yes, gel coloring works beautifully and may actually produce more vibrant color; use approximately half the amount of gel coloring compared to liquid coloring.
How do I prevent the pancakes from sticking to the heart-shaped mold? Coat the mold generously with cooking spray before adding batter, and ensure the griddle is hot enough so pancakes release cleanly from the mold without sticking.
Can I make the cream cheese frosting less tangy for those who prefer sweeter flavors? Yes, reduce the cream cheese slightly and increase the butter amount, which mellows the tang while maintaining the creamy frosting texture.
Final Thoughts
These heart-shaped red velvet pancakes represent the perfect marriage of comfort and elegance, transforming breakfast into a special occasion that celebrates love, thoughtfulness, and the joy of sharing something genuinely meaningful with people you care about. Next, they prove that creating something special and memorable doesn’t require complicated techniques or extensive experience, but rather thoughtful presentation and quality ingredients prepared with care.
Furthermore, the combination of subtle red velvet flavor, creamy frosting, and fresh fruit toppings creates an absolutely indulgent yet elegant breakfast experience that makes anyone feel genuinely celebrated and appreciated. The next time you want to show someone how much they mean to you or celebrate a special occasion, remember that these heart-shaped red velvet pancakes deliver everything you need: incredible flavor, stunning visual presentation, straightforward preparation, and the kind of thoughtfulness that makes moments genuinely memorable.
So gather your ingredients, prepare your heart-shaped mold with care, and get ready to create a breakfast experience that celebrates the special people in your life with these absolutely irresistible, stunningly beautiful, genuinely unforgettable heart-shaped red velvet pancakes.
Did you love this recipe? If Heart Shaped Red Velvet Pancakes has become your new special occasion breakfast favorite, please save this recipe, pin it to your Pinterest board, and share it with friends and family who would love it! Your support means everything to us and helps us create more delicious recipes that bring people together. Thank you for cooking with us!