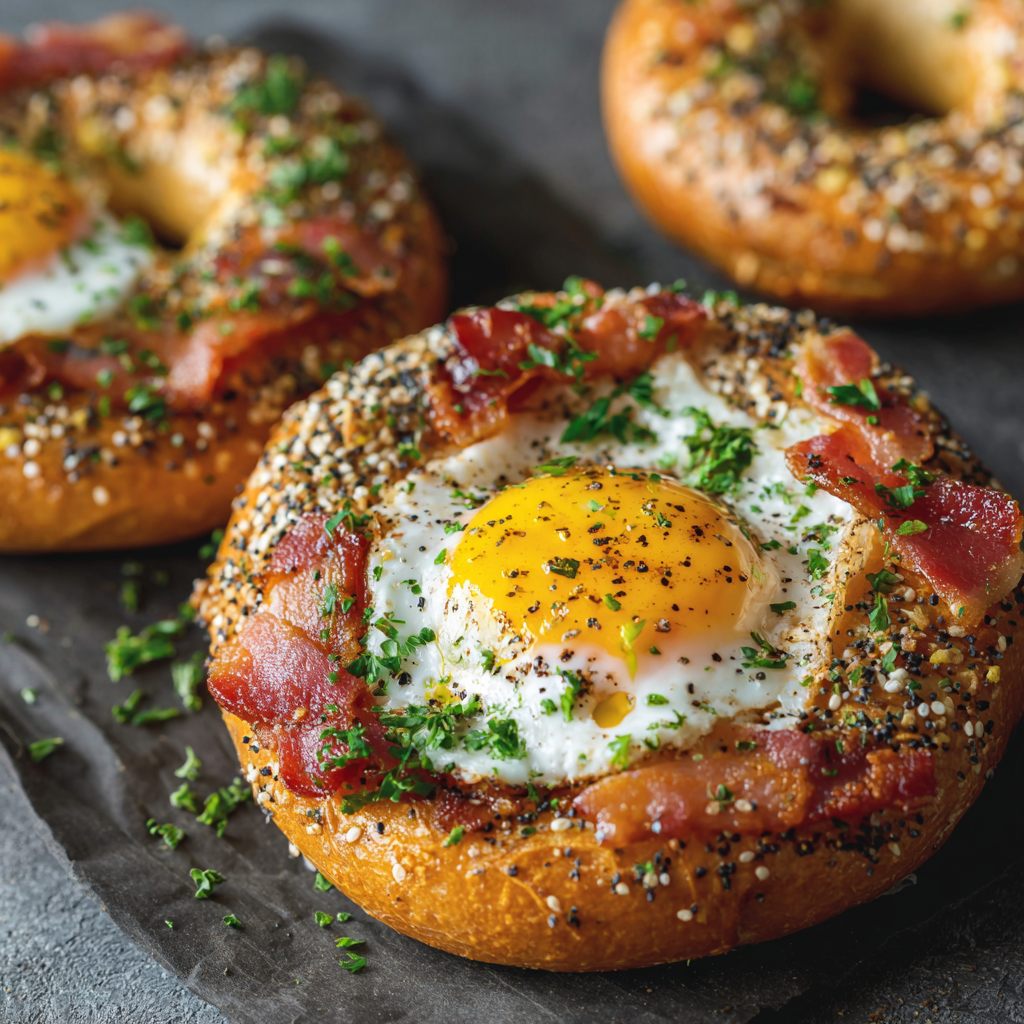
Imagine starting your morning with a delicious, satisfying bagel that keeps you full for hours because it’s packed with genuine protein—not weird powders or artificial additives. These high protein breakfast bagels prove that nutritious food doesn’t have to taste boring or feel like you’re sacrificing pleasure for wellness. This recipe combines whole grains, eggs, Greek yogurt, and cottage cheese to create bagels that contain nearly double the protein of regular varieties while maintaining that perfect chewy texture and satisfying taste. What makes this recipe truly special is how it transforms simple, recognizable ingredients into something that tastes decadent while delivering serious nutritional substance. Each bagel emerges from the oven with a gorgeous golden exterior and a tender, protein-packed interior that keeps hunger at bay until lunch. Whether you’re building muscle, managing energy levels, or simply seeking breakfast that actually satisfies, these high protein bagels accomplish all three with delicious results.
Ingredients
Servings: 8 bagels
- 1 1/2 cups whole wheat flour
- 1/2 cup all-purpose flour
- 3/4 cup Greek yogurt, plain and unsweetened
- 1/2 cup cottage cheese, drained
- 2 large eggs
- 2 tablespoons honey or maple syrup
- 1 tablespoon granulated sugar
- 2 teaspoons sea salt
- 1 1/2 teaspoons baking powder
- 1/4 cup water
- 2 tablespoons coarse sea salt (for boiling water)
- 2 tablespoons ground flaxseed (optional, adds additional protein)
- Optional toppings: sesame seeds, everything bagel seasoning, poppy seeds, hemp seeds, chia seeds, or crushed walnuts
Why These Bagels Deliver Exceptional Protein Content
First, combining Greek yogurt and cottage cheese creates a protein powerhouse that forms the base of these bagels. Meanwhile, eggs add additional protein while contributing to moisture and structure. However, the real secret lies in using whole wheat flour, which contains more protein and nutrients than all-purpose flour alone. Additionally, the combination of multiple protein sources creates complete amino acid profiles that support muscle recovery and sustained energy. As a result, each bagel contains approximately 12-15 grams of protein—nearly triple the amount in regular bagels—without any artificial protein powders or strange additives.
Step-by-Step Instructions
1. Prepare your ingredients for optimal mixing. To begin, ensure your Greek yogurt and cottage cheese are at room temperature, as cold dairy won’t incorporate smoothly into your dough. Next, drain your cottage cheese thoroughly using a fine-mesh strainer, pressing gently to remove excess liquid. Having everything prepared before mixing ensures smooth workflow and consistent results.
2. Measure and combine your dry ingredients. Pour the whole wheat flour, all-purpose flour, granulated sugar, sea salt, and baking powder into a large mixing bowl. Whisk these together thoroughly, ensuring the baking powder and salt are evenly distributed throughout both flour varieties. This whisking prevents lumps and ensures your bagels rise evenly during baking.
3. Create a well in your dry ingredients. Using the back of a spoon, create a well in the center of your flour mixture. This well will hold your wet ingredients and makes incorporating them considerably easier. Meanwhile, this technique prevents dry flour from spreading across your counter during mixing.
4. Combine your wet ingredients in a separate bowl. In another bowl, whisk together the Greek yogurt, cottage cheese, eggs, honey, and water until relatively smooth. Meanwhile, some small cottage cheese curds are perfectly fine—they’ll cook into the bagels invisibly. Additionally, if using ground flaxseed, add it now and stir well.
5. Merge wet and dry ingredients together. Pour your wet ingredient mixture into the center well of your flour. Next, begin stirring with a wooden spoon or sturdy spatula, gradually pulling the dry ingredients from the sides into the wet center. Continue mixing until a shaggy dough forms and no dry flour remains visible throughout.
6. Knead your dough briefly on a work surface. Transfer your dough to a clean, lightly floured work surface and knead it for about two to three minutes. The dough will initially feel slightly sticky and dense, but it firms up as you work it. However, avoid kneading too long—you’re not developing gluten intensively like you would for traditional yeast bread. Instead, you’re simply bringing everything together into a cohesive mass.
7. Divide the dough into eight equal portions. Flour your work surface lightly, then divide your dough into eight equal pieces. Use a kitchen scale for precise portions if you have one, aiming for about 90-95 grams per bagel to account for the added protein ingredients. Alternatively, eyeball the divisions, ensuring they’re roughly the same size for even cooking and consistent protein content per bagel.
8. Form each portion into a smooth, tight ball. Take one piece of dough and shape it into a tight, smooth ball using your hands. To begin, gently pull the dough surfaces toward the center while rotating it in your palm, creating surface tension that helps the bagel hold its shape during boiling. Repeat this process with all eight portions, placing each ball on a floured baking sheet as you finish.
9. Allow dough to rest briefly. Cover your baking sheet with a clean kitchen towel and allow the dough balls to rest for ten minutes. This brief resting period relaxes the gluten and makes creating the bagel shape considerably easier. Meanwhile, the dough firms up slightly, making it less sticky to handle and more responsive to shaping.
10. Create the signature bagel hole in each ball. Using your thumb and forefinger, poke a hole through the center of each dough ball. Gently stretch the hole larger, rotating the dough to create an even ring shape. The hole should be about two inches in diameter—remember it will shrink slightly during boiling and baking. In contrast to working with yeast dough, Greek yogurt-based dough is forgiving and won’t collapse if you handle it gently.
11. Bring water to a boil in a large pot. Fill a large pot about three-quarters full with water, then bring it to a rolling boil. Add the coarse sea salt to the water—this seasoning becomes part of the bagel’s exterior and adds wonderful flavor while enhancing the boiling process. Meanwhile, prepare a slotted spoon or small strainer for removing bagels from the water.
12. Boil your bagels in batches. Working in batches of three or four bagels, carefully place them into the boiling water. Next, they’ll sink initially, then float to the surface after about one minute. Once floating, allow them to boil for an additional one to two minutes per side, gently flipping halfway through. Afterward, use your slotted spoon to carefully remove them to a paper towel-lined baking sheet.
13. Preheat your oven while bagels are boiling. While your bagels are cooking in the water, preheat your oven to 400 degrees Fahrenheit. Line a fresh baking sheet with parchment paper. Additionally, if you’re using optional toppings, place them in small bowls for easy access and application.
14. Add toppings before baking for maximum adherence. As soon as each bagel comes out of the boiling water, place it on your prepared baking sheet. Meanwhile, if you’re adding toppings, do so immediately while the bagels are still wet from boiling—this helps them adhere beautifully. Use a pastry brush to apply a light wash of water if your preferred toppings aren’t adhering well.
15. Bake until golden brown and crispy. Transfer your toppings-laden bagels to your preheated 400-degree oven and bake for 22-27 minutes. The bagels are done when they’re golden brown on the exterior and sound slightly hollow when tapped on the bottom. First, check doneness at 22 minutes, as oven variations can affect cooking time. However, slightly longer baking creates a crispier exterior while maintaining the tender interior.
16. Cool before slicing. Remove the bagels from the oven and transfer them to a cooling rack. Allow them to cool for at least 15 minutes before slicing—this cooling period lets them set properly and makes them considerably easier to slice cleanly. However, they’re still delicious eaten warm, and the slight softness of warm bagels creates a wonderful eating experience.
Serving and Storage Tips
How to Serve Your High Protein Breakfast Bagels

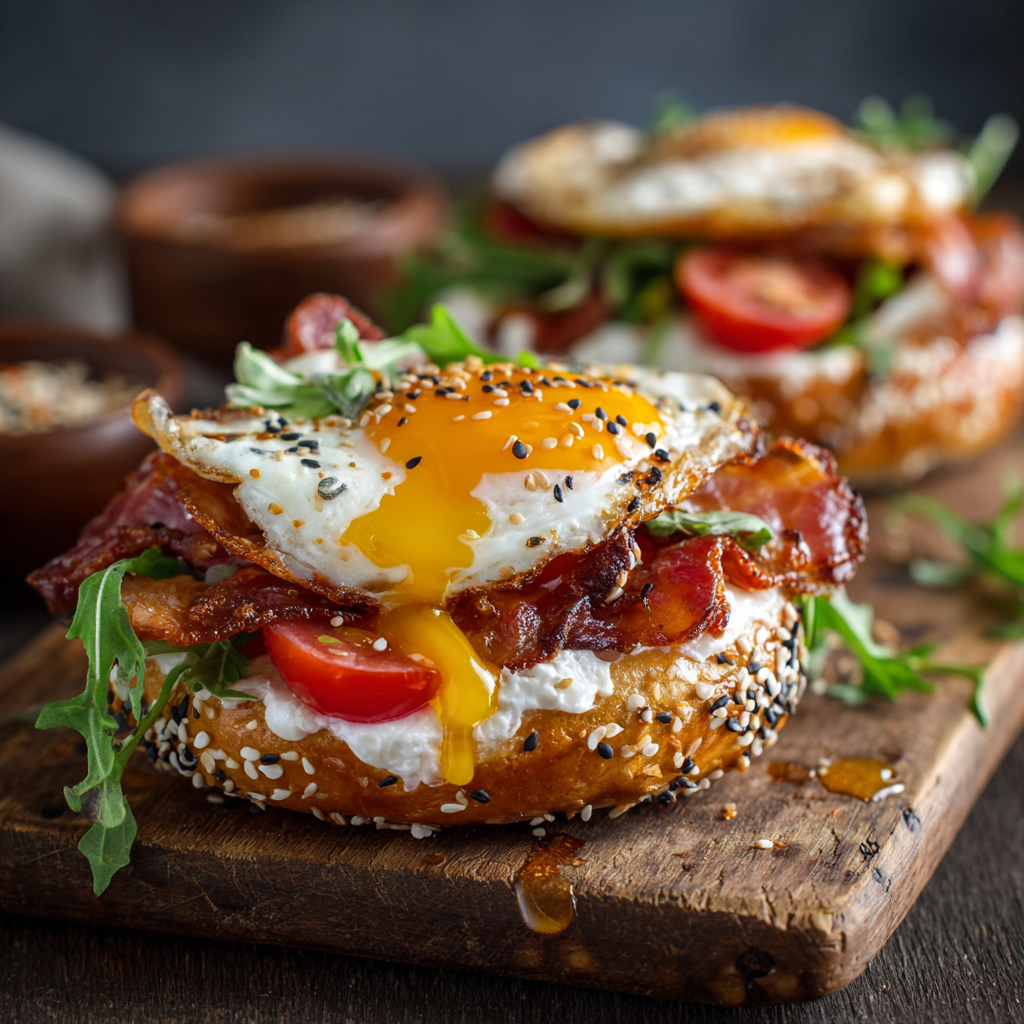
First, split your bagels in half and toast them lightly if you prefer a crispier exterior with a soft interior. Next, serve them with protein-rich toppings like cream cheese mixed with smoked salmon, almond butter, or cottage cheese for maximum nutritional impact. Additionally, create hearty bagel sandwiches using eggs, cheese, avocado, and vegetables for a complete, balanced breakfast. However, plain warm bagels are equally satisfying, especially when still fragrant from the oven. Furthermore, pair them with fresh fruit, yogurt, and strong coffee or tea for a well-rounded breakfast experience. As a result, these bagels work equally well as standalone breakfast items or as the foundation for elaborate breakfast sandwiches packed with additional protein sources.
Proper Storage Methods
To begin, store cooled bagels in an airtight container or paper bag at room temperature for up to three days. Next, they’ll gradually firm up as they age, but remain perfectly delicious for toasting. Additionally, these bagels freeze beautifully for up to six weeks when wrapped individually in plastic wrap and stored in a freezer-safe container. Furthermore, thaw frozen bagels at room temperature for 30-40 minutes, then slice and toast before serving for optimal texture and taste. However, if you prefer your bagels completely soft rather than toasted after freezing, wrap them in a damp paper towel and microwave for 25-35 seconds. In contrast to some baked goods, high protein bagels maintain exceptional texture and nutritional integrity even after freezing for extended periods.
Helpful Notes and Tips for Success
Understanding key techniques ensures your high protein breakfast bagels turn out perfect every single time. First, the Greek yogurt and cottage cheese must be at room temperature for proper incorporation. Meanwhile, cold dairy products from the refrigerator won’t mix smoothly into your dough, potentially resulting in lumpy, uneven texture. However, simply letting them sit on your counter for 30-45 minutes before starting solves this issue completely.
Next, draining your cottage cheese is absolutely essential for proper dough consistency. Additionally, excess moisture from the cottage cheese creates overly wet dough that won’t hold its shape during boiling. However, a simple strainer and gentle pressing removes this excess liquid in minutes.
Furthermore, don’t skip the boiling step under any circumstances, as this is what creates the characteristic bagel texture and chewy exterior. Meanwhile, the water creates steam that gelatinizes the starch on the bagel’s exterior, resulting in that signature shiny, chewy crust. In contrast to bread dough that rises in the oven, bagels achieve their structure and texture through boiling before baking.
Additionally, whole wheat flour absorbs slightly more water than all-purpose flour, which is why this recipe includes specific proportions. However, if your dough seems too wet or sticky, you can add an additional tablespoon of all-purpose flour. Meanwhile, if it seems too dry, add water one tablespoon at a time. As a result, you’re creating the ideal balance of protein-rich whole wheat with lighter all-purpose flour for texture.
Finally, the protein content in these bagels makes them considerably more satisfying than regular bagels. To begin, this means you might eat less than you normally would. Meanwhile, this is actually beneficial for portion control while maintaining complete satisfaction.
Common Mistakes to Avoid
To begin, one frequent error is using cold Greek yogurt and cottage cheese directly from the refrigerator. Meanwhile, cold dairy won’t incorporate smoothly, resulting in lumpy dough and uneven protein distribution. However, room temperature dairy mixes beautifully into your dough.
Additionally, another mistake involves not draining cottage cheese thoroughly enough. In contrast, excess liquid makes your dough too wet and difficult to shape. Furthermore, some home cooks skip the boiling step entirely, creating bread-like results instead of proper bagels with that characteristic chewiness. However, the boiling step is absolutely essential—it’s what fundamentally distinguishes bagels from bread.
Finally, creating bagel holes that are too small results in uneven cooking where the center remains gummy while the exterior is done. Meanwhile, generously sized holes ensure even heat penetration and consistent texture throughout. As a result, don’t be timid when creating your bagel holes.
Chef Tips
Professional bagel makers recommend using a digital scale for precise measurements of all ingredients, especially the protein-rich dairy components, as this ensures consistent protein content and nutritional value batch after batch. Additionally, experimenting with different topping combinations creates endless variety—next time try hemp seeds, chia seeds, crushed walnuts, or everything bagel seasoning for unique flavor and added nutrition profiles.
Frequently Asked Questions
How much protein is actually in each bagel? These bagels contain approximately 12-15 grams of protein per bagel, depending on exact ingredient measurements and toppings used. This is significantly higher than regular bagels, which typically contain only 5-7 grams of protein.
Can I use regular yogurt instead of Greek yogurt? You can use regular yogurt, though you’ll need to use slightly less—start with 1/2 cup instead of 3/4 cup and adjust the water accordingly. However, Greek yogurt provides superior protein content and creates better texture.
Do these bagels really need cottage cheese, or can I omit it? Cottage cheese is essential for maximum protein content and creates superior moisture. However, if you must omit it, increase Greek yogurt to 1 cup and reduce water to 2 tablespoons.
Can I add protein powder to increase the protein content further? You can add 1/4 cup vanilla or unflavored protein powder, though you may need to adjust water slightly to maintain proper dough consistency. Experiment with 2-3 tablespoons of additional water.
How long do these bagels stay fresh? Stored properly in an airtight container, they remain fresh at room temperature for three days, refrigerated for up to five days, and frozen for six weeks when wrapped individually.
Why These High Protein Bagels Become a Breakfast Staple
First, the ability to enjoy delicious bagels while achieving genuine protein goals is genuinely life-changing for fitness enthusiasts and health-conscious eaters. Next, these bagels taste nearly identical to indulgent regular versions while providing triple the protein and sustained energy. Meanwhile, no artificial powders or strange additives means you know exactly what you’re eating. Additionally, the combination of whole wheat and all-purpose flour creates superior nutrition compared to white flour bagels. Furthermore, the recipe is flexible enough for endless topping variations, preventing boredom during your breakfast rotation.
As a result, these high protein bagels bridge the gap between fitness goals and genuine pleasure perfectly. In contrast to protein bars that taste artificial or disappointing, these homemade bagels deliver authentic flavor and satisfaction. However, they’re far simpler to make than yeast-based bagels, requiring no fermentation or overnight planning. Additionally, once you master this formula, you’ll find yourself making bagels regularly for weekend meal prep and quick weekday breakfasts. Therefore, this recipe deserves a permanent place in your healthy eating repertoire.
The Bottom Line
High protein breakfast bagels represent the ideal solution for those seeking nutritious, satisfying breakfast without compromising on taste or texture. Next, whether you’re building muscle, managing weight, or simply wanting breakfast that keeps you full, this recipe delivers professional results every single time. Additionally, the combination of simplicity, impressive nutrition, and exceptional flavor creates something genuinely memorable and worth repeating frequently.
To begin your high protein bagel journey, gather your ingredients this week. Afterward, set aside just 90 minutes on your next weekend morning to create a batch. Furthermore, as you slice into your first warm bagel and taste the chewy exterior, tender interior, and genuine protein content, you’ll understand why these bagels are worth making regularly for your breakfast routine. The authentic flavor, satisfying texture, impressive nutrition, and convenient make-ahead nature combine to create something truly special that transforms your breakfast experience.
Did you adore this high protein breakfast bagels recipe? We’d absolutely love to hear about it! Please save this recipe for your next weekend breakfast adventure, pin it to your Pinterest board for easy access, and share it with friends and family who deserve satisfying, protein-packed breakfasts. Your love and support mean everything to us—every save, share, and pin encourages us to create more delicious recipes and helpful nutritious baking content. Thank you for being part of our health-conscious, delicious culinary community!