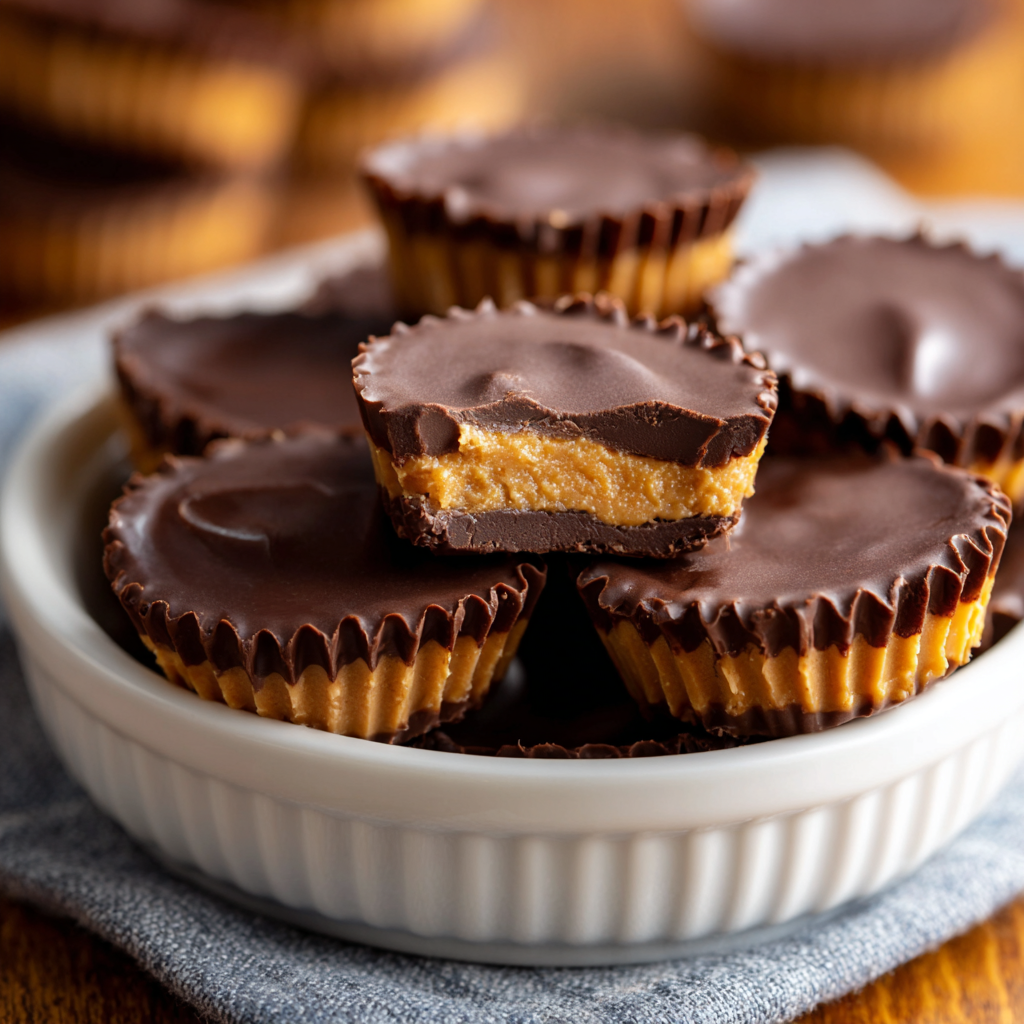
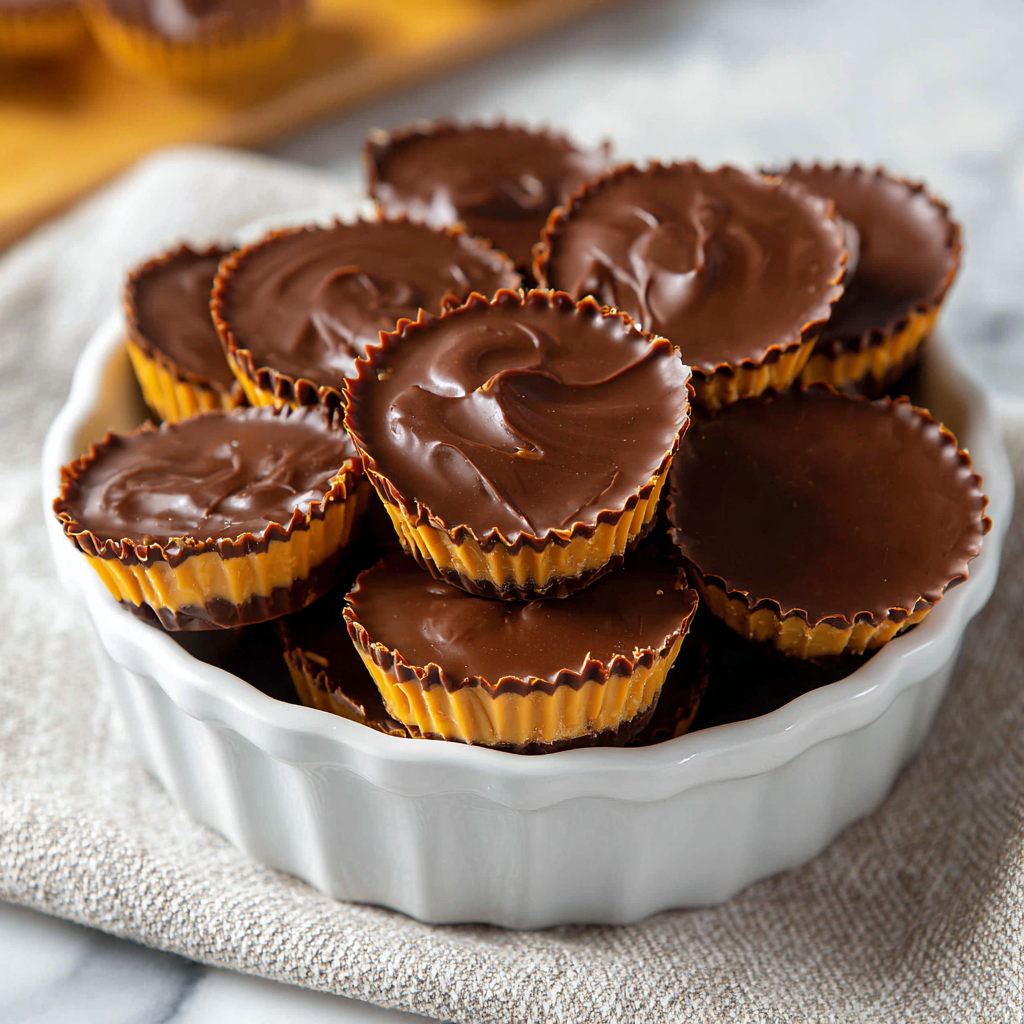
Imagine biting into a homemade peanut butter cup that rivals your favorite store-bought version yet contains zero artificial ingredients, excess sugar, or mystery additives. This homemade peanut butter cups recipe proves that café-quality confections are entirely achievable in your own kitchen with just a handful of quality ingredients and minimal special equipment. What makes this recipe truly special is how it balances rich dark chocolate with creamy, natural peanut butter, creating that perfect combination of flavors that seems so simple yet tastes absolutely addictive. The homemade version costs a fraction of premium store-bought cups while delivering noticeably superior flavor and texture. Each cup features a crispy chocolate shell encasing a smooth peanut butter center that melts luxuriously on your tongue, creating an indulgent experience that feels far more sophisticated than the effort required. Whether you’re seeking gifts that impress, healthier alternatives to processed candy, or simply wanting to satisfy chocolate and peanut butter cravings with something authentic, these homemade peanut butter cups accomplish all three with surprising ease.
Ingredients
Yields: 12 peanut butter cups
- 8 ounces dark chocolate (70% cacao or higher), chopped
- 2 tablespoons coconut oil or cocoa butter
- 1 cup natural peanut butter (creamy or chunky)
- 1/4 cup unsalted butter, softened
- 1/2 cup powdered sugar
- 1 teaspoon vanilla extract
- Pinch of sea salt
- 1/2 teaspoon honey or maple syrup (optional, for smoothness)
- Pinch of fleur de sel or finishing sea salt (optional, for topping)
Why Homemade Peanut Butter Cups Taste Superior
First, quality dark chocolate and natural peanut butter contain real flavor compounds absent from mass-produced versions that rely on fillers and artificial flavoring. Meanwhile, combining butter with peanut butter creates a center that’s smoother and creamier than peanut butter alone. However, the real magic lies in controlling the sweetness level and ingredient quality, creating something that tastes authentic rather than overly processed. Additionally, homemade cups stay fresher longer because they lack preservatives and stabilizers. As a result, each cup delivers genuine chocolate and peanut butter satisfaction without the waxy texture or artificial aftertaste of store-bought alternatives.
Step-by-Step Instructions
1. Prepare your peanut butter cup molds properly. To begin, gather a standard muffin tin or silicone candy mold designed for twelve cups. Next, if using a metal muffin tin, line each cup with paper liners—these prevent sticking and make removal considerably easier. Additionally, ensure your mold is clean and dry. Meanwhile, silicone molds don’t require liners. However, chilling your mold in the freezer for five minutes before starting helps the chocolate set faster and more firmly.
2. Melt your chocolate and coconut oil together. Combine your chopped dark chocolate and coconut oil in a heat-safe bowl. Next, place this bowl over a pot of simmering water—the double boiler method prevents chocolate from overheating and becoming grainy. Alternatively, use short thirty-second microwave bursts, stirring between each burst. Meanwhile, heat until the chocolate is completely melted and smooth. However, avoid overheating—chocolate that’s too hot can separate and become unusable.
3. Prepare your peanut butter center mixture. In a separate bowl, combine your softened butter and natural peanut butter. Next, mix them together thoroughly until well blended. Additionally, add the powdered sugar, vanilla extract, sea salt, and optional honey. Stir everything together until you have a smooth, spreadable mixture resembling thick frosting. Meanwhile, the mixture should hold its shape but remain soft enough to spread easily.
4. Taste and adjust your peanut butter mixture. Sample your filling mixture and adjust sweetness or salt to your preference. Next, if it seems too sweet, reduce powdered sugar slightly in future batches. Meanwhile, if it tastes too bland, add a pinch more salt. Additionally, some people prefer slightly more peanut butter richness over sweetness—adjust the ratio based on your preferences.
5. Add a thin chocolate layer to each cup. Pour your melted chocolate into your prepared mold, adding about one-quarter inch to one-half inch to the bottom of each cup. Next, use a small spoon or brush to ensure the chocolate distributes evenly and covers the entire bottom. Meanwhile, this base layer prevents the filling from leaking out during assembly. Additionally, ensure chocolate reaches the edges and corners.
6. Chill the chocolate base until firm. Place your filled mold in the freezer for about ten minutes, until the chocolate base is firm enough to support the filling without softening. Next, you want it frozen solid but not so long that it becomes brittle. Meanwhile, checking at the five-minute mark helps you determine readiness. However, ten minutes is typically sufficient for proper setting.
7. Add your peanut butter filling carefully. Remove your mold from the freezer. Next, spoon approximately one tablespoon of your peanut butter mixture into each chocolate-lined cup. Using the back of a small spoon or your finger, smooth and level the filling, leaving about one-quarter inch of space at the top for the final chocolate layer. Meanwhile, work quickly so the chocolate base doesn’t warm and soften.
8. Cover with the final chocolate layer. Gently reheat your melted chocolate if it has solidified, then carefully spoon the remaining chocolate over each filled cup. Next, use a small offset spatula or knife to smooth the top, ensuring the filling is completely sealed beneath chocolate. Meanwhile, ensure the top layer is evenly distributed and reaches the edges of each cup. Additionally, try to create level, smooth tops for a professional appearance.
9. Smooth the tops for a polished finish. Using a warm knife or offset spatula, gently smooth the chocolate tops, creating an even surface. Next, if you have fleur de sel or finishing salt available, sprinkle a tiny pinch on top of each cup before the chocolate completely sets. Meanwhile, salt enhances chocolate and peanut butter flavors beautifully. However, this topping is entirely optional.
10. Chill until completely set. Place your mold back in the freezer for at least 30 minutes, preferably one hour. Next, extended freezing ensures the peanut butter butter cups are completely solid and set. Meanwhile, you’ll know they’re ready when they release easily from molds without cracking. Additionally, cold temperatures help prevent fingerprints and damage.
11. Remove from molds with care. Remove your mold from the freezer and allow it to sit at room temperature for about two to three minutes. Next, this brief warming makes the cups release more easily without cracking. Afterward, gently flex the silicone mold or carefully tap the metal tin to loosen the cups. Meanwhile, pop each cup out gently, handling them carefully to avoid fingerprints or dents in the chocolate.
12. Store properly until serving. Place your finished peanut butter cups in an airtight container, separating layers with parchment paper to prevent sticking. Next, store them in the refrigerator for optimal quality and texture. Meanwhile, they maintain perfect texture and flavor when kept chilled. However, they can also be stored at room temperature if your kitchen stays cool, though they may soften slightly.
Serving and Storage Tips
How to Serve Your Homemade Peanut Butter Cups
First, serve your peanut butter cups chilled directly from the refrigerator, allowing the chocolate shell to snap delicately and the peanut butter center to have a firm yet creamy texture. Next, enjoy them as dessert after dinner or as a special treat with coffee or hot tea. Additionally, package them beautifully in decorative boxes or cellophane bags tied with ribbon for impressive gifts. However, they’re equally satisfying eaten casually straight from your storage container. Furthermore, these cups pair beautifully with cold milk, creating a luxurious treat that feels indulgent yet homemade. As a result, these cups work equally well for personal enjoyment and impressive gift-giving.
Proper Storage and Shelf Life
To begin, store your peanut butter cups in an airtight container in the refrigerator for up to three weeks. Next, they maintain perfect texture and flavor when kept chilled at all times. Additionally, these cups freeze beautifully for up to three months when stored in a freezer-safe container with parchment paper between layers. Furthermore, thaw frozen cups in the refrigerator for 30 minutes before serving, maintaining that perfect firm-yet-creamy texture. However, you can also enjoy them straight from the freezer for a harder, crunchier bite. In contrast to store-bought cups that soften at room temperature, homemade versions maintain better texture through refrigeration.
Helpful Notes and Tips for Success
Understanding key techniques ensures your homemade peanut butter cups turn out absolutely professional every single time. First, the quality of your chocolate matters significantly for flavor and texture. Meanwhile, look for chocolate specifically labeled as containing minimal additives and no added oils. However, using chocolate chips instead of bars works, though results may be slightly grainier due to stabilizers in chips.
Next, natural peanut butter is essential for authentic flavor and proper texture. Additionally, avoid heavily processed peanut butter filled with sugar and hydrogenated oils. Meanwhile, natural peanut butter may have oil separation on top—simply stir it back in before using. However, if your natural peanut butter seems too oily, drain off excess oil before measuring.
Furthermore, the coconut oil helps chocolate achieve a smooth, glossy finish that sets properly without becoming too hard. To begin, this ingredient is particularly important if your chocolate seems thick or grainy. Meanwhile, without it, chocolate can become brittle or develop a chalky texture. However, if you cannot use coconut oil, cocoa butter works as an alternative.
Additionally, the butter in the peanut butter mixture creates smoothness and prevents it from becoming too dense or crumbly. To begin, softened butter incorporates more smoothly than cold butter. Meanwhile, removing it from the refrigerator 30 minutes before starting ensures proper incorporation. However, if you’ve used cold butter, simply mix more vigorously until smooth.
Finally, working quickly when assembling your cups prevents the chocolate base from softening and losing its crisp texture. To begin, organize all your ingredients and tools beforehand. Meanwhile, having everything within reach prevents scrambling mid-process. As a result, preparation and organization translate directly into better results.
Common Mistakes to Avoid
To begin, one frequent error is overheating chocolate, which causes it to become grainy, separated, or thick. Meanwhile, slow, gentle heat applied via double boiler or short microwave bursts prevents this issue. However, if you do accidentally overheat chocolate, a small amount of additional coconut oil stirred in might help salvage it.
Additionally, another mistake involves creating a peanut butter filling that’s too soft or oily, making assembly difficult. In contrast, mixing in adequate powdered sugar creates proper consistency. Furthermore, some home cooks use hot chocolate immediately, which melts the peanut butter filling. However, allowing chocolate to cool slightly to warm rather than hot prevents this issue.
Finally, filling cups too generously causes peanut butter to leak out the sides when you apply the final chocolate layer. Meanwhile, keeping about one-quarter inch of space at the top ensures a proper seal. As a result, showing restraint with filling creates superior final results.
Chef Tips
Professional chocolatiers recommend tempering your chocolate for an ultra-shiny, snappy finish with a satisfying snap when bitten, though it requires more technique than the simple melting method described here. Additionally, for extra indulgence, add one-quarter teaspoon of instant espresso powder to your peanut butter filling—this enhances chocolate flavor without making the filling taste like coffee, creating restaurant-quality sophistication.
Frequently Asked Questions
Can I use milk chocolate instead of dark chocolate? You can, though dark chocolate provides better balance with the sweetness of the peanut butter filling. Milk chocolate creates a sweeter result that some people prefer, though it lacks the sophisticated flavor of dark chocolate.
What can I substitute for natural peanut butter? You can use almond butter, cashew butter, or sunflower seed butter for nut-free options. However, these alternatives may have different oil content, requiring slight adjustments to powdered sugar amounts for proper consistency.
How can I make these peanut butter cups less sweet? Simply reduce the powdered sugar amount, starting with one-quarter cup instead of one-half cup. You can also use dark chocolate with higher cacao percentages, which contains less sugar and tastes less sweet.
Can I add flavoring to the peanut butter filling? Absolutely. You can add one-quarter teaspoon of cinnamon, a small pinch of cayenne pepper, or a few drops of maple extract. Experiment cautiously with additional flavorings, adding small amounts and tasting as you go.
Do these need to be kept frozen, or can they be stored in the refrigerator? Refrigeration is sufficient for up to three weeks—freezing is optional. However, frozen cups maintain texture longer and can be enjoyed straight from the freezer for a firmer bite.
Why These Homemade Peanut Butter Cups Become a Signature Recipe
First, the ability to create confections that rival premium store-bought versions is genuinely empowering for home candy makers. Next, the cost savings compared to specialty chocolate shops are substantial—homemade cups cost a fraction of premium versions. Meanwhile, the genuine chocolate and peanut butter flavor delivers satisfaction that impresses even discerning chocolate lovers. Additionally, the combination of creamy filling and crispy chocolate creates a texture contrast that feels luxurious. Furthermore, because they freeze beautifully, you can batch-prepare for convenient treats throughout the month.
As a result, these homemade peanut butter cups bridge the gap between indulgence and homemade quality perfectly. In contrast to store-bought cups containing artificial ingredients and fillers, these deliver authentic satisfaction. However, they require no special equipment beyond a standard mold or muffin tin. Additionally, once you master this basic formula, you’ll find yourself experimenting with flavor variations and different chocolate percentages. Therefore, this recipe deserves a permanent place in your special treats repertoire.
The Bottom Line
Homemade peanut butter cups represent the ideal solution for those seeking authentic, luxurious confections without artificial ingredients or excessive processing. Next, whether you’re satisfying personal chocolate and peanut butter cravings, creating impressive gifts, or exploring chocolate candy making, this recipe delivers professional results every single time. Additionally, the combination of quality dark chocolate, natural peanut butter, and creamy center creates something genuinely memorable and worth making regularly.
To begin your homemade peanut butter cup journey, invest in quality dark chocolate and natural peanut butter this week. Afterward, set aside 45 minutes on your next afternoon to create your first batch. Furthermore, as you bite into your first homemade cup and taste the genuine chocolate and peanut butter flavor, you’ll understand why making these confections at home is absolutely worthwhile. The authentic taste, impressive presentation, minimal required effort, and remarkable flavor combine to create something truly special that transforms your relationship with chocolate and peanut butter.
Did you adore this homemade peanut butter cups recipe? We’d absolutely love to hear about it! Please save this recipe for your next special treat occasion, pin it to your Pinterest board for easy access, and share it with friends and family who deserve delicious, authentic homemade confections. Your love and support mean everything to us—every save, share, and pin encourages us to create more delicious recipes and helpful treat-making content. Thank you for being part of our warm, welcoming culinary community!