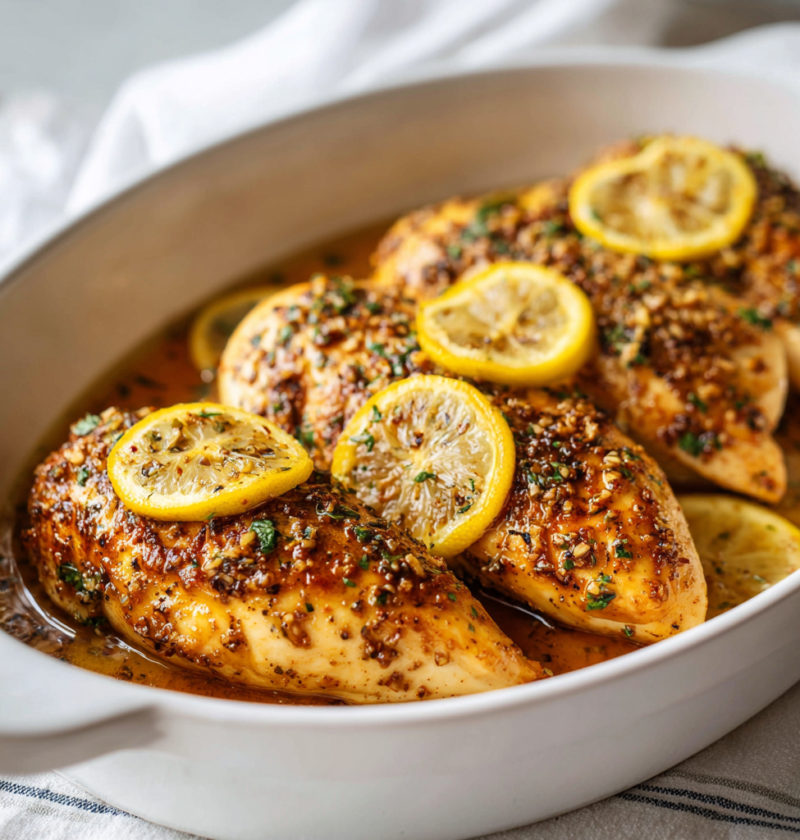
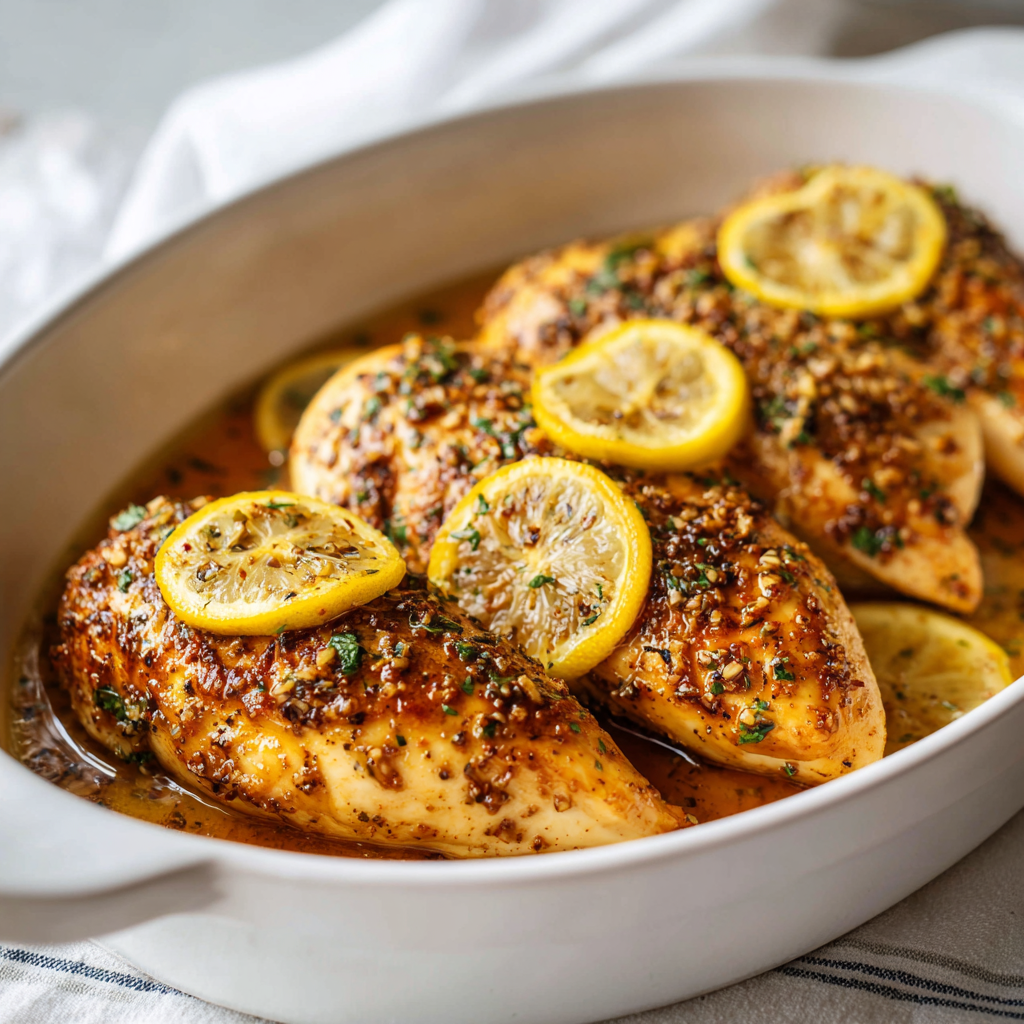
Bright, zesty, and incredibly satisfying, this lemon garlic chicken breast recipe has become my go-to weeknight dinner for one simple reason: it tastes restaurant-quality while coming together in under thirty minutes. First time I experimented with this combination, I was amazed at how the lemon’s acidity perfectly cuts through the richness of butter and garlic, creating a sauce that’s both sophisticated and comforting. The beauty of this dish lies in its simplicity—just a handful of pantry staples transform lean chicken breast into something juicy, tender, and absolutely crave-worthy. Additionally, this recipe proves that healthy eating doesn’t mean sacrificing flavor or satisfaction. Whether you’re meal prepping for the week, cooking for your family, or impressing dinner guests with minimal fuss, this lemon garlic chicken delivers every single time with results that taste like you spent hours in the kitchen when really you barely spent thirty minutes.
Ingredients
This recipe makes 4 servings.
• 4 boneless, skinless chicken breasts (about 6-8 ounces each) • 4 tablespoons unsalted butter, divided • 6 cloves fresh garlic, minced • 1/2 cup fresh lemon juice (about 3-4 lemons) • 1 cup chicken broth • 1/2 cup dry white wine or additional chicken broth • 1 teaspoon kosher salt • 1/2 teaspoon black pepper • 1/2 teaspoon garlic powder • 1/4 teaspoon paprika • 2 bay leaves • 1 teaspoon fresh thyme leaves (or 1/2 teaspoon dried) • 1 teaspoon fresh rosemary leaves (or 1/2 teaspoon dried) • 2 tablespoons fresh lemon zest • 3 tablespoons fresh parsley, finely chopped • 1 tablespoon cornstarch mixed with 2 tablespoons water (optional, for thicker sauce) • Olive oil for cooking
Step-by-Step Instructions
Preparing Your Chicken and Seasonings
- Remove the chicken breasts from the refrigerator about 15 minutes before cooking so they reach room temperature, which ensures more even cooking throughout.
- Pat the chicken breasts completely dry with paper towels on both sides, as moisture prevents proper browning and sauce absorption.
- Combine the kosher salt, black pepper, garlic powder, and paprika in a small bowl.
- Season both sides of each chicken breast generously with the spice mixture, taking care to distribute it evenly across the entire surface.
Searing the Chicken
- Heat 2 tablespoons of butter and 1 tablespoon of olive oil in a large skillet over medium-high heat until the butter foams and just starts to brown slightly.
- Carefully place the seasoned chicken breasts into the hot skillet, arranging them without overlapping if possible—if necessary, work in batches rather than crowding the pan.
- Sear the chicken for 6-7 minutes on the first side without moving them around, allowing a golden-brown crust to develop across the entire surface.
- Flip each breast using tongs and sear the other side for another 4-5 minutes until light golden brown—the chicken doesn’t need to be fully cooked at this stage.
- Transfer the seared chicken to a clean plate and set aside momentarily while you prepare the sauce.
Creating the Lemon Garlic Sauce
- Pour off most of the fat from the skillet, leaving just about 1 tablespoon behind for added flavor.
- Add the remaining 2 tablespoons of butter to the skillet and let it melt over medium heat, swirling to coat the bottom evenly.
- Stir in the minced garlic and cook for approximately 1 minute, stirring constantly to prevent burning while allowing it to become fragrant and golden.
- Pour in the white wine and use a wooden spoon to scrape up all those delicious browned bits from the bottom of the pan—this deglazing step releases incredible flavor into your sauce.
- Add the chicken broth and fresh lemon juice, stirring everything together to create a cohesive, aromatic sauce.
- Drop in the bay leaves and sprinkle in the fresh thyme and rosemary, stirring to distribute the herbs evenly throughout the sauce.
- Taste the sauce and adjust the lemon juice or salt as needed to achieve a bright, well-balanced flavor.
Cooking the Chicken Through
- Return the seared chicken breasts to the skillet, nestling them into the sauce so they’re partially submerged.
- Bring the sauce to a gentle simmer over medium heat, then immediately reduce the heat to medium-low to maintain a gentle, steady simmer.
- Cook the chicken uncovered for 8-10 minutes until an instant-read thermometer inserted into the thickest part of a breast reads 165°F (74°C)—this ensures perfectly cooked, moist chicken.
- Once cooked through, remove the skillet from the heat and let the chicken rest in the sauce for 2-3 minutes before serving.
Finishing Touches
- If you prefer a thicker sauce, stir the cornstarch slurry into the hot sauce and cook over medium heat for 1-2 minutes, stirring constantly until it reaches your desired consistency.
- Remove and discard the bay leaves from the sauce.
- Sprinkle the fresh lemon zest and fresh parsley over the chicken and sauce just before serving for brightness, freshness, and a professional presentation.
Serving and Storing Tips
How to Serve This Beautiful Dish
This lemon garlic chicken pairs wonderfully with light, fresh sides that complement its bright flavors. Next, consider serving it over a bed of fluffy white rice, creamy risotto, or buttered egg noodles to capture every drop of that incredible pan sauce. Additionally, roasted vegetables like asparagus, green beans, or zucchini provide a fresh contrast to the rich sauce without overwhelming the palate. You could also serve this over a bed of fresh pasta tossed with a touch of olive oil for a lighter, Mediterranean-inspired meal. Creamy mashed potatoes work beautifully with the lemon sauce, or try serving it alongside roasted potatoes and a crisp Caesar salad for a more substantial dinner. For a healthier option, pair this with quinoa, farro, or simply serve alongside steamed broccoli and sautéed spinach for a complete, balanced meal.
Storing Your Leftovers Properly
Store any leftover chicken and sauce in an airtight container in the refrigerator for up to 3 days, ensuring the chicken stays submerged in the sauce to prevent drying out. To reheat, place the chicken gently in a skillet over medium-low heat with a splash of chicken broth, stirring occasionally until heated through—this stovetop method prevents the chicken from becoming rubbery. Alternatively, microwave individual portions in a microwave-safe container for 1-2 minutes, though the stovetop method produces superior results. For freezing, let the chicken cool completely before transferring it to a freezer-safe container or zip-top bag for up to 2 months. Thaw frozen chicken overnight in the refrigerator and reheat gently on the stovetop to preserve moisture and texture.
Helpful Tips and Tricks
Ingredient Substitutions and Variations
If you don’t have fresh lemon juice, bottled lemon juice works adequately though fresh always produces superior brightness and flavor. Swap white wine for additional chicken broth, apple juice, or even a splash of vinegar if you prefer to avoid alcohol entirely. Fresh herbs can be replaced with dried herbs at half the quantity, though fresh herbs provide noticeably more vibrant flavor. For a lighter sauce, use half the butter and add a touch of olive oil instead, reducing calories without sacrificing taste. If you want deeper garlic flavor, increase the cloves to 8-10, as the long, slow cooking mellows garlic considerably and makes it sweet rather than sharp. Try adding sun-dried tomatoes, capers, or olives to the sauce for Mediterranean flair, or incorporate a touch of Dijon mustard for subtle depth.
Common Mistakes to Avoid
Many home cooks forget to pat the chicken dry, which prevents proper browning and creates steam instead of a flavorful crust. Don’t skip the searing step, as this develops crucial flavor through the Maillard reaction that you simply can’t get by poaching alone. Another common mistake is using room-temperature ingredients from the start, which leads to uneven cooking—letting chicken sit out briefly makes a noticeable difference. Overcrowding the skillet is problematic because it steams the chicken rather than searing it; give each piece space or cook in batches. Finally, cooking at too high a temperature once the sauce is added can result in tough, stringy chicken; keep the heat at a gentle simmer.
Time-Saving Strategies
Prepare your minced garlic and lemon zest the night before, storing them separately in the refrigerator so assembly is incredibly quick. Use a microplane grater for lemon zest, which is faster and produces more fragrant results than a box grater. Consider buying pre-made chicken broth to eliminate any simmering time, and quality store-bought broth works beautifully in this recipe. Pound your chicken breasts to even thickness before cooking, which dramatically reduces cooking time and ensures even doneness throughout. Another useful tip is marinating the chicken in salt, pepper, and garlic powder for up to 2 hours while you prepare other components, adding flavor depth without additional cooking time.
Chef Tips for Restaurant-Quality Results
The secret to incredibly moist chicken breast is removing it from heat the moment it reaches exactly 165°F—not a degree more—then letting residual heat finish the cooking while it rests in the sauce. Zest your lemon before juicing it and sprinkle it over the finished dish at the last second; this single step elevates the entire dish from good to restaurant-quality with minimal effort.
Frequently Asked Questions
Can I use frozen chicken breasts? Yes, but thaw them overnight in the refrigerator first; cooking from frozen results in uneven cooking and drier meat with longer cooking times.
How can I make this dish even healthier? Skip the butter and use olive oil instead, reduce the wine, and serve over cauliflower rice or roasted vegetables for a lighter, lower-calorie version.
Can I cook this in the oven instead of stovetop? Absolutely—after searing, transfer everything to a baking dish and bake at 375°F for 12-15 minutes until the chicken reaches 165°F for hands-off cooking.
What if my sauce is too thin or too acidic? Add the cornstarch slurry for thickness, or balance acidity by adding a pinch of sugar or more broth to mellow the lemon.
How far in advance can I prepare this dish? Prepare the sauce completely up to 24 hours ahead and refrigerate it, then sear and finish cooking the chicken when you’re ready to serve.
Conclusion
This lemon garlic chicken breast recipe proves that lean, healthy proteins don’t require hours of cooking time or complicated techniques to taste absolutely incredible. Moreover, the bright, fresh flavors make this dish equally suitable for casual weeknight dinners and more special occasions where you want impressive results without stress. The magic happens when you respect the simple ingredients, take time to develop a proper sear, and finish with fresh herbs that brighten everything on the plate. Additionally, this recipe is incredibly forgiving, adapting beautifully to whatever vegetables or grains you have on hand. I genuinely believe this will become one of those recipes you return to again and again because it’s quick enough for busy nights, healthy enough for your wellness goals, and delicious enough to satisfy everyone at the table. The combination of tender chicken, silky lemon butter sauce, and aromatic garlic creates a complete meal that tastes far more complicated than it actually is to prepare.
Did you love this recipe? Please save it, pin it, and share it with your friends and family! Your support means the world to us and motivates us to keep creating more delicious, easy recipes for you to enjoy. Let us know in the comments how your lemon garlic chicken breast turned out—we’d absolutely love to hear about your experience and any creative variations you tried!