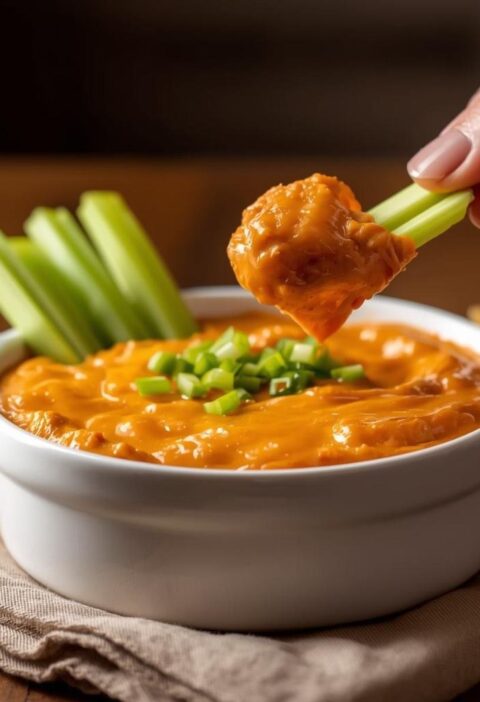
There’s something wonderfully democratic about nachos—everyone loves them, they bring people together, and they satisfy both the casual snacker and the adventurous foodie with equal enthusiasm. Loaded nachos represent the ultimate shareable appetizer that transforms simple tortilla chips into a mountain of melted cheese, seasoned meat, and vibrant toppings that taste like an incredible fiesta in every bite. What makes this recipe truly special is how easily it adapts to your preferences and whatever ingredients you have available, yet always delivers restaurant-quality results that taste far better than anything you could order for takeout. Whether you’re hosting a game day gathering, throwing a casual dinner party, preparing appetizers for a Cinco de Mayo celebration, or simply craving something indulgent and delicious, loaded nachos work perfectly for any occasion. The beauty of this dish lies in its flexibility—you can customize the toppings completely based on your guests’ preferences, dietary restrictions, or what’s already in your pantry. From the moment that first warm, cheesy nacho hits your mouth, you’ll understand why this humble dish has become such a beloved classic that everyone wants to come back to again and again.
Ingredients
This recipe makes approximately 4 to 6 servings as an appetizer or light main course, depending on portion size.
- 1 large bag tortilla chips, approximately 13 ounces, preferably restaurant-style or sturdy chips
- 2 cups shredded cheddar cheese, divided
- 1 cup shredded Monterey Jack cheese or additional cheddar
- 1 pound ground beef or ground turkey, cooked and seasoned
- 6 slices bacon, cooked and crumbled
- 1 cup diced jalapeños, fresh, seeds removed for less heat if preferred
- 1 cup diced tomatoes, fresh and drained
- ½ cup diced red onion, finely minced
- 1 cup sour cream
- ¾ cup fresh cilantro, finely chopped
- ¾ cup sliced black olives, drained
- ½ cup sliced green onions or scallions
- 1 cup corn kernels, fresh or frozen and thawed
- 1 tablespoon cumin
- 1 tablespoon chili powder
- 1 teaspoon garlic powder
- 1 teaspoon salt
- ½ teaspoon black pepper
- ¼ teaspoon cayenne pepper
- ½ cup salsa, your preferred style
- ½ cup guacamole or sliced avocado
- Fresh lime wedges for serving
- Additional shredded cheese for layering
Preparing Your Meat and Toppings
Start by cooking your ground beef or turkey in a large skillet over medium-high heat, breaking it into small pieces as it cooks. Stir frequently until the meat is completely browned, about 8 to 10 minutes total, then drain any excess fat using a fine-mesh strainer. Return the cooked meat to the skillet and stir in your cumin, chili powder, garlic powder, salt, black pepper, and cayenne pepper, mixing thoroughly until every piece of meat is evenly coated with the spice blend. Add a splash of water, about ¼ cup, to create a light sauce consistency, then let it simmer gently for about 2 minutes before removing from heat.
While your meat cooks, prepare all your remaining toppings and arrange them in small bowls for easy assembly. Next, cook your bacon until it’s crispy, about 8 to 10 minutes depending on your preferred crispness level, then transfer it to a paper towel-lined plate to drain and cool. Once cooled, crumble it into bite-sized pieces. Additionally, prepare your jalapeños by slicing them and removing the seeds if you prefer less heat, dice your tomatoes into small pieces and drain them to remove excess moisture, and mince your red onion finely so it distributes evenly throughout the nachos.
Building Your Nacho Mountain
Preheat your oven to 400°F to ensure it reaches full temperature before you begin assembly. Arrange a single layer of your tortilla chips across a large oven-safe platter, baking sheet, or cast iron skillet, spacing them out somewhat so there’s room for toppings to sink between the chips. Sprinkle about half of your shredded cheddar cheese evenly over this chip layer, distributing it generously so every chip receives some cheese. Next, distribute half of your cooked seasoned meat over the cheese, then add half of your Monterey Jack cheese, creating layers that ensure balanced flavor in every bite.
Bake this first layer of nachos in your preheated oven for about 5 to 7 minutes until the cheese begins to melt and become gooey. The timing depends on your oven, so watch carefully to ensure the cheese melts completely but the chips don’t begin to brown excessively or burn at the edges. Remove the baking sheet from the oven and add your second layer of tortilla chips directly over the melted cheese, then repeat the process by adding the remaining cheddar cheese, remaining meat, and remaining Monterey Jack cheese.
Return this completed nacho mountain to the oven for another 5 to 7 minutes until all the cheese is melted, bubbly, and absolutely irresistible. The cheese should be stretchy and gooey throughout, pulling in delicious strings when you scoop up a nacho.
Adding Fresh and Flavorful Toppings
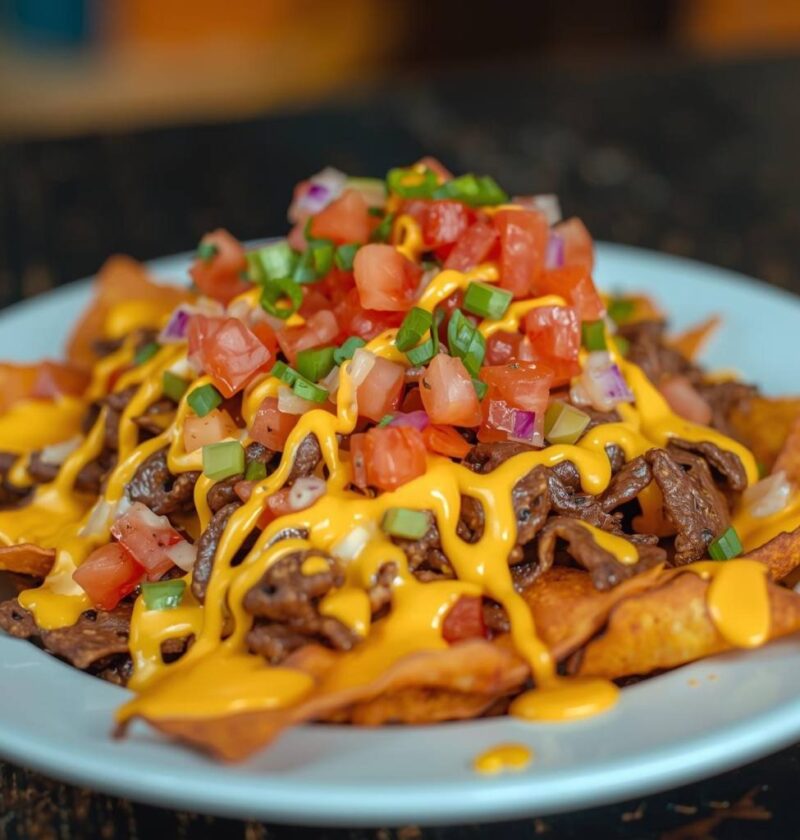
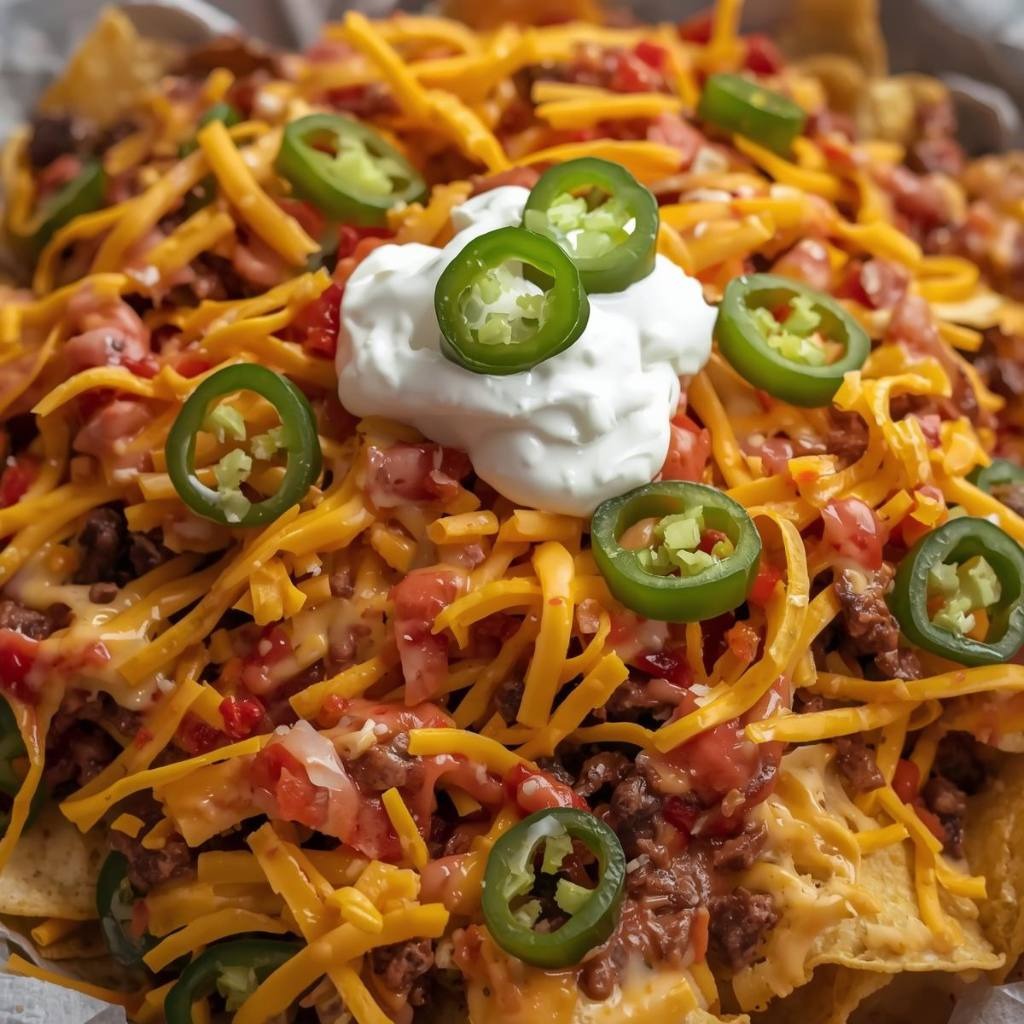
Remove your nachos from the oven and immediately begin adding your fresh, cooler toppings over the hot cheese while it’s still melted and pliable. First, scatter your crumbled bacon evenly across the entire platter, allowing the warmth to warm it slightly. Next, distribute your diced tomatoes, remembering that you’ve already drained them to prevent excess moisture from making the nachos soggy. Additionally, sprinkle your diced jalapeños across the top, choosing the quantity based on your heat preference and your guests’ tolerance for spicy food.
Drizzle your salsa evenly over the nachos, distributing it so you get some on every section of the platter rather than concentrating it in just one area. Furthermore, dollop small spoonfuls of sour cream around the platter, spacing them out so multiple people can grab some without everything getting mixed together. Add your sliced black olives, diced red onion, sliced green onions, and fresh cilantro, creating a colorful, vibrant appearance that’s as visually appealing as it is delicious.
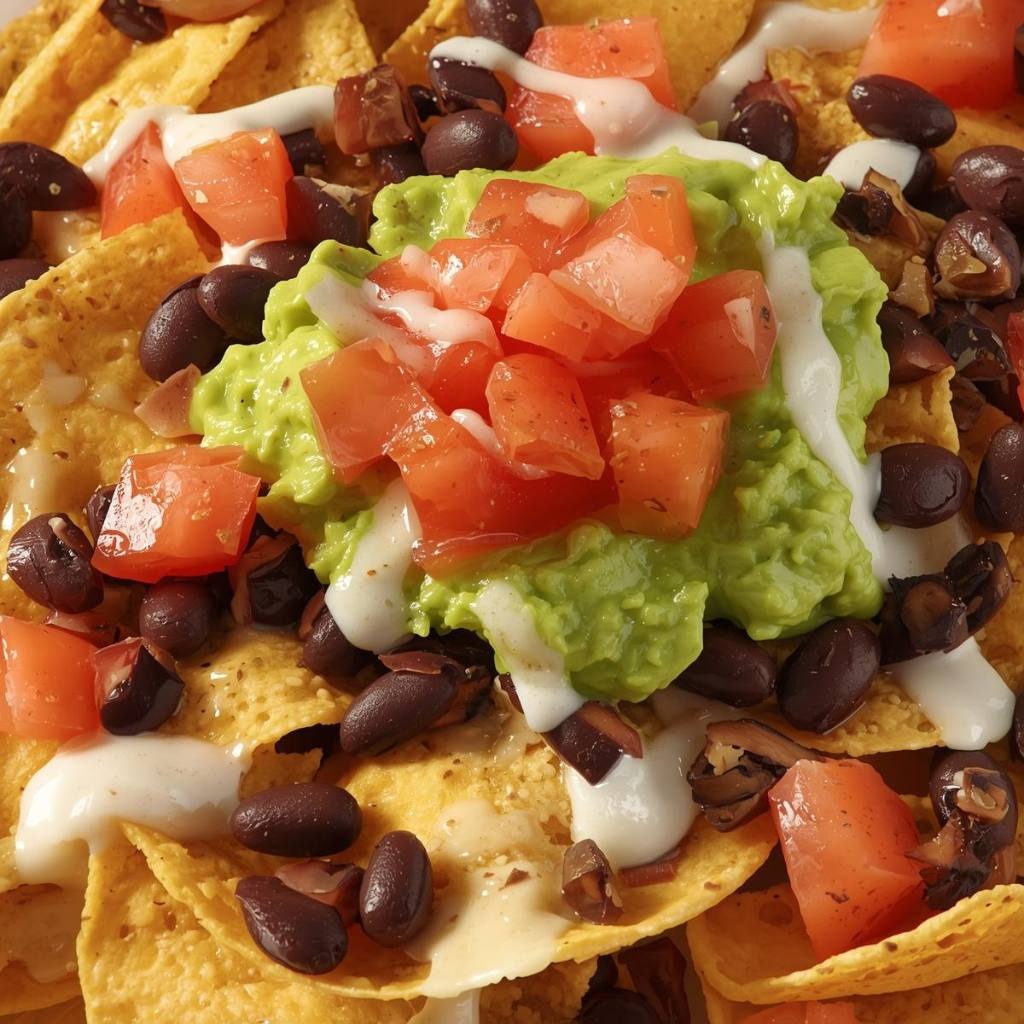
Finally, add small dollops or slices of guacamole or fresh avocado around the platter, being careful not to add this too early since it oxidizes and browns if exposed to air for extended periods. Serve your loaded nachos immediately while the cheese is still warm and stretchy, providing fresh lime wedges on the side for squeezing over individual nachos.
Serving and Storage Tips
Serving Suggestions
Serve your loaded nachos immediately after completing them, while the cheese is still melted and warm and all the toppings are at their ideal temperature. First, arrange them on a large platter in the center of your table so everyone can easily reach and enjoy them communally, which adds to the fun and interactive nature of this dish. These nachos work wonderfully as a main course for casual family dinners, the centerpiece appetizer for game day parties, a fun option for outdoor gatherings and backyard barbecues, or the highlight of Cinco de Mayo celebrations.
Additionally, loaded nachos make an excellent option for when you’re hosting a crowd but don’t want to spend hours cooking individual dishes—simply prepare several batches and keep them coming throughout the evening. They’re also perfect for movie nights when you want something more substantial than typical popcorn, or as a late-night appetizer when entertaining friends. Furthermore, they work beautifully as a vegetarian main course if you omit the meat and add extra beans, corn, and vegetables instead.
Storage Instructions
Leftover loaded nachos are best consumed immediately after preparation, as the chips begin to soften as they absorb moisture from the cheese and toppings. However, you can store any leftover components separately in airtight containers in your refrigerator for up to 3 days. The cooked meat keeps well for 3 to 4 days, the cheese can be reheated, and most fresh toppings remain good for several days.
To reheat leftover nachos, preheat your oven to 350°F, arrange them on a baking sheet, cover loosely with foil, and warm for about 8 to 10 minutes until the cheese re-melts slightly. However, the chips will be softer than fresh nachos, so this method works better for casual eating rather than impressive entertaining. Alternatively, you can rebuild fresh nachos using your leftover components, which guarantees the best texture and eating experience.
Helpful Notes and Tips
One of the most important factors in creating exceptional nachos is using sturdy, high-quality tortilla chips that can support the weight of toppings and cheese without breaking apart. Thin, delicate chips tend to shatter under the weight, making it difficult to grab a complete nacho. Restaurant-style tortilla chips or thicker varieties work much better for this application and create a more satisfying eating experience.
If you prefer a healthier version, you can use baked tortilla chips instead of fried, though these tend to be slightly more fragile and may soften more quickly under the weight of toppings. Additionally, you can reduce the amount of cheese or use a lower-fat variety, substitute ground turkey or lean ground beef for fattier versions, and load up heavily on vegetables to increase nutrition while maintaining incredible flavor and satisfaction.
Another helpful variation involves making these nachos completely vegetarian by omitting the meat and bacon, then adding black beans, pinto beans, or refried beans for protein and substance. Some creative cooks enjoy adding shredded chicken instead of ground beef, creating a lighter but equally delicious version. Furthermore, you could add corn, diced bell peppers, diced pineapple for a sweet tropical twist, or even crumbled chorizo for spicy intensity.
A common mistake involves adding all the toppings before baking, which causes them to wilt, dry out, or become overly cooked. Instead, add only the toppings that benefit from heat before baking, then add fresh, cool toppings after the nachos come out of the oven. Additionally, avoid using wet ingredients like fresh tomato without draining them first, as excess moisture soaks the chips and creates a mushy texture rather than crispy eating experience.
Chef Tips
Professional cooks often layer their nachos in stages rather than adding everything at once, which allows them to control the texture and temperature of each element precisely. Furthermore, using a cast iron skillet instead of a baking sheet creates more even heat distribution and helps the cheese melt more uniformly, resulting in consistently delicious nachos throughout the entire platter.
Frequently Asked Questions
Can I make loaded nachos ahead of time and reheat them? You can prepare the components ahead of time and assemble them just before serving for the best texture, though reheated nachos will have softer chips than fresh ones.
What’s the best way to reheat leftover nachos? Preheat your oven to 350°F, place the nachos on a baking sheet covered loosely with foil, and warm for 8 to 10 minutes until the cheese softens.
Can I use a slow cooker to keep the cheese warm for a party? Yes, pour melted cheese sauce into a slow cooker on low heat to keep it warm throughout the event, allowing guests to add it to fresh chips as needed.
What are some good alternatives to ground beef for nachos? Shredded chicken, chorizo, ground turkey, black beans, or seasoned pork all work wonderfully as protein options in loaded nachos.
How can I prevent the tortilla chips from becoming soggy? Use sturdy chips, layer in stages, add cheese-based toppings last, and serve immediately after assembly rather than letting them sit.
Why This Recipe Works
Loaded nachos succeed because they combine multiple layers of flavor, texture, and temperature into a single unified dish that satisfies every craving simultaneously. The melted cheese provides richness and warmth, while fresh toppings add brightness, crunch, and acidity that balance the heavier elements. The variety of toppings ensures that every single bite contains something different, preventing the dish from becoming monotonous even as you eat large quantities.
The beauty of this recipe lies in its adaptability to your specific preferences and available ingredients while still consistently delivering impressive results. First-time cooks often think that making restaurant-quality nachos requires special equipment or techniques, but this straightforward approach proves that excellent results are absolutely achievable in any home kitchen with basic tools and ingredients.
Next, the fact that you can prepare most components in advance and assemble them quickly makes this recipe incredibly practical for busy home cooks who want to serve something special without spending excessive time in the kitchen. Furthermore, nachos work wonderfully for feeding a crowd since one large platter serves multiple people, making them economical for entertaining while also creating that fun, interactive dining experience that people love.
If you loved making these loaded nachos, I’d absolutely love to hear about your experience! Did your guests go crazy for these cheesy, delicious nachos? Did everyone come back for seconds and thirds? Please take a moment to save this recipe for future reference, pin it to your favorite Pinterest board, or share it with friends and family who appreciate impressive appetizers that are surprisingly simple to make. Your feedback and enthusiasm truly inspire us to keep creating more exciting recipes that make your gatherings memorable and delicious. Thank you so much for cooking with us today!