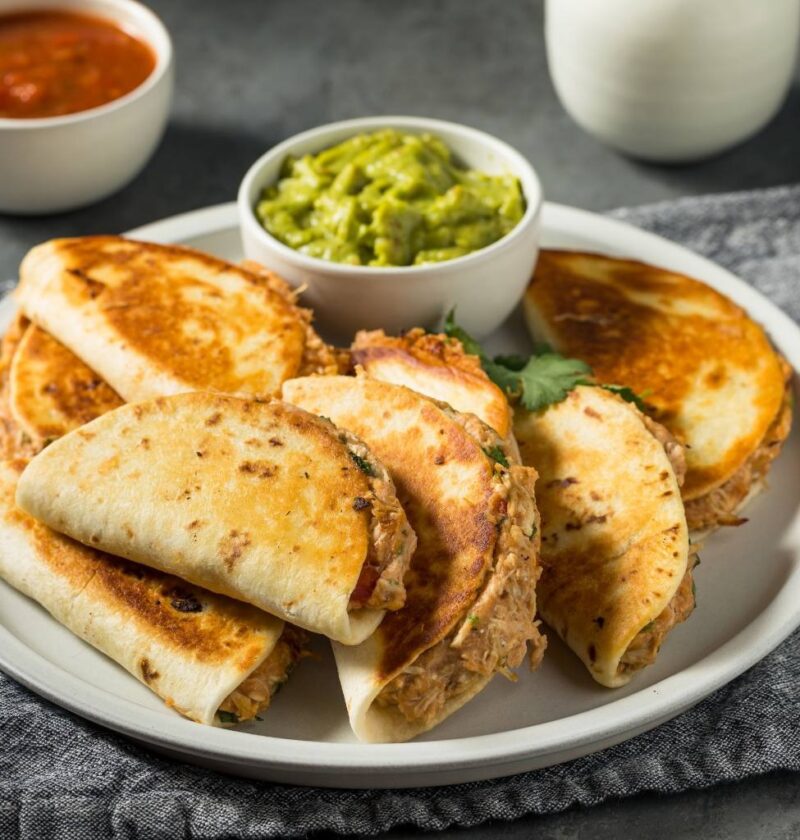
Mini chicken quesadillas are the perfect appetizer, snack, or light meal that manages to be both impressive and incredibly simple to make. These crispy, golden pockets of melted cheese studded with tender chicken and bold flavors deliver restaurant-quality results from your own kitchen in less than 30 minutes. What makes this recipe so special is the way it transforms ordinary ingredients into something that feels sophisticated enough for entertaining yet casual enough for weeknight family dinners. Additionally, kids and adults alike fall in love with the combination of crispy tortillas, gooey cheese, and savory chicken that comes together so effortlessly. The beauty of these quesadillas lies in their versatility—you can customize them with your favorite toppings, adjust the spice level to suit your preference, and prepare them ahead of time for stress-free entertaining. Furthermore, these little handheld packages are far more interesting than standard cheese quesadillas, offering genuine substance and flavor in every single bite that keeps people reaching for seconds and thirds.
Ingredients
This recipe makes 16 mini quesadillas (serves 4–6 people as appetizer or 3–4 as main course)
- 16 small flour tortillas (6-inch)
- 3 cups shredded cooked chicken (about 1.5 pounds)
- 2 cups shredded cheddar cheese
- 1 cup shredded Monterey Jack cheese
- ½ cup diced bell peppers (red, yellow, or orange)
- ½ cup diced red onion
- ½ cup corn kernels (fresh, frozen, or canned and drained)
- ¾ cup salsa (mild or spicy, according to preference)
- ½ jalapeño, seeded and minced (optional)
- 2 tablespoons fresh cilantro, chopped (optional)
- 3 tablespoons unsalted butter, melted
- 1 teaspoon cumin
- ½ teaspoon chili powder
- ¼ teaspoon garlic powder
- ¼ teaspoon black pepper
- ¼ teaspoon salt
- Optional: 2 tablespoons cream cheese for extra creaminess
- Optional: ¼ cup cooked crumbled bacon
- Optional: ¼ cup sliced black olives
Step-by-Step Instructions
1. Preheat your oven to 400°F and position the oven rack to the middle setting for even cooking and browning.
2. In a large mixing bowl, combine the shredded chicken, diced bell peppers, diced red onion, corn kernels, and minced jalapeño if using.
3. Add the salsa, cumin, chili powder, garlic powder, black pepper, and salt to the chicken mixture, stirring until everything is evenly distributed and well combined.
4. If using cream cheese, fold it gently into the mixture to add richness and help bind the filling together.
5. In a small bowl, combine the shredded cheddar cheese and Monterey Jack cheese, mixing well.
6. Lay out 8 flour tortillas on your work surface, arranging them in a single layer.
7. Divide the chicken mixture evenly among the 8 tortillas, spooning approximately ¼ cup of filling onto the center of each.
8. Sprinkle approximately ¼ cup of the mixed cheese over the chicken filling on each tortilla.
9. Top each filled tortilla with another tortilla to create a sandwich, pressing down gently to help everything stay together during cooking.
10. Brush the melted butter evenly over the top of each quesadilla, ensuring complete coverage for even browning.
11. Flip the quesadillas carefully and brush the other side with melted butter as well.
12. Arrange the buttered quesadillas on baking sheets lined with parchment paper, fitting them in a single layer.
13. Bake for 8–10 minutes until the tortillas turn golden brown and crispy at the edges.
14. Remove the quesadillas from the oven and let them cool for 2–3 minutes before handling.
15. Using a sharp knife or pizza cutter, slice each quesadilla into quarters to create four triangular pieces per quesadilla.
Serving Tips
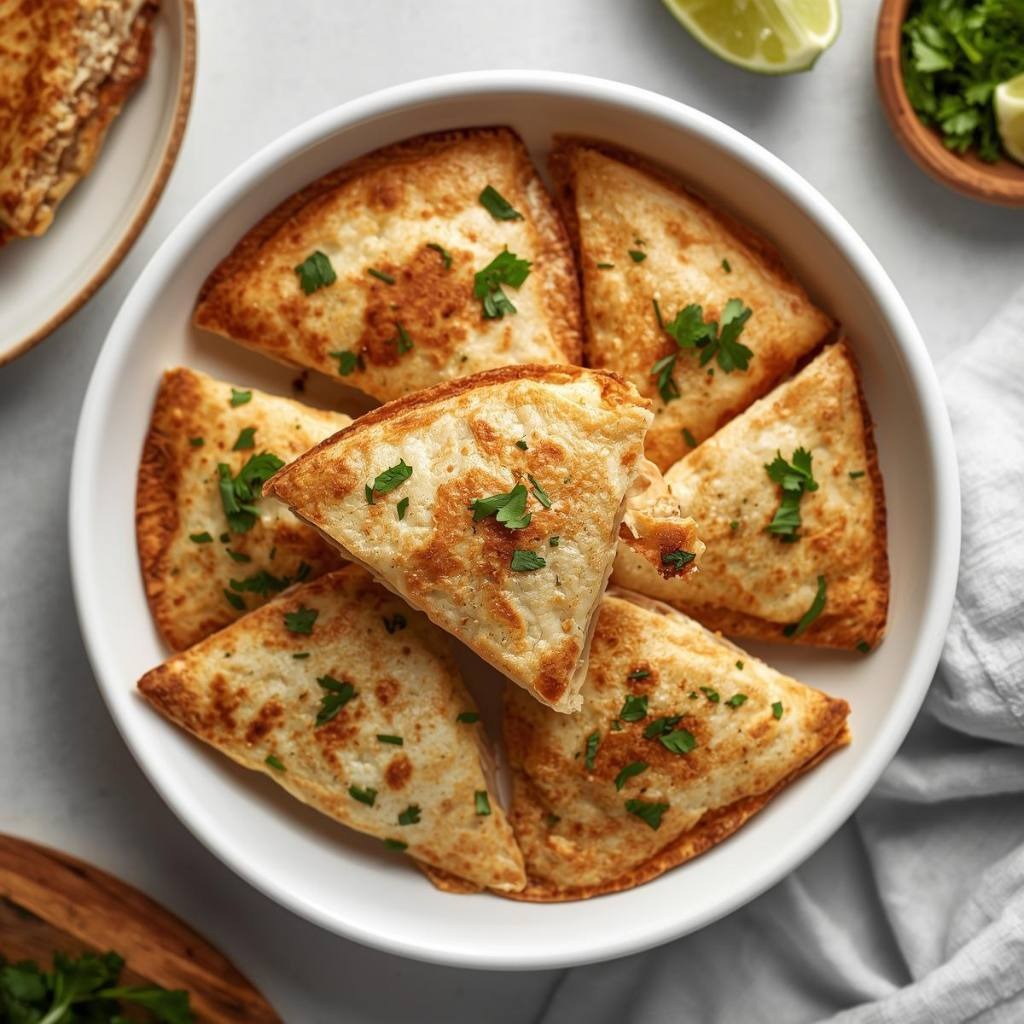
Next, serve these mini quesadillas warm, preferably straight from the oven while the cheese is still melted and the tortillas maintain their crispness. Additionally, set out small bowls of sour cream, guacamole, and extra salsa for dipping, allowing guests to customize their experience with each bite. These quesadillas pair beautifully with Mexican rice, black beans, or fresh cilantro-lime rice for a complete meal. Meanwhile, a refreshing side like pico de gallo or a simple lime-dressed green salad provides a bright contrast to the richness of the melted cheese. Furthermore, consider offering hot sauce, crema, or queso fresco as additional toppings that guests can add individually. They work wonderfully as party appetizers, casual lunch fare, quick weeknight dinners, or contribution-worthy dishes for potluck gatherings where quality and ease of eating are essential.
Storage Tips
To store leftover quesadillas, allow them to cool completely to room temperature before placing them in an airtight container in the refrigerator, where they’ll keep for up to four days. However, they’re best enjoyed within the first two days while the tortillas maintain optimal crispness. When reheating, place quesadilla pieces on a baking sheet and warm them in a 350°F oven for about 5 minutes until heated through and the cheese is melted again. Alternatively, you can reheat individual pieces in a skillet over medium heat for 1–2 minutes per side for better crispness than microwaving. For freezing, arrange cooled, uncut quesadillas in a single layer on a baking sheet and freeze until solid, then transfer to a freezer-safe container or bag for up to two months. To use frozen quesadillas, bake them directly from frozen at 375°F for 12–15 minutes until heated through and crispy. Additionally, you can freeze just the filling in an airtight container for up to three months, then assemble and cook quesadillas fresh whenever you need a quick meal.
Helpful Notes
Ingredient Substitutions: To begin with, you can replace the chicken with shredded turkey, ground beef, or carnitas for different flavor profiles. Next, any melting cheese works beautifully—try pepper jack for heat, oaxaca for creaminess, or gouda for smoky depth. Additionally, if fresh corn isn’t available, frozen or canned corn works perfectly and requires no additional preparation. For a vegetarian version, substitute chicken with black beans, sautéed mushrooms, or a combination of fresh vegetables like zucchini and squash.
Tortilla Selection: However, flour tortillas work best for quesadillas because they hold together and become wonderfully crispy. Whole wheat tortillas offer a nuttier flavor, while spinach or jalapeño-flavored tortillas add visual interest and subtle flavor variations. Additionally, ensure tortillas are fresh and pliable before using, as older tortillas may crack or break apart.
Filling Consistency: To avoid soggy quesadillas, ensure vegetables are cut into small, bite-sized pieces and that the filling isn’t overly wet. Additionally, if your salsa is particularly juicy, drain excess liquid before adding to the filling. Furthermore, don’t overstuff the quesadillas, as too much filling makes them difficult to seal and cook unevenly.
Common Mistakes to Avoid: Meanwhile, don’t skip the butter brushing step—it’s essential for achieving golden, crispy tortillas. Additionally, ensure the oven is fully preheated before baking so quesadillas cook evenly throughout. Furthermore, resist opening the oven door repeatedly during cooking, as this disrupts temperature consistency and extends cooking time.
Time-Saving Tricks: To streamline preparation, assemble the quesadillas up to six hours in advance, cover them with plastic wrap, and refrigerate until ready to bake. Additionally, prepare the chicken filling the night before and store it in an airtight container, then simply assemble and bake the next day. Meanwhile, consider cooking the vegetables in advance and storing them separately in the refrigerator for quick assembly.
Chef Tips
Tip 1: Pan-fry the quesadillas in a cast iron skillet over medium-high heat for 2–3 minutes per side instead of baking for even crisper results and more control over browning. This method produces restaurant-quality texture that’s difficult to achieve in the oven alone.
Tip 2: Toast the tortillas lightly in a dry skillet for 10–15 seconds per side before assembling to strengthen them and prevent tearing, especially important if your filling is particularly moist or if you plan to cut the quesadillas immediately after cooking.
Frequently Asked Questions
Can I make these quesadillas ahead of time? Yes, assemble them up to six hours in advance, cover with plastic wrap, and refrigerate until ready to bake. Add 2–3 minutes to the baking time if baking from cold.
What’s the best way to reheat leftover quesadillas? Place them on a baking sheet in a 350°F oven for about 5 minutes until heated through and crispy. Avoid microwaving, which makes the tortillas soggy and rubbery.
Can I freeze these quesadillas, and for how long? Absolutely—freeze uncut quesadillas in a single layer until solid, then transfer to a freezer-safe container for up to two months. Bake directly from frozen at 375°F for 12–15 minutes.
What dips pair best with mini chicken quesadillas? Sour cream, guacamole, salsa, crema, and queso fresco all complement these beautifully. Additionally, lime crema and chipotle mayo add exciting flavor variations.
Can I make vegetarian or vegan versions of this recipe? Definitely—substitute chicken with black beans, mushrooms, or vegetables, and use dairy-free cheese if needed. The texture and flavor change slightly, but they remain delicious and satisfying.
Why This Recipe Works
The magic of mini chicken quesadillas comes from the contrast of textures and flavors working together in perfect harmony. Additionally, the crispy exterior created by butter-brushing and oven-baking provides a satisfying crunch that contrasts beautifully with the creamy melted cheese inside. Meanwhile, the chicken filling combines tender protein with fresh vegetables and aromatic spices that create depth and interest with every bite. Furthermore, the small size makes these infinitely more practical than full-sized quesadillas—they’re easy to eat as appetizers, simple to portion for meals, and perfect for serving to groups where bite-sized food is ideal. The beauty of this recipe also lies in its flexibility—the filling can be adjusted to suit any preference, dietary restriction, or ingredient availability while maintaining delicious results.
Variations to Try
Cream Cheese Version: Next, add 4 ounces of cream cheese mixed with cilantro and lime juice to the filling for extra creaminess and tanginess.
Southwestern Style: To try something different, add black beans, roasted corn, diced jalapeños, and crispy bacon to the filling for more texture and complexity.
Crispy Fried Chicken Version: However, use crispy fried chicken pieces instead of shredded chicken for added texture and crunch that creates a more substantial quesadilla.
BBQ Chicken Style: As an alternative, toss the chicken in barbecue sauce instead of salsa and add crispy fried onions for a sweet, smoky variation.
Spicy Chipotle Version: To add serious heat, mix chipotle peppers in adobo sauce into the filling and use pepper jack cheese for a smoky, spicy flavor profile.
Breakfast Quesadillas: For a different meal, add scrambled eggs, crispy bacon, hash browns, and sharp cheddar for a breakfast twist that’s perfect for brunch.
Dipping Sauce Recipes
Lime Crema: Mix one cup sour cream with the juice of two limes, one minced garlic clove, and salt to taste for a bright, tangy dip.
Chipotle Mayo: Combine one cup mayonnaise with two chipotle peppers in adobo sauce, one tablespoon lime juice, and salt and pepper for a smoky, spicy option.
Cilantro Avocado Dip: Blend one ripe avocado with ½ cup sour cream, ¼ cup fresh cilantro, one garlic clove, lime juice, salt, and pepper for a creamy, herbaceous dip.
Final Thoughts
Mini chicken quesadillas represent the perfect intersection of impressive presentation, genuine flavor, and practical ease of preparation. Whether you’re hosting a gathering, preparing a quick family dinner, or looking for a versatile appetizer that works for any occasion, these quesadillas deliver consistently delicious results. Additionally, the endless customization possibilities mean you can make them exactly as you prefer, adjusting heat levels, vegetables, and cheese choices to suit your palate and available ingredients. Next time you’re planning a meal that needs to be both special and stress-free, remember that these mini quesadillas are just 30 minutes away from becoming the standout dish everyone remembers.
Did you love this recipe? If you enjoyed making these Mini Chicken Quesadillas, we’d be thrilled if you’d save this recipe to your favorites, pin it to your Pinterest board, or share it with a friend who’d appreciate it! Your support means everything to us and helps us keep creating delicious recipes to share. Tell us in the comments what toppings and dips you used, and let us know if you created any fun variations—we’d absolutely love to hear about your experience!