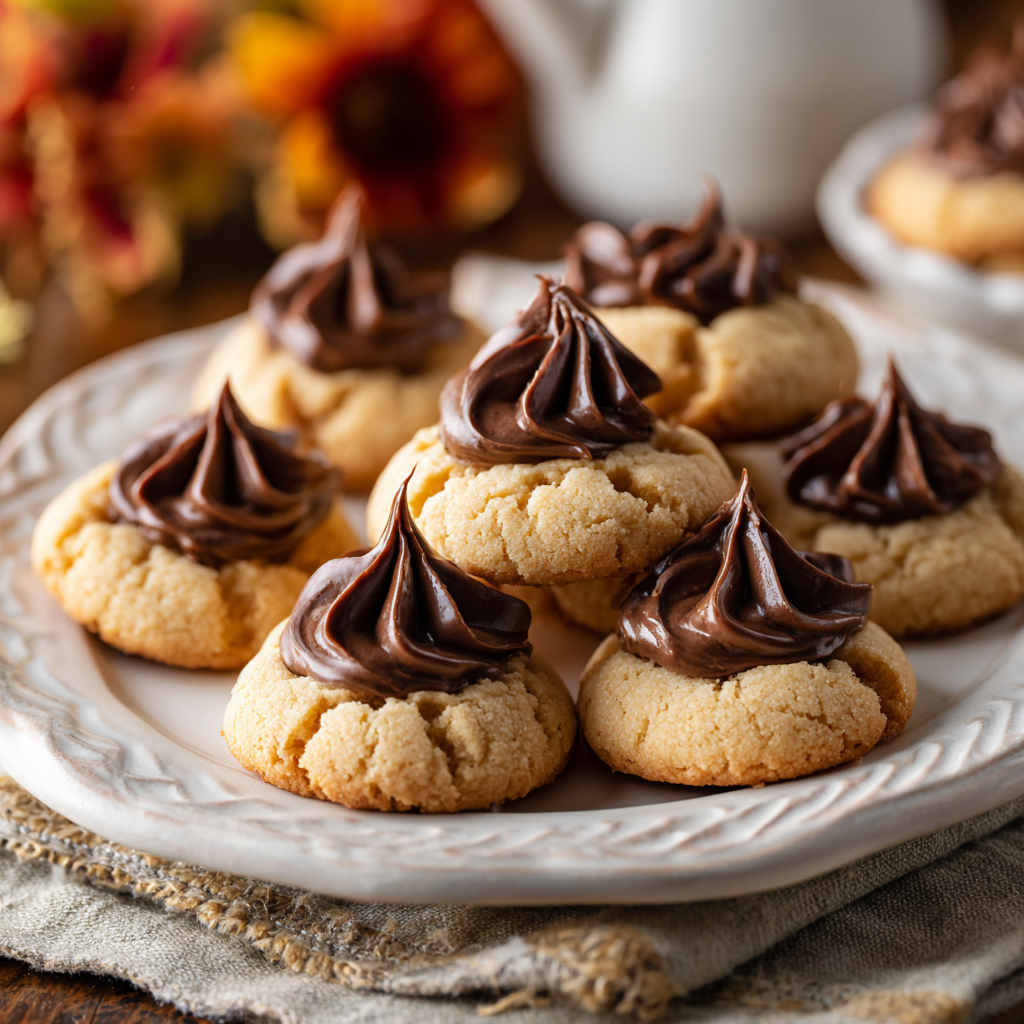
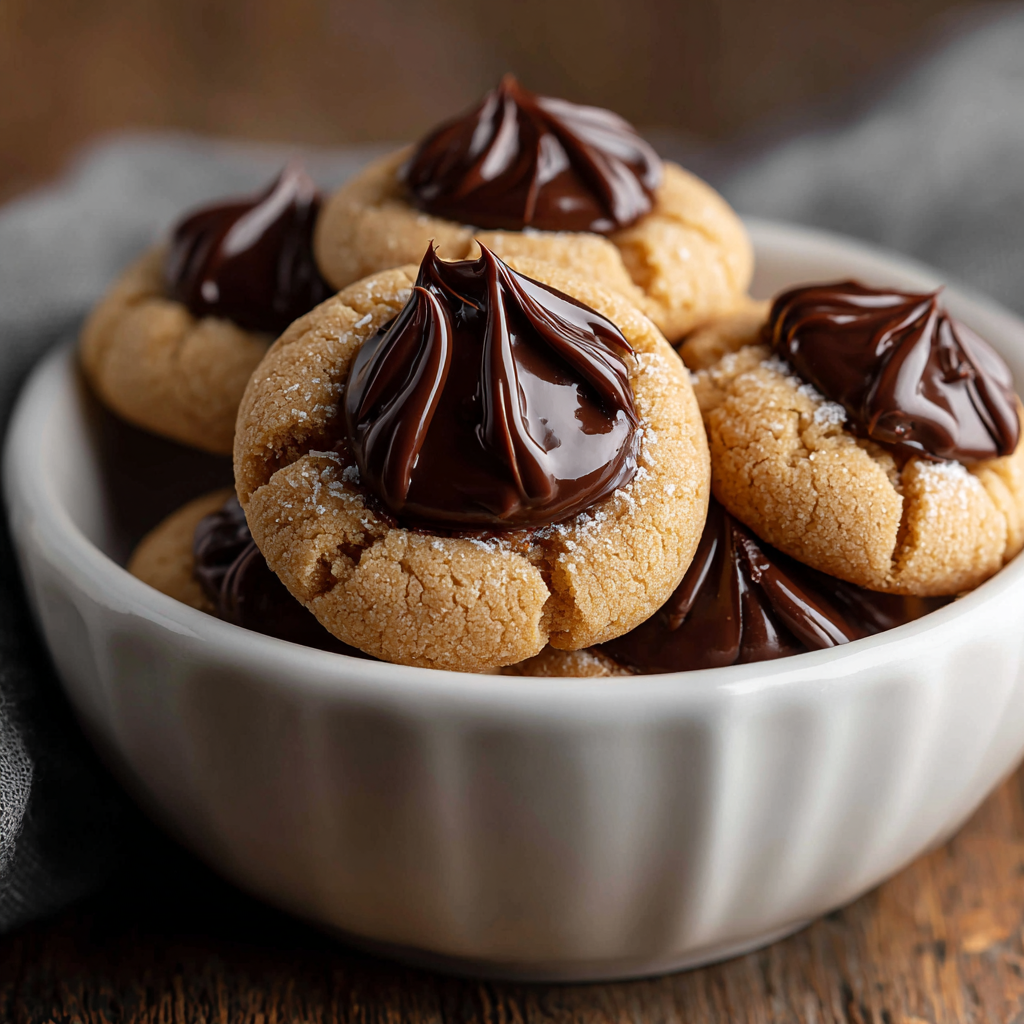
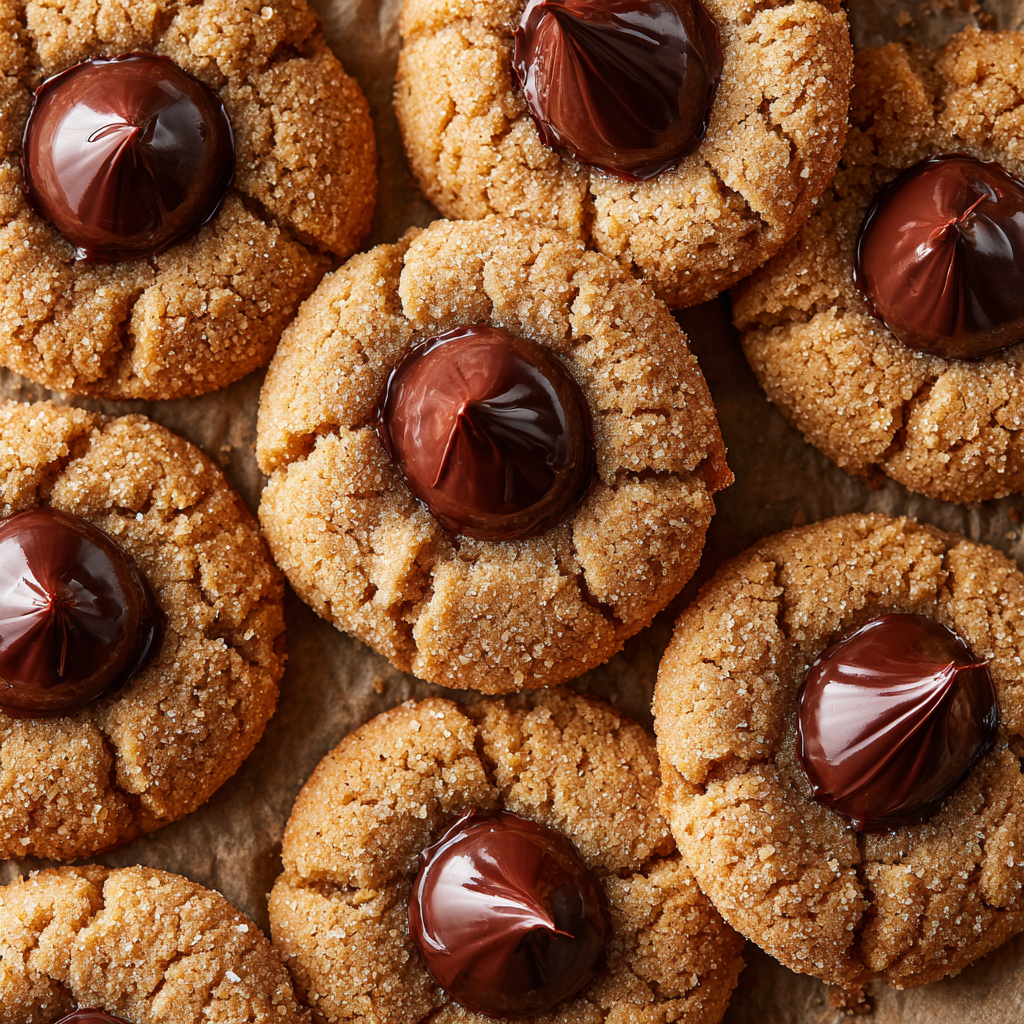
Few treats capture the spirit of holiday baking quite like peanut butter blossom cookies—those gorgeous little mounds of creamy peanut butter dough crowned with a single chocolate kiss that melts into a luscious, decadent experience with every bite. These iconic cookies have graced holiday tables for generations, yet they remain just as beloved and anticipated today as they ever were. Peanut Butter Blossom Cookies deliver the perfect balance of salty, rich peanut flavor with sweet, creamy chocolate that creates an absolutely irresistible combination that keeps people coming back for more. First, they’re straightforward enough for beginning bakers yet impressive enough to serve at sophisticated holiday gatherings without apology. Next, they require minimal ingredients and no special techniques or equipment beyond basics you already possess in your kitchen. Additionally, these cookies remain fresh and delicious for days when stored properly, making them ideal for advance baking during your busy season or gifting throughout December. Most importantly, these cookies create genuine nostalgia—they taste exactly like comfort, tradition, and the holidays should taste. Whether you’re honoring family traditions by recreating a beloved childhood favorite, introducing peanut butter blossoms to your own family for the first time, or seeking a crowd-pleasing cookie that satisfies diverse palates, this recipe delivers consistent excellence that makes you look like a baking expert while requiring surprisingly minimal effort.
Ingredients
This recipe makes approximately 24 to 30 cookies depending on size.
For the Peanut Butter Dough:
- 1/2 cup unsalted butter, softened to room temperature
- 1/2 cup creamy peanut butter, at room temperature
- 1/2 cup granulated sugar
- 1/2 cup packed brown sugar
- 1 large egg, room temperature
- 1 1/2 teaspoons vanilla extract
- 1 3/4 cups all-purpose flour
- 1/2 teaspoon baking soda
- 1/4 teaspoon sea salt
- 1 tablespoon granulated sugar for rolling
For Assembly and Baking:
- 24 to 30 milk chocolate candy kisses, unwrapped
- Parchment paper or silicone baking mats
- Baking sheets
- Cooling racks
Creating Your Peanut Butter Base
To begin, preheat your oven to 350 degrees Fahrenheit and position the racks to the middle setting for even baking throughout. Meanwhile, in a small bowl, whisk together the all-purpose flour, baking soda, and sea salt, combining them thoroughly and breaking up any lumps. Set this dry mixture aside while you focus on building the creamed mixture that forms your cookie’s foundation.
In a large mixing bowl, combine the softened unsalted butter and creamy peanut butter, beating them together on medium speed using an electric mixer for approximately two minutes. First, mixing these fats creates a smooth, cohesive base that distributes evenly throughout your dough. Next, don’t worry about achieving perfect uniformity—a couple minutes of mixing creates sufficient combination without requiring obsessive precision.
Add the granulated sugar and packed brown sugar to the peanut butter mixture, beating on medium speed for approximately two to three minutes until the mixture becomes pale and noticeably fluffy. First, the brown sugar adds moisture and chewiness while granulated sugar creates crispness—together they create perfect textural balance. Next, this creaming incorporates air that creates tender cookies, so take your time with this step even though it seems minor.
Add the room-temperature egg and vanilla extract to your creamed mixture, beating on medium speed for approximately one minute until everything combines smoothly and becomes pale again. First, room-temperature ingredients incorporate more evenly than cold ones, creating homogeneous dough that bakes consistently. Next, beat just until combined—don’t overbeat, which incorporates excessive air and can cause cookies to spread too much during baking.
Gradually add your flour mixture to the wet ingredients, mixing on low speed and stopping frequently to scrape down the bowl with a rubber spatula. First, adding flour gradually prevents overmixing that develops too much gluten and creates tough cookies instead of tender ones. Next, stop mixing the moment the flour disappears—don’t continue stirring once everything has combined, as additional mixing makes cookies tough and dense rather than soft and delicious.
Shaping and Rolling Your Cookies
Place one tablespoon of granulated sugar in a shallow bowl for rolling your cookie dough. Using a cookie scoop or spoon, scoop rounded portions of dough approximately one inch in diameter—these should be about the size of a small walnut. Roll each portion between your palms into a smooth ball, then roll the ball in granulated sugar, coating all sides evenly. First, rolling in sugar creates a slightly crispy, sparkly exterior that contrasts beautifully with the soft interior. Next, the sugar also helps prevent sticking while creating visual appeal that makes these cookies look homemade and special.
Line your baking sheets with parchment paper or silicone baking mats to prevent sticking and promote even browning. Arrange your sugar-coated dough balls on the prepared baking sheets, spacing them approximately two inches apart to allow for spreading during baking. First, consistent spacing ensures even cooking without some cookies browning excessively while others remain underdone. Next, these dough balls should remain rounded and slightly rustic—don’t flatten or shape them further, as natural mounds create cookies with maximum height and chewy centers.
Baking and Adding Your Chocolate Kisses
Place your baking sheets in the preheated 350-degree oven and bake for approximately eight to ten minutes. First, watch carefully as your cookies near completion—they should be set on the edges but the centers should still jiggle slightly if you gently shake the pan. Next, the cookies won’t look completely done; this is exactly what you want because they’ll continue cooking from residual heat even after removal from the oven.
Remove from the oven when the cookies are still slightly soft in the centers but clearly set on the edges—they should look like they need just 30 more seconds of baking. First, removing at this perfect moment creates chewy centers surrounded by slightly crispy, peanut-buttery edges. Next, if you bake until the centers look completely done, they’ll become too hard and dense as they cool.
Working quickly while the cookies are still hot, gently press one unwrapped chocolate kiss into the center of each cookie, pressing gently but firmly enough that the kiss sinks slightly into the dough without breaking through to the bottom. First, the heat from the baking sheet and residual oven heat will soften the chocolate kiss just enough to create a melted appearance while maintaining its shape. Next, work quickly but carefully—if the cookies cool too much, the chocolate won’t adhere or melt properly, creating an awkward appearance.
Allow the cookies to cool on the baking sheet for approximately five minutes, which firms them up just enough for safe handling without becoming brittle. Next, transfer them to a wire cooling rack using a thin spatula, being gentle to avoid disturbing the chocolate kiss or cracking the cookie. Allow them to cool completely before stacking or storing—warm cookies contain moisture that creates steam in containers and can soften neighboring cookies’ textures.
Serving and Storing Tips
Serving Tips
Present your peanut butter blossom cookies on beautiful platters, festive tiered cake stands, or charming cookie jars positioned prominently where guests naturally gravitate during holiday gatherings. Additionally, arrange them with fresh greenery, ribbon, or festive napkins that enhance their visual appeal without requiring elaborate decorating beyond the chocolate kiss crown. Serve alongside cold milk, hot cocoa, coffee, or herbal tea for the ultimate comfort experience that celebrates chocolate and peanut butter harmony.
Furthermore, package cookies into festive tins, boxes, or decorative bags tied with ribbon for gifting throughout the season to neighbors, friends, teachers, and colleagues. Consider creating mixed assortments combining these peanut butter blossoms with other cookie varieties for more elegant, thoughtful gift presentations. For holiday parties and gatherings, arrange cookies on tiered stands or decorative platters positioned where they encourage casual snacking while visiting with loved ones.
Storage Tips
First, store completely cooled cookies in airtight containers at room temperature for up to one week, placing parchment between layers to prevent the chocolate from sticking to neighboring cookies. Next, these cookies also freeze beautifully for up to three months—layer them in freezer-safe containers with parchment between layers, allowing you to enjoy fresh cookies throughout the season without daily baking.
Keep cookies in cool, dry conditions away from direct sunlight and heat sources that can cause chocolate to bloom or soften unpredictably. Additionally, you can prepare cookie dough in advance and refrigerate it for up to three days or freeze it for up to three months, allowing you to add chocolate kisses and bake fresh cookies whenever inspiration strikes. Store unused chocolate kisses in cool, dry conditions in their original packaging to prevent them from melting or becoming damaged before use.
Helpful Notes and Ingredient Substitutions
The beauty of this recipe lies in its flexibility—you can adapt components based on your preferences, dietary needs, and what you have available without compromising the essential cookie. For peanut butter, use creamy varieties for traditional results, though chunky peanut butter adds interesting texture if you prefer more peanut pieces throughout. Additionally, substitute other nut butters like almond butter, cashew butter, or sunflower seed butter for different flavor profiles and allergen considerations. Next, ensure your peanut butter is at room temperature so it incorporates smoothly without creating lumps in your dough.
For chocolate, use quality milk chocolate kisses that taste delicious on their own since they’re the crowning element. Additionally, substitute with semi-sweet chocolate, dark chocolate, white chocolate, or peanut butter-flavored kisses depending on your preferences. Furthermore, you can use small pieces of chocolate bark or premium chocolate chunks pressed into the centers instead of traditional kisses for customized presentations.
For sweetness adjustments, reduce sugar slightly if your peanut butter is particularly sweet, or add an extra tablespoon of brown sugar for chewier cookies. Next, a pinch of cinnamon or salt sprinkled into the dough adds subtle depth and complexity without being identifiable as a specific ingredient. Furthermore, add one-quarter teaspoon of espresso powder to enhance chocolate flavor without making cookies taste like coffee.
To save time during busy weeks, prepare your dough in advance and refrigerate it for up to three days—cold dough actually produces slightly chewier cookies that bake more evenly. Moreover, you can scoop cookie dough onto baking sheets, cover them with plastic wrap, and refrigerate overnight, allowing you to simply press chocolate kisses and bake fresh cookies in the morning. Next, prep by measuring dry ingredients in advance and combining them in containers, which allows dough assembly in minutes when you’re ready to bake.
Avoid common mistakes by not opening your oven door during baking, as temperature fluctuations cause uneven cooking and cookies to spread unpredictably. Additionally, don’t use peanut butter that’s separated with oil on top without stirring it in—this creates greasy dough and overly flat cookies. Next, ensure your egg and peanut butter are truly room temperature before mixing, as cold ingredients create lumpy dough and inconsistent cookies.
Chef Tips
First, create more interesting peanut flavor by using natural peanut butter instead of conventional brands—the deeper, more complex peanut taste elevates these cookies noticeably. Next, lightly toast your peanut butter in a skillet over low heat for one minute before using, which intensifies peanut flavor and creates subtle caramelization that adds depth.
Frequently Asked Questions
Can I use natural peanut butter with separated oil on top? Yes, simply stir the oil into the peanut butter until it combines evenly—don’t drain the oil away as it’s essential to the peanut butter’s texture and nutrition.
What if the chocolate kiss slides off my cookie during baking? This happens occasionally due to moisture or uneven dough surface—simply press it back on once the cookie cools slightly, and the residual heat will help it stick.
How far in advance can I prepare these cookies? Baked cookies freeze for up to three months, while cookie dough keeps in the refrigerator for three days or freezer for three months before baking and adding chocolate.
Can I use creamy peanut butter spread instead of natural peanut butter? Yes, conventional creamy peanut butter works beautifully and is what most traditional recipes call for—choose whatever tastes best to you personally.
What if my cookies spread too much and become too thin? Chill your dough for 30 minutes before baking, use slightly less sugar, or reduce your oven temperature to 325 degrees—these adjustments help cookies maintain their height.
Why Peanut Butter Blossom Cookies Deserve Permanent Status in Your Holiday Routine
These cookies represent the perfect marriage of simplicity and sophistication—they’re straightforward enough for beginning bakers yet impressive enough to serve at the most elegant holiday gatherings. First, they require minimal ingredients that you likely already have in your pantry, making spontaneous baking accessible without special shopping trips. Next, the combination of creamy peanut butter with melted chocolate creates flavor harmony that’s difficult to resist, making these cookies universally loved by diverse palates.
The iconic appearance of a chocolate kiss nestled perfectly in the center of a peanut butter cookie creates immediate nostalgia and recognition that feels both comforting and special. Most importantly, these cookies prove that holiday baking doesn’t need complexity or elaborate techniques—sometimes the most beloved treats come from straightforward simplicity prepared with genuine care.
The joy of sharing homemade peanut butter blossom cookies with people you care about creates memories and goodwill that extends far beyond the cookies themselves. Whether you’re honoring family traditions by recreating a beloved childhood favorite, introducing these cookies to your own family for the first time, or seeking crowd-pleasing treats that satisfy diverse preferences, these cookies deliver consistent excellence.
First-time bakers find this recipe encouraging because every step is straightforward and forgiving—mistakes are nearly impossible and success is virtually guaranteed. Experienced bakers appreciate the reliable consistency and foolproof nature that makes this recipe perfect for busy holiday seasons when complicated attention becomes impossible. From the first bite of peanut butter dough to the moment of melted chocolate blending with creamy peanut butter, these cookies deliver comfort and joy that defines holiday baking at its finest.
These cookies will inevitably become your go-to recipe throughout December—the one you reach for when unexpected guests arrive, holiday gifts require last-minute preparation, or you simply need comfort and warmth. Whether this is your first time making them or you’ve perfected this recipe through countless December batches, each iteration offers opportunity to create something delicious and share genuine joy with everyone around you.
Did you love this Peanut Butter Blossom Cookies Recipe? If so, we’d absolutely adore it if you’d save this recipe for later, pin it to your favorite Pinterest board, or share it with friends and family who appreciate these timeless, beloved cookies that taste like holidays and tradition. Your support means everything to us and inspires us to keep creating recipes that make holiday baking feel achievable, enjoyable, and genuinely delicious. Thank you for baking with us this holiday season!