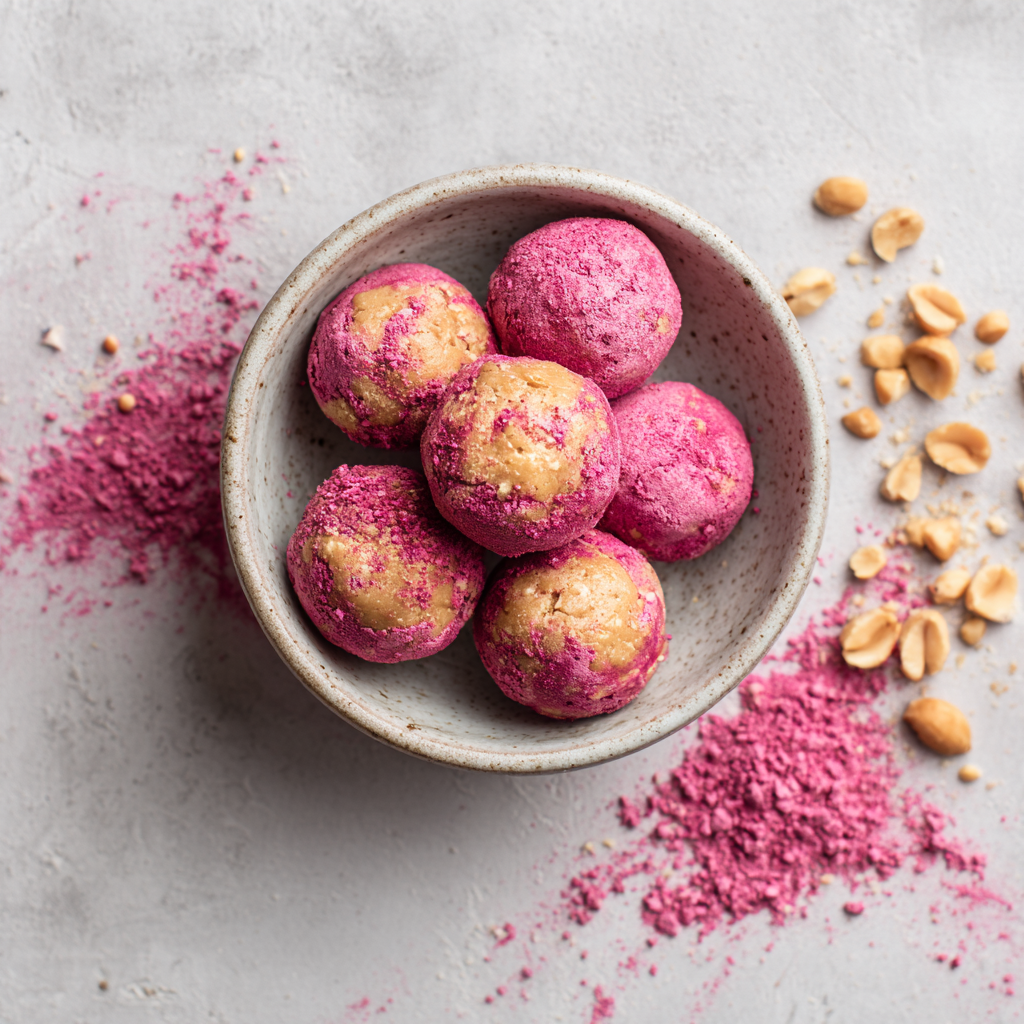
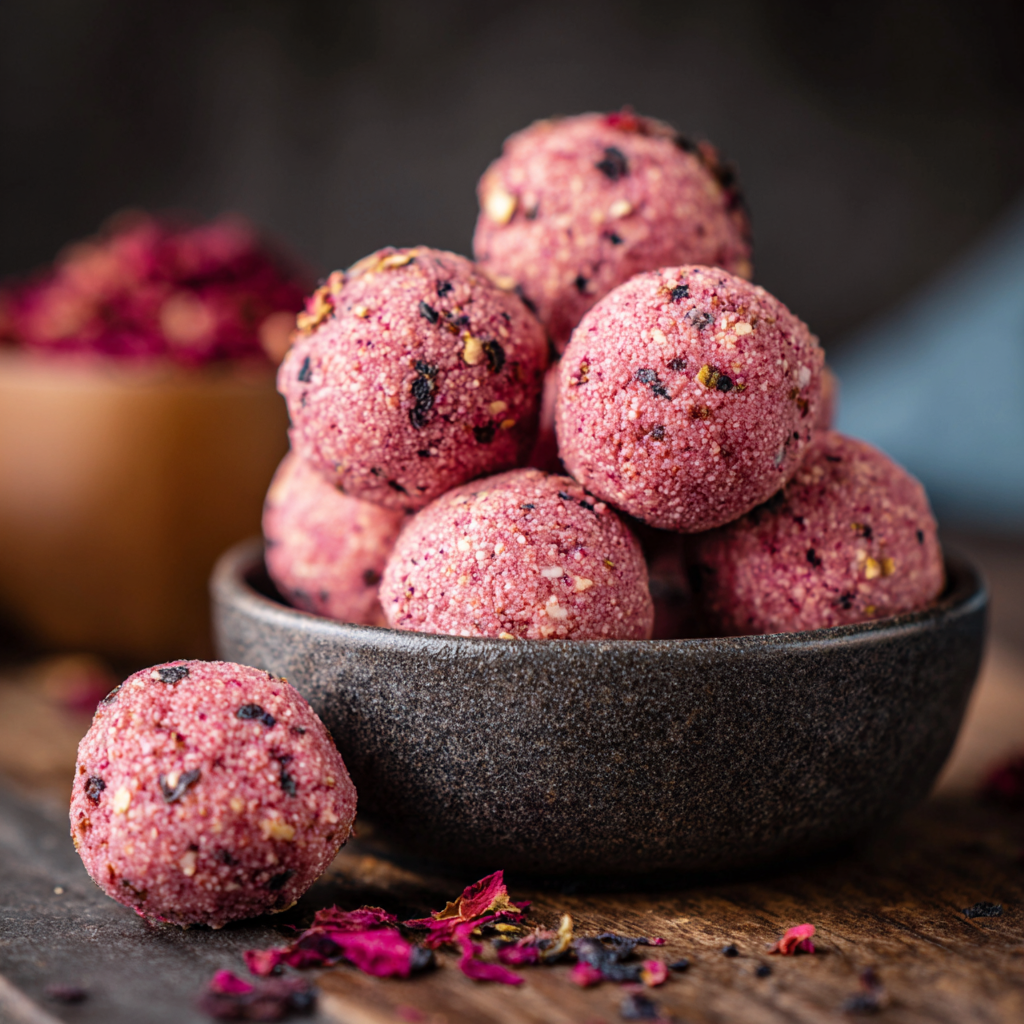
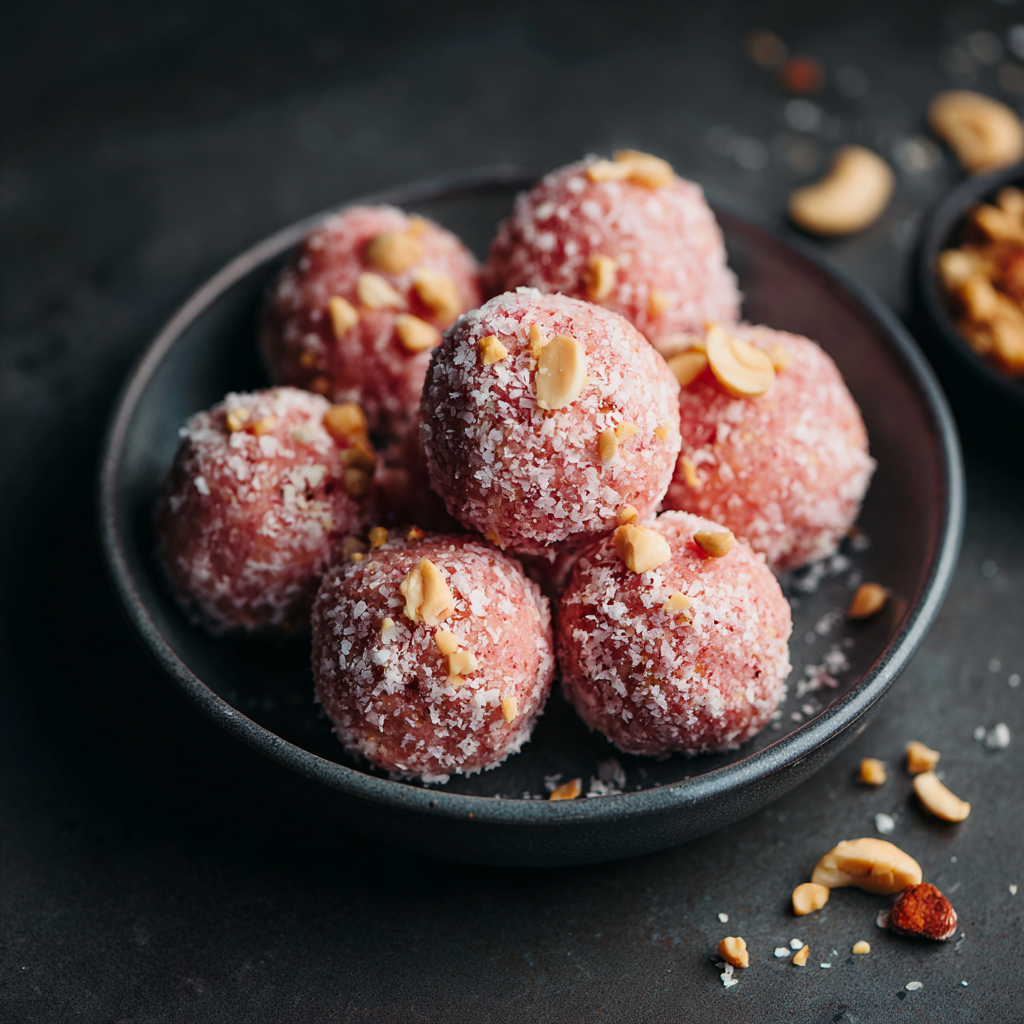
These absolutely delicious pink peanut butter protein balls deliver the perfect balance of indulgent taste with genuinely nourishing ingredients that make you feel amazing while satisfying sweet cravings completely. First, these beautiful no-bake treats feature creamy peanut butter centers coated in smooth pink-tinted chocolate that creates the most satisfying, surprisingly sophisticated flavor combination. Next, the straightforward preparation requires absolutely no baking, special equipment, or cooking skills, making these perfect for busy schedules and spontaneous treat-making moments. Additionally, the high protein content from peanut butter and optional protein powder makes these genuinely nutritious without tasting like health food. The stunning pink color makes these naturally beautiful for Valentine’s Day, special occasions, gifting, or whenever you want something that looks impressive and tastes absolutely fantastic. Furthermore, these protein balls are perfect for healthy snacking, post-workout treats, gifts for health-conscious friends, special occasions, or whenever you want something indulgent that actually supports wellness goals.
Why Pink Peanut Butter Protein Balls Are the Ultimate Healthy Indulgence
Pink peanut butter protein balls represent the beautiful intersection of genuine nutrition with indulgent appearance and satisfying flavor that makes healthy eating feel like a treat rather than a sacrifice. These no-bake treats deliver creamy, satisfying texture from quality peanut butter while the smooth chocolate coating adds richness and luxury. Meanwhile, the natural protein from peanut butter combined with optional protein powder creates treats that satisfy hunger for hours without energy crashes. Furthermore, the simple ingredient list contains only real food with no artificial additives, making these clean-eating friendly while tasting genuinely delicious. Additionally, making these requires no baking knowledge or special equipment, allowing anyone to create impressive, nourishing treats. The flexibility allows customization to match any dietary preference—dairy-free, vegan, gluten-free, or refined-sugar-free—without sacrificing deliciousness. For anyone seeking to create impressive, nourishing treats that taste genuinely fantastic while supporting wellness goals and looking absolutely beautiful, pink peanut butter protein balls are absolutely the answer.
Ingredients (Makes About 20 Balls)
For the Peanut Butter Centers:
- 1 cup natural peanut butter (or almond butter for variation)
- ½ cup powdered sugar
- 3 tablespoons honey or maple syrup
- ¼ cup vanilla protein powder (optional, for added protein and structure)
- ¼ teaspoon vanilla extract
- Pinch of salt
- Optional: 2 tablespoons coconut oil for smoother texture
For the Pink Chocolate Coating:
- 1 cup semi-sweet or dark chocolate chips
- 2 tablespoons coconut oil or butter
- 2-3 drops red or pink food coloring (gel coloring for deeper color)
- ¼ teaspoon vanilla extract
- Pinch of salt
Optional Decorations:
- Pink sprinkles or sanding sugar
- White chocolate drizzle
- Crushed freeze-dried strawberries
- Edible pearls or gold dust
- Unsweetened cocoa powder for dusting
Step-by-Step Instructions
Preparing Your Workspace
- Line a large baking sheet with parchment paper or silicone baking mat.
- Set up a space for dipping where you’ll coat the peanut butter centers in chocolate.
- Have all ingredients measured and ready near your workspace for efficient assembly.
- Fill a tall glass or bowl with warm water—this will be your chocolate-dipping station for softening the coating.
- Gather small spoons or forks for dipping, along with a plate for setting coated balls.
Creating the Peanut Butter Centers
- In a medium mixing bowl, combine the natural peanut butter, powdered sugar, honey, and salt.
- Stir thoroughly with a spoon or wooden spatula until well combined and uniform in color.
- If using protein powder, add it to the mixture gradually, stirring until evenly distributed.
- The protein powder helps firm up the centers and adds nutritional value without changing the flavor noticeably.
- Add the vanilla extract and stir until completely incorporated.
- If the mixture seems too soft or sticky to form into balls, add the optional coconut oil, one tablespoon at a time, stirring thoroughly.
- The consistency should be firm enough to hold a shape but still pliable enough to roll easily.
- Test by forming a small ball with your hands—it should hold together without crumbling or being too greasy.
Rolling the Centers Into Balls
- Using a spoon or cookie scoop, portion the peanut butter mixture into balls about the size of a walnut.
- Alternatively, use a melon baller or small ice cream scoop for uniform-sized balls.
- Roll each portion gently between your palms, creating smooth, uniform sphere shapes.
- Work quickly but gently to avoid warming the mixture excessively, which can make it harder to work with.
- Place each finished ball on the prepared baking sheet, spacing them about 1 inch apart.
- Once all balls are formed, place the baking sheet in the freezer for at least 30 minutes to firm up the centers.
- Chilled centers are easier to coat and less likely to absorb chocolate or lose their shape during dipping.
Melting the Chocolate Coating
- In a heat-safe bowl, combine the chocolate chips, coconut oil, and pinch of salt.
- Place the bowl over a pot of gently simmering water, creating a double boiler setup.
- Alternatively, microwave the chocolate in 30-second intervals, stirring after each interval, until melted.
- Stir the chocolate mixture gently and consistently until completely smooth and shiny.
- The mixture should be warm enough to coat easily but not so hot it will melt the peanut butter centers.
- Remove from heat once melted and smooth, then add the vanilla extract, stirring gently to incorporate.
- Add the red or pink food coloring drop by drop, stirring after each addition.
- Start with 2 drops and adjust upward gradually until you achieve your desired shade of pink.
- Gel coloring produces more vibrant pink without watering down the chocolate like liquid coloring does.
- The chocolate should be a beautiful pink color, smooth, and ready for dipping.
Coating the Centers
- Remove the chilled peanut butter balls from the freezer—they should be very firm.
- Using a small fork or dipping spoon, carefully pick up one peanut butter ball.
- Submerge it completely in the melted pink chocolate, coating it thoroughly on all sides.
- Gently tap the fork on the side of the bowl to remove excess chocolate, allowing it to drip back into the mixture.
- Place the coated ball back on the prepared baking sheet, using the fork to gently slide it off.
- Repeat the dipping process with each remaining peanut butter ball, working efficiently while the chocolate stays warm.
- If the chocolate begins to cool and thicken, gently reheat it over warm water for 30 seconds, stirring once or twice.
- Don’t allow the chocolate to get too hot, as excessive heat will melt your peanut butter centers.
Adding Optional Decorations
- While the chocolate coating is still wet and shiny, add optional decorations if desired.
- Sprinkle pink sanding sugar, edible pearls, or crushed freeze-dried strawberries over the wet chocolate.
- Alternatively, wait for the chocolate to set slightly, then drizzle white chocolate over the tops for elegant decoration.
- Work quickly before the chocolate sets completely so decorations adhere properly.
- Allow the decorated balls to set at room temperature for about 1 hour until the chocolate hardens completely.
- For faster setting, place them in the refrigerator for 20-30 minutes until the chocolate is firm.
Final Steps and Serving
- Once the chocolate is completely set, the protein balls are ready to enjoy or store.
- Arrange them on a beautiful platter for serving, or package them for gift-giving.
- Serve at room temperature, though they can be enjoyed chilled straight from the refrigerator.
Serving and Storing Tips
How to Serve and Enjoy
These beautiful pink peanut butter protein balls are perfect for nearly every occasion where healthy, indulgent, genuinely delicious treats are celebrated and appreciated. First, serve them on a beautiful platter for impressive dessert displays at parties, gatherings, or special occasions. Next, package them individually in cellophane or pretty paper for memorable homemade gifts that friends and family genuinely appreciate. Additionally, these work beautifully for Valentine’s Day gift exchanges, office treats, fitness-focused gatherings, or anywhere health-conscious people congregate. Furthermore, enjoy them as post-workout treats that provide protein and satisfaction without guilt, afternoon snacks with coffee or tea, or evening indulgences. You might also serve them at special brunches, ladies’ luncheons, or gatherings where elegant, nutritious options are appreciated. Consider arranging them in gift boxes with colorful tissue paper and ribbon for genuinely impressive presentations that communicate thoughtfulness. These balls are equally perfect for personal snacking, quiet moments enjoying something beautiful and delicious, or whenever you want something satisfying that aligns with wellness goals.
Storage for Maximum Freshness
To preserve pink peanut butter protein balls at peak flavor and texture, store them in an airtight container in the refrigerator. Layer balls with parchment paper between them to prevent sticking and maintain individual integrity. Properly stored, these balls stay fresh and delicious for up to 10 days in the refrigerator, maintaining their firm centers and smooth chocolate coating throughout. For extended storage, freeze the finished balls in a freezer-safe container for up to 2 months—thaw them at room temperature for about 30 minutes before enjoying, and they’ll taste fresh and delicious. The peanut butter center mixture can be made ahead and refrigerated for up to 5 days before rolling and coating, allowing convenient preparation over multiple days. For entertaining, prepare the peanut butter centers and form into balls ahead of time, then coat with chocolate just before serving or up to 2 days before for fresh appearance. Store uncoated peanut butter balls frozen for up to 1 month, then coat with chocolate fresh just before serving for peak chocolate texture. Do not leave these balls at room temperature for extended periods, as warm temperatures can soften the chocolate coating and make the centers greasy. For gift-giving, store in the refrigerator in pretty boxes until ready to transport, keeping them cold during transport if possible. Include a note mentioning they’re best enjoyed from the refrigerator, as the cold temperature keeps the texture perfect.
Helpful Notes and Tips
Several practical considerations will help you create beautiful, delicious pink peanut butter protein balls that turn out perfectly every single time. First, choosing quality natural peanut butter matters—look for brands with minimal ingredients, no added sugar, which creates the best-tasting centers. Next, the protein powder is optional but genuinely recommended—it adds structure that helps the balls hold together and increases nutritional value without changing flavor. Additionally, chilling the peanut butter centers before coating is absolutely crucial—room temperature centers can soften and absorb chocolate or lose their shape during dipping. Meanwhile, the chocolate should be warm enough to coat smoothly but not so hot it melts the centers—test with a small ball first. The gel food coloring produces more vibrant pink without watering down the chocolate like liquid coloring does, so it’s worth seeking out. For dairy-free versions, ensure you use dairy-free chocolate and coconut oil rather than butter in the coating. Those preferring vegan options should use maple syrup or agave instead of honey in the centers. For lower-sugar versions, reduce the powdered sugar to ¼ cup and increase protein powder slightly for structure. The peanut butter quality genuinely matters—high-quality, creamy peanut butter creates the best centers, so splurge on good butter. For deeper chocolate flavor, use dark chocolate instead of semi-sweet, though this creates less sweet final product. If the chocolate coating cracks or looks uneven, you can remelt it and re-dip the ball for a smooth finish. For colorful variety, make multiple batches with different food coloring shades—red, hot pink, light pink—for beautiful assortments.
Chef Tips
Chill the peanut butter centers for at least 30 minutes before coating—very firm centers resist absorbing chocolate and maintain their shape better during the dipping process, resulting in cleaner-looking finished balls.
Keep a tall glass of warm water nearby while dipping; if the chocolate coating begins to thicken as you work, dip your dipping fork into the warm water and wipe dry between dips to help the chocolate flow smoothly.
Frequently Asked Questions
Can I use different nut butters instead of peanut butter? Absolutely! Almond butter, cashew butter, or sunflower seed butter all work beautifully, each creating slightly different flavor profiles while maintaining the same nutritional benefits.
What if my peanut butter centers are too soft to coat? Freeze them longer until they’re very firm—at least 1-2 hours, or overnight if needed; firm centers resist melting and coating better than soft ones.
Can I make these without chocolate coating? Yes! Roll the peanut butter balls in cocoa powder, shredded coconut, or cinnamon sugar for delicious no-chocolate versions that taste amazing.
How do I prevent chocolate from dripping when dipping? Use a small fork or spoon to dip and tap gently against the bowl’s side to remove excess chocolate; the less chocolate coating, the less dripping occurs.
Can I make these dairy-free and vegan? Yes! Use dairy-free chocolate chips, coconut oil in both filling and coating, maple syrup instead of honey, and ensure the protein powder is vegan-friendly.
The Joy of Genuinely Healthy Indulgence
These pink peanut butter protein balls represent the beautiful intersection of genuine nutrition with indulgent appearance and satisfying flavor that makes healthy eating feel genuinely special and celebratory. From the moment you begin rolling creamy peanut butter centers through coating them in beautiful pink chocolate and adding elegant touches, you’ll understand why these no-bake treats are so beloved. The recipe delivers impressive results that feel genuinely luxurious without requiring complicated techniques or advanced skills.
What makes these protein balls truly special is the combination of creamy peanut butter comfort with smooth chocolate luxury and genuine nutritional value. First, the natural peanut butter provides protein and healthy fats that satisfy hunger for hours. Next, the beautiful pink chocolate coating adds richness and visual appeal that makes these feel genuinely special. Additionally, the optional protein powder increases nutritional density without affecting flavor or texture. Furthermore, the absence of artificial ingredients means you know exactly what you’re eating, making these genuinely health-conscious without tasting like health food.
Whether you’re creating these for Valentine’s Day gifts, fitness-focused snacking, special occasions, entertaining health-conscious friends, or simply because you want something delicious that aligns with wellness goals, pink peanut butter protein balls deliver absolute magic without requiring guilt. The combination of creamy centers, smooth chocolate coating, beautiful pink color, and genuine nutrition creates something truly memorable that impresses everyone fortunate enough to enjoy them. Every ball promises creamy satisfaction, smooth texture, and the warmth that comes from creating something delicious and genuinely nourishing.
We’d absolutely love to hear if you try these pink peanut butter protein balls! Did they become your go-to recipe for healthy snacking and special gifts? Please save this recipe for future treat-making sessions, share it with friends and family members who appreciate healthy, delicious options, and pin it to your favorite snacks and wellness recipe boards. Your feedback, comments, and shares truly inspire us to continue creating meaningful recipes that bring people together and make healthy eating feel joyful and achievable. Drop a comment below telling us what nut butter you used, how you decorated them, or how your loved ones reacted to these beautiful treats—we absolutely cherish hearing about your culinary adventures and the joy our recipes bring to your kitchen and wellness journey!