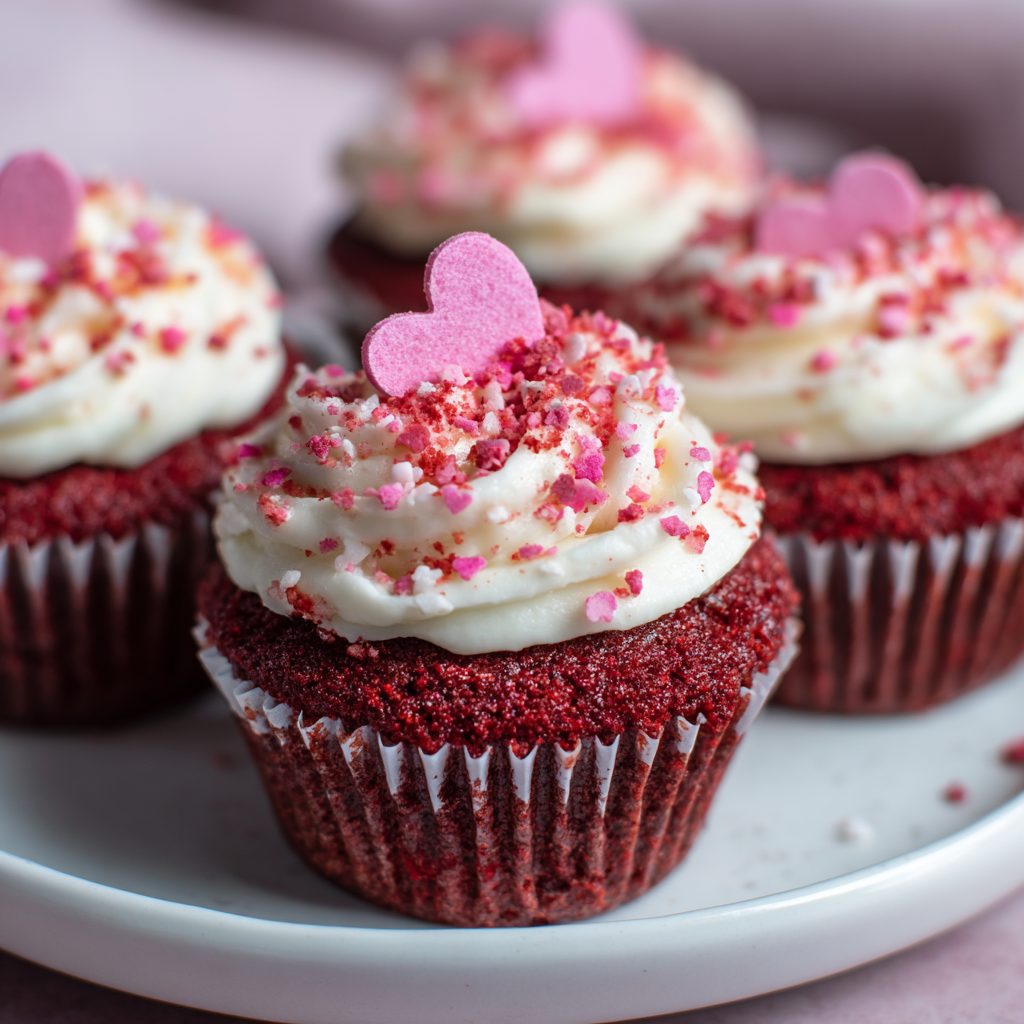
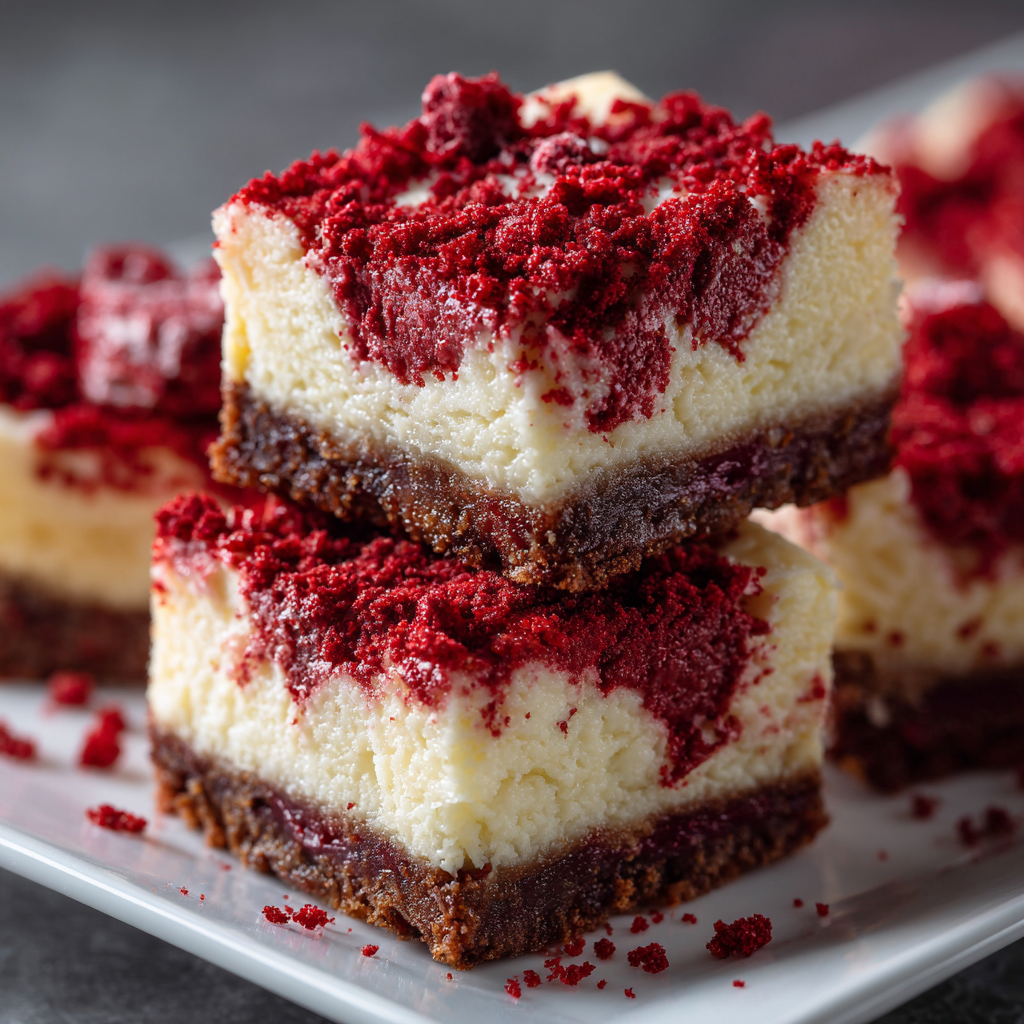
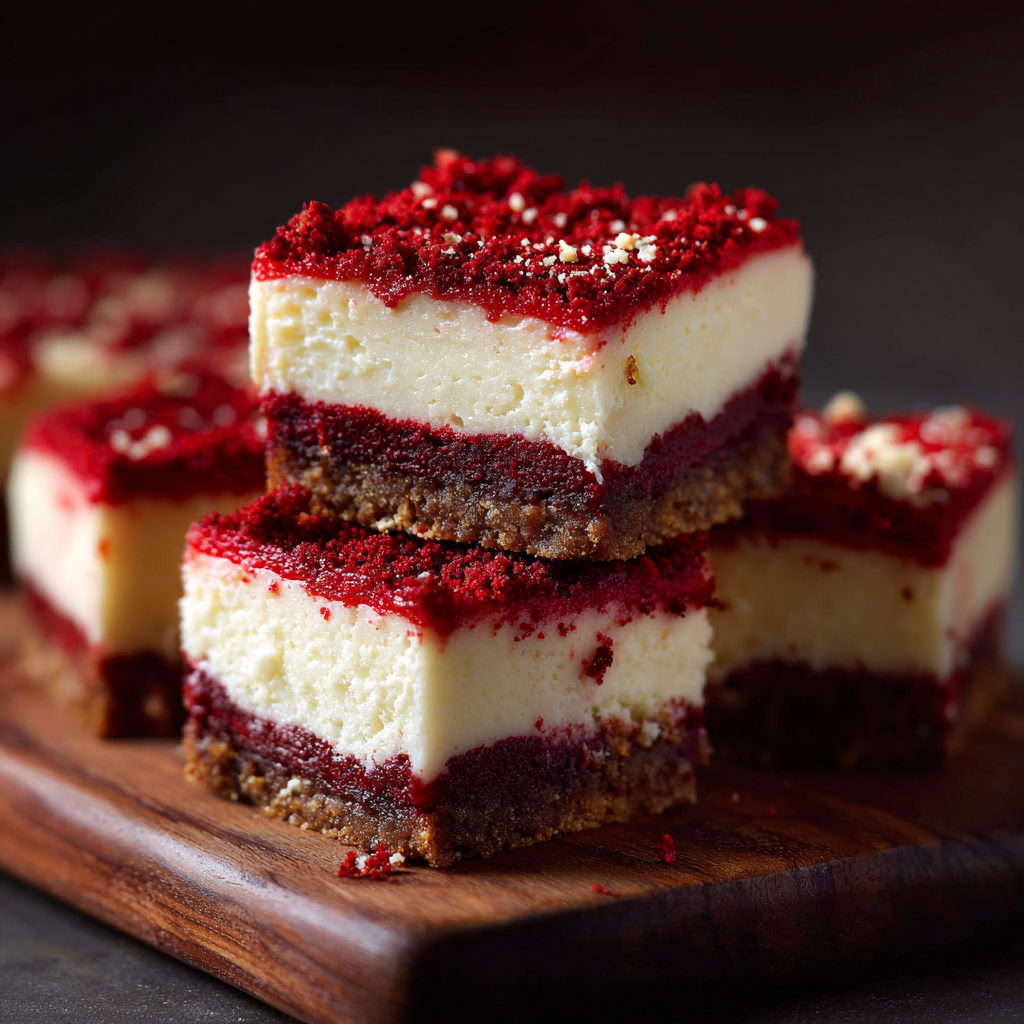
These stunning red velvet cheesecake bars combine the best of both beloved desserts into one absolutely irresistible treat that’s sure to become your go-to recipe for special occasions and celebrations. First, these elegant bars feature a tender red velvet cake layer base topped with creamy, tangy cheesecake that creates a textural contrast that makes every bite genuinely exciting. Next, the ingredient list brings together pantry staples and kitchen essentials, eliminating the need for specialty shopping or complicated ingredient hunting. Additionally, the preparation method is straightforward enough for novice bakers yet produces results so impressive they appear restaurant-quality and professionally made. The stunning deep red color with white cheesecake swirls creates a visually gorgeous dessert that photographs beautifully and impresses everyone before they even taste it. Furthermore, these bars are perfect for holiday gatherings, Valentine’s Day celebrations, special occasions, gift-giving, or whenever you want to create something truly memorable. Whether you’re baking for a crowd or an intimate gathering, red velvet cheesecake bars deliver show-stopping results that leave everyone asking for the recipe.
Why Red Velvet Cheesecake Bars Are Irresistibly Perfect
Red velvet cheesecake bars represent the ultimate fusion of two beloved desserts, combining red velvet cake’s subtle cocoa flavor and beautiful color with creamy cheesecake’s luxurious texture and tangy richness. These bars deliver what single-component desserts cannot—the complexity that comes from combining complementary flavors and textures into one sophisticated creation. Meanwhile, the combination of tender cake layer and creamy cheesecake topping appeals to diverse taste preferences, satisfying everyone from cake lovers to cheesecake enthusiasts simultaneously. Furthermore, the visual appeal of these bars—deep red with white creamy swirls—makes them inherently impressive and Instagram-worthy without requiring advanced decorating skills. Additionally, baking them in bar form rather than individual slices makes serving and portion control remarkably easy, perfect for entertaining or batch baking. The straightforward preparation method makes achieving professional-quality results completely accessible to home bakers of any skill level. For anyone seeking to create something genuinely impressive yet surprisingly achievable, red velvet cheesecake bars are absolutely the answer.
Ingredients (Makes 16 Bars)
For the Red Velvet Cake Layer:
- ½ cup unsalted butter, softened to room temperature
- 1 cup granulated sugar
- 1 large egg
- 1 tablespoon white vinegar
- 1 teaspoon vanilla extract
- 1¾ cups all-purpose flour
- 2 tablespoons unsweetened cocoa powder
- ½ teaspoon salt
- ½ teaspoon baking soda
- ½ cup buttermilk
- 1-1½ teaspoons red food coloring (gel coloring for deeper color)
For the Cheesecake Layer:
- 16 ounces cream cheese, softened to room temperature
- ½ cup granulated sugar
- 2 large eggs
- ½ cup sour cream
- 1 teaspoon vanilla extract
- Pinch of salt
- 2 tablespoons all-purpose flour (prevents cracks)
Optional Garnish:
- 2 tablespoons white chocolate shavings (optional)
- Fresh raspberries (optional)
Step-by-Step Instructions
Preparing Your Baking Station
- Preheat your oven to 325°F and position the rack in the center for even heat distribution and consistent baking.
- Line a 9-inch square baking pan with parchment paper, extending the parchment up the sides and over the edges.
- The overhanging parchment makes it easy to lift the finished bars out of the pan for clean, even cutting.
- Alternatively, line the pan with greased aluminum foil, creating a similar lifting system.
- Gather all ingredients and equipment near your mixing station so everything is immediately accessible.
- Bring the cream cheese to room temperature by leaving it on the counter for about 1 hour—room temperature cream cheese mixes smoothly without lumps.
- Similarly, allow the butter and eggs to reach room temperature for optimal mixing and texture.
Creating the Red Velvet Cake Layer
- In a large mixing bowl, cream together the softened butter and granulated sugar using an electric mixer on medium speed.
- Beat for about 3-4 minutes until the mixture becomes noticeably lighter in color, fluffier in texture, and increased in volume.
- Add the egg to the butter mixture and beat on medium speed for about 1 minute until fully incorporated and the mixture looks fluffy.
- Pour in the white vinegar and vanilla extract, beating on medium speed for another minute until everything combines smoothly.
- The vinegar reacts with the baking soda to create the cake’s characteristic tender crumb and subtle tang.
- In a separate medium bowl, whisk together the flour, cocoa powder, salt, and baking soda until evenly combined.
- Reduce the mixer speed to low and alternately add the dry ingredients and buttermilk to the butter mixture, beginning and ending with dry ingredients.
- Start with one-third of the dry mixture, then half the buttermilk, then another third of dry mixture, then remaining buttermilk, then final dry mixture.
- This alternating method ensures even mixing without overworking the batter and developing tough cake layers.
- Mix just until each addition is incorporated—overmixing develops gluten and creates dense, tough cake instead of tender crumb.
- Add the red food coloring gradually, stirring until you achieve the deep red color you desire—start with 1 teaspoon and adjust upward.
- Gel coloring produces more vibrant red without watering down the batter like liquid food coloring does.
- Pour the red velvet cake batter into the prepared baking pan, spreading it evenly into all corners with a spatula.
- Smooth the top and ensure even distribution, then set aside while you prepare the cheesecake layer.
Creating the Cheesecake Layer
- In a large mixing bowl, beat the room-temperature cream cheese using an electric mixer on low speed for about 2 minutes.
- Beat just until the cream cheese becomes smooth and creamy; avoid overmixing, which incorporates air and causes cracks during baking.
- Add the granulated sugar gradually while beating on low speed, mixing until combined but not overmixing.
- Add the eggs one at a time, beating on low speed after each addition until just incorporated—do not overbeat.
- Pour in the sour cream and vanilla extract, beating on low speed until the mixture combines smoothly.
- Sprinkle the flour and pinch of salt over the mixture and fold gently by hand with a spatula until just incorporated.
- The flour helps stabilize the cheesecake and reduce cracks during baking, so don’t skip this ingredient.
- The batter should look smooth, creamy, and uniform in color.
Assembling and Baking
- Carefully pour the cheesecake batter over the red velvet cake layer, spreading it gently and evenly with a spatula.
- Work gently to avoid disturbing the cake layer underneath; the layers will combine slightly at the edges, which is perfectly fine.
- Smooth the top, ensuring the cheesecake covers all the cake layer and reaches evenly into all corners.
- Place the baking pan in the preheated 325°F oven on the center rack.
- Bake for 35-40 minutes until the cheesecake layer is set around the edges but the center still wobbles slightly when you gently shake the pan.
- The center should not jiggle excessively, but a slight wobble indicates the cheesecake is baked perfectly without overcooking.
- A toothpick inserted into the cheesecake should come out clean or with just a few creamy crumbs, not wet batter.
- Remove the pan from the oven and place it on a wire cooling rack to begin cooling gradually.
- Allow the bars to cool at room temperature for at least 1 hour, then refrigerate for at least 4 hours or preferably overnight.
- Chilling is essential—it allows the bars to set completely, making them much easier to cut cleanly and preventing a mushy texture.
Cutting and Serving
- Once thoroughly chilled, lift the parchment corners to remove the entire bar square from the pan.
- Place the bar square on a cutting board and cut into 16 equal squares using a sharp, dry knife.
- Wipe the knife clean between cuts with a damp paper towel to prevent layers from sticking and tearing.
- For the cleanest cuts, dip your knife in hot water and wipe dry between each cut, which slightly melts the layers for smooth edges.
- Arrange the cut bars on a serving plate or store them in an airtight container in the refrigerator.
- Optional: garnish with white chocolate shavings or fresh raspberries just before serving for elegant presentation.
Serving and Storing Tips
How to Serve and Enjoy
These elegant red velvet cheesecake bars are perfect for nearly every occasion where impressive, sophisticated desserts are celebrated and appreciated. First, serve them chilled directly from the refrigerator, as the cold temperature brings out the creamy cheesecake texture and vibrant red color beautifully. Next, pair them with hot beverages like coffee, hot chocolate, or specialty lattes for an indulgent dessert experience that feels genuinely luxurious. Additionally, serve them at holiday gatherings, Valentine’s Day celebrations, special occasions, or gatherings where impressive desserts are appreciated. Furthermore, these bars work beautifully as gifts when packaged individually in clear cellophane or arranged in elegant bakery boxes with ribbon. You might also arrange them on a beautiful dessert platter alongside fresh berries, whipped cream, and other elegant treats for stunning dessert table displays. Consider serving them with vanilla ice cream for a more indulgent version, or with a dollop of fresh whipped cream for added elegance. These bars are equally perfect for casual entertaining, potlucks where you want to impress, or whenever you want to create something truly memorable and visually stunning.
Storage for Maximum Freshness
To preserve these bars at peak flavor and creamy texture, store them in an airtight container in the refrigerator away from strong-smelling foods. Layer bars with parchment paper between them to prevent sticking and maintain clean, beautiful appearance. Properly stored, these red velvet cheesecake bars stay fresh and delicious for up to 5 days in the refrigerator, maintaining their creamy texture and vibrant color throughout. For extended storage, freeze the cut bars in a freezer-safe container or freezer bag for up to 2 months—thaw them in the refrigerator overnight before serving, and they’ll taste nearly as fresh as the day they were baked. Do not freeze uncut bars, as they’re difficult to cut cleanly after freezing; instead, cut first, then freeze individual bars for convenient portioning. For gift-giving, wrap individual bars in colorful cellophane or tissue paper, securing with pretty ribbon or tape for presentation. Store wrapped bars in the refrigerator until ready to gift; they should remain chilled during transport and storage. If bars become too soft during storage, chill them in the refrigerator for 15-20 minutes before serving to restore the proper texture. Do not leave these bars at room temperature for extended periods, as the cream cheese frosting can become greasy or develop off-flavors from temperature exposure.
Helpful Notes and Tips
Several practical considerations will help you create absolutely beautiful, delicious red velvet cheesecake bars that turn out perfectly every single time. First, bringing all ingredients to room temperature is genuinely important—cold cream cheese, butter, and eggs don’t mix smoothly, resulting in lumpy texture and uneven baking. Next, avoid overmixing the batter at any stage; the key is mixing just until ingredients are combined, not beating vigorously, which incorporates excess air and causes cracks. Additionally, the chilling time is not optional—at least 4 hours or preferably overnight allows the bars to set completely, making them much easier to cut cleanly and preventing a mushy texture. Meanwhile, the food coloring amount depends on how vibrant you want the red color; gel coloring produces deeper color with less liquid than liquid coloring, so it’s the better choice. For a more traditional red velvet flavor, ensure you include both the white vinegar and cocoa powder, as these create the subtle flavor that distinguishes red velvet from plain chocolate. Those preferring less cocoa flavor can reduce it to 1 tablespoon, though this creates a milder cake layer. For deeper, richer red velvet flavor, increase the cocoa powder to 3 tablespoons, creating a more chocolate-forward base. The cream cheese quality matters; use full-fat cream cheese and avoid low-fat versions, which don’t create proper cheesecake texture. The sour cream is genuinely important—it adds tanginess that balances sweetness beautifully and contributes to creamy texture, so don’t skip it or substitute. Using gel food coloring allows you to achieve vibrant red without adding excess moisture that would affect batter consistency and baking results. For a marbled appearance, reserve some plain cheesecake batter and drizzle it over the red layer before baking, then swirl gently with a knife for decorative effect.
Chef Tips
Allow all ingredients to reach room temperature before mixing—cream cheese especially needs this to blend smoothly without lumps, resulting in the creamiest, smoothest cheesecake layer possible.
Use a sharp serrated knife dipped in hot water and wiped clean between cuts to create the cleanest, most professional-looking bar edges without dragging through the delicate layers.
Frequently Asked Questions
Why did my cheesecake layer crack? Cracks usually result from overmixing the batter (which incorporates excess air) or overbaking; mix on low speed only, don’t overmix, and remove when the center still wobbles slightly.
Can I make these bars without the cake layer? Yes! Simply skip the red velvet layer and make the cheesecake layer in a graham cracker crust for a simpler version, though the two-layer combination is particularly special.
What if my bars don’t cut cleanly? Ensure they’re thoroughly chilled for at least 4 hours, use a hot, wet knife wiped between cuts, and cut slowly and steadily rather than sawing back and forth through the layers.
Can I substitute the sour cream? Greek yogurt can substitute for sour cream in a pinch, though it creates slightly different texture; avoid using whipped cream or whipped topping substitutes, which don’t bake properly.
How do I prevent the cream cheese from lumping? Always bring cream cheese to room temperature for at least 1 hour before mixing, then beat only on low speed until smooth—overmixing or using cold cheese causes lumps.
The Elegance of Red Velvet Cheesecake Fusion
These red velvet cheesecake bars represent the beauty of thoughtfully combining two beloved desserts into one sophisticated creation that delivers more than either could alone. From the moment you begin layering red velvet cake with creamy cheesecake through that first bite of perfectly balanced flavors and textures, you’ll understand why this combination is genuinely genius. The recipe delivers consistent, impressive results that feel luxurious and celebratory without requiring complicated techniques or special skills.
What makes these bars truly special is the harmonious combination of complementary flavors and textures working together. First, the tender red velvet cake layer provides structural foundation and subtle cocoa-vanilla flavor. Next, the creamy cheesecake layer adds luxurious texture and tangy richness that balances the cake’s sweetness beautifully. Additionally, the vibrant red color with creamy white cheesecake creates a visually stunning presentation that’s almost too beautiful to eat. Furthermore, the combination of both textures in each bite creates complexity and interest that single-layer desserts cannot achieve.
Whether you’re baking for special occasions, Valentine’s Day celebrations, holiday gatherings, gift-giving, or simply because you want to create something genuinely impressive, red velvet cheesecake bars deliver absolute magic from your own kitchen. The combination of tender red velvet cake, creamy cheesecake, and beautiful presentation creates something truly memorable that impresses everyone fortunate enough to enjoy them. Every batch promises stunning visual appeal, layered textures, and the warm satisfaction that comes from creating homemade treats that deliver both beauty and genuine deliciousness.
We’d absolutely love to hear if you try these red velvet cheesecake bars! Did they become your go-to recipe for special occasions and celebrations? Please save this recipe for future baking sessions, share it with friends and family members who appreciate elegant, impressive desserts, and pin it to your favorite dessert and celebration boards. Your feedback, comments, and shares truly motivate us to continue creating delicious, accessible recipes that bring people together and make home baking feel joyful and achievable. Drop a comment below telling us how you served them, what garnishes you added, or how your loved ones reacted to these stunning bars—we absolutely cherish hearing about your baking adventures and the joy our recipes bring to your kitchen and special celebrations!