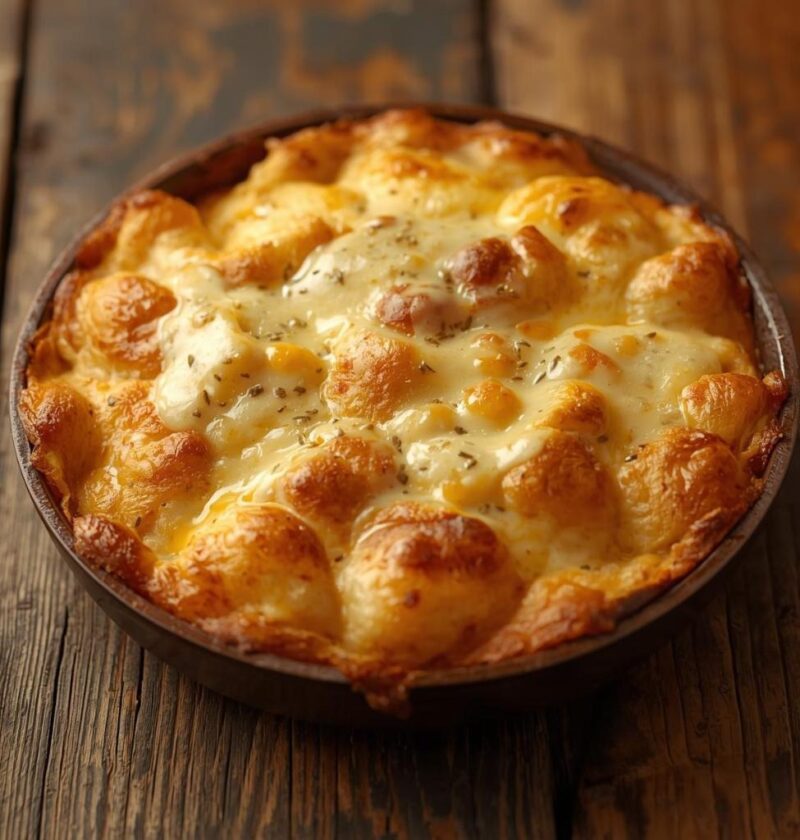
Scalloped potatoes are the ultimate creamy, indulgent side dish that transforms simple potatoes and cheese into a luxuriously comforting masterpiece that steals the spotlight from even the most impressive main course. These tender potato slices bathed in a rich, velvety cheese sauce and topped with buttery breadcrumbs deliver the kind of comfort food satisfaction that makes people close their eyes in contentment with every creamy, cheesy bite. What makes this recipe so special is the way properly prepared scalloped potatoes achieve a perfect balance between the tender potatoes, silky sauce, and subtle cheese flavor that creates genuine sophistication without feeling overly complicated or pretentious. Additionally, scalloped potatoes work equally well as an elegant side dish at holiday celebrations, an essential component of special occasion dinners, a comforting family meal accompaniment, a potluck contribution that always receives compliments, or alongside grilled meats and roasted vegetables where their richness perfectly complements lighter proteins. The beauty of this recipe lies in its versatility and the way the same basic technique accommodates countless variations while maintaining incredible comfort food appeal. Furthermore, despite their luxurious taste and impressive presentation, these potatoes are remarkably straightforward to prepare, making them perfect for home cooks who want to serve restaurant-quality side dishes without requiring advanced culinary skills or complicated techniques.
Ingredients
This recipe serves 8–10 people as a side dish or 6–8 as a main course
For the Potatoes and Base:
- 3 pounds russet or Yukon Gold potatoes (approximately 6–8 medium potatoes)
- 4 tablespoons unsalted butter
- 1 large onion, thinly sliced
- 4 cloves garlic, minced
- 3 tablespoons all-purpose flour
- 2½ cups whole milk, warmed
- 1 cup heavy cream, warmed
- 2 cups shredded sharp cheddar cheese
- ½ cup shredded Gruyere cheese
- ¼ cup grated Parmesan cheese
- 1 teaspoon salt
- ½ teaspoon black pepper
- ¼ teaspoon ground nutmeg
- ¼ teaspoon cayenne pepper
- Optional: 2 tablespoons fresh thyme, chopped
- Optional: 1 tablespoon fresh rosemary, chopped
- Optional: ¼ cup crispy cooked bacon, crumbled
For the Topping:
- 3 tablespoons unsalted butter, melted
- 1 cup panko breadcrumbs
- ½ cup grated Parmesan cheese
- 2 tablespoons fresh parsley, chopped
- ¼ teaspoon salt
- ⅛ teaspoon black pepper
- Optional: ½ teaspoon smoked paprika for color and depth
- Optional: ¼ cup crispy fried onions for crunch
Step-by-Step Instructions
1. Preheat your oven to 350°F and position the oven rack to the middle setting for even cooking and browning.
2. Lightly butter or spray a 9×13-inch baking dish, or use a similar-sized dish that accommodates the potatoes comfortably.
3. Scrub the potatoes under cool running water to remove any dirt, then pat them completely dry with paper towels.
4. Using a sharp knife or mandoline slicer, cut the potatoes into thin slices approximately ⅛-inch thick for even cooking throughout the dish.
5. Place the sliced potatoes in a large bowl and set aside, covering them with cool water if preparing ahead to prevent browning.
6. In a large saucepan, melt the 4 tablespoons of butter over medium heat until it foams gently.
7. Add the thinly sliced onion and minced garlic to the melted butter, stirring frequently until the onion becomes soft and translucent, approximately 5–7 minutes.
8. Sprinkle the flour over the softened onion mixture, stirring constantly to coat all the onion pieces evenly.
9. Cook the flour mixture, stirring constantly, for approximately 1–2 minutes to cook off the raw flour taste.
10. Gradually pour the warmed milk into the flour mixture while whisking constantly to create a smooth sauce without lumps.
11. Continue whisking and stirring for approximately 3–5 minutes until the sauce thickens enough to coat the back of a spoon.
12. Remove the saucepan from the heat and allow it to cool slightly, approximately 1–2 minutes.
13. Stir in the warm heavy cream, mixing until evenly distributed throughout the sauce.
14. Add the shredded cheddar cheese, Gruyere cheese, and Parmesan cheese to the sauce, folding gently until the cheeses melt completely and the sauce becomes smooth and creamy.
15. Season the sauce with salt, black pepper, ground nutmeg, and cayenne pepper, tasting and adjusting seasonings as needed.
16. If using optional fresh thyme, rosemary, or crispy bacon, fold these into the sauce now, distributing them evenly throughout.
17. Drain the potatoes thoroughly, patting them dry with clean kitchen towels to remove excess moisture.
18. Spread half of the drained potato slices in an even layer on the bottom of the prepared baking dish.
19. Pour half of the cheese sauce over the first layer of potatoes, spreading it evenly to ensure all potatoes contact the sauce.
20. Arrange the remaining potato slices in an even layer over the sauce.
21. Pour the remaining cheese sauce over the top layer of potatoes, spreading it evenly and ensuring good coverage.
22. In a small bowl, combine the melted butter, panko breadcrumbs, Parmesan cheese, fresh parsley, salt, and black pepper.
23. If using optional smoked paprika or crispy fried onions, add these to the breadcrumb mixture and stir until evenly distributed.
24. Sprinkle the breadcrumb mixture evenly over the top of the scalloped potatoes, creating an even layer.
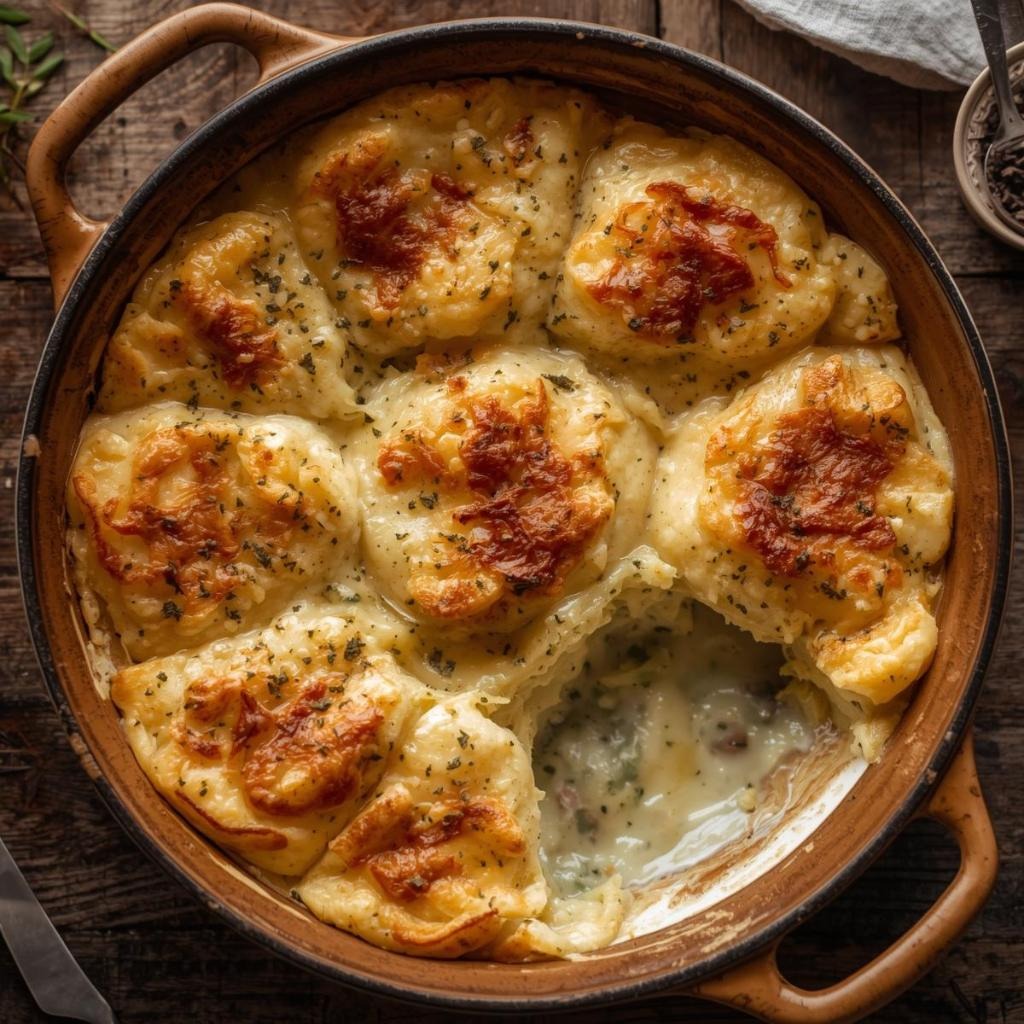
25. Bake at 350°F for 45–55 minutes until the top becomes golden brown and the sauce bubbles around the edges of the dish.
26. If the top begins browning too quickly before the potatoes are tender, cover the dish loosely with aluminum foil during the final 15 minutes of baking.
27. Remove from the oven and allow the potatoes to rest for approximately 10 minutes before serving, which allows the sauce to set slightly.
28. Garnish with fresh parsley or additional fresh herbs just before serving for bright color and fresh flavor.
Serving Tips
Next, serve these creamy scalloped potatoes warm, straight from the oven while the sauce is still perfectly creamy and the topping maintains its crispy texture. Additionally, scoop generous portions onto serving plates, ensuring each serving includes creamy potato layers and some of the golden, crunchy topping. These pair beautifully with grilled steaks, roasted chicken, baked ham, or any protein that benefits from a rich, creamy side dish. Meanwhile, they complement lighter mains like grilled fish or roasted vegetables equally well, where their richness balances the lightness of the primary dish. Furthermore, they work perfectly as part of holiday celebration menus, special occasion dinners, casual family gatherings, sophisticated entertaining, or potluck contributions where their universal appeal ensures they disappear quickly. They’re ideal alongside carved roasts, glazed hams, herb-roasted poultry, or any occasion where an impressive, comforting side dish elevates the entire meal.
Storage Tips
To store leftover scalloped potatoes, allow them to cool completely to room temperature before covering and placing them in the refrigerator, where they’ll keep for up to four days. However, they’re best enjoyed within the first two days while the sauce maintains optimal creaminess and the breadcrumb topping retains maximum crispness. When reheating, place portions in a baking dish, cover loosely with foil, and warm in a 350°F oven for about 15–20 minutes until heated through completely. Alternatively, you can reheat individual portions in the microwave, though this may soften the breadcrumb topping—add it fresh if preferred. For freezing, transfer cooled scalloped potatoes to a freezer-safe container for up to three months, though the texture becomes slightly less creamy after thawing. To use frozen potatoes, thaw them overnight in the refrigerator and reheat using the oven method for best results. Additionally, you can freeze unbaked scalloped potatoes before baking—simply assemble completely, cover tightly, and freeze for up to two months. Bake directly from frozen at 350°F for 60–75 minutes until the potatoes are tender and the top is golden brown.
Helpful Notes
Potato Selection: To begin with, choosing the right potato variety is essential—Yukon Gold potatoes offer waxy texture that holds shape beautifully, while russet potatoes provide fluffier interiors though they’re slightly more prone to falling apart. However, either variety works wonderfully in this dish, so choose based on your personal texture preference. Additionally, avoid waxy potatoes like red potatoes, as their high moisture content can result in watery dishes rather than creamy sauces.
Slicing Consistency: Next, ensuring the potato slices are uniform in thickness is absolutely essential—varying thickness results in uneven cooking where some potatoes are tender while others remain firm. Additionally, using a mandoline slicer creates perfectly consistent, thin slices far more easily than hand-slicing. Furthermore, patting the slices dry after slicing prevents excess moisture from diluting the cheese sauce.
Creating the Roux: Meanwhile, proper roux technique creates the foundation for smooth, lump-free sauce without which the entire dish suffers. Additionally, cooking the flour for 1–2 minutes after adding to the butter eliminates the raw flour taste and helps it thicken properly. Furthermore, whisking constantly while adding milk prevents lumps from forming and creates silky, smooth sauce.
Sauce Temperature: To understand why this matters, using warmed milk and cream allows them to incorporate smoothly into the roux without cooling the mixture and causing lumps. Additionally, cold milk added to hot roux creates lumpy, uneven sauce. Furthermore, warming the dairy in a microwave or small saucepan takes just a few minutes and dramatically improves results.
Cheese Selection: However, the combination of three cheeses creates more complex flavor than using a single variety. Additionally, sharp cheddar provides tangy depth, Gruyere adds sophisticated nuttiness, and Parmesan contributes umami complexity. Furthermore, using freshly shredded cheese melts more smoothly than pre-shredded varieties, which contain anti-caking agents that affect texture.
Layering Technique: To achieve even cooking and creamy texture, alternating potato layers with sauce ensures all potatoes contact the creamy mixture rather than some sitting dry. Additionally, spreading sauce evenly between layers creates uniform creaminess throughout the dish. Furthermore, reserving some sauce for the top layer ensures adequate coverage and creamy texture in the final product.
Preventing Watery Dishes: Meanwhile, thoroughly draining the sliced potatoes removes excess moisture that would otherwise dilute the cheese sauce. Additionally, patting them dry with clean towels further reduces moisture. Furthermore, using the proper ratio of sauce to potatoes ensures creaminess without excess liquid.
Breadcrumb Topping: To create the perfect topping, using panko breadcrumbs instead of regular breadcrumbs creates extra crunch and better browning. Additionally, tossing the breadcrumbs with melted butter ensures even coating and golden browning. Furthermore, adding Parmesan to the topping mixture creates extra flavor and improved browning.
Common Mistakes to Avoid: However, don’t use cold milk and cream, as this prevents smooth sauce formation. Additionally, don’t skip the resting period after baking—allowing the dish to sit allows the sauce to set slightly, making portions hold together better. Furthermore, avoid overcrowding the dish, as this prevents even cooking and results in uneven texture.
Time-Saving Tricks: To streamline preparation, prepare the cheese sauce the night before and store in an airtight container in the refrigerator, then reheat gently before assembling. Additionally, you can slice the potatoes up to four hours ahead, storing them in a covered bowl in the refrigerator, then proceed with assembly when ready. Meanwhile, you can assemble the entire dish up to 24 hours in advance and refrigerate it unbaked, then bake as directed—just add 10–15 minutes to the baking time since it starts cold.
Chef Tips
Tip 1: Add two tablespoons of fresh thyme and one tablespoon of fresh rosemary to the cheese sauce for herbaceous depth that elevates this from good to absolutely extraordinary, creating sophistication that feels intentional and restaurant-quality.
Tip 2: Brown the butter used for the roux before creating the sauce, which adds deep, nutty complexity to the entire dish and creates nuanced flavor that makes people wonder what’s making it taste so good.
Frequently Asked Questions
Can I make scalloped potatoes ahead and freeze them? Yes, assemble the complete dish, cover tightly with plastic wrap and foil, and freeze for up to two months. Bake directly from frozen at 350°F for 60–75 minutes until tender and golden.
How do I prevent the potatoes from becoming watery? Drain the sliced potatoes thoroughly, pat them dry, and use the proper ratio of sauce to potatoes. Additionally, avoid opening the oven door frequently during baking, as this releases steam that can create wateriness.
What if my sauce becomes lumpy? Strain it through a fine-mesh sieve into the baking dish, or use an immersion blender to smooth out the lumps before layering with potatoes.
Can I substitute the cheese varieties? Absolutely—use any melting cheeses you prefer. Sharp cheddar, smoked gouda, gruyere, fontina, or combinations of these work beautifully.
How do I know when the potatoes are done baking? The top should be golden brown and the sauce should bubble around the edges. A fork should pierce the potatoes easily without resistance.
Why This Recipe Works
The magic of scalloped potatoes comes from the combination of tender, thinly sliced potatoes suspended in a rich, velvety cheese sauce that coats every slice completely. Additionally, the three-cheese combination provides complex flavor depth that elevates the dish beyond simple potato and sauce. Meanwhile, the breadcrumb topping provides essential textural contrast with a crispy exterior against the creamy interior. Furthermore, the gentle oven temperature allows potatoes to cook through completely while the sauce thickens and flavors meld beautifully. The beauty of this recipe also lies in its versatility—the same basic technique accommodates countless variations while maintaining incredible comfort food appeal.
Variations to Try
Bacon and Cheddar Version: Next, fold crispy cooked bacon crumbles into the cheese sauce and use all sharp cheddar instead of the cheese combination for a more intensely flavored, bacon-forward dish.
Herb Roasted Version: To try something different, add two tablespoons of fresh thyme, one tablespoon of fresh rosemary, and one tablespoon of fresh sage to the sauce for Mediterranean-inspired depth.
Smoky Gouda Version: However, replace the cheddar with smoked gouda and add ¼ teaspoon of smoked paprika to the sauce for deeper, smokier complexity.
Leek and Gruyere Version: As an alternative, sauté sliced leeks instead of onions and use all Gruyere cheese for a more sophisticated, delicate flavor profile.
Loaded Baked Potato Style: For a completely different approach, add cooked bacon, green onions, sour cream, and crispy fried onions to create a baked potato-inspired variation.
Truffle Cream Version: To create a luxurious variation, add one tablespoon of truffle oil to the sauce and increase the Parmesan for elegant sophistication.
Complementary Main Dishes
These scalloped potatoes shine brightest when paired with proteins that benefit from their rich, creamy accompaniment. Next, herb-roasted chicken, grilled steaks, roasted prime rib, or baked ham all pair beautifully. Additionally, roasted pork chops or lamb receive complementary richness. Meanwhile, lighter proteins like grilled fish or roasted chicken breast work equally well where the richness of the potatoes provides satisfying balance.
Make-Ahead and Entertaining Tips
For stress-free entertaining, these potatoes actually improve when made a day ahead—the flavors develop and meld more completely. Next, assemble them completely, cover, and refrigerate overnight. Additionally, bake them just before serving, adding a few extra minutes to account for starting from a cold state. Furthermore, you can prepare the sauce and slice the potatoes separately, then assemble quickly when entertaining, minimizing last-minute work.
Nutritional Information
While scalloped potatoes are undeniably indulgent, they do provide nutritional value beyond comfort. Next, potatoes offer fiber, vitamins C and B6, manganese, and potassium. Additionally, using whole milk and cream provides calcium and vitamin D. Furthermore, the cheese contributes protein and additional calcium, making these a more substantial side dish than they might initially appear.
Final Thoughts
Scalloped potatoes represent the perfect intersection of genuine comfort, elegant sophistication, and practical ease of preparation that makes them ideal for any special occasion, holiday celebration, or meal where you want to serve an impressive side dish. Whether you’re hosting holiday celebrations, preparing special occasion dinners, contributing to potlucks, or simply wanting to elevate ordinary family meals, these potatoes deliver consistently delicious results that become requested favorites. Additionally, the endless customization possibilities for cheese varieties, herbs, and optional additions mean you can make these exactly as you prefer. Next time you’re planning a meal that needs an impressive side dish that actually becomes the highlight, remember that scalloped potatoes are just one hour away from becoming the creamy, crispy masterpiece that everyone raves about long after the meal ends.
Did you love this recipe? If you enjoyed making these Scalloped Potatoes, we’d be thrilled if you’d save this recipe to your favorites, pin it to your Pinterest board, or share it with a friend who’d appreciate it! Your support means everything to us and helps us keep creating delicious recipes to share. Tell us in the comments what cheese combinations you used and whether you experimented with any fun variations—we’d absolutely love to hear about your experience and see how you made this classic side dish your own!