
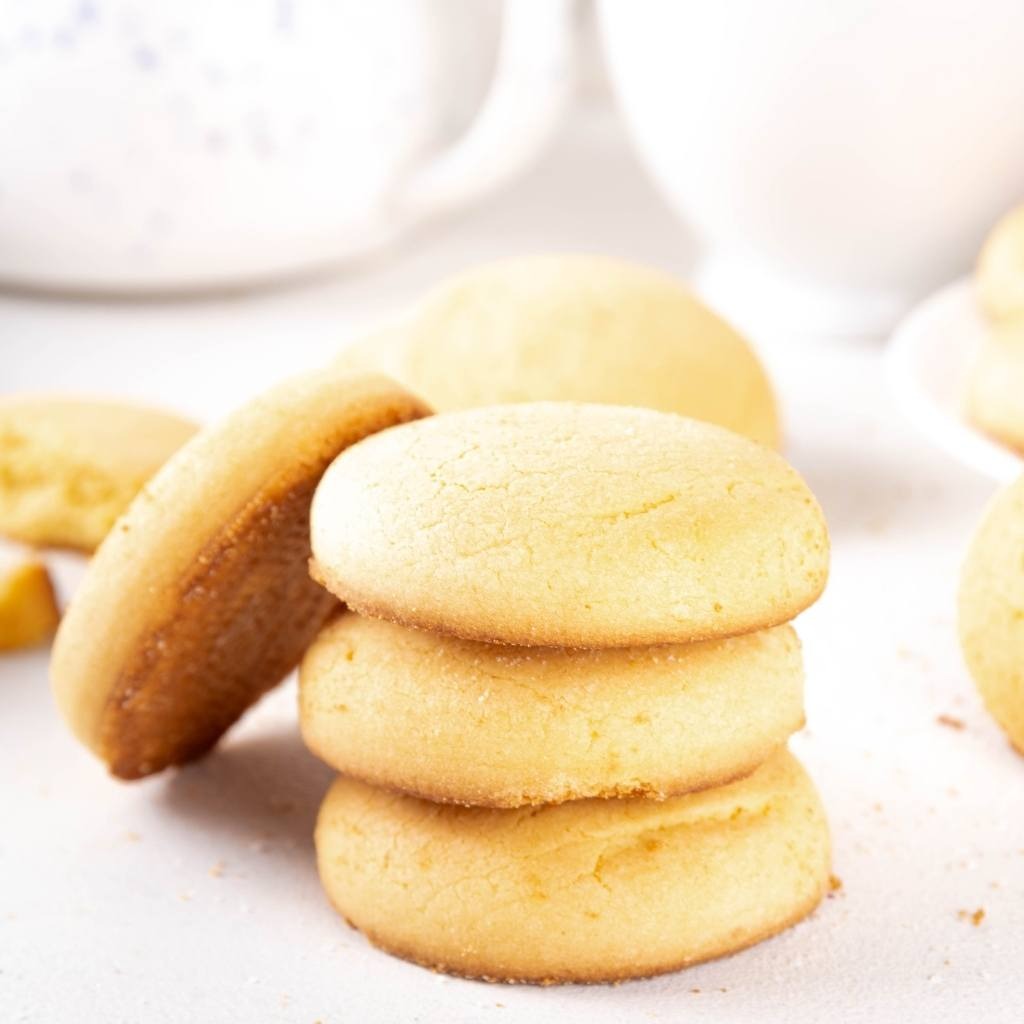
There’s something magical about biting into a sugar cookie that’s perfectly soft, tender, and wonderfully buttery, with just the right amount of sweetness and vanilla flavor dancing across your taste buds. Soft Sugar Cookies represent the gold standard of cookie baking—simple enough for beginners yet sophisticated enough to impress, delivering treats that stay soft for days and become even more delicious as they sit. What makes this recipe truly special is how it balances texture, flavor, and ease, creating cookies that taste homemade and special while remaining genuinely simple to prepare. Whether you’re decorating cookies for holidays, searching for a treat that stays soft and fresh for days, preparing gifts for neighbors and friends, baking with children, or simply craving something sweet and comforting, these cookies deliver every single time. The beauty of soft sugar cookies lies in their versatility and universal appeal; they work beautifully plain, decorated with icing, topped with sprinkles, or enjoyed as a blank canvas for creative variations. Beyond their delicious taste and wonderful texture, these cookies offer the satisfaction of creating something genuinely homemade that rivals any bakery while being far more economical and customizable. From the moment you cream the first butter and sugar together, you’ll understand why this recipe has remained a beloved favorite across generations and continues to be requested year after year.
Ingredients
Servings: 36 cookies
Dry Ingredients: • 2 3/4 cups all-purpose flour • 1/2 teaspoon baking soda • 1/4 teaspoon salt
Wet Ingredients: • 1 cup unsalted butter, softened • 1 1/2 cups granulated sugar • 1 large egg, room temperature • 1 large egg yolk, room temperature • 1 1/2 teaspoons vanilla extract • 1/4 teaspoon almond extract (optional but recommended)
Optional Toppings and Decorations: • 2-3 tablespoons coarse sugar or pearl sugar • Sprinkles or nonpareils • Royal icing for decorating • Food coloring gels • Cinnamon sugar mixture
Step-by-Step Instructions
Mix the Dry Ingredients
- Combine all-purpose flour, baking soda, and salt in a medium mixing bowl, whisking together thoroughly.
- Break up any small lumps and ensure the baking soda is evenly distributed throughout the flour.
- Set the dry mixture aside while you prepare the wet ingredients.
Prepare the Wet Ingredients
- Add the softened unsalted butter to a large mixing bowl and beat on medium speed for about 1 minute until creamy.
- Gradually add the granulated sugar while continuing to beat, mixing on medium speed for about 3 minutes total.
- The mixture should become light and fluffy, indicating that air has been properly incorporated into the dough.
- Stop the mixer and scrape down the sides and bottom of the bowl to ensure all butter and sugar are evenly combined.
- Add the whole egg and beat on medium speed for about 1 minute until fully incorporated.
- Add the egg yolk and beat briefly until the mixture is smooth and uniform.
- Add the vanilla extract and almond extract, beating briefly until the extracts are evenly distributed throughout the mixture.
Combine Dry and Wet Ingredients
- With the mixer on low speed, gradually add the dry ingredient mixture to the wet ingredients.
- Mix only until the dough just comes together—do not overmix, as overworking develops gluten and creates tough cookies.
- Stop the mixer as soon as you no longer see streaks of dry flour, which typically takes about 30 to 45 seconds.
- The dough should be smooth, uniform, and soft but not sticky to the touch.
Chill the Dough
- Divide the dough in half and flatten each portion into a disk about 1 inch thick.
- Wrap each disk tightly in plastic wrap and refrigerate for at least 30 minutes, though 2 hours or even overnight is ideal.
- Chilling the dough makes it easier to work with, prevents excessive spreading during baking, and improves the cookie texture.
- If you’re in a time crunch, freezing the dough for 15 minutes works in an emergency, though longer chilling produces better results.
Prepare Your Workspace
- Preheat your oven to 325°F and position racks in the upper and lower thirds of the oven.
- Line baking sheets with parchment paper or silicone baking mats to prevent sticking and ensure even baking.
- Remove one dough disk from the refrigerator and allow it to sit at room temperature for about 5 minutes to soften slightly.
Roll and Cut the Cookies
- Place the chilled dough between two pieces of parchment paper to prevent sticking.
- Using a rolling pin, roll the dough to about 1/4-inch thickness, which is crucial for the cookies to remain soft.
- If the dough becomes too warm and sticky, transfer it to the refrigerator for 5 minutes to firm up.
- Using cookie cutters, cut the dough into your desired shapes, keeping the cutter as close together as possible to minimize waste.
- Gently transfer the cut cookies to the prepared baking sheets using a thin-bladed spatula.
- Space the cookies about 1 inch apart, as they will spread slightly during baking but not excessively.
- Re-roll the dough scraps and continue cutting until all dough from the first disk is used.
- Repeat the rolling and cutting process with the second dough disk.
Optional Topping Application
- If decorating with coarse sugar or cinnamon sugar, sprinkle it on top of each cookie before baking.
- For sprinkles or other toppings, add them after baking while the cookies are still warm so they adhere properly.
- Royal icing decorations are best applied to completely cooled cookies for the most professional appearance.
Bake the Cookies
- Place one baking sheet on the upper oven rack and one on the lower rack.
- Bake for 10 to 12 minutes, until the cookie edges are very light golden brown but the centers remain pale.
- Begin checking for doneness at the lower end of the time range to prevent overbaking.
- The cookies should look slightly underdone when removed from the oven—they will continue cooking slightly as they cool.
- Rotate the baking sheets halfway through baking for even browning and to prevent some cookies from baking too quickly.
Cool the Cookies
- Remove the baking sheets from the oven and allow the cookies to cool on the sheets for about 3 to 5 minutes.
- This cooling time allows the cookies to set slightly while remaining soft enough to transfer without breaking.
- Transfer the cookies to wire cooling racks using a thin-bladed spatula, handling them gently.
- Allow the cookies to cool completely on the wire racks, which will take about 20 to 30 minutes.
- The cookies will continue to soften as they cool, developing that perfect chewy-tender texture.
Apply Final Decorations (Optional)
- Once the cookies are completely cooled, decorate with royal icing, pipe intricate designs, or add other decorative elements.
- Allow royal icing to dry completely, which typically takes 2 to 4 hours depending on humidity.
- Store decorated cookies in an airtight container with parchment paper between layers to preserve decorations.
Serving and Storing Tips
Serving Tips
First, serve these cookies at room temperature for the best flavor and texture, allowing them to showcase their wonderfully soft, tender crumb. Next, present them on a beautiful platter or in a decorative tin, creating an inviting display that encourages people to enjoy several. Additionally, you can serve them alongside coffee, hot tea, cold milk, or hot chocolate, making them ideal for any time of day. These cookies pair wonderfully with ice cream for a simple dessert, or enjoyed plain when you simply want to savor their vanilla-forward flavor. Furthermore, they work beautifully as components of dessert platters, cookie gifts, or party favors wrapped in pretty packaging. For special occasions, decorate them elaborately with royal icing in colors matching your event theme for an impressive, personalized presentation. Consider serving them at room temperature or slightly warmed, as temperature affects how soft and enjoyable they are.
Storage Tips
Store your soft sugar cookies in an airtight container at room temperature for up to 7 days, maintaining their soft, tender texture throughout the storage period. Meanwhile, you can place parchment paper between layers to prevent them from sticking together, making individual cookies easier to grab. Additionally, these cookies freeze beautifully for up to 3 months when stored in a freezer-safe container with parchment paper separating each layer. To thaw frozen cookies, simply transfer them to room temperature for about 30 minutes before serving, or enjoy them straight from the freezer for a slightly firmer texture. Furthermore, if your cookies have been stored for a few days and begin to feel slightly hard, place a slice of bread in the airtight container overnight and the cookies will reabsorb moisture and become soft and chewy again. The bread can be removed the next day, and your cookies will be noticeably softer. Do not refrigerate cookies, as the cold temperature causes them to dry out faster than room temperature storage. Decorated cookies with royal icing should be stored in a single layer or separated by parchment paper to preserve the decorations.
Helpful Notes
Ingredient Substitutions and Variations
The versatility of this soft sugar cookie recipe allows for countless adaptations while maintaining the wonderfully soft, tender texture that makes these treats so beloved. First, you can substitute unsalted butter with salted butter if you prefer, though you should reduce the salt to 1/8 teaspoon. Next, all-purpose flour can be partially replaced with cake flour for an even softer, more delicate texture, substituting up to 1/4 cup of cake flour for all-purpose. Meanwhile, those avoiding eggs can use a flax egg or applesauce in equal amounts as a binder, though the texture may be slightly different. Additionally, almond extract can be replaced with other extracts like lemon, peppermint, or coconut based on your preference. For nut-free versions, simply omit the almond extract and increase vanilla to 2 teaspoons for a stronger vanilla flavor. Furthermore, you can add 1/2 teaspoon of lemon zest or 1/4 teaspoon of peppermint extract to create flavor variations without changing the basic recipe.
Flavor Enhancement and Decoration Ideas
These cookies provide an excellent foundation for creative variations and decorative approaches that celebrate special occasions and personal preferences. For brown sugar cookies with deeper flavor, replace 1/2 cup of granulated sugar with firmly packed brown sugar for a subtle caramel note. Additionally, adding 1/4 teaspoon of ground cinnamon to the dry ingredients creates warm spice undertones. Meanwhile, incorporating 1 tablespoon of honey into the wet ingredients creates a more complex sweetness. For a more luxurious version, add 1/4 cup of sour cream or Greek yogurt and reduce the egg yolk to achieve richer flavor and tender crumb. Furthermore, royal icing allows for unlimited decorative possibilities—use food coloring to create themed designs, patterns, and personalized messages. Consider creating gradient effects by using multiple shades of the same color, or create intricate piping designs for a professional, bakery-quality appearance. Sprinkles, nonpareils, edible glitter, and shimmer dust transform simple cookies into festive celebrations.
Common Mistakes to Avoid
One of the most frequent mistakes is overbaking the cookies, which transforms soft, tender treats into hard, crispy ones that disappoint. Remove them from the oven when the edges are only very light golden and the centers still look slightly pale—carryover heat will continue cooking them. Additionally, overmixing the dough after combining wet and dry ingredients develops gluten and results in tough cookies rather than tender ones. Mix only until just combined, leaving no visible dry flour. Furthermore, rolling the dough too thick or too thin affects both texture and baking time, so aim for a consistent 1/4-inch thickness. Meanwhile, not chilling the dough adequately results in cookies that spread excessively and bake unevenly, so patience with this step is essential. Finally, using cold eggs or butter prevents proper incorporation and can result in uneven texture, so always ensure ingredients are at room temperature before beginning.
Time-Saving and Make-Ahead Tips
These cookies are perfect for advance preparation, making them ideal for busy weeks when you want freshly-baked treats without stress. First, you can prepare the dough up to 3 days ahead and refrigerate it, or freeze it for up to 2 months for ultimate convenience. Next, you can roll and cut the dough up to 1 day ahead, then refrigerate the cut cookies on baking sheets before baking. Additionally, complete cookies can be baked the day before and stored in an airtight container at room temperature, then decorated just before serving. For maximum convenience, bake cookies completely and freeze them individually wrapped for up to 3 months, providing you with quick treats available anytime without any baking involved. Furthermore, you can scoop dough into balls, freeze them unbaked, then bake directly from frozen by adding 2 to 3 minutes to the baking time. You can also prepare royal icing up to 2 days ahead and store it in an airtight container, applying it to cooled cookies just before serving.
Professional Baking Tips
The secret to perfectly soft sugar cookies lies in removing them from the oven slightly underbaked and understanding that carryover heat continues cooking them after removal. Additionally, using an egg yolk in addition to a whole egg provides extra fat and richness without adding too much moisture, contributing to the tender, soft texture. Meanwhile, rolling the dough between parchment paper prevents sticking and excessive flour incorporation, which would toughen the cookies. Furthermore, rotating the baking sheets halfway through baking ensures even browning and prevents some cookies from baking too quickly. Finally, allowing cookies to cool on the baking sheet for a few minutes before transferring them to a wire rack prevents them from becoming fragile and breaking apart, while still maintaining their soft texture.
Frequently Asked Questions
Can I bake these cookies without chilling the dough, and will they still turn out soft? Chilling is highly recommended for proper texture and shape, though you can chill for just 15 to 20 minutes in a pinch—longer chilling produces better results.
Why are my cookies spreading too much and becoming too thin, and how can I prevent this? This usually indicates the dough wasn’t chilled long enough or the oven temperature is too high; always chill for at least 30 minutes and verify oven temperature.
What should I do if my cookies become too hard after baking, and can I soften them? This indicates overbaking; next time remove them when the edges are only light golden; to soften stale cookies, store with bread overnight.
Can I use brown sugar instead of granulated sugar, and how does it affect the cookies? You can replace up to half the sugar with brown sugar for deeper flavor, though the cookies may spread slightly more and be chewier.
Is the egg yolk really necessary, or can I use just a whole egg instead? The egg yolk adds richness and contributes to softness; you can use just a whole egg, though the cookies may be slightly less tender.
Conclusion
Soft Sugar Cookies represent the quintessential homemade treat that brings joy, comfort, and delicious simplicity to any occasion, proving that the best desserts don’t require complexity or extensive ingredient lists. This classic recipe celebrates pure vanilla flavor and buttery richness while delivering cookies that stay soft for days, making them perfect for families, gatherings, and gift-giving. The remarkable balance of ease and impressive results makes these cookies ideal for both experienced bakers and absolute beginners seeking to create something genuinely special.
The versatility of this recipe opens endless possibilities for flavor variations, decorative approaches, and creative celebrations, ensuring you’ll never grow bored regardless of how frequently you bake them. Furthermore, the make-ahead nature of these cookies means you can prepare dough weeks in advance, keeping your schedule flexible while always having the ability to bake fresh treats on short notice. The opportunity to involve children in baking, decorating, and sharing these treats creates memories alongside delicious results that will be cherished for years.
Next time you’re craving something sweet and comforting, want to impress with homemade goodness, or simply need cookies that stay soft and fresh for days, remember that soft sugar cookies are always the perfect choice. Your family and friends will be absolutely delighted by their tender texture and wonderful vanilla flavor, and you’ll love the confidence that comes from creating something genuinely beloved from your own kitchen.
If you loved making these Soft Sugar Cookies and found this recipe helpful, we’d absolutely love it if you’d save it, pin it to your Pinterest board, or share it with friends and family who might enjoy making it too! Your support and feedback inspire us to keep creating delicious, accessible recipes and helpful guides that bring joy and creativity to home bakers everywhere. We can’t wait to hear about your experience making these cookies, so please come back and let us know if you tried any fun variations or special decorating techniques. Happy baking!