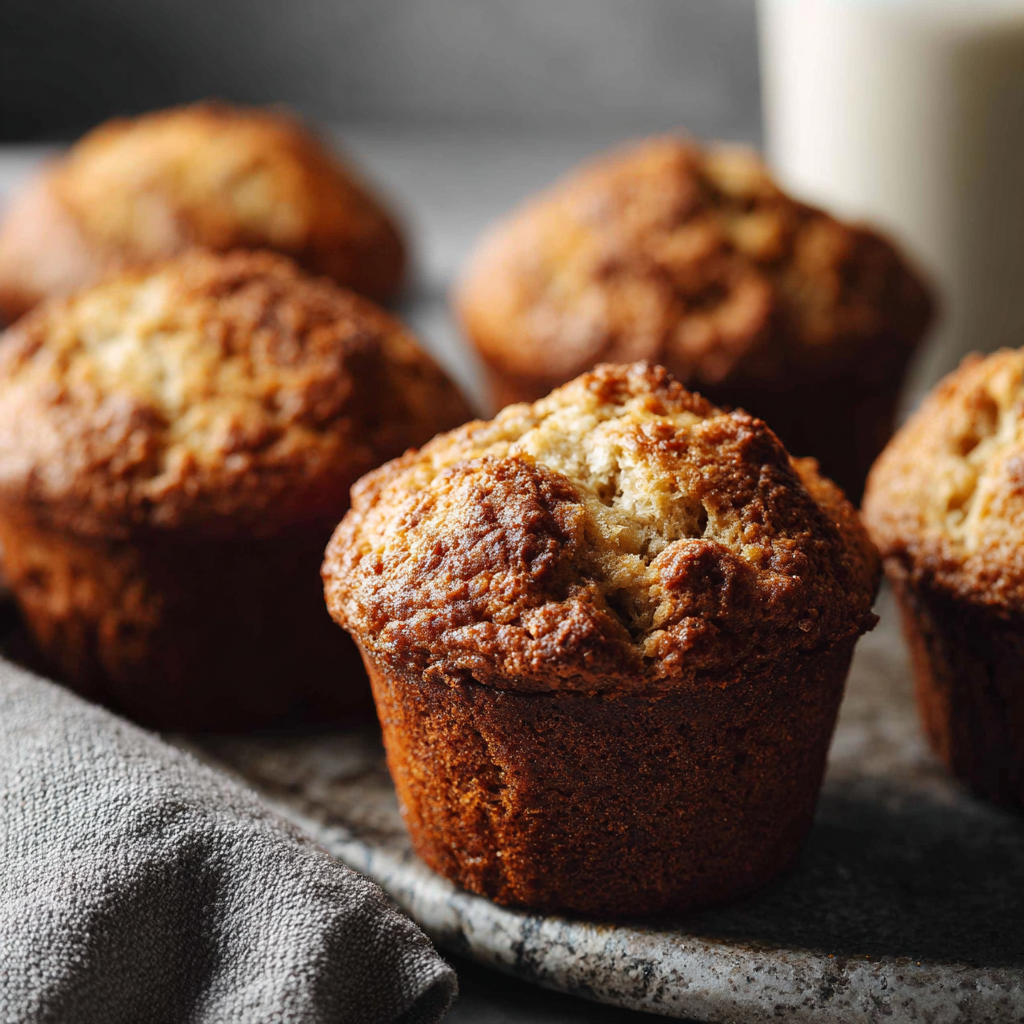
There’s something absolutely magical about the aroma of waffles baking in your waffle iron, and when those waffles are made with sourdough discard, the result is something transcendent—crispy exteriors with tender interiors, subtle fermented complexity, and superior flavor that transforms ordinary breakfast waffles into something genuinely memorable and completely irresistible. This Sourdough Discard Waffles Recipe proves that sourdough starter belongs in breakfast treats—instead of the trash, it transforms simple waffle batter into something with incredible texture, fermented depth, and extended freshness that makes traditional waffles pale in comparison. What makes these waffles truly extraordinary is how they celebrate the intersection of sustainability and culinary excellence, transforming typically discarded sourdough starter into breakfast that tastes like you’ve mastered advanced waffle techniques when really, simple ingredients and proper fermentation create magic naturally. Whether you’re a sourdough enthusiast looking to expand your creative repertoire, someone who appreciates complex flavors in beloved breakfast foods, planning to create impressive weekend breakfasts for people you love, or simply treating yourself to something absolutely delicious and meaningfully made, these sourdough discard waffles deliver pure indulgence and genuine satisfaction. The combination of crispy-yet-tender texture, subtle fermented complexity, perfect golden browning, and versatile topping options creates waffles that taste like genuine homemade care in every single bite. Your loved ones will be absolutely enchanted by the sophisticated flavor, impressed by how delicious homemade sourdough waffles taste compared to store-bought frozen versions, and utterly satisfied enjoying stack after stack of these absolutely wonderful breakfast creations.
Ingredients
This recipe makes approximately 8 to 10 waffles, depending on waffle iron size.
For the Waffle Batter:
- 1 cup sourdough discard (unfed, room temperature)
- ¾ cup whole milk, room temperature
- ¼ cup water, room temperature
- 4 tablespoons melted butter, plus extra for the waffle iron
- 2 tablespoons honey or maple syrup
- 1 large egg, room temperature
- 1 teaspoon vanilla extract
- 1¾ cups all-purpose flour
- 1½ teaspoons baking powder
- ½ teaspoon baking soda
- ¼ teaspoon salt
- ½ teaspoon cinnamon (optional)
- Pinch of nutmeg (optional)
For Optional Mix-Ins:
- ½ cup chocolate chips (semi-sweet or dark)
- ½ cup fresh blueberries
- ¼ cup chopped pecans or walnuts
- ¼ cup shredded coconut
- 2 tablespoons ground flaxseed
For Serving:
- Pure maple syrup, warmed
- Fresh berries
- Whipped cream or Greek yogurt
- Powdered sugar
- Lemon wedges
- Fresh mint leaves
- Butter pats
Instructions
Prepare Your Equipment
- Preheat your waffle iron according to manufacturer instructions, ensuring it’s hot before you begin cooking waffles.
- Have all ingredients measured and organized within easy reach, creating an efficient, stress-free preparation process.
- Use a large mixing bowl for combining wet ingredients and a separate medium bowl for mixing dry ingredients.
Combine Wet Ingredients
- In a large mixing bowl, combine the sourdough discard and room temperature milk, stirring together until they’re partially combined.
- Add the room temperature water and melted butter to the mixture, beating gently with a wooden spoon until these ingredients are incorporated.
- Add the honey or maple syrup, room temperature egg, and vanilla extract to the wet ingredients, beating gently until completely combined.
- Continue beating until the mixture is smooth and well combined with no visible lumps of sourdough discard remaining.
- The wet ingredient mixture should appear creamy and uniform in color, with a slightly thick consistency.
Combine Dry Ingredients
- In a separate medium mixing bowl, whisk together the all-purpose flour, baking powder, baking soda, and salt thoroughly.
- If using optional cinnamon and nutmeg, add them to the dry ingredients and whisk until evenly distributed throughout.
- The dry mixture should appear uniform in color with no visible streaks of baking soda remaining throughout.
Combine Wet and Dry
- Create a well in the center of the dry ingredients and pour the sourdough-milk mixture into it.
- Using a spatula or wooden spoon, gently fold the wet and dry ingredients together, stirring just until they combine into a thick batter.
- Avoid overmixing, as this develops gluten and creates tough, dense waffles rather than light, crispy ones.
- Small visible flour streaks in the batter are acceptable and actually preferable—overmixing creates inferior texture and crumb structure.
Add Optional Mix-Ins
- If using optional chocolate chips, fresh blueberries, nuts, or other mix-ins, fold them into the batter gently, distributing them evenly.
- Continue folding until all mix-ins are incorporated throughout without crushing delicate berries or breaking nuts excessively.
- The finished batter should appear thick and pourable with mix-ins distributed for balanced bites throughout.
Let Batter Rest
- Allow the waffle batter to rest for 5 minutes at room temperature, which allows the flour to fully hydrate and the leavening agents to activate.
- This resting period creates lighter, crispier waffles compared to cooking immediately after mixing.
- The batter should be thick but pourable at this point, with a consistency that flows slowly when spooned.
Cook the Waffles
- Brush the preheated waffle iron lightly with melted butter using a pastry brush, ensuring even coverage on both grids.
- Pour approximately ¾ to 1 cup of batter into the center of the waffle iron, using the manufacturer’s recommended amount.
- Close the waffle iron gently and allow the waffle to cook undisturbed for 2 to 3 minutes until the indicator light signals completion.
- Professional tip: Allow the waffle to cook slightly longer than the indicator suggests for crispier exteriors with golden browning.
- Using a wooden fork or waffle tool, gently remove the finished waffle from the iron, being careful not to tear the delicate waffle structure.
- Place the cooked waffle on a wire rack rather than stacking on a plate, which prevents steam from creating soggy waffles.
- If keeping waffles warm for serving, place them on a baking sheet in a 200°F oven while finishing remaining batches.
- Continue making waffles with remaining batter, rebuttering the waffle iron between batches as needed for consistent results.
- Work efficiently to complete all waffles while the first ones are still warm and at their crispiest.
Assemble and Serve
- Arrange the warm sourdough waffles on beautiful serving plates, stacking them slightly or creating an attractive arrangement.
- Top each stack with a generous pat of butter, allowing it to melt luxuriously into the warm waffle crevices.
- Drizzle generously with warmed pure maple syrup, or allow guests to add syrup according to personal preference.
- Arrange fresh berries, whipped cream, or Greek yogurt on the side for additional flavor and elegance.
- Dust lightly with powdered sugar, add fresh mint leaves, and serve immediately while the waffles are still warm and crispy.
- Provide additional warmed maple syrup in a small pitcher for guests to add according to their preferences.
Serving and Storing Tips
How to Serve These Wonderful Waffles
Present your gorgeous sourdough discard waffles on beautiful serving plates or a decorative platter that showcases their golden-brown color and crispy texture. First, serve them immediately while still warm from the waffle iron, as this is when they achieve the perfect crispy-yet-tender texture. Additionally, provide multiple toppings and accompaniments allowing guests to customize their experience completely. Meanwhile, serve alongside fresh fruit, whipped cream, Greek yogurt, or savory breakfast items for a complete meal. For special occasions, arrange with fresh flowers, cloth napkins, and beautiful tableware celebrating the thoughtfulness of homemade breakfast. Furthermore, these waffles make wonderful Valentine’s Day breakfasts when arranged creatively and topped with fresh berries shaped or arranged artfully.
Storage Instructions for Maximum Quality
Keep leftover sourdough discard waffles in an airtight container in the refrigerator for up to 3 days, storing them in a single layer separated by parchment paper to prevent sticking. To reheat, place waffles on a baking sheet and warm them in a 350°F oven for 8 to 10 minutes until heated through while regaining some crispness on the exterior. Alternatively, you can reheat individual waffles in a toaster on medium setting for about 1 minute per side, which preserves crispy texture while warming evenly. For longer storage, freeze the cooked waffles in a freezer-safe container with parchment between layers for up to 3 months. To use frozen waffles, reheat them directly from frozen in a toaster, toaster oven, or conventional oven at 350°F for 10 to 12 minutes until heated through completely.
Helpful Notes and Pro Tips
Tips for Perfectly Crispy Waffles
Start by using sourdough discard that hasn’t been recently fed, as unfed discard contains the most fermented flavor that creates complexity in the waffles. Additionally, room temperature ingredients ensure proper mixing and incorporation—cold eggs and milk don’t combine smoothly, affecting rise and texture. The key to crispy waffles is allowing adequate cooking time in the waffle iron—don’t remove them when the indicator first signals completion, but allow them another 30 to 60 seconds for maximum crispiness. Furthermore, placing cooked waffles on a wire rack rather than stacking prevents steam condensation that creates soggy results. When folding in mix-ins, work gently to avoid crushing berries or breaking nuts excessively. Meanwhile, not overmixing the batter is crucial for light, tender waffles rather than dense, tough ones.
Understanding Sourdough Discard in Waffles
Sourdough discard is the starter removed before feeding, containing wild yeast and lactic acid bacteria that add subtle fermented complexity to waffles. Additionally, the discard contributes moisture and tang that improve waffle texture and keep them fresher longer than traditional recipes. The sourdough discard may cause slightly different rise patterns, but the baking powder and baking soda ensure proper leavening and light texture. Furthermore, fermented discard breaks down starches, potentially making waffles easier to digest than traditional versions. The acidic nature of sourdough discard contributes to the subtle fermented flavor that distinguishes sourdough waffles from basic waffles in ways people immediately notice and appreciate.
Ingredient Substitutions and Variations
If you don’t have sourdough discard, you can use Greek yogurt or buttermilk in equal amounts, though the fermented complexity will be less pronounced. In contrast, for maximum sourdough flavor, you could increase the discard to 1¼ cups and reduce other liquids slightly. For different flavor profiles, you could add ½ teaspoon of almond extract, ¼ teaspoon of orange zest, or ½ teaspoon of peppermint extract for completely different taste experiences. You could also create a brown butter version by browning the butter before mixing, which adds nutty depth that complements sourdough beautifully. Alternatively, adding 1 tablespoon of honey or maple syrup creates sweeter waffles that some people find more indulgent and satisfying.
Mix-In and Topping Variations
Beyond the suggested optional mix-ins, you can create completely personalized waffles by choosing from an unlimited array of options including crushed candies, caramel bits, or cereal. Additionally, you could experiment with different berries like strawberries, blackberries, or cherries for varied flavor profiles. You might also consider adding banana slices, apple chunks, or peach pieces for completely different seasonal variations. Meanwhile, creating a savory version by omitting sugar and cinnamon, then topping with cheese, bacon, and fresh herbs creates unexpected sophistication. You could also create a chocolate waffle variation by adding cocoa powder to the dry ingredients and using chocolate chips or fudge as toppings.
Chef Tips
Professional waffle makers always brush their iron with butter between batches to ensure even browning and prevent sticking that would damage the delicate waffle structure. Additionally, allowing waffles to cook slightly longer than the indicator suggests creates crispier, more satisfying results compared to removing them at the first signal.
Frequently Asked Questions
Can I use recently fed sourdough starter instead of unfed discard? Yes, though unfed discard provides more fermented complexity and tanginess; recently fed starter still works beautifully and creates delicious waffles with milder sourdough flavor.
What if my waffles aren’t crispy enough and turn out soft or soggy? Cook them longer in the waffle iron—don’t remove them when the indicator first signals completion; allow additional time for maximum crispiness.
Can I make the waffle batter ahead of time and cook waffles whenever I want? Yes, you can make the batter up to 4 hours ahead and refrigerate it, though you may need to add a touch of milk if it thickens too much.
How do I know if my waffles are perfectly cooked versus underdone or overdone? Perfectly cooked waffles are deeply golden brown and crispy on the exterior; if too pale, cook longer; if burnt, reduce heat slightly or check waffle iron temperature.
Is there a way to make these waffles without sourdough discard if I don’t have a starter? You can replace the discard with buttermilk or Greek yogurt in equal amounts, though the fermented complexity and subtle tang will be different from the original recipe.
Conclusion
Sourdough Discard Waffles represent the perfect marriage of beloved breakfast comfort food and sourdough craftsmanship that creates waffles so delicious and sophisticated that they elevate this classic dish into something genuinely extraordinary and memorable. This recipe proves that sourdough discard belongs in waffles rather than in the trash—instead, it transforms simple waffle batter with fermented complexity, superior flavor development, and extended freshness that distinguishes them from basic waffles immediately. Whether you’re a sourdough enthusiast looking to expand your creative repertoire, someone who appreciates complex flavors in beloved breakfast foods, creating impressive weekend meals for people you love, or simply treating yourself to something absolutely delicious and meaningfully made, these sourdough discard waffles deliver on every level. From the moment you begin mixing the batter and those wonderful fermented aromas fill your kitchen to the final bite of crispy-yet-tender, flavorful waffle, every aspect of this experience feels completely special and thoroughly satisfying. The straightforward instructions mean that even inexperienced cooks can create something that tastes professionally made and absolutely incredible without any stress or frustration. Most importantly, the care and attention you invest in creating these waffles from sourdough discard shines through in every crispy, delicious bite. This is more than just waffles—it’s an expression of sustainability, comfort, and genuine affection served warm and wonderful.
Did you absolutely love making these Sourdough Discard Waffles as much as we loved sharing this recipe with you? We’d genuinely adore hearing about your waffle breakfast experience! Please save this recipe to your favorites, pin it to your Pinterest board, and share it with friends and family who deserve delicious, sustainable waffles that prove sourdough discard belongs at the breakfast table, not in the trash. Your shares, comments, and feedback inspire us to keep developing delicious recipes that bring joy and celebration to your kitchen and table. Don’t forget to tag us on social media if you make these wonderful waffles—we can’t wait to see your gorgeous creations and hear how much your loved ones cherished these thoughtful, delicious, and absolutely wonderful sourdough discard waffles!