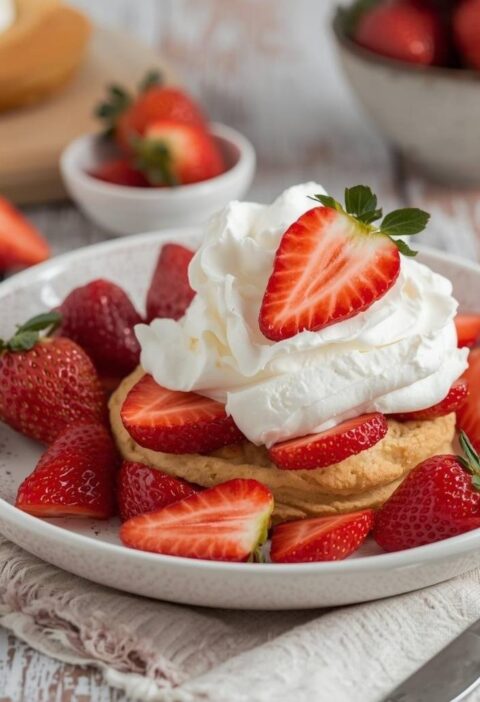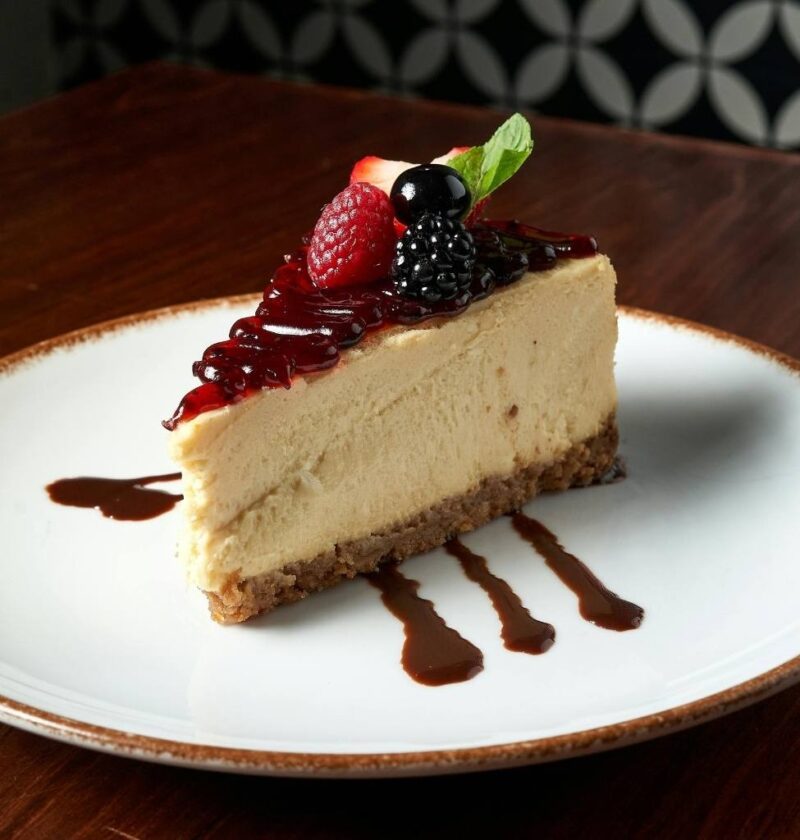
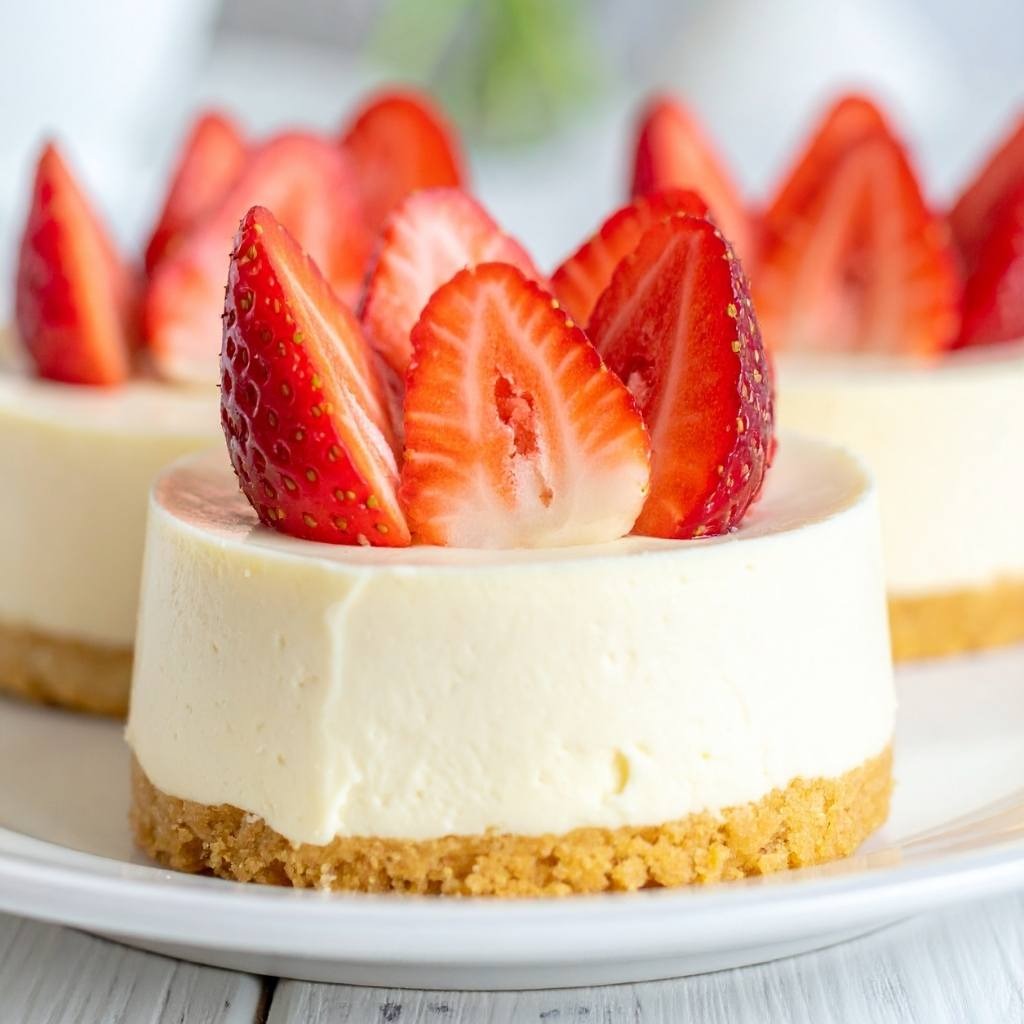
Strawberry cheesecake combines the rich, velvety texture of creamy cheesecake with the bright, refreshing flavor of fresh strawberries, creating an elegant dessert that feels both indulgent and sophisticated. This stunning showstopper features a buttery graham cracker crust topped with smooth cream cheese filling and crowned with a vibrant strawberry topping that catches the eye and tantalizes the taste buds. What makes this recipe truly special is the way fresh strawberries cut through the richness of the cheesecake, creating a perfect balance of flavors and textures that appeals to everyone from casual dessert lovers to discerning palates. The beauty of strawberry cheesecake lies in its impressive appearance and the way it captures the essence of summer on a plate, combining classic flavors that have delighted diners for generations. Unlike some elaborate desserts that require advanced techniques or hard-to-find ingredients, this strawberry cheesecake comes together with straightforward steps and readily available components. Whether you’re preparing dessert for a special celebration, impressing dinner guests, or simply craving something luxurious and beautiful, strawberry cheesecake delivers pure indulgence. The combination of buttery crust, silky cream cheese filling, and juicy strawberries creates a dessert that tastes both timeless and perfectly contemporary, proving that sometimes the most impressive treats are built on simple, classic foundations.
Ingredients
Serves: 12-14 people
For the Graham Cracker Crust:
- 2 cups graham cracker crumbs (about 14-16 full crackers)
- ¼ cup granulated sugar
- 6 tablespoons unsalted butter, melted
- ¼ teaspoon salt
For the Creamy Cheesecake Filling:
- 32 ounces cream cheese, room temperature (two 16-ounce packages)
- 1 cup granulated sugar
- ½ cup sour cream, room temperature
- 3 large eggs, room temperature
- 2 teaspoons vanilla extract
- 1 tablespoon fresh lemon juice
- 1 tablespoon cornstarch
For the Strawberry Topping:
- 1½ pounds fresh strawberries, hulled and sliced
- ½ cup granulated sugar
- 2 tablespoons fresh lemon juice
- 2 tablespoons cornstarch
- 2 tablespoons water
Optional Garnish:
- Whole fresh strawberries
- Whipped cream
- Fresh mint leaves
- Strawberry coulis
Step-by-Step Instructions
For the Graham Cracker Crust:
- Preheat your oven to 325°F and position a rack in the middle of the oven for even baking throughout the cheesecake.
- Wrap the outside and bottom of a 9-inch springform pan with heavy-duty aluminum foil, creating a seal that prevents water from seeping in during the water bath.
- Crush graham crackers into fine crumbs by placing them in a food processor and pulsing until you reach a coarse, sandy texture resembling wet sand.
- In a medium bowl, combine the graham cracker crumbs with granulated sugar and salt, whisking gently to distribute both evenly throughout.
- Next, pour the melted butter over the crumb mixture and stir thoroughly with a fork until all the crumbs are moistened and resemble wet sand.
- Press the mixture firmly and evenly into the bottom of your prepared springform pan, using the bottom of a measuring cup to create an even, compact layer.
- Make sure the crust extends to the edges and is packed tightly so it holds together when the cheesecake is cut; this creates a sturdy foundation for the filling.
- Bake the crust for 8-10 minutes until it becomes lightly golden, then remove it from the oven and set aside to cool briefly while you prepare the filling.
For the Creamy Cheesecake Filling:
- Remove the cream cheese from the refrigerator and allow it to sit at room temperature for 20-30 minutes, ensuring it’s completely softened before mixing.
- In a large mixing bowl, beat the room-temperature cream cheese on medium speed for about 3-4 minutes until it becomes smooth, creamy, and light.
- Add the granulated sugar gradually to the cream cheese and beat on medium speed for another 2-3 minutes until well incorporated and the mixture becomes slightly fluffy.
- Add the sour cream, vanilla extract, and fresh lemon juice to the cream cheese mixture, beating on low speed until everything is well incorporated and smooth.
- In a small bowl, whisk together the cornstarch with a tablespoon of water to create a smooth slurry, then add this to the filling mixture.
- Add the eggs one at a time, beating on low speed after each addition and allowing each egg to fully incorporate before adding the next; this prevents the filling from curdling.
- Once all the eggs are incorporated, beat the filling on medium speed for one final minute until smooth and combined, being careful not to overmix.
- Pour the filling over the prepared crust and smooth the top with a spatula, creating an even, attractive surface.
- Place the springform pan into a larger roasting pan, then add enough hot water to the roasting pan to come halfway up the sides of the springform pan, creating a water bath for gentle, even baking.
- Carefully transfer the roasting pan to the preheated oven and bake for 55-65 minutes until the cheesecake is mostly set but the center still jiggles slightly when gently shaken.
- Turn off the oven and crack the door open about 4 inches, allowing the cheesecake to cool slowly in the oven for 1 hour; this prevents sudden temperature changes that cause cracks.
- Remove the cheesecake from the oven and allow it to cool to room temperature on the counter for another 30-45 minutes before refrigerating.
- Once the cheesecake has cooled to room temperature, wrap it tightly with plastic wrap and refrigerate for at least 8 hours, though overnight refrigeration is ideal.
For the Strawberry Topping:
- In a medium saucepan, combine the sliced strawberries with granulated sugar and fresh lemon juice over medium heat.
- Bring the strawberry mixture to a gentle simmer and cook for about 5-7 minutes, stirring occasionally, until the strawberries release their juices and become slightly soft.
- In a small bowl, whisk together the cornstarch with 2 tablespoons water to create a smooth slurry that will thicken the strawberry mixture.
- Add the cornstarch slurry to the simmering strawberries and stir constantly for 1-2 minutes until the mixture thickens and becomes glossy.
- Remove the strawberry topping from heat and allow it to cool to room temperature before spreading over the chilled cheesecake.
- Spread the cooled strawberry topping evenly over the entire surface of the cheesecake, creating an attractive, even layer that showcases the beautiful fruit.
- Refrigerate the finished cheesecake for at least 2 more hours, or up to several hours, allowing the topping to set before serving.
For Finishing and Serving:
- Remove the cheesecake from the refrigerator about 10 minutes before serving, allowing it to warm slightly for easier slicing and better flavor.
- Run a thin, hot knife around the edges of the cheesecake to loosen it from the pan, wiping the knife between each stroke to prevent residue from dragging.
- Unclamp the springform pan carefully and remove the sides, leaving the cheesecake on the pan base for presentation and serving.
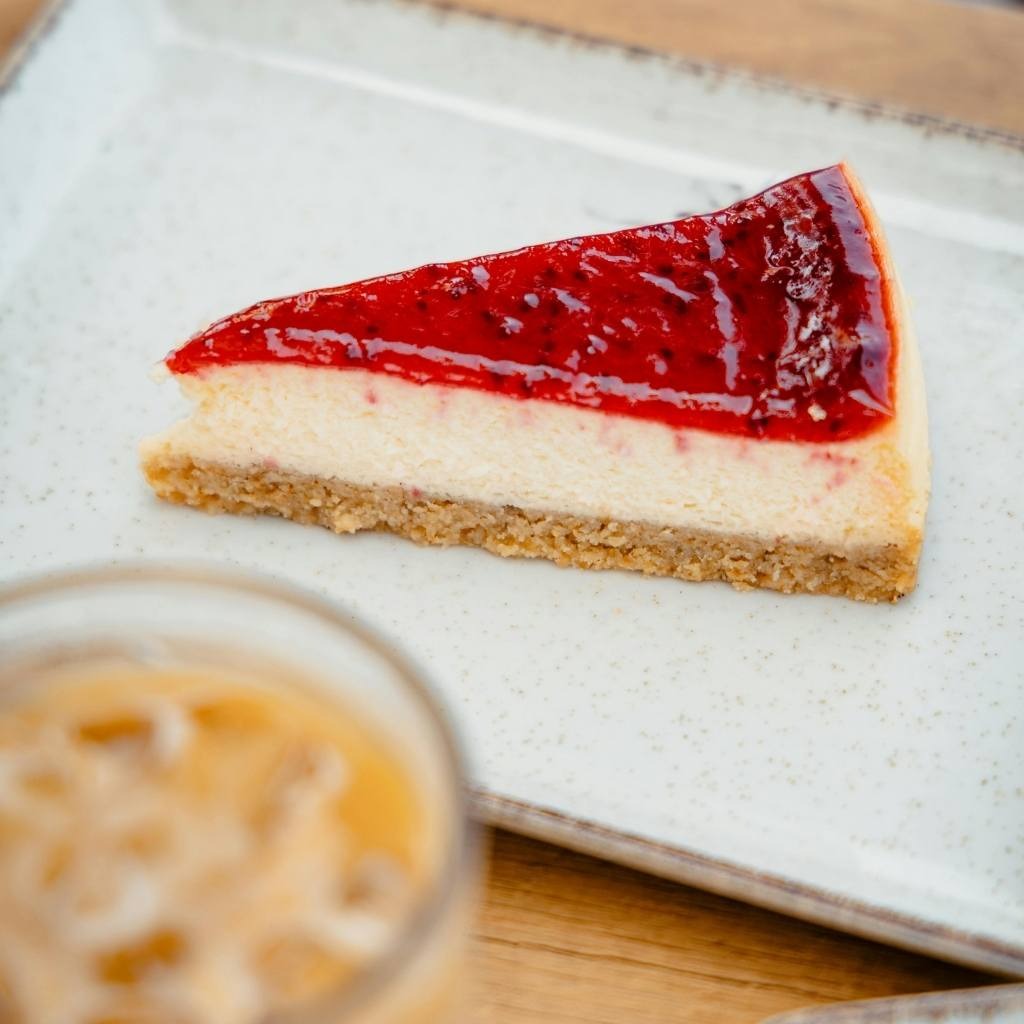
- Slice using a hot knife dipped in hot water and wiped clean between cuts, creating neat, attractive slices that hold their shape beautifully.
- Serve chilled, garnishing each slice with whipped cream, a whole strawberry, or fresh mint if desired for an elegant presentation.
Why Baked Cheesecake Excels
Baked strawberry cheesecake offers advantages that distinguish it from no-bake versions, creating a denser, richer texture that many cheesecake enthusiasts prefer. First, the gentle baking in a water bath creates incredibly smooth, creamy filling with a slightly firmer texture than no-bake versions. Additionally, the eggs in the filling add richness and create a more luxurious mouthfeel that’s prized in traditional cheesecake. Furthermore, the baking process allows flavors to develop and integrate more deeply than in no-bake versions. Moreover, baked cheesecake slices more cleanly and holds its shape better when plated, making it ideal for formal presentations. Finally, while baked cheesecake requires more technique than no-bake versions, it delivers a sophisticated, classic result that impresses even the most discerning diners.
Strawberries as the Perfect Topping
Fresh strawberries serve as the ideal topping for cheesecake because their bright flavor and slight tartness balance the richness of the cream cheese filling beautifully. Next, the vibrant red color creates stunning visual contrast against the pale yellow cheesecake, making the dessert inherently Instagram-worthy. Additionally, cooking the strawberries with sugar and lemon juice transforms them into a glossy topping that stays in place when sliced and served. Furthermore, the cooked strawberry layer creates textural contrast with the smooth filling below, adding interest to each bite. In contrast to fresh berries alone, cooking the strawberries with cornstarch creates a more stable, elegant topping that holds together beautifully. Finally, strawberries pair naturally with lemon and cream cheese, creating flavor combinations that feel both classic and contemporary.
Serving Tips
Serve strawberry cheesecake chilled directly from the refrigerator, as the cold temperature is essential to the texture and showcases the beautiful contrast between the cool filling and the strawberry topping. Additionally, present slices on elegant dessert plates with a dollop of whipped cream and a fresh strawberry garnish for added sophistication. Furthermore, pair servings with coffee, tea, or sparkling beverages that complement the rich, creamy flavor profile. For formal dinners, arrange slices on plates at the table just before serving, allowing guests to appreciate the beautiful presentation. You can also serve the cheesecake whole at the table initially, creating an impressive visual moment before slicing. Additionally, for casual gatherings, offer fresh whipped cream on the side so guests can customize their portions. Finally, consider adding a drizzle of strawberry coulis or a mint leaf for additional visual appeal and flavor dimension.
Storage and Make-Ahead Tips
Refrigerator Storage:
Baked strawberry cheesecake keeps beautifully in the refrigerator for up to 5 days when covered loosely with plastic wrap or stored in an airtight container. In fact, the cheesecake tastes even better on the second day after baking, as flavors mellow and deepen significantly. However, avoid storing it longer than 5 days, as the filling gradually absorbs moisture and the quality diminishes. If you notice the crust becoming slightly soft, this is normal and doesn’t affect the cheesecake’s flavor or safety.
Freezing Instructions:
The completed, baked and topped cheesecake can be frozen for up to 2 months when wrapped tightly in plastic wrap and aluminum foil, then stored in a freezer-safe container. To use, transfer to the refrigerator and thaw slowly for 8-10 hours or overnight, allowing the cheesecake to thaw evenly without any temperature shocks. Additionally, the texture may be slightly different after freezing, becoming a touch icier than fresh cheesecake, though the flavor remains delicious. Note that for best quality, freeze the cheesecake before adding the strawberry topping if possible, then add fresh cooked topping after thawing.
Make-Ahead Strategy:
Bake the cheesecake up to 3 days ahead, wrapping it tightly after cooling and refrigerating until ready to top and serve. Next, prepare the strawberry topping up to 2 days ahead, storing it in an airtight container in the refrigerator. When ready to serve, top the chilled cheesecake with the strawberry mixture and refrigerate for at least 2 hours before serving. This approach allows you to do all the work ahead of time and simply remove from the refrigerator when guests arrive. Finally, individual slices can be plated hours ahead, covered with plastic wrap, and refrigerated until serving, making this ideal for entertaining with minimal last-minute preparation.
Transport and Gifting:
Baked strawberry cheesecake travels reasonably well for potlucks or gatherings when kept chilled in a cooler with ice packs. Additionally, you can assemble the cheesecake directly on a serving plate or cake board, then cover and transport in a sturdy box, eliminating the need to transfer it after chilling. For gifting, bake the cheesecake in a disposable aluminum springform pan, cover beautifully with plastic wrap, and include a ribbon and handwritten care instructions for a thoughtful homemade present.
Helpful Tips for Success
Mastering this recipe requires understanding key baking techniques that ensure consistent, perfect results every time. First, ensure all your ingredients, particularly the cream cheese and eggs, are at room temperature before beginning; this creates better emulsion and prevents lumps in the filling. Next, the water bath is essential; it insulates the cheesecake and creates gentle, even heat that prevents cracks and overcooking the edges. Additionally, don’t open the oven door while the cheesecake bakes, as sudden temperature changes can cause cracking and uneven cooking.
When the cheesecake is done, it should be mostly set but still have a slight jiggle in the very center about the size of a quarter when gently shaken; this indicates it’s cooked perfectly without being overdone. Furthermore, the gradual cooling process in the oven and then on the counter is crucial; rushing this step causes thermal shock that leads to cracks. Additionally, make sure to refrigerate the cheesecake for the full recommended time before adding toppings; a complete set is essential for clean slicing and proper texture. Finally, if cracks do appear, they’re easily hidden by the strawberry topping, so don’t stress if your cheesecake isn’t perfectly smooth; it will still taste delicious.
Chef Tips
Professional pastry chefs recommend using cream cheese that’s been softened to room temperature before mixing, as this ensures perfectly smooth filling without lumps or air pockets that can affect texture. Additionally, tap the filled springform pan gently on the counter several times before placing it in the water bath to release air bubbles trapped in the batter, which creates a more even crumb.
Frequently Asked Questions
How do I prevent cracks from forming on my cheesecake? Use a water bath, cool the cheesecake slowly in the oven with the door cracked open, and refrigerate completely before serving; these three steps virtually eliminate cracks in most cases.
Can I make strawberry cheesecake without a water bath? While possible, the water bath creates superior texture and reduces the risk of cracks; if you must skip it, bake at a lower temperature (300°F) and watch carefully to avoid overbaking the edges.
What should I do if my cheesecake cracks? Don’t panic—cracks are easily hidden by the strawberry topping, which will cover most imperfections; alternatively, serve slices upside down if preferred.
How long does strawberry cheesecake last in the refrigerator? The cheesecake keeps beautifully for up to 5 days when stored covered in the refrigerator, though it’s best eaten within 3 days for optimal texture and strawberry topping quality.
Can I use frozen strawberries instead of fresh for the topping? Yes, frozen strawberries work well when thawed and drained; however, fresh strawberries have better flavor and create a more elegant topping, so fresh is preferred when available.
Flavor Variations and Creative Ideas
This strawberry cheesecake serves as a wonderful foundation for creative variations that suit different occasions and preferences. First, consider creating a white chocolate strawberry version by melting white chocolate and swirling it into the filling before baking. Next, add a layer of strawberry jam or coulis under the cooked strawberry topping for deeper berry flavor. Additionally, infuse the filling with a hint of almond extract or vanilla bean for additional aromatic complexity. Furthermore, create a mixed berry version by combining strawberries with raspberries and blackberries in the topping. Finally, make individual cheesecake cups by baking the filling in ramekins with graham cracker crusts, creating elegant individual portions perfect for entertaining.
Why This Recipe Works
Baked strawberry cheesecake succeeds because it respects time-tested cheesecake principles while celebrating fresh, quality strawberries that elevate the classic dessert. The careful balance of cream cheese, eggs, and sour cream creates a texture that’s simultaneously dense and creamy, rich yet not heavy. Moreover, the water bath ensures gentle, even baking that produces smooth filling without cracks or overcooking. Additionally, fresh strawberries cooked into a glossy topping add brightness, beauty, and sophisticated flavor that transforms good cheesecake into something truly memorable.
This recipe appeals to anyone who appreciates classic desserts made with quality ingredients and proper technique. Furthermore, while baked cheesecake requires more steps than no-bake versions, the superior texture and richer flavor justify the additional effort. Additionally, the forgiving nature of hiding any imperfections under the strawberry topping means even first-time cheesecake bakers create impressive results. Finally, the versatility of the base recipe means you can customize the topping endlessly to match different occasions and preferences.
Perfect Occasions for Strawberry Cheesecake
This elegant dessert shines at virtually any gathering where an impressive, sophisticated finale would be appreciated. First, serve it at elegant dinner parties as the show-stopping conclusion to a multi-course meal. Next, bring it to celebrations, milestone events, and special occasions where guests expect something truly special. Additionally, present it at spring and summer gatherings, garden parties, and outdoor celebrations where fresh strawberries are in season. Furthermore, serve it at bridal showers, baby showers, and engagement celebrations where an elegant, beautiful dessert creates memorable moments. Finally, enjoy it simply at home as a special treat, or gift beautifully packaged to friends and family who appreciate impressive homemade creations.
Final Thoughts
Making strawberry cheesecake from scratch is a rewarding experience that yields a dessert that looks and tastes far more impressive than the straightforward technique required to create it. Additionally, there’s something deeply satisfying about transforming simple ingredients into an elegant, professional-quality dessert that rivals those from fancy bakeries. This recipe proves that spectacular desserts are entirely within the reach of home cooks who appreciate quality ingredients and time-tested baking techniques.
Next time you want to impress family and friends with a dessert that tastes luxurious and feels special, remember that this strawberry cheesecake delivers sophisticated flavor and beautiful results with straightforward steps. The combination of creamy filling, buttery crust, and vibrant strawberry topping creates magic on the plate and satisfaction with every spoonful. Whether it’s your first time making it or your hundredth, this classic dessert never fails to bring delight and admiration to the table.
We’d absolutely love to hear what you think about this strawberry cheesecake recipe! Did you try it? How did your cheesecake turn out? Did you encounter any cracks or challenges, and how did you solve them? Please save this recipe to your favorite collection, pin it to your Pinterest board so you can find it easily when you’re planning special occasions, and share it with friends and family who appreciate impressive homemade desserts. Your feedback and support truly encourage us to keep creating delicious recipes and helpful baking guidance for you. Thank you for being part of our cooking community!