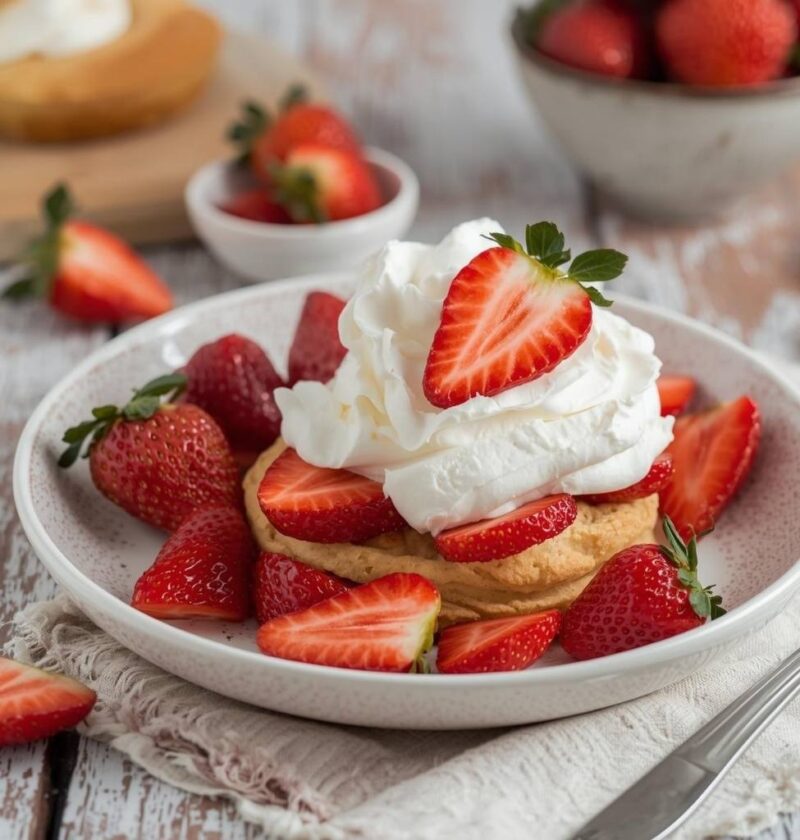
There’s something truly magical about strawberry shortcake—a dessert that captures the essence of summer in every bite. This timeless classic combines fluffy, tender sponge cake layers with fresh whipped cream and juicy strawberries, creating a harmonious balance of textures and flavors that has delighted families for generations. What makes this recipe especially wonderful is that it’s surprisingly straightforward to prepare, even for novice bakers. You don’t need fancy equipment or obscure ingredients; just basic pantry staples and fresh strawberries will transform into an elegant dessert that tastes like you’ve spent hours in the kitchen. The beauty of this dish lies in its simplicity and the way it celebrates the natural sweetness of peak-season berries. Whether you’re planning an elegant dinner party, a casual family gathering, or simply craving something sweet and satisfying, this strawberry shortcake delivers pure comfort and joy. It’s the kind of dessert that brings smiles to faces and creates lasting memories around the table.
Ingredients
Serves: 8-10 people
For the Sponge Cake:
- 2 cups all-purpose flour
- 2 teaspoons baking powder
- ½ teaspoon salt
- ¾ cup granulated sugar
- 3 large eggs, room temperature
- 1 teaspoon vanilla extract
- ¾ cup whole milk, room temperature
- 4 tablespoons unsalted butter, melted
For the Strawberry Filling and Topping:
- 2 pounds fresh strawberries, hulled and sliced
- ¼ cup granulated sugar
- 2 tablespoons fresh lemon juice
- 2 cups heavy whipping cream
- 3 tablespoons granulated sugar (for the whipped cream)
- 1 teaspoon vanilla extract
Optional Garnish:
- Fresh mint leaves
- Whipped cream for decoration
- Extra whole strawberries
Step-by-Step Instructions
For the Sponge Cake:
- Preheat your oven to 350°F. Grease and flour two 8-inch round cake pans, ensuring the bottoms and sides are well coated to prevent sticking.
- Sift together the flour, baking powder, and salt in a medium bowl, whisking gently to combine these dry ingredients evenly.
- In a large mixing bowl, beat the eggs with granulated sugar on medium-high speed for about 3-4 minutes until the mixture becomes pale, fluffy, and approximately doubles in volume—this step is crucial for creating a light, airy cake.
- Next, add vanilla extract to the egg mixture and beat briefly to incorporate. Meanwhile, alternate adding the flour mixture and milk to the egg mixture, beginning and ending with the flour, stirring gently after each addition to avoid overmixing.
- Fold in the melted butter using a spatula with a few gentle strokes until just combined; be careful not to overmix or you’ll deflate the batter.
- Divide the batter evenly between your prepared cake pans and smooth the tops with a spatula for even baking.
- Bake for 25-30 minutes until a toothpick inserted into the center comes out clean and the tops are golden brown.
- Remove the cakes from the oven and allow them to cool in the pans for about 10 minutes before turning them out onto wire racks to cool completely.
Preparing the Strawberry Filling:
- While the cakes cool, combine your sliced strawberries with ¼ cup granulated sugar and fresh lemon juice in a large bowl, tossing gently to coat all the berries evenly.
- Set this mixture aside at room temperature for 15-20 minutes, allowing the strawberries to release their natural juices and create a lovely sauce that will add moisture and flavor to your finished dessert.
Making the Whipped Cream:
- In a chilled bowl, pour the heavy whipping cream and add 3 tablespoons granulated sugar along with vanilla extract.
- Beat the cream on medium speed until soft peaks form, typically taking 2-3 minutes of beating; be careful not to overbeat or you’ll end up with butter instead of whipped cream.
Assembling the Strawberry Shortcake:
- Once your cake layers are completely cooled, place the first layer on a serving plate or cake stand, creating a stable base for your dessert.
- Spread a generous layer of whipped cream over the first cake layer using an offset spatula or the back of a spoon.
- Arrange about half of the marinated strawberries (with some of their juice) over the whipped cream layer, distributing them evenly across the surface.
- Carefully place the second cake layer on top, pressing gently so it settles onto the filling without sliding around.
- Top the second layer with the remaining whipped cream, spreading it smoothly and generously across the entire top surface.
- Finish by arranging the remaining strawberries and any extra whole berries on top, creating an attractive and appetizing presentation that showcases the fresh fruit.
- Refrigerate for at least 1 hour before serving, allowing the layers to set together and flavors to meld beautifully.
Serving Tips
Strawberry shortcake pairs beautifully with afternoon tea, making it perfect for a summer gathering or special celebration. Additionally, consider serving it alongside a light champagne or dessert wine that complements the fresh berry flavors. To make each serving extra special, add a sprinkle of fresh mint leaves or a drizzle of berry coulis across the plate. Furthermore, this dessert works wonderfully as the centerpiece for bridal showers, baby showers, garden parties, or intimate dinner parties. For a more indulgent presentation, serve it with a side of vanilla ice cream or a scoop of strawberry ice cream that melts into the warm cake layers. Alternatively, pair it with a dollop of crème fraîche for a more sophisticated touch that adds subtle tartness to balance the sweetness.
Storage and Make-Ahead Tips
Refrigerator Storage:
Leftover strawberry shortcake keeps well when stored in an airtight container in the refrigerator for up to 2 days. However, the cake layers will gradually absorb moisture from the filling and whipped cream, which means the texture changes slightly but the flavor remains delicious. For best quality, store any uneaten portions loosely covered with plastic wrap rather than in an airtight container, as this allows some airflow while preventing the cake from drying out.
Freezing Components:
The unfrosted cake layers can be frozen for up to 1 month when wrapped tightly in plastic wrap and stored in a freezer-safe container. To prepare them for freezing, allow the cakes to cool completely, wrap them individually, and label with the date. When you’re ready to use them, thaw the cake layers at room temperature for about 1-2 hours before assembling with fresh whipped cream and strawberries for optimal results.
Make-Ahead Strategy:
Consider baking the cake layers the day before your event, as they actually taste better after resting overnight. Additionally, you can prepare the whipped cream up to 4 hours in advance by refrigerating it in a covered bowl. Prepare the strawberry mixture no more than 2-3 hours before serving to prevent them from becoming too soft or releasing excessive liquid.
Helpful Tips for Success
Making adjustments and understanding the nuances of this recipe will help you achieve perfect results every time. First, ensure all your ingredients, particularly the eggs and milk, are at room temperature before beginning—this creates a better emulsion and results in a more tender crumb. Next, don’t skip the sifting step for the dry ingredients, as this incorporates air and ensures even distribution of the baking powder.
Additionally, avoid opening the oven door while the cakes bake, as sudden temperature changes can cause them to sink or crack in the middle. When beating the eggs and sugar together, take the full time to incorporate plenty of air; rushing this step results in a denser, less fluffy cake. Furthermore, when folding in the butter, use a gentle hand and fold just until combined—overmixing at this stage deflates all the air you’ve worked to incorporate.
If strawberries aren’t at peak ripeness when you purchase them, consider macerating them in the sugar mixture slightly longer to draw out more natural juices. Additionally, for a lower-calorie version, substitute Greek yogurt for half of the whipped cream, creating a tangier flavor profile that many find refreshing. Finally, if you’re making this dessert for someone with egg allergies, an aquafaba-based foam made from chickpea liquid can replace the whipped cream layer, though it has a slightly different texture and flavor profile.
Chef Tips
Professional pastry chefs recommend using a serrated knife dipped in hot water and wiped between cuts when slicing the cake layers—this creates cleaner, more even layers that stack more beautifully and provide better stability. Additionally, room-temperature ingredients mix more smoothly and create better texture, so taking five minutes to bring everything to room temperature before starting actually saves time in the mixing process and produces superior results.
Frequently Asked Questions
Can I make this cake ahead of time? Yes, the unfrosted cake layers can be baked 1-2 days in advance and stored in an airtight container at room temperature. However, assemble the complete dessert no more than 4-6 hours before serving for the best texture.
What if I don’t have fresh strawberries? While fresh strawberries are ideal, frozen strawberries that have been thawed and drained work in a pinch, though they’ll release more liquid and have a softer texture. Reserve the liquid that drains from them and use it to create a berry coulis instead.
Can I use a cake mix instead of making the cake from scratch? Absolutely—a quality yellow or vanilla cake mix works well as a substitute, though homemade cakes generally have superior flavor and texture. Simply follow the package directions and allow the layers to cool completely before assembling.
How do I prevent the cake layers from sliding when stacking? Placing a small dollop of whipped cream under the bottom cake layer keeps it stable on the serving plate, creating friction that prevents sliding. Additionally, insert a few cake dowels or pretzel sticks through the layers to provide structural support.
Can this dessert be made without dairy products? Yes, substitute dairy-free whipped cream (made from coconut cream or commercial brands) and use a plant-based milk in the cake. The result is delicious and accommodates dairy-free diets while maintaining the classic flavor and appeal.
Why This Recipe Works
The magic of strawberry shortcake lies in the interplay between its three primary components. The sponge cake provides a tender, slightly sweet foundation that’s sturdy enough to support the toppings without becoming soggy. Furthermore, the whipped cream adds richness and helps distribute moisture evenly throughout the dessert. Finally, the fresh strawberries and their natural juice balance the sweetness with bright acidity and provide bursts of natural flavor.
This recipe respects the classic formula while remaining accessible to home bakers of all skill levels. The technique of aerating the eggs and sugar is straightforward once you understand the principle, and the rest of the process requires only basic mixing and assembly skills. Whether you’re preparing this for a special occasion or simply satisfying a craving, you’ll find that the simplicity of the method stands in beautiful contrast to the sophisticated and elegant final result.
The beauty of this strawberry shortcake extends beyond its wonderful taste to its versatility. You can easily customize it with different berries, adjust the sweetness level, or create individual servings in parfait glasses for a casual presentation. Furthermore, the components are forgiving—slightly imperfect cake layers, whipped cream that’s a touch softer than intended, or strawberries that are less perfect than ideal still create a delicious and memorable dessert that tastes far more impressive than the effort required to make it.
Final Thoughts
Making strawberry shortcake from scratch is a rewarding experience that fills your kitchen with the aroma of freshly baked cake and the bright scent of ripe strawberries. Additionally, there’s something deeply satisfying about creating a stunning dessert with your own hands, especially when you see the delight on your guests’ faces at the first bite. This recipe proves that you don’t need complicated techniques or hard-to-find ingredients to create restaurant-quality desserts at home.
Next time you’re planning a celebration or simply want to impress those you care about, remember that this strawberry shortcake is within your reach. The combination of homemade cake, billowy whipped cream, and fresh strawberries creates magic on the plate and warmth in the heart. Whether it’s your first time making it or your fiftieth, this classic dessert never fails to bring joy and satisfaction to the table.
We’d absolutely love to hear what you think about this strawberry shortcake recipe! Did you try it? How did it turn out? Please save this recipe to your favorite collection, pin it to your Pinterest board so you can find it easily next time, and share it with friends and family who might enjoy making it too. Your support and feedback truly encourage us to keep creating delicious recipes and helpful kitchen guidance for you. Thank you for being part of our cooking community!