Individual strawberry shortcake cups represent the perfect evolution of a beloved classic dessert, transforming the traditional layered cake into elegant, portable servings that look restaurant-quality but require minimal fuss to prepare. These charming cups capture all the nostalgic flavors you adore—fluffy vanilla cake, billowy whipped cream, and fresh juicy strawberries—while offering the convenience and sophistication of individual presentations. What makes this recipe truly special is that it’s remarkably forgiving and wonderfully flexible; you can assemble them hours ahead of time, making it an ideal choice for entertaining guests or preparing desserts for special occasions without last-minute stress. The beauty of serving dessert in cups lies in the ease of presentation and eating; each guest receives a perfectly portioned, Instagram-worthy treat without the fuss of cutting and plating. Whether you’re hosting a bridal shower, garden party, or casual dinner, these cups deliver impressive results that make you look like a seasoned pastry chef. The magic happens when guests discover the delightful layers hidden within each cup, creating moments of pure culinary joy and satisfaction.
Ingredients
Serves: 8-10 people
For the Vanilla Cake:
- 1½ cups all-purpose flour
- 1½ teaspoons baking powder
- ¼ teaspoon salt
- ½ cup granulated sugar
- 2 large eggs, room temperature
- ¾ teaspoon vanilla extract
- ½ cup whole milk, room temperature
- 3 tablespoons unsalted butter, melted
For the Strawberry Filling and Topping:
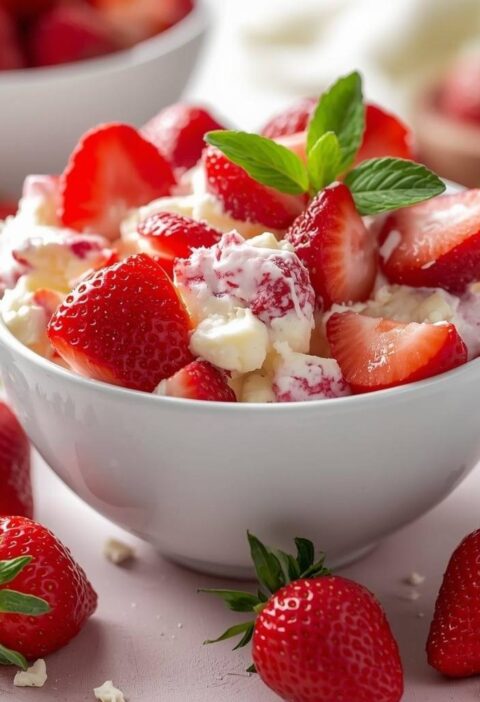
- 1½ pounds fresh strawberries, hulled and sliced
- 3 tablespoons granulated sugar
- 1 tablespoon fresh lemon juice
- 1½ cups heavy whipping cream
- 2 tablespoons granulated sugar (for the whipped cream)
- ½ teaspoon vanilla extract
Optional Additions:
- Fresh mint leaves for garnish
- Whole strawberries for decoration
- Biscuit crumbles or pound cake pieces for texture variation
- Strawberry jam or coulis for drizzling
Step-by-Step Instructions
For the Vanilla Cake:
- Preheat your oven to 350°F and prepare an 8-inch square baking pan by greasing and flouring the bottom and sides thoroughly to prevent sticking.
- Sift together the flour, baking powder, and salt in a small bowl, whisking gently to combine these dry ingredients evenly throughout.
- In a medium mixing bowl, beat the eggs with granulated sugar on medium-high speed for 2-3 minutes until the mixture becomes pale and fluffy, creating the foundation for a tender crumb.
- Next, add vanilla extract to the egg mixture and beat briefly to incorporate the flavor throughout. Meanwhile, alternate adding the flour mixture and milk to the egg mixture in three additions, beginning and ending with the flour, stirring gently after each addition.
- Fold in the melted butter using a rubber spatula with just a few gentle strokes until the batter is fully combined and smooth.
- Pour the batter into your prepared baking pan and smooth the top with a spatula for even baking throughout.
- Bake for 20-25 minutes until a toothpick inserted into the center comes out clean and the top is lightly golden.
- Remove the cake from the oven and allow it to cool in the pan for about 10 minutes before turning it out onto a wire rack to cool completely.
- Once cooled, cut the cake into small cubes approximately ¾ to 1 inch in size, creating the perfect pieces for your cups.
Preparing the Strawberry Mixture:
- In a large bowl, combine your sliced strawberries with 3 tablespoons granulated sugar and fresh lemon juice, tossing gently to coat evenly.
- Set this mixture aside at room temperature for 15-20 minutes, allowing the strawberries to macerate and release their natural juices, which creates a delicious sauce.
Making the Whipped Cream:
- Pour the heavy whipping cream into a chilled bowl and add 2 tablespoons granulated sugar along with vanilla extract.
- Beat the cream on medium speed for 2-3 minutes until soft peaks form, being careful not to overbeat and transform the cream into butter.
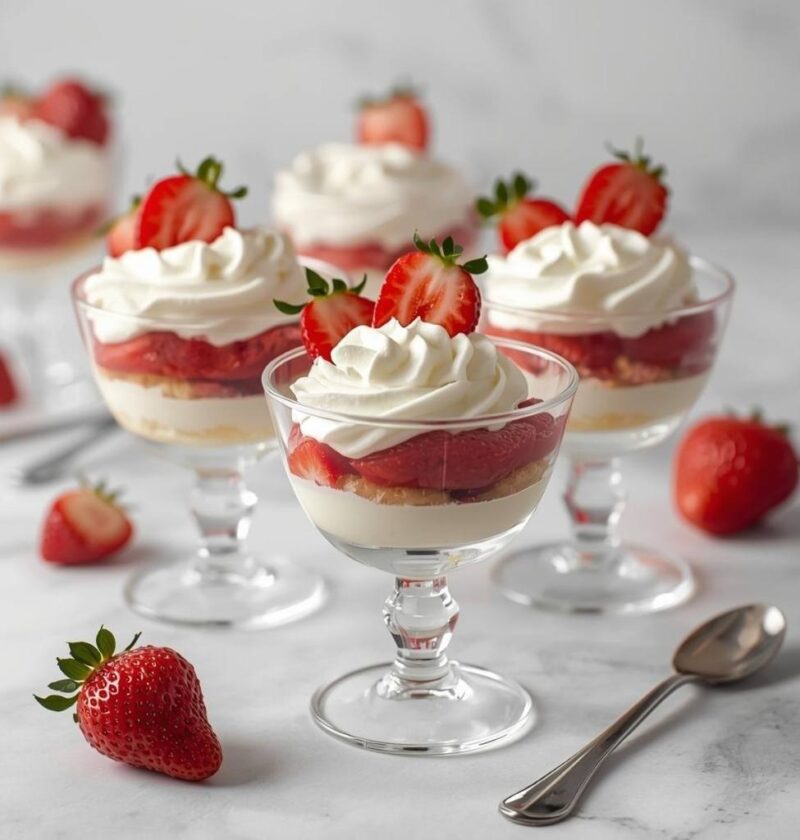
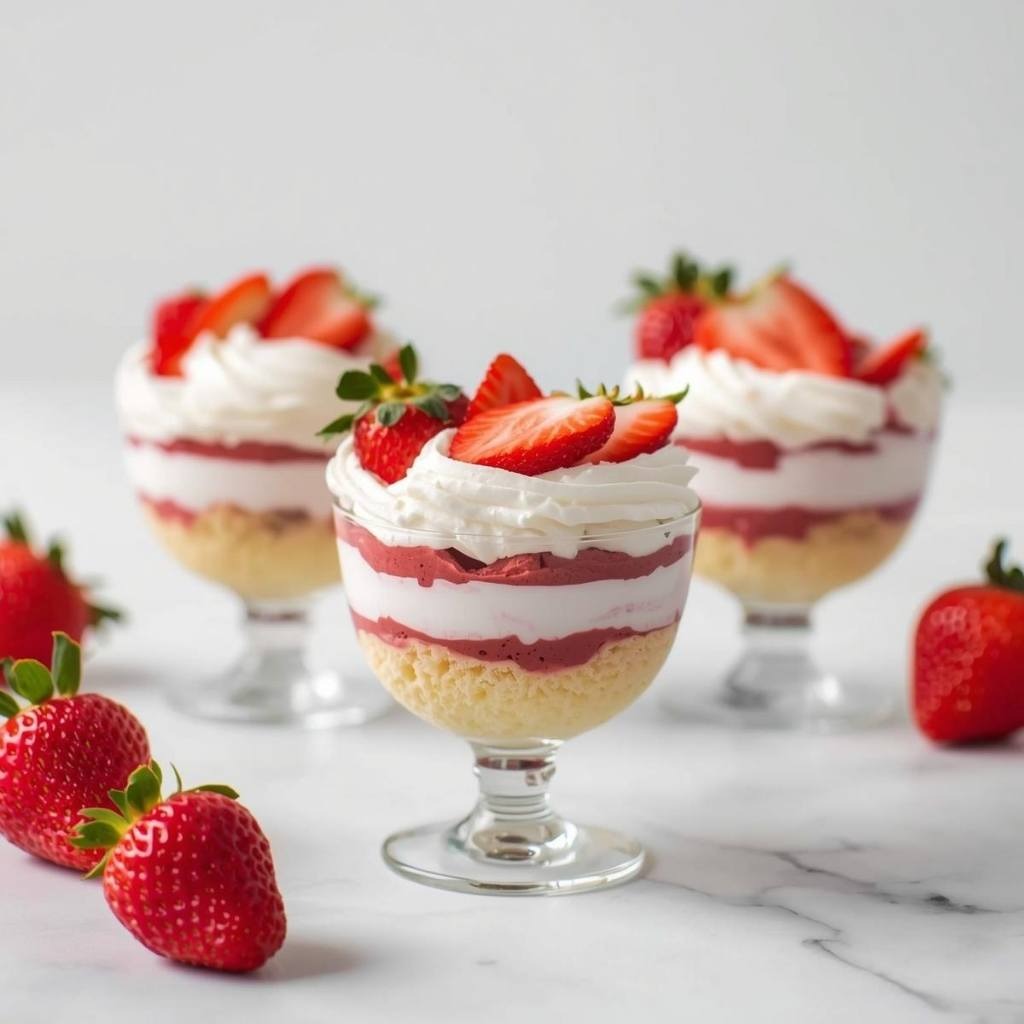
Assembling the Strawberry Shortcake Cups:
- Gather your serving cups or glasses; clear glasses or small bowls work beautifully and showcase the lovely layers inside.
- Spoon a small amount of whipped cream into the bottom of each cup, creating a base that prevents cake pieces from absorbing excess liquid.
- Add a layer of cake cubes on top of the whipped cream, distributing them evenly in each cup.
- Top the cake layer with a spoonful of the macerated strawberries and some of their natural juice, adding moisture and flavor to each cup.
- Add another layer of whipped cream on top of the strawberries, spreading it gently across the surface.
- Repeat the layering process with more cake cubes, strawberries, and whipped cream, creating a beautiful visual presentation.
- Finish the top of each cup with a generous dollop of whipped cream and several whole strawberries or sliced strawberries arranged attractively.
- Garnish with fresh mint leaves if desired, adding a pop of color and a subtle fresh aroma.
- Refrigerate the cups for at least 30 minutes before serving, allowing the layers to set and flavors to meld together beautifully.
Why Individual Cups Work Better
Serving strawberry shortcake in cups offers numerous advantages over the traditional whole-cake presentation. First, the individual format eliminates the need for plating and cutting, which streamlines your serving process considerably. Additionally, clear cups or glasses allow the beautiful layers to show through, creating an inherently elegant presentation that requires no additional decoration. Furthermore, each guest receives a perfectly proportioned serving, ensuring everyone gets the right balance of cake, cream, and fruit without waste or uneven portions. The cups also make transportation easier if you’re bringing dessert to a potluck or gathering, as each serving is contained and portable. Moreover, guests appreciate the convenience of eating directly from the cup with a spoon, making the dessert feel casual and friendly rather than overly formal.
Serving Tips
These strawberry shortcake cups shine when served chilled directly from the refrigerator, as the cold temperature creates a refreshing contrast with the fresh strawberries. Additionally, consider presenting them on a beautiful platter or tiered stand to create an impressive dessert display that catches guests’ eyes immediately. Pair these cups with light refreshments such as champagne, sparkling water with fresh fruit, or sweet dessert wine that complements the delicate vanilla and berry flavors. Furthermore, these cups work wonderfully for afternoon tea, bridal showers, garden parties, or elegant brunches where you want dessert to feel special without being overly heavy or formal. For a more casual setting, serve them during summer barbecues or family gatherings where guests can enjoy them while mingling. Additionally, you can create a toppings bar where guests customize their cups with different garnishes, nuts, or chocolate drizzles according to their preferences.
Storage and Make-Ahead Tips
Refrigerator Storage:
Assembled strawberry shortcake cups keep beautifully in the refrigerator for up to 6 hours when covered loosely with plastic wrap or stored in an airtight container. However, the cake layers will gradually absorb moisture from the whipped cream and strawberry juice, which means the texture becomes slightly softer but the flavor deepens and improves. For optimal texture, assemble the cups no more than 4 hours before serving if you prefer the cake to remain light and fluffy. In contrast, if you prefer a more integrated, cake-soaked texture similar to traditional trifle, assemble them the night before and refrigerate overnight.
Make-Ahead Strategy:
One of the greatest advantages of this recipe is its outstanding make-ahead flexibility. Bake the cake up to 2 days in advance and store it in an airtight container at room temperature. Additionally, prepare the whipped cream up to 8 hours ahead by refrigerating it in a covered bowl. Next, macerate the strawberries up to 4 hours before assembling to maintain their fresh texture and vibrant color. When you’re ready to assemble, simply layer the components into your cups within 1-2 hours of serving for the best presentation and texture. This approach allows you to do most of your work ahead of time and quickly assemble everything at the last minute.
Freezing Components:
The unfrosted cake can be frozen for up to 1 month when wrapped tightly in plastic wrap and stored in a freezer-safe container. However, avoid freezing the assembled cups with whipped cream, as the cream becomes grainy and separates when thawed. Freeze only the cake components, then thaw them at room temperature for about 1 hour before assembling with fresh whipped cream and strawberries.
Helpful Tips for Success
Understanding the nuances of this recipe ensures perfect results every time you make it. First, ensure all your baking ingredients, especially the eggs and milk, are at room temperature before beginning, as this creates a better emulsion and more tender cake crumb. Next, don’t skip sifting the dry ingredients together, as this incorporates air and distributes the baking powder evenly throughout the flour. Additionally, when beating the eggs and sugar, take the full time to incorporate plenty of air; rushing this step results in a denser cake that doesn’t showcase the delicate texture you’re aiming for.
When layering the cups, vary the sizes of your cake pieces slightly; a mix of different-sized cubes creates interesting texture and looks more artisanal than perfectly uniform pieces. Furthermore, don’t fill the cups too high, or they become difficult to eat with a spoon and may tip over if guests are holding them while standing. If strawberries aren’t perfectly ripe when you purchase them, macerate them in the sugar mixture for an extended time—up to 30 minutes—to draw out more natural juices. Additionally, for a lighter version, substitute Greek yogurt for half of the whipped cream, creating a tangier flavor profile that many find refreshing and sophisticated. Finally, if you want to add extra flavor dimension, drizzle a small amount of strawberry jam or homemade berry coulis between the layers for additional sweetness and fruit flavor.
Chef Tips
Professional pastry chefs recommend using a small ice cream scoop or measuring spoon to portion whipped cream evenly into each cup, creating consistent, attractive layers that look polished and intentional. Additionally, chill your serving cups or glasses in the refrigerator for 15 minutes before assembling, as this keeps the whipped cream from softening too quickly and helps maintain clean, distinct layers throughout the chilling period.
Frequently Asked Questions
Can I assemble these cups the night before? Yes, strawberry shortcake cups can be assembled up to 12 hours ahead, though the cake will absorb more moisture from the whipped cream and strawberries, creating a softer, more integrated texture similar to trifle, which many people actually prefer.
What type of cups or glasses work best? Clear glass cups, mason jars, small bowls, or clear plastic cups all work beautifully, as they showcase the lovely layers inside and make for an impressive presentation that requires minimal additional decoration.
Can I use store-bought pound cake instead of making cake from scratch? Absolutely—quality store-bought pound cake works well as a convenient substitute and saves significant time while still delivering delicious results with proper layering and fresh ingredients.
How do I prevent the whipped cream from weeping or separating? Whip the cream to soft peaks rather than stiff peaks, chill the serving cups beforehand, and assemble within a few hours of serving to prevent excess liquid from developing in the whipped cream.
Can I make these cups dairy-free? Yes, use dairy-free whipped cream made from coconut cream or commercial dairy-free alternatives, and substitute plant-based milk in the cake for a completely dairy-free version that tastes delicious and accommodates dietary restrictions.
Customization Ideas
These strawberry shortcake cups serve as a perfect canvas for creative variations that match your preferences or dietary needs. First, consider layering in fresh raspberries, blackberries, or blueberries alongside or instead of strawberries for a mixed berry version. Next, add a layer of graham cracker crumbles or biscuit pieces between the cake and whipped cream for extra crunch and textural interest. Additionally, drizzle chocolate sauce, caramel sauce, or strawberry coulis between the layers for added richness and flavor complexity. Furthermore, substitute the vanilla cake with lemon, almond, or coconut cake for different flavor profiles that pair beautifully with fresh strawberries. Finally, for a more decadent version, add a layer of mascarpone cream or pastry cream instead of whipped cream alone, creating a richer, more sophisticated dessert.
Why This Recipe Works
The individual cup format takes the beloved strawberry shortcake concept and modernizes it for contemporary entertaining. Additionally, the strategic use of small cake cubes rather than intact cake layers allows for easier assembly and eating while maintaining all the textural contrast and flavor balance of the original. Furthermore, the layering approach showcases each component beautifully, creating visual appeal that encourages guests to savor every spoonful.
This recipe respects time-tested flavor combinations while offering the practical advantages of advance preparation and elegant individual presentation. The technique requires only basic baking skills, and the assembly process is simple enough for anyone to master quickly. Moreover, the flexibility of the recipe means you can customize it to match your ingredients, preferences, and serving style without compromising the final result.
Why Guests Love These
People gravitate toward individual strawberry shortcake cups because they combine nostalgia with modern convenience and elegance. First, the familiar flavors remind guests of cherished memories and summer celebrations, creating emotional connections to the dessert. Next, the attractive presentation makes each guest feel special and valued, as if you’ve prepared something thoughtfully just for them. Additionally, the ease of eating from a cup eliminates awkwardness around plating and eating, allowing guests to relax and enjoy the moment. Furthermore, the contained format makes these cups perfect for standing receptions, informal gatherings, or elegant dinners where you want dessert to feel special without requiring formal plating at the table.
Final Thoughts
Making strawberry shortcake cups from scratch is a rewarding experience that yields impressive results with minimal stress or complicated technique. Additionally, there’s something deeply satisfying about creating individual servings that look like they came from a professional bakery, especially knowing you made them yourself. This recipe proves that elegant, impressive desserts are entirely within the reach of home cooks who want to entertain thoughtfully.
Next time you’re planning a celebration or gathering, remember that these strawberry shortcake cups offer the perfect solution for serving dessert with style and simplicity. The combination of homemade cake, billowy whipped cream, and fresh strawberries creates magic in each spoonful and warmth in the hearts of those enjoying them. Whether it’s your first time making them or your fiftieth, these cups never fail to bring delight and satisfaction to the table.
We’d absolutely love to hear how these strawberry shortcake cups turned out for you! Did you try the recipe? What flavor variations did you create? Please save this recipe to your favorite collection, pin it to your Pinterest board so you can find it easily the next time you’re planning a celebration, and share it with friends and family who might love making it too. Your feedback and support truly inspire us to keep creating delicious recipes and helpful kitchen guidance for you. Thank you for being part of our cooking community!