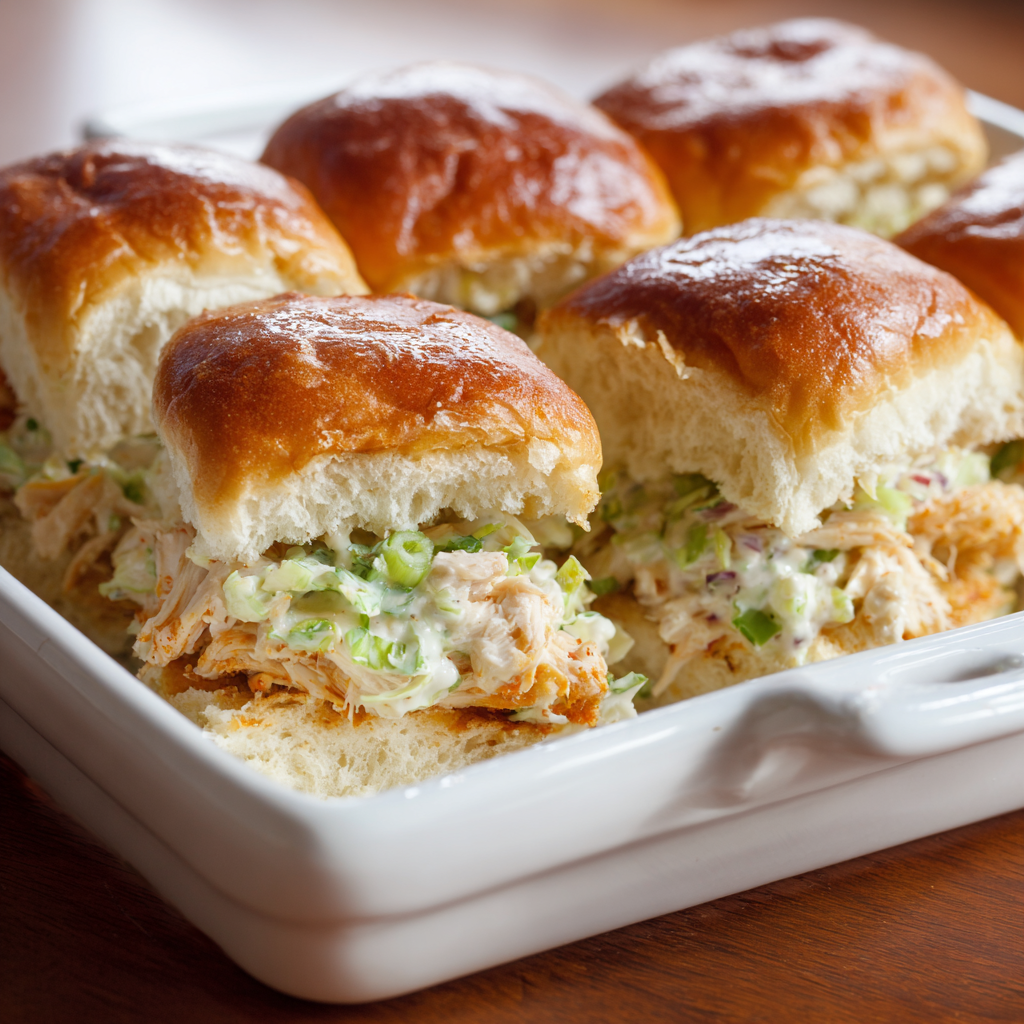
Few things bring people together quite like a tray of warm, savory sliders fresh from the oven during the big game. These bite-sized sandwiches pack incredible flavor into every mouthful, combining tender seasoned chicken, melted cheese, and a buttery brushed topping that creates an irresistible golden crust. What makes these sliders truly exceptional is how they feed a crowd without requiring you to spend hours in the kitchen or master complicated cooking techniques. Using Hawaiian rolls as the base creates a slightly sweet contrast to the savory filling, while baking everything together ensures every slider comes out perfectly consistent. Whether you’re hosting your first Super Bowl party or you’re a seasoned game day veteran, these sliders deliver impressive results with minimal effort. The best part is that you can assemble them ahead of time and simply pop them in the oven when your guests arrive, leaving you free to actually enjoy the celebration.
Ingredients
This recipe makes 12 sliders.
- 1 package (12 count) Hawaiian sweet rolls
- 2 pounds boneless, skinless chicken breasts
- 1 teaspoon salt
- 1/2 teaspoon black pepper
- 1 teaspoon garlic powder
- 1 teaspoon onion powder
- 1/2 teaspoon paprika
- 2 tablespoons olive oil
- 1 cup mayonnaise
- 2 tablespoons Dijon mustard
- 1 tablespoon honey
- 12 slices cheddar cheese
- 6 slices cooked bacon, cut in half
- 1/2 cup unsalted butter, melted
- 2 teaspoons Worcestershire sauce
- 1 tablespoon everything bagel seasoning
- 1 teaspoon dried parsley
- Lettuce leaves, for serving
- Tomato slices, for serving
- Pickles, for serving
Instructions
- Preheat your oven to 375°F and line a baking sheet with parchment paper or aluminum foil.
- Season the chicken breasts on both sides with salt, black pepper, garlic powder, onion powder, and paprika.
- Heat olive oil in a large skillet over medium-high heat until it shimmers.
- Add the seasoned chicken breasts to the hot skillet and cook for 6 to 7 minutes per side until golden brown.
- Check that the internal temperature of the chicken reaches 165°F using an instant-read thermometer.
- Remove the chicken from the skillet and let it rest on a cutting board for 5 minutes.
- Dice the rested chicken into small, bite-sized pieces approximately 1/2-inch in size.
- Combine the mayonnaise, Dijon mustard, and honey in a medium bowl, stirring until smooth and well blended.
- Add the diced chicken to the mayo mixture and toss until every piece is thoroughly coated.
- Slice the entire package of Hawaiian rolls in half horizontally, keeping the top and bottom sections intact.
- Place the bottom half of the rolls in a 9×13-inch baking dish, maintaining the connected sheet.
- Spread the chicken mixture evenly across the bottom layer of rolls, reaching all the way to the edges.
- Layer the cheddar cheese slices over the chicken mixture, overlapping slightly to cover completely.
- Arrange the bacon pieces evenly across the cheese layer, distributing them throughout.
- Place the top half of the rolls over the filling, pressing down gently to compact the layers.
- Mix the melted butter with Worcestershire sauce in a small bowl, whisking to combine.
- Brush the butter mixture generously over the top of the rolls, coating the entire surface.
- Sprinkle everything bagel seasoning and dried parsley evenly over the buttered tops.
- Cover the baking dish tightly with aluminum foil and bake for 15 minutes.
- Remove the foil and continue baking for an additional 5 to 7 minutes until the tops turn golden brown.
- Remove from the oven and let the sliders rest for 3 minutes before cutting along the roll divisions.
- Serve the sliders warm with lettuce, tomato, and pickles on the side for adding to individual sandwiches.
Why Hawaiian Rolls Make Perfect Sliders
Hawaiian sweet rolls have become the gold standard for slider recipes, and for good reason. Their soft, pillowy texture creates a delicate contrast to heartier fillings without falling apart or becoming soggy. Moreover, the subtle sweetness in these rolls balances beautifully against savory ingredients like chicken, bacon, and cheese, creating a more complex and interesting flavor profile than regular dinner rolls could provide.
The connected sheet format of Hawaiian rolls offers a significant advantage when preparing sliders for crowds. Instead of assembling twelve individual sandwiches, you simply build layers across the entire sheet, slice once, and serve.
This approach saves considerable time and effort while ensuring every slider looks uniform and professional. Additionally, baking them together in one dish creates steam that keeps the rolls incredibly moist and tender throughout the cooking process.
For those who can’t find Hawaiian rolls or prefer a different option, other soft slider buns or dinner rolls work acceptably well in this recipe. However, the unique texture and flavor of Hawaiian rolls truly elevate these sliders from good to exceptional. Many home cooks stock up on these rolls whenever they’re on sale specifically because they make entertaining so much easier and more enjoyable.
Creating Flavorful Chicken Filling
The chicken filling serves as the heart of these sliders, and getting it right makes all the difference. Seasoning the chicken generously before cooking builds flavor from the inside out, creating depth that simple salt and pepper alone cannot achieve. The combination of garlic powder, onion powder, and paprika provides a savory base that complements rather than competes with the other slider components.
Dicing the chicken into small pieces ensures every bite contains the perfect ratio of meat to bread and toppings. Pieces that are too large create uneven distribution and make the sliders difficult to eat, while pieces that are too small can get lost in the other ingredients. Aim for uniform 1/2-inch cubes that provide substantial texture without overwhelming the delicate rolls.
The honey mustard mayo mixture does more than just bind the chicken together—it adds moisture, richness, and tangy sweetness that prevents the filling from tasting dry or bland. This coating also helps the chicken adhere to itself, creating a cohesive layer that stays put when you bite into the slider. Furthermore, mixing the chicken with this sauce while it’s still warm allows the flavors to meld together more effectively than if you waited for the chicken to cool completely.
Mastering the Butter Topping
That gorgeous golden-brown crust on top of your sliders comes from a simple but crucial butter topping. Brushing melted butter across the surface accomplishes several important functions beyond just adding flavor. First, it helps the seasonings stick to the rolls and distributes them evenly. Second, it creates a barrier that prevents the tops from drying out during baking. Finally, it promotes beautiful browning that makes your sliders look as incredible as they taste.
Adding Worcestershire sauce to the butter might seem like a small detail, but it contributes savory umami notes that deepen the overall flavor profile. This ingredient works quietly in the background, enhancing everything else without drawing attention to itself. Even guests who typically dislike Worcestershire sauce won’t identify it here—they’ll simply notice that these sliders taste exceptionally good.
Everything bagel seasoning has become a beloved shortcut for adding complex flavor with minimal effort. The combination of sesame seeds, poppy seeds, dried garlic, dried onion, and salt creates a restaurant-quality finish that looks impressive and tastes phenomenal. If you don’t have this seasoning blend on hand, you can substitute with sesame seeds, garlic powder, and a pinch of coarse salt for a similar effect.
Serving and Storing Tips
Serving Tips
Serve these sliders hot from the oven for the optimal taste experience when the cheese is still melty and the rolls are at their softest. Setting up a slider bar with various toppings and condiments allows guests to customize their sandwiches according to personal preferences. Offer fresh lettuce, ripe tomato slices, crispy pickles, sliced red onions, additional condiments like ranch dressing or barbecue sauce, and extra bacon for those who want to load up their sliders.
These chicken sliders pair wonderfully with classic game day sides that complement without competing. Consider serving them alongside crispy french fries, sweet potato fries, coleslaw, potato salad, tortilla chips with salsa and guacamole, or a fresh vegetable platter with ranch dip. For beverages, ice-cold beer, lemonade, iced tea, or soft drinks keep the casual, fun atmosphere going strong throughout the game.
The beauty of slider-style serving lies in how it encourages social eating and sharing. Arrange the sliders on a large platter or cutting board in the center of your food table, and watch as guests naturally gather around to grab a few. This format works perfectly for parties where people want to graze throughout the event rather than sitting down for a formal meal. Additionally, the portable nature of sliders means guests can eat while standing, walking around, or sitting on the couch without needing plates or utensils.
Storage Tips
Store leftover sliders in an airtight container in the refrigerator for up to 3 days, though they taste best when consumed within the first day or two. The rolls will firm up slightly in the refrigerator, but reheating them properly restores much of their original texture. For optimal results, wrap individual sliders in aluminum foil before refrigerating to maintain moisture and prevent them from drying out.
When reheating refrigerated sliders, wrap them in foil and warm them in a 350°F oven for 10 to 12 minutes until heated through completely. Alternatively, microwave individual sliders for 30 to 45 seconds, though this method won’t restore the crispy top that oven heating provides. Adding fresh toppings like lettuce and tomato after reheating rather than before storing helps maintain better texture and prevents sogginess.
Freezing assembled sliders works surprisingly well for make-ahead meal planning. Prepare the sliders completely through the assembly stage, then wrap the entire pan tightly in plastic wrap followed by aluminum foil. Freeze for up to 2 months, then thaw overnight in the refrigerator before baking according to the original instructions. This approach allows you to prepare party food weeks in advance, reducing stress and workload on the actual event day.
Helpful Notes
Make-ahead preparation transforms these sliders from convenient to absolutely effortless for busy hosts. Assemble the entire dish up to 24 hours in advance, cover it tightly with plastic wrap or foil, and refrigerate until you’re ready to bake.
When game time approaches, simply remove the cover, brush with the butter mixture, add the seasonings, and bake as directed. This strategy means you can have hot, fresh sliders ready with just 25 minutes of hands-off oven time.
Rotisserie chicken provides an excellent shortcut that cuts your active cooking time significantly without sacrificing flavor. Purchase one whole rotisserie chicken from your grocery store, remove the skin, shred or dice the meat, and use about 3 cups in place of the cooked chicken breasts. Toss the rotisserie chicken with just the honey mustard mayo mixture since it’s already seasoned, and proceed with assembling your sliders as usual.
For those managing dietary restrictions, several simple swaps make these sliders work for different needs. Use gluten-free slider buns for gluten-sensitive guests, swap turkey bacon for regular bacon, choose dairy-free cheese alternatives, or use olive oil-based mayo instead of traditional mayonnaise. Each substitution maintains the recipe’s integrity while making it accessible to more people at your gathering.
Preventing soggy bottoms requires ensuring your chicken mixture isn’t too wet before layering it on the rolls. If your mayo mixture seems excessively runny, add the chicken gradually and stop once you achieve a moistened but not dripping consistency. Alternatively, drain any excess liquid from the chicken mixture before spreading it on the rolls to maintain the perfect texture balance.
Chef Tips
Professional caterers know that even heat distribution creates uniformly perfect sliders without overcooked edges or undercooked centers. Place your baking dish in the center of the oven rather than on the top or bottom rack, which promotes even browning and prevents the tops from burning before the insides heat through. Furthermore, using the convection setting if your oven has one helps circulate hot air more effectively, though it’s not necessary for excellent results.
Another expert technique involves scoring the bottom layer of rolls slightly with a serrated knife before adding the filling. These shallow cuts help the moisture and flavors penetrate into the bread without making it soggy, creating more flavorful bites throughout. Additionally, this subtle scoring makes separating the finished sliders cleaner and easier, resulting in neater presentation and less frustration when serving.
Frequently Asked Questions
Can I use ground chicken instead of chicken breasts?
Yes, cook 2 pounds of ground chicken with the seasonings until fully cooked, drain excess fat, then mix with the honey mustard mayo and proceed with assembly.
How do I keep the sliders warm for a party?
Cover them loosely with foil and keep them in a 200°F oven for up to 30 minutes, or use a warming tray set on low heat.
What other cheeses work well in these sliders?
Swiss, pepper jack, provolone, or American cheese all melt beautifully and offer different flavor profiles depending on your preferences.
Can I make these sliders without bacon?
Absolutely, simply omit the bacon layer entirely, or substitute with crispy fried onions, sliced avocado, or roasted red peppers for added texture and flavor.
How far in advance can I assemble these before baking?
Assemble the sliders completely up to 24 hours ahead, cover tightly, refrigerate, and bake when ready, adding 2 to 3 extra minutes to the covered baking time.
Perfect Party Food Made Simple
Great party food should taste incredible while requiring minimal last-minute attention from the host. These chicken sliders achieve that ideal balance, allowing you to focus on your guests rather than being stuck in the kitchen during the game. The assembly-line approach to building these sandwiches makes the process feel more like a fun project than tedious cooking, especially if you recruit a helper to make it even faster.
Did these Super Bowl Chicken Sliders disappear faster than you expected at your party? If you loved how easy they were to prepare, how perfectly they fed your crowd, and how many compliments you received, we’d be so grateful if you could save this recipe for future gatherings, pin it to your game day Pinterest board, or share it with friends who love entertaining. Your support and feedback inspire us to continue developing and sharing recipes that make hosting easier and more enjoyable for home cooks everywhere. Tell us in the comments what toppings your guests loved most and whether these sliders earned a permanent spot on your party menu—we can’t wait to hear about your slider success stories!