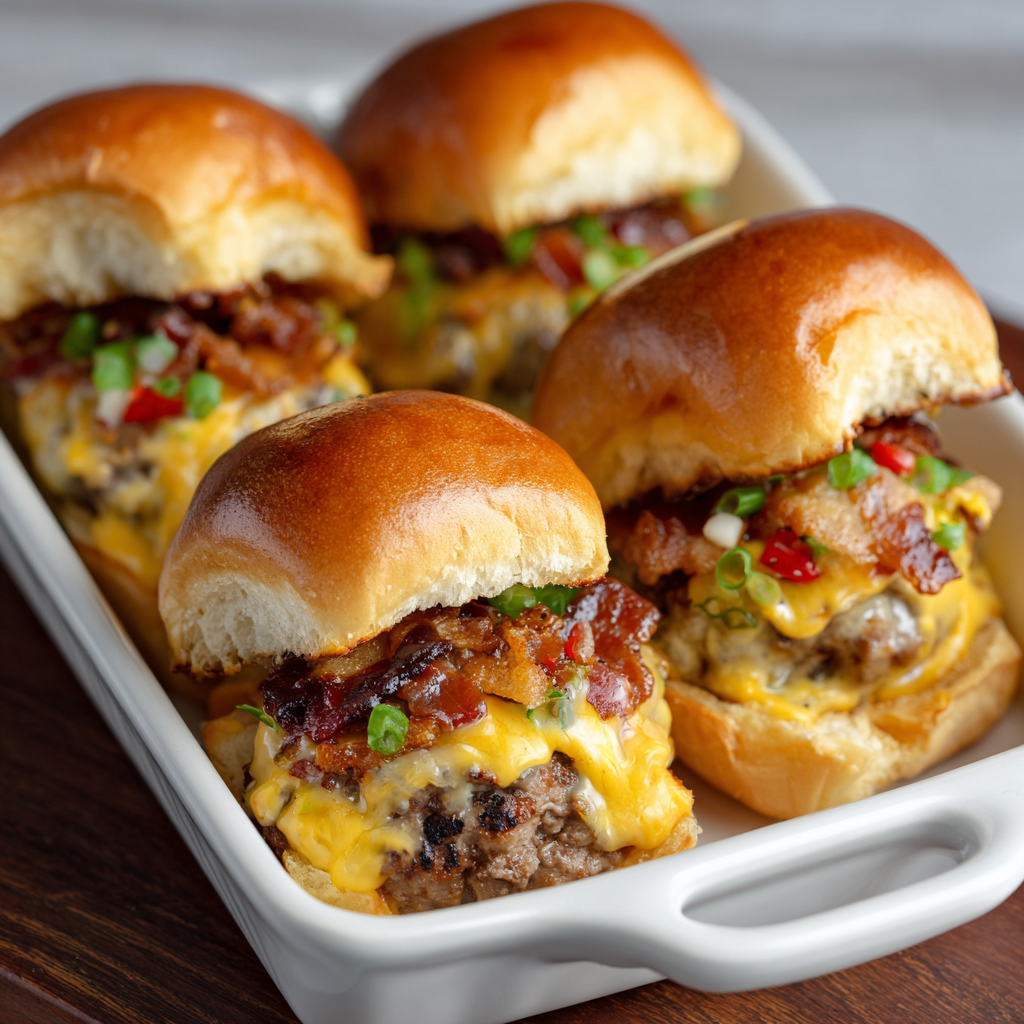
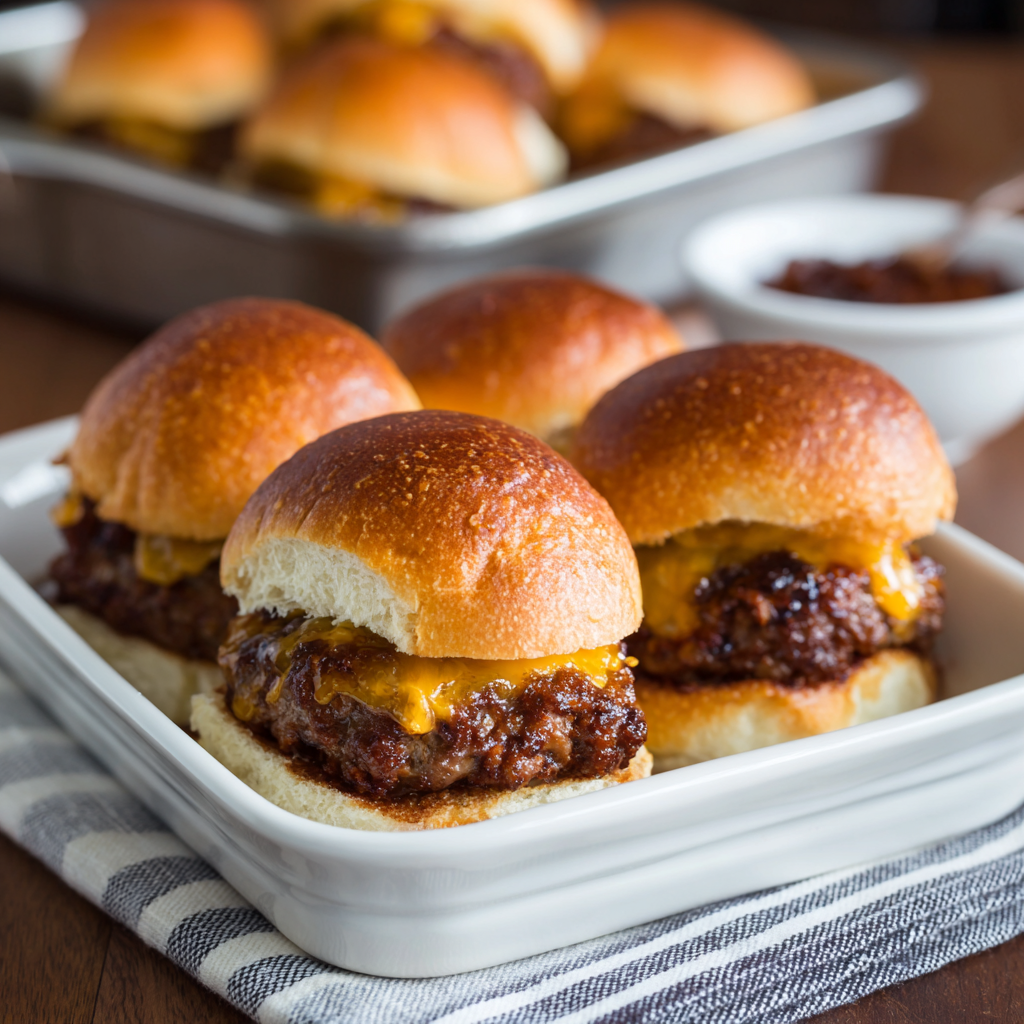
There’s an undeniable appeal to slider burgers: they’re fun to eat, incredibly satisfying, and they allow guests to enjoy multiple flavors without committing to a full-sized burger. These smash sliders take that concept and elevate it with a crispy, caramelized crust and juicy, flavorful beef that tastes far superior to typical fast-food versions. Next, what makes this recipe truly special is the smashing technique, which creates maximum surface area for contact with the hot skillet, resulting in that coveted golden crust while keeping the interior incredibly moist and tender. Additionally, these sliders come together remarkably quickly, making them perfect for gameday entertaining when you want impressive results without spending hours in the kitchen. Furthermore, the simplicity of the ingredient list belies the complex, deeply satisfying flavors that emerge from proper technique and quality beef. Whether you’re hosting a Super Bowl party, feeding a crowd of hungry fans, or looking for a fun, interactive eating experience that brings people together, these smash sliders deliver everything you need in one delicious, hand-held package.
Ingredients
Makes: 12-16 sliders (4-6 servings)
For the Sliders
- 1.5 pounds ground beef (80/20 blend)
- 1 medium yellow onion, very thinly sliced
- 2 tablespoons unsalted butter, divided
- 1 teaspoon sea salt, divided
- 0.5 teaspoon black pepper, divided
- 0.25 teaspoon garlic powder
- 12-16 slider buns (or small dinner rolls)
- 8 slices American cheese (or cheddar), cut into small squares
- 4 tablespoons mayonnaise
- 2 teaspoons yellow mustard
- 1 tablespoon Worcestershire sauce
- Fresh lettuce leaves (optional)
- Dill pickle slices
- Sliced tomato (optional)
- Fresh or fried onions for topping (optional)
For Caramelized Onions (Optional)
- 1 tablespoon unsalted butter
- 0.5 teaspoon salt
- 0.25 teaspoon black pepper
- 0.5 teaspoon sugar
- Additional 2-3 minutes cooking time
Preparation and Cooking Instructions
Preparing Your Workspace and Ingredients
First, remove your ground beef from the refrigerator about 15 minutes before cooking to allow it to reach room temperature slightly, which promotes better browning and more even cooking. Meanwhile, slice your yellow onion very thinly using a sharp knife or mandoline slicer, keeping the slices intact rather than separating them into individual rings.
Next, toast your slider buns lightly in a dry skillet or toaster oven for about one to two minutes until they’re golden brown and slightly crispy. This step prevents them from becoming soggy when you add toppings and sauce, maintaining structural integrity throughout the eating experience. Additionally, toasted buns provide a pleasant textural contrast to the juicy burger and soft cheese.
Prepare all your toppings and condiments in small bowls or containers arranged near your cooking station. This mise en place approach streamlines the assembly process and ensures you’re not scrambling for ingredients while your burgers are cooking. Furthermore, having everything prepared in advance means you can focus on the crucial smashing and cooking technique that creates these burgers’ signature crust.
Creating the Perfect Smash Burgers
First, divide your ground beef into 12 to 16 small portions, using your hands to gently form small, loosely packed balls about the size of a large grape. However, avoid overworking the meat, as this creates dense burgers that lose their tender, juicy quality. Next, the key to excellent smash burgers lies in loose, delicate handling that preserves the natural texture of the meat.
Heat a large cast-iron skillet or heavy-bottomed griddle over medium-high heat until it’s very hot but not smoking. Meanwhile, place a few of your meat balls onto the hot surface, spacing them at least one inch apart so they cook individually rather than merging together.
Using a metal spatula or burger smasher, firmly and decisively press each meat ball flat onto the skillet surface, creating a thin patty approximately one-quarter inch thick. As a result, you’ll develop that coveted crispy, caramelized crust that defines excellent smash burgers. Additionally, this pressing step increases the surface area in contact with the hot skillet, maximizing browning and flavor development.
Without moving the burgers, allow them to cook undisturbed for two to three minutes until the bottom develops a deep golden-brown crust. However, resist the urge to flip them prematurely or move them around, as this disrupts the browning process. Next, when the bottom is properly caramelized, use your spatula to carefully flip each burger, and immediately season the just-cooked top side with a pinch of sea salt and black pepper.
Building Layers of Flavor
Cook the burgers on the second side for approximately one minute to one minute and thirty seconds, allowing the second side to brown while maintaining the juiciness of the interior. Meanwhile, immediately place a small square of American cheese on top of each burger and cover the skillet with a lid or inverted baking sheet for about 30 seconds to help the cheese melt completely.
Transfer your finished burgers to a plate and repeat this process with any remaining meat balls, working in batches as needed. However, remember that you’re cooking only a few burgers at a time to maintain proper heat and spacing, so take your time and focus on quality rather than speed.
Once all your burgers are cooked, wipe out your skillet and add one tablespoon of butter over medium heat. Next, add your thinly sliced onions and a pinch of salt, cooking them for four to five minutes while stirring occasionally until they become soft, translucent, and slightly caramelized.
If you prefer deeper caramelization and sweeter onions, continue cooking for an additional two to three minutes, stirring frequently and adding the sugar to encourage browning. Additionally, these caramelized onions add incredible depth and complexity that elevates your sliders from good to extraordinary.
Assembling Your Smash Sliders
Remove your toasted buns from the oven and arrange them on your work surface with the cut sides facing up. Next, spread a small amount of mayonnaise on the bottom bun and a touch of yellow mustard on the top bun, creating a simple but flavorful base for your toppings.
Layer a smashed burger patty with its melted cheese onto the bottom bun. Afterward, add a small amount of caramelized onions directly on top of the melted cheese, allowing them to nestle into the cheese while it’s still warm.
Add a dill pickle slice or two and optional fresh tomato or lettuce if desired. Meanwhile, place the top bun on your slider, gently pressing down to help all the components meld together. As a result, you’ve created a perfectly balanced burger with distinct flavors and textures that work harmoniously together.
If you prefer additional toppings, add them now, keeping in mind that sliders are meant to be compact and easily eaten in just a few bites. Furthermore, too many toppings can make them unwieldy and difficult to enjoy, so restraint is key.
Final Presentation
Arrange your completed sliders on a large platter or wooden board, creating an attractive display that invites guests to grab one or two. Next, serve them immediately while the burgers are still warm and the cheese remains melted and creamy. Additionally, place any remaining toppings, condiments, or sauces in small bowls nearby so guests can customize their sliders according to personal preference.
For gameday entertaining, consider serving sliders in multiple waves throughout the event, ensuring that each batch is freshly made and warm from the skillet. Meanwhile, this approach keeps your guests engaged and provides them with hot food throughout the duration of the game.
Serving and Storing Tips
Serving Suggestions
Serve these smash sliders as the star of your Super Bowl party or gameday gathering, presenting them on an attractive platter in the center of your entertaining space. Next, allow guests to help themselves, creating a casual, interactive atmosphere perfect for watching the game together.
Pair the sliders with classic gameday sides such as crispy fries, creamy coleslaw, or a simple green salad for a complete meal. Additionally, they work beautifully alongside pickles, potato chips, or other traditional burger accompaniments that complement the flavors and textures.
These sliders are perfect for buffet-style entertaining, allowing guests to grab one or two easily without sitting down at a formal table. Meanwhile, they’re equally suited for casual dinners, weeknight meals, or any occasion where you want to serve something special without requiring extensive preparation.
For a sliders-and-sides bar, arrange your smashed burgers alongside toasted buns, various cheese options, sliced toppings, and multiple condiments, allowing guests to build their own customized sliders. Furthermore, this interactive approach adds fun to the entertaining experience while accommodating various preferences and dietary needs.
Storage Tips
These smash sliders are best enjoyed immediately after assembly while the burgers are still warm and the cheese remains melted. However, if you have leftovers, you can store them in an airtight container in the refrigerator for up to two days, though the buns will gradually soften and the overall texture will decline.
If you need to reheat leftover sliders, place them on a baking sheet and warm in a 350°F oven for five to seven minutes until heated through, which preserves texture better than microwaving. Additionally, you can assemble sliders without cheese and refrigerate them for up to four hours before cooking, reducing your day-of preparation time.
You can cook your ground beef patties ahead of time and store them in the refrigerator for up to one day, reheating them briefly in the skillet just before assembly. Next, prepare your caramelized onions completely and refrigerate them for up to three days, reheating gently before serving.
For longer-term storage, freeze uncooked burgers formed into patties in a freezer-safe container with parchment paper between layers for up to two months. Meanwhile, cook them directly from frozen, adding one to two extra minutes per side to the cooking time.
Helpful Notes and Tips
Ingredient Substitutions and Variations
If you prefer ground turkey or chicken to beef, use the same technique and cooking method, though you may need slightly longer cooking times since poultry is leaner and cooks faster. Additionally, ground turkey produces wonderful burgers with a slightly different flavor profile that many people enjoy.
For a more indulgent version, use an 85/15 beef ratio or add a small amount of butter directly into your meat portions before forming them. However, this creates a richer burger that may drip more during cooking, so proceed carefully.
The cheese is infinitely customizable based on your preferences and what you have available. Next, try sharp cheddar for bold flavor, Swiss for nuttiness, pepper jack for heat, or a combination of cheeses for complexity. Additionally, vegan cheese options work beautifully for those avoiding dairy without requiring adjustments to the recipe.
You can customize your condiments according to personal preference, swapping mayo for garlic aioli, using spicy mustard instead of yellow, or adding special sauce made from mayonnaise, ketchup, relish, and paprika. Meanwhile, caramelized onions, crispy bacon, fresh sautéed mushrooms, and pickled red onions all elevate these sliders beautifully.
The bun option is flexible based on what you have available and your preferences. Next, brioche slider buns work wonderfully, as do small dinner rolls, potato rolls, or even toasted bread slices. Additionally, for gluten-free options, small gluten-free buns work equally well with no recipe changes needed.
Common Mistakes to Avoid
One frequent error is overworking the ground beef while forming the meat balls, which creates dense, tough burgers that lose their tender, juicy quality. Instead, handle the meat gently and form the balls loosely, allowing them to fall apart slightly when pressed onto the skillet.
Additionally, avoid cooking too many sliders at once, which causes them to steam rather than smash and brown properly. Furthermore, crowding the skillet lowers the temperature significantly, preventing the development of that crucial caramelized crust.
Another common mistake involves moving the burgers around excessively during cooking, which disrupts browning and prevents the development of a proper crust. Instead, allow them to sit undisturbed on the skillet for the appropriate amount of time before flipping.
Do not skip the smashing step, which is the defining characteristic of smash burgers and creates their signature texture and flavor profile. Furthermore, pressing too gently won’t create adequate surface area for browning, so use firm, decisive pressure when smashing.
Time-Saving Tips
Prepare your caramelized onions several hours in advance and store them in the refrigerator, simply reheating them gently before serving. Next, this allows you to focus entirely on cooking the burgers during your gameday event.
Form your meat balls ahead of time and refrigerate them on a baking sheet for up to four hours before cooking. Meanwhile, this approach means you simply pull them from the fridge and cook them fresh when your guests arrive, minimizing active cooking time during entertaining.
Toast your slider buns in advance and store them in an airtight container, reheating them briefly in the oven if they’ve cooled before assembly. Additionally, prepare all your toppings and condiments ahead of time, arranging them in small bowls so everything is ready when you need it.
Chef Tips for Success
First, the secret to exceptional smash burgers lies in using a 80/20 ground beef blend that provides adequate fat for flavor and juiciness while still maintaining structural integrity. Additionally, freshly ground beef produces superior results compared to pre-ground meat, so consider asking your butcher to grind beef for you just before you cook.
Furthermore, a cast-iron skillet is far superior to a non-stick pan for smash burgers because it retains heat better and develops superior browning. Additionally, the friction helps you press the meat firmly without the burger slipping around, which is crucial for proper crust development.
Next, resist the urge to add seasonings to the beef before cooking, as salt draws out moisture and results in dense, dry burgers. Instead, season only after smashing or immediately after flipping, which prevents this moisture loss while still imparting flavor throughout.
Additionally, for the juiciest burgers, avoid pressing too hard or too long when smashing, using firm but brief pressure that creates a thin, uniform patty. Meanwhile, the goal is maximum browning with minimum moisture loss, which this technique accomplishes beautifully.
Frequently Asked Questions
Can I prepare these sliders completely ahead of time and just reheat them before serving? You can cook the burgers ahead and refrigerate them, then reheat in a skillet for one to two minutes per side, though they’ll have softer exterior texture than freshly cooked burgers.
What’s the best way to keep sliders warm if I’m making them in batches throughout the event? Cook them fresh in batches as needed, or place cooked sliders in an insulated cooler lined with foil and towels to maintain warmth for 20-30 minutes without drying them out.
Can I use lean ground beef instead of 80/20 blend for a healthier option? Yes, lean beef works, though it produces slightly less juicy burgers; adding one tablespoon of butter to the meat or cooking on a slightly lower heat helps compensate for lower fat content.
How do I prevent the sliders from being too salty since I’m using American cheese, which is already quite salty? Season the burgers lightly and remember that cheese adds saltiness, or swap American cheese for a less salty variety like white cheddar or Swiss.
Can I make smash sliders without a cast-iron skillet? Yes, a heavy stainless steel skillet or griddle works, though cast iron is superior for heat retention and browning; avoid non-stick pans, which don’t develop proper crust.
Final Thoughts
These Super Bowl smash slider burgers represent the perfect marriage of simplicity and sophistication, combining basic ingredients prepared with impeccable technique to create something truly special. Next, they prove that exceptional food doesn’t require complex recipes or extensive ingredient lists, but rather a focus on quality components and proper methodology. Furthermore, the satisfaction of a perfectly smashed burger with a crispy, caramelized exterior and juicy, flavorful interior is genuinely unmatched.
The next time you’re hosting a Super Bowl party, gameday gathering, or any event where you want to serve something impressive that brings people together, remember that these smash sliders deliver everything you need: incredible flavor, simple preparation, customizable toppings, and the kind of fun, interactive eating experience that makes entertaining memorable.
So gather your ingredients, fire up your skillet, and prepare to become the hero of your event with a generous platter of these irresistible, perfectly smashed, absolutely unforgettable slider burgers.
Did you love this recipe? If Super Bowl Smash Slider Burgers has become your new go-to entertaining dish, please save this recipe, pin it to your Pinterest board, and share it with friends and family who would love it! Your support means everything to us and helps us create more delicious recipes that bring people together. Thank you for cooking with us!