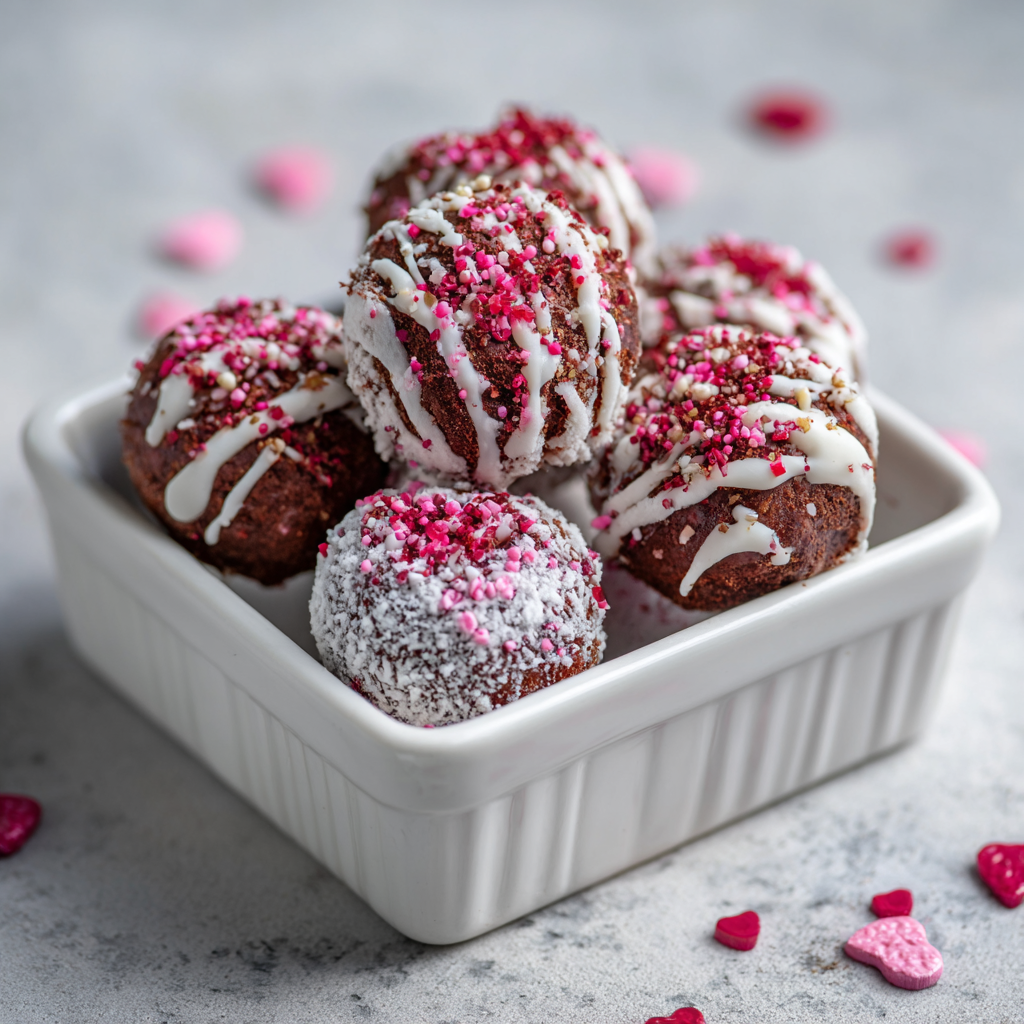
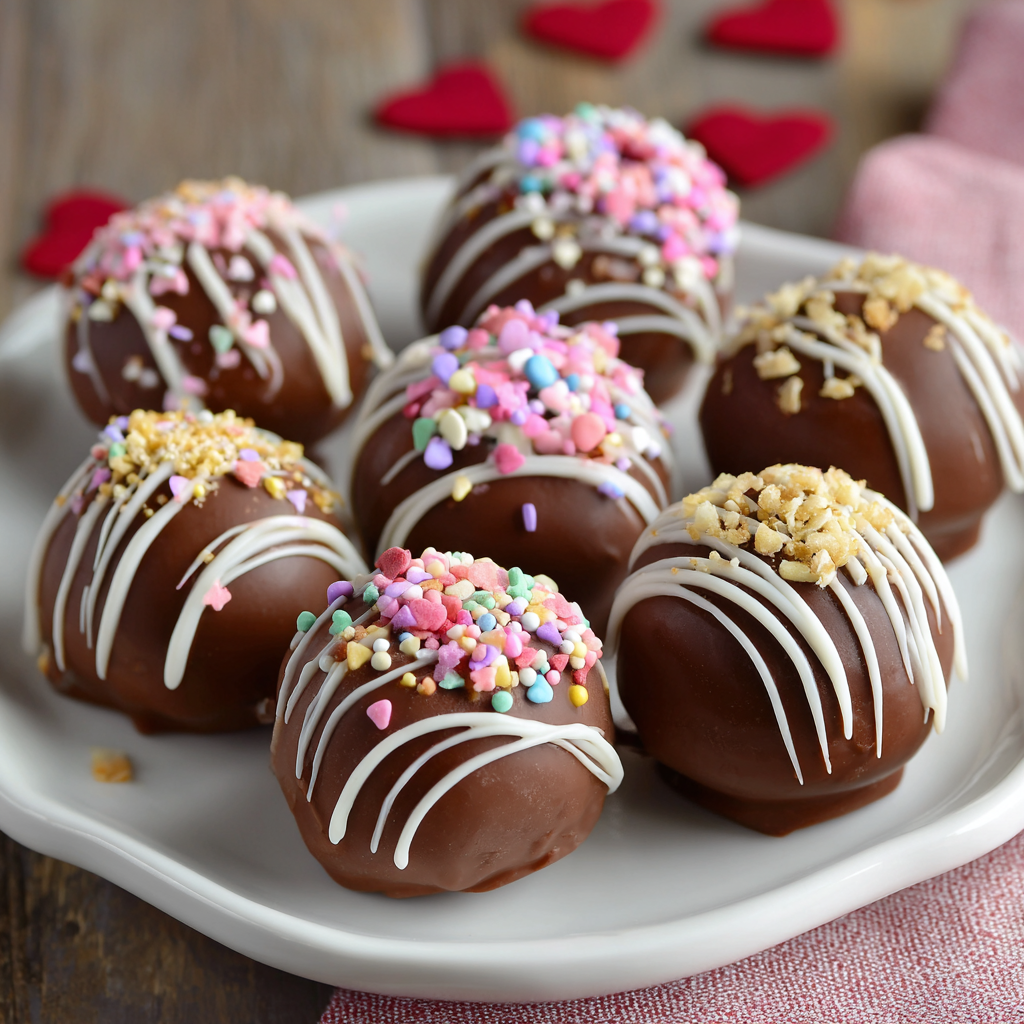
There’s an undeniable magic in gifting something homemade that’s been made with love and intention, and these Valentine’s Brownie Truffles deliver pure chocolate indulgence in a beautiful, bite-sized package that feels both elegant and genuinely impressive. These decadent little spheres combine rich, fudgy brownie pieces with smooth chocolate ganache, creating a confection that tastes like it came straight from an upscale chocolatier while remaining surprisingly simple and straightforward to make at home. What makes this recipe truly special is how it transforms ordinary brownies into something luxurious and sophisticated through a simple rolling, dipping, and decorating process that requires no specialized equipment or advanced baking skills. Whether you’re crafting Valentine’s gifts for someone you love, preparing treats for a romantic celebration, or simply indulging your own chocolate cravings, these truffles deliver an experience of pure decadence in every single bite. The combination of fudgy chocolate, silky ganache coating, and beautiful decorative touches creates a sensory experience that feels completely indulgent while remaining remarkably achievable in your own kitchen. Your loved ones will be absolutely enchanted by the thoughtfulness, impressed by the professional appearance, and utterly satisfied by the incredible chocolate flavor that shines through in every magnificent bite.
Ingredients
This recipe makes approximately 24 beautiful chocolate truffles.
For the Brownies:
• 1 cup all-purpose flour • ½ cup unsweetened cocoa powder • ½ teaspoon baking soda • ¼ teaspoon salt • ½ cup softened butter • ¾ cup granulated sugar • 2 large eggs, room temperature • 1 teaspoon vanilla extract • 4 ounces semi-sweet chocolate, chopped
For the Chocolate Ganache Coating:
• 8 ounces semi-sweet chocolate, finely chopped • ½ cup heavy cream • 2 tablespoons butter • 1 teaspoon vanilla extract • Pinch of salt
For Decoration:
• 2 ounces white chocolate, melted (optional) • Red sprinkles or edible glitter • Cocoa powder for dusting • Heart-shaped candies or decorative elements (optional)
Instructions
Prepare and Bake the Brownies
- Preheat your oven to 350°F and line an 8×8-inch square baking pan with parchment paper, allowing the paper to hang over the edges for easy removal later.
- In a small mixing bowl, whisk together the flour, cocoa powder, baking soda, and salt, setting this dry mixture aside for later incorporation into the batter.
- Beat the softened butter and granulated sugar together in a large mixing bowl using an electric mixer on medium speed for 2 to 3 minutes until the mixture becomes light, fluffy, and pale in color.
- Add the room temperature eggs one at a time, beating well after each addition, then add the vanilla extract and continue beating until the mixture is smooth and well combined.
- Reduce the mixer speed to low and add the dry flour mixture in two additions, folding gently with a spatula after each addition to prevent overmixing, which can create a dense, tough brownie.
- Fold in the chopped semi-sweet chocolate with a spatula using gentle motions, ensuring it’s evenly distributed throughout the batter without any flour streaks remaining.
- Pour the brownie batter into the prepared pan, spreading it evenly across the bottom with an offset spatula or the back of a spoon.
- Bake in the preheated 350°F oven for 20 to 25 minutes until a toothpick inserted in the center comes out with just a few moist crumbs clinging to it, indicating perfect fudgy brownies.
- Remove the pan from the oven and allow the brownies to cool completely to room temperature on a wire rack, which typically takes about 30 minutes.
- Once fully cooled, lift the parchment paper and brownies out of the pan and cut them into small 1-inch pieces, creating approximately 24 chunks for your truffles.
Prepare the Chocolate Ganache Coating
- Place the finely chopped semi-sweet chocolate in a medium mixing bowl, then heat the heavy cream in a small saucepan over medium heat until it just begins to steam with small bubbles forming around the edges.
- Pour the hot cream over the chopped chocolate, then cover the bowl with plastic wrap or a lid and allow it to sit undisturbed for 2 to 3 minutes while the heat softens the chocolate.
- Remove the cover and stir the mixture with a whisk until it becomes completely smooth, silky, and uniform in color with no visible chocolate chunks remaining.
- Add the butter, vanilla extract, and salt to the ganache, stirring gently until the butter is completely melted and fully incorporated throughout.
- Allow the ganache to cool for 5 to 10 minutes until it thickens slightly and reaches a consistency thick enough to coat the brownies without running off immediately.
Roll and Shape the Truffles
- Working with clean hands or wearing food-safe gloves, roll each brownie piece between your palms into a smooth sphere, applying gentle pressure to create compact, evenly shaped balls.
- If the brownie pieces are too crumbly to hold together, you can lightly dampen your hands or add a touch of melted chocolate to help bind them, creating more cohesive truffle centers.
- Arrange all the rolled brownie balls on a baking sheet lined with parchment paper, then place the sheet in the freezer for at least 30 minutes until the truffles are firm and cold.
- Chilling the truffles makes them much easier to coat with ganache without falling apart, and ensures a smooth, professional-looking finish on the completed truffles.
Coat with Ganache
- Remove the chilled brownie truffles from the freezer and working quickly, use a dipping fork or regular fork to submerge each truffle into the warm ganache, coating it completely.
- Allow excess ganache to drip back into the bowl by holding the fork steady for a moment, then carefully transfer the coated truffle back to the parchment-lined baking sheet.
- Continue this process with all remaining truffles, working as quickly as possible before the ganache cools and becomes too thick to coat smoothly.
- Once all truffles are coated, return the baking sheet to the refrigerator for at least 1 hour until the ganache coating is completely set and firm to the touch.
Decorate with Love
- Remove the truffles from the refrigerator and begin decorating them with your chosen toppings while the ganache is still slightly firm but not rock-hard.
- Drizzle melted white chocolate over some truffles using a fork or piping bag, creating elegant lines across the dark chocolate surface.
- Sprinkle red Valentine’s sprinkles, edible glitter, or small heart-shaped candies onto the ganache coating while it’s still slightly sticky, allowing the decorations to adhere beautifully.
- For extra elegance, dust some truffles lightly with cocoa powder using a fine sieve, creating a sophisticated, velvety appearance.
- Return the decorated truffles to the refrigerator for another 30 minutes to allow all decorations to set properly before packaging or serving.
Serving and Storing Tips
How to Serve These Luxurious Truffles
Present these beautiful truffles chilled directly from the refrigerator for the best texture and eating experience, as they’ll maintain their perfect shape and smooth ganache coating. First, arrange them on a beautiful platter lined with decorative paper or tissue for a stunning presentation that rivals any upscale chocolatier. Additionally, you might consider placing each truffle in a small paper or foil candy cup, which creates an elegant presentation while making them easier for guests to enjoy without getting their hands messy. Meanwhile, serve these truffles with champagne, sparkling cider, wine, or espresso for a truly sophisticated pairing that enhances their rich chocolate flavor. For romantic occasions, consider presenting them in a beautiful gift box tied with a silk ribbon, complete with a handwritten note explaining the homemade chocolates inside. Furthermore, if you’re serving at a dinner party, you can arrange them on a dessert platter alongside fresh berries, shortbread cookies, or candied nuts for a luxurious after-dinner experience.
Storage Instructions for Maximum Enjoyment
Keep your chocolate truffles in an airtight container in the refrigerator for up to 10 days, storing them in a single layer separated by parchment paper to prevent them from sticking together or transferring flavors. If your kitchen is warm or you live in a hot climate, the refrigerator is essential to prevent the ganache coating from becoming too soft. For longer storage, freeze the truffles in a freezer-safe container with parchment between layers for up to 3 months, and they’ll taste just as delicious when thawed. To thaw frozen truffles, simply move them to the refrigerator 30 minutes before serving, allowing them to come to the perfect temperature and texture. For the best presentation, always serve truffles directly from the refrigerator or freezer, as they’ll have a beautiful firm texture and the ganache coating will have an appetizing appearance.
Helpful Notes and Pro Tips
Tips for Perfect Truffles
Start by ensuring your brownies are completely cooled before attempting to roll them, as warm brownies are too soft and crumbly to hold together in ball shapes effectively. Additionally, the ganache consistency is crucial for successful coating—if it’s too thin, the coating will run off the truffles, but if it’s too thick, it will be difficult to coat smoothly. Allow the ganache to cool for several minutes after adding the butter and vanilla, then test the consistency by dipping a truffle to ensure it coats evenly. Furthermore, keeping the brownie balls very cold before dipping helps them stay intact during the coating process and prevents them from falling into the ganache. When rolling the brownies into balls, don’t apply excessive pressure or they’ll compress too much and become dense rather than fudgy. Meanwhile, if your hands get too warm during rolling, dip them briefly in cold water and pat dry before continuing, which helps maintain the chocolate’s integrity.
Ingredient Substitutions and Variations
If you prefer a less intense chocolate flavor, you can replace some or all of the semi-sweet chocolate with milk chocolate in both the brownies and ganache coating. In contrast, for chocolate lovers who want maximum intensity, you can use dark chocolate with 70% cocoa content in place of semi-sweet chocolate for a more sophisticated, less sweet result. For those with nut allergies, brownie truffles remain naturally nut-free, though you should always verify that all your chocolate products are processed in nut-free facilities. You could also create completely different flavors by adding 1 teaspoon of espresso powder to the ganache for mocha-flavored truffles, or ½ teaspoon of peppermint extract for holiday-inspired variations. Alternatively, infusing the ganache with a touch of strawberry liqueur, raspberry extract, or orange zest creates exciting flavor combinations that align beautifully with Valentine’s Day themes. For a salted caramel twist, you can spread a small amount of salted caramel into the ganache before coating, creating layers of flavor and texture.

Decoration and Customization Ideas
Beyond the simple decorating suggestions, you can create completely personalized truffles by drizzling them with different colored white chocolate mixed with food coloring. Additionally, you could press a single red edible pearl or small heart-shaped candy into the ganache coating of each truffle before it fully sets. Meanwhile, rolling finished truffles in cocoa powder, colored sugar, or crushed freeze-dried strawberries creates a beautiful, sophisticated appearance that looks completely professional. You could also create a two-tone effect by coating some truffles with dark chocolate ganache and others with white chocolate ganache, arranging them together for striking visual contrast. For extra personalization, you might consider adding initials or decorative elements that reference private jokes or meaningful moments, making each truffle feel uniquely special.
Chef Tips
Professional chocolatiers always keep their truffle centers very cold before dipping to prevent them from falling apart during the coating process, and they work in a cool kitchen environment to ensure the ganache sets properly. Additionally, using a chocolate dipping fork or regular fork rather than fingers reduces the transfer of heat and helps achieve a smooth, professional-looking ganache coating on every single truffle.
Frequently Asked Questions
Can I make these truffles ahead of time for a Valentine’s Day gift or celebration? Yes, these truffles are perfect for advance preparation—make them up to 10 days ahead and store them in the refrigerator, or freeze them for up to 3 months without any loss of quality or flavor.
What should I do if my ganache becomes too thick before I finish coating all the truffles? Gently reheat the ganache over low heat, stirring constantly until it reaches the proper consistency again, then continue coating the remaining truffles.
Can I use store-bought brownies instead of baking them from scratch? Yes, you can absolutely use brownie mix or bakery brownies—simply crumble them, follow the truffle-rolling instructions, and your final result will be equally delicious and impressive.
How do I prevent the chocolate coating from cracking or becoming dull looking after it sets? Ensure the brownie balls are very cold before dipping, and keep the ganache at the proper temperature—not too hot or too cool—which helps create a smooth, glossy finish.
Are these truffles difficult to mail as gifts, or will they arrive damaged? With proper packaging using cardboard boxes, packing peanuts, and bubble wrap, these truffles can successfully be mailed, though they’re best shipped during cooler months to prevent melting.
Conclusion
Valentine’s Brownie Truffles represent the ultimate combination of homemade charm, luxurious indulgence, and heartfelt gift-giving that transforms simple ingredients into something absolutely extraordinary. These beautiful chocolate spheres showcase how easy it can be to create something that looks and tastes professionally made while still maintaining the personal touch that only homemade confections provide. Whether you’re crafting these for someone special, preparing treats for a Valentine’s Day gathering, or indulging your own chocolate cravings, these truffles deliver an experience of pure decadence and joy. From the moment you roll the first brownie ball to that final bite of rich fudgy chocolate with its silky ganache coating, every aspect of making these truffles becomes a pleasure rather than a task. The straightforward instructions mean that even inexperienced candy makers can create something that rivals professional chocolatiers in both appearance and flavor. Most importantly, the effort and care you invest in making these truffles from scratch shines through in every magnificent bite, reminding everyone who receives them exactly how much they matter to you. This is more than just candy—it’s an expression of love, creativity, and genuine affection presented in the most delicious form possible.
Did you absolutely love creating these Valentine’s Brownie Truffles as much as we loved sharing this recipe with you? We’d genuinely adore hearing about your chocolate-making experience! Please save this recipe to your favorites, pin it to your Pinterest board, and share it with friends and family who deserve these luxurious homemade treats. Your shares, comments, and feedback inspire us to keep developing delicious recipes that bring joy and celebration to your kitchen and table. Don’t forget to tag us on social media if you make these stunning truffles—we can’t wait to see your gorgeous creations and hear how much your loved ones cherished these heartfelt, decadent chocolates!