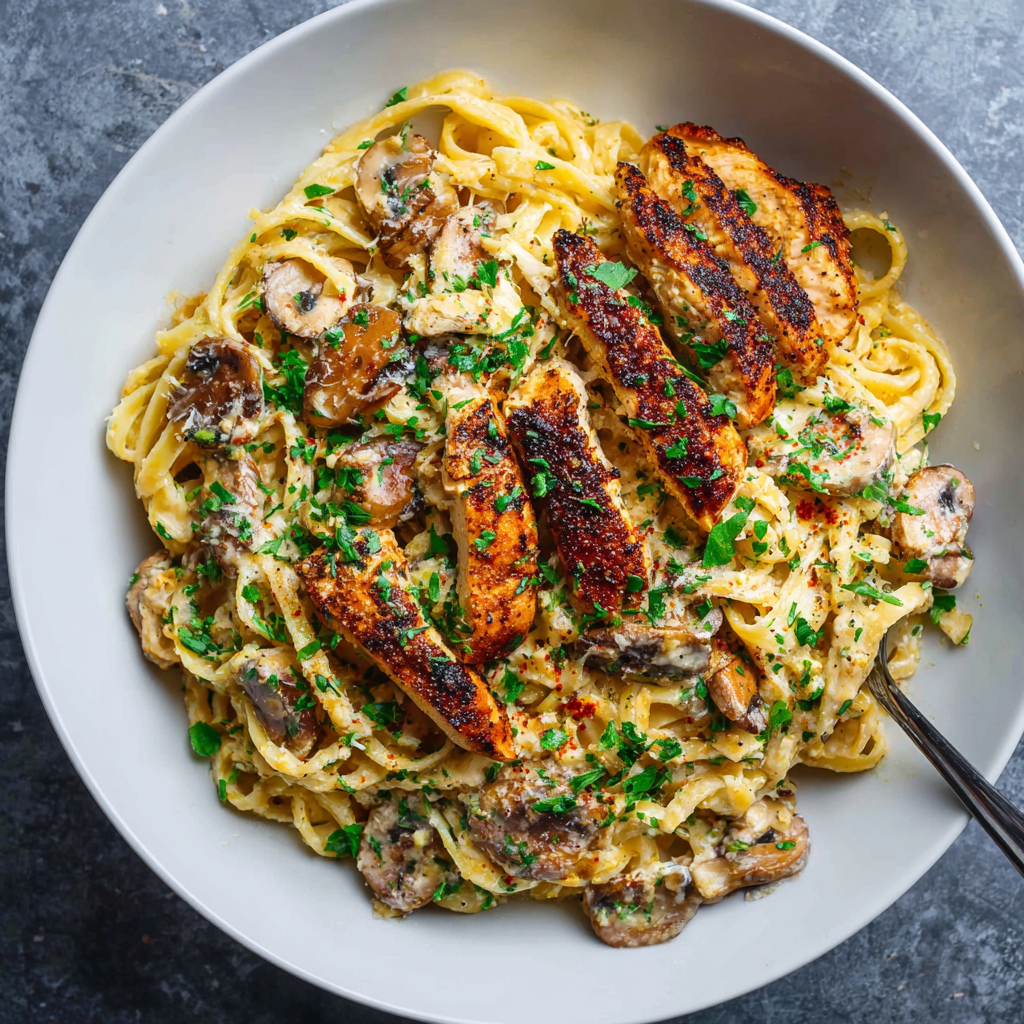
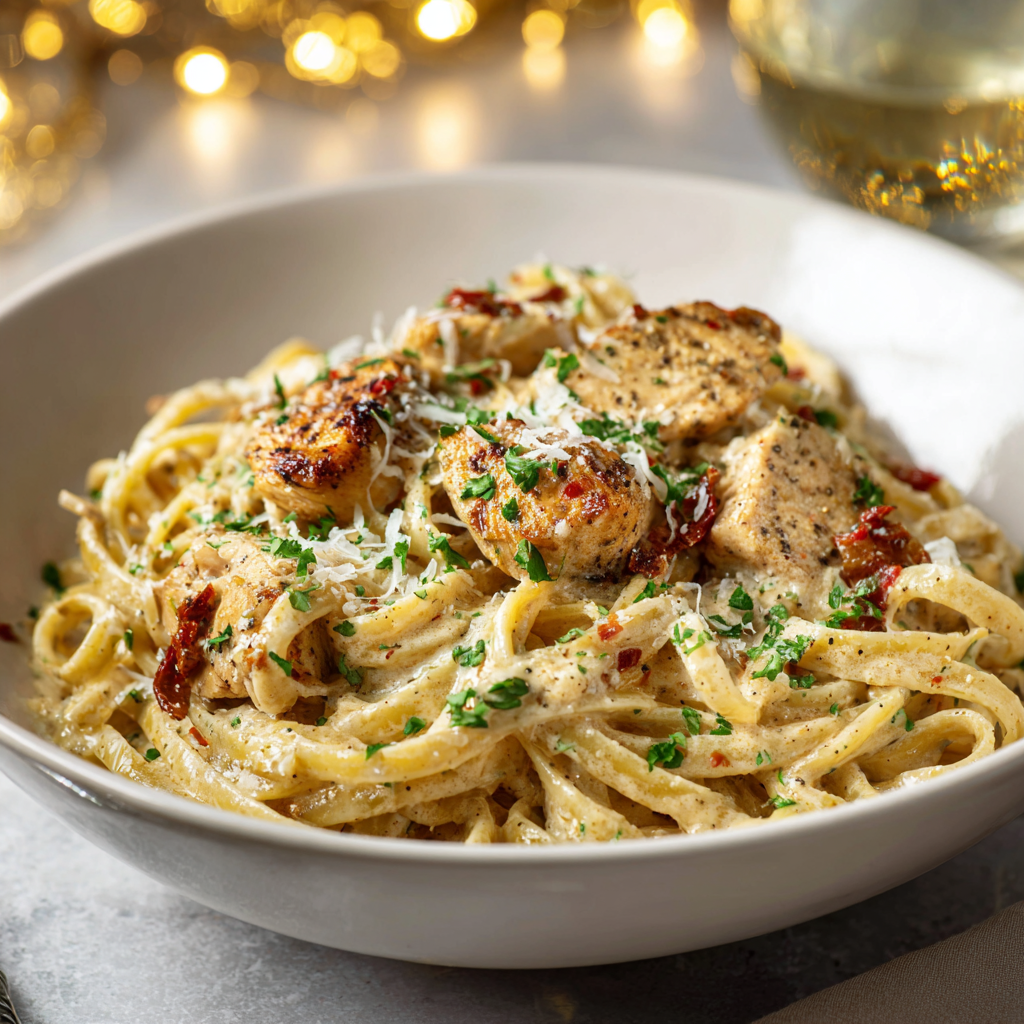
When winter nights call for something warm, satisfying, and irresistibly flavorful, this garlic butter chicken delivers golden, juicy meat bathed in a luscious sauce that makes every bite feel like pure comfort. Tender chicken breasts cook to perfection in a rich, garlicky butter sauce that’s so delicious you’ll want to soak up every last drop with crusty bread. What makes this recipe truly exceptional is how it achieves restaurant-quality results using just a handful of simple ingredients and one skillet, proving that impressive dinners don’t require complicated techniques or specialty items. The combination of butter, fresh garlic, and aromatic herbs creates layers of savory flavor that transform ordinary chicken into something extraordinary while filling your kitchen with mouthwatering aromas. Whether you’re feeding your family on a busy weeknight, preparing a romantic dinner for two, or looking for a reliable recipe that never disappoints, this garlic butter chicken delivers satisfying results in just 25 minutes from start to finish.
Ingredients
This recipe makes 4 servings.
For the Chicken:
- 4 boneless, skinless chicken breasts (about 6 ounces each)
- 1 teaspoon salt
- 1/2 teaspoon black pepper
- 1/2 teaspoon garlic powder
- 1/2 teaspoon paprika
- 2 tablespoons olive oil
- 2 tablespoons butter
For the Garlic Butter Sauce:
- 6 tablespoons unsalted butter
- 6 cloves garlic, minced
- 1/2 cup chicken broth
- 1/4 cup dry white wine (or additional chicken broth)
- 1 teaspoon dried Italian seasoning
- 1/2 teaspoon red pepper flakes (optional)
- 1/4 cup heavy cream (optional)
- 2 tablespoons fresh parsley, chopped
- 1 tablespoon fresh lemon juice
- Additional salt and pepper to taste
- Lemon slices for garnish
Instructions
- Remove the chicken breasts from the refrigerator and let them sit at room temperature for 10 to 15 minutes for more even cooking.
- Pat each chicken breast completely dry with paper towels, removing all surface moisture that would prevent proper browning.
- If any chicken breasts are significantly thicker than others, gently pound them to even thickness using a meat mallet or rolling pin.
- Season both sides of each chicken breast generously with salt, black pepper, garlic powder, and paprika, pressing the spices into the meat.
- Heat the olive oil and 2 tablespoons of butter in a large skillet over medium-high heat until the butter melts and begins to foam.
- Add the seasoned chicken breasts to the hot skillet, making sure they don’t touch or crowd the pan.
- Cook the chicken without moving it for 6 to 7 minutes, allowing a golden-brown crust to develop on the bottom.
- Flip each chicken breast carefully and continue cooking for another 6 to 7 minutes until the internal temperature reaches 165°F.
- Transfer the cooked chicken to a clean plate and tent loosely with aluminum foil to keep warm while you prepare the sauce.
- Reduce the heat to medium and add the 6 tablespoons of butter to the same skillet, swirling to melt completely.
- Add the minced garlic to the melted butter, stirring constantly for 45 to 60 seconds until fragrant and just beginning to turn golden.
- Pour in the chicken broth and white wine, scraping up any browned bits stuck to the bottom of the pan with a wooden spoon.
- Stir in the Italian seasoning and red pepper flakes if using, allowing the sauce to simmer for 2 to 3 minutes.
- Let the sauce reduce by about one-third, concentrating the flavors and creating a slightly thicker consistency.
- If using heavy cream, stir it into the sauce now and let it warm through for 1 minute without boiling.
- Return the chicken breasts to the skillet along with any accumulated juices from the plate.
- Spoon the garlic butter sauce over the chicken repeatedly, allowing the flavors to meld for 2 to 3 minutes over low heat.
- Remove the skillet from heat and stir in the fresh lemon juice, which brightens all the flavors beautifully.
- Sprinkle the fresh parsley over everything for color and freshness.
- Taste the sauce and adjust seasonings with additional salt, pepper, or lemon juice as needed.
- Transfer the chicken to serving plates, drizzling generously with the garlic butter sauce from the pan.
- Garnish with lemon slices and extra parsley before serving immediately while hot.
Understanding the Power of Butter and Garlic
Butter serves as the foundation for countless French and Italian sauces because it creates rich, velvety texture while carrying and amplifying other flavors beautifully. Unlike olive oil alone, butter adds distinctive richness and slight sweetness that makes sauces taste more luxurious and satisfying. Furthermore, butter contains milk solids that brown slightly during cooking, contributing nutty, complex flavors that olive oil cannot provide no matter how carefully you cook it.
Fresh garlic transforms simple butter sauce into something aromatic and crave-worthy that elevates the entire dish. Using whole cloves that you mince yourself creates more vibrant, complex garlic flavor than pre-minced varieties that lose essential oils and develop off-flavors during storage. The generous amount of garlic used here might seem excessive, but it mellows considerably as it cooks in butter, creating savory depth rather than overwhelming sharpness.
The combination of butter and garlic has universal appeal that crosses cultural boundaries and satisfies virtually every palate. This classic pairing works because the fat in butter carries garlic’s volatile compounds directly to your taste receptors while tempering any harshness, creating balanced flavor that tastes rich but not heavy. Additionally, the garlic infuses the butter completely, ensuring every spoonful of sauce delivers consistent flavor throughout the meal.
Achieving Perfectly Cooked Chicken Breasts
Cooking chicken breasts properly requires understanding that they cook quickly and become dry and tough when overdone. Starting with chicken at room temperature promotes more even cooking because the center doesn’t remain cold while the exterior overcooks. This simple step takes just 10 minutes but significantly improves results, creating chicken that’s juicy throughout rather than dry at the edges and barely cooked in the middle.
Creating even thickness by pounding thick portions ensures the entire breast finishes cooking simultaneously rather than having thin ends that overcook before thick sections reach temperature. Place the chicken between plastic wrap or parchment paper and gently pound with a mallet, starting from the center and working outward to create uniform thickness. This technique takes less than a minute per breast but makes an enormous difference in the final texture and prevents disappointing dry spots.
Using a meat thermometer removes all guesswork and ensures perfectly cooked chicken every single time. Insert the thermometer into the thickest part of the breast, avoiding bone if using bone-in pieces, and remove the chicken when it reaches exactly 165°F. The chicken will continue cooking slightly from residual heat as it rests, so pulling it off at precisely this temperature prevents overcooking while ensuring food safety.
Building Flavor Through Proper Searing
Developing a golden-brown crust on the chicken creates hundreds of complex flavor compounds through the Maillard reaction that cannot form without proper searing. This caramelization adds depth and richness that makes the difference between bland chicken and flavorful chicken that tastes delicious even without sauce. Additionally, the browned bits left in the pan become the foundation for the sauce, contributing concentrated chicken flavor that ties everything together.
Patting the chicken dry before seasoning is absolutely crucial for achieving proper browning rather than steaming. Surface moisture creates steam that prevents the meat from making direct contact with the hot pan, resulting in pale, rubbery chicken instead of golden, flavorful crust. Taking 30 seconds to thoroughly dry each breast dramatically improves your results and transforms the entire dish from ordinary to exceptional.
Resisting the temptation to move the chicken while it cooks allows the crust to form properly and prevents sticking. When the chicken is ready to flip, it releases easily from the pan—if it’s sticking, it needs more time. Moving it prematurely tears the developing crust and wastes the flavor-building process that makes seared chicken so appealing. Patience during this crucial step pays dividends in both taste and texture.
Creating Restaurant-Quality Pan Sauce
Deglazing the pan after removing the chicken captures all those flavorful browned bits and transforms them into the foundation of your sauce. The liquid helps lift the fond off the pan surface, incorporating concentrated chicken flavor into the sauce that would otherwise be lost. This technique, fundamental to professional cooking, adds complexity and depth that makes homemade pan sauces taste restaurant-quality despite using simple ingredients.
Adding wine to the sauce contributes acidity and complexity that brightens the rich butter and prevents the sauce from tasting flat or one-dimensional. The alcohol evaporates during cooking, leaving behind concentrated flavor without any harsh alcohol taste. If you prefer not to use wine, simply substitute additional chicken broth, though the sauce will be slightly less complex and may benefit from extra lemon juice for brightness.
Reducing the sauce concentrates flavors while creating a slightly thicker consistency that clings to the chicken beautifully. As the liquid evaporates, the remaining sauce becomes more intense and develops silky texture from the butter and any gelatin released by the chicken. However, watch carefully to prevent over-reduction, which can make the sauce too thick or overly intense rather than balanced and coating.
Balancing Richness with Brightness
Heavy cream adds luxurious body and mellows the sauce’s intensity, creating a more indulgent version that some people prefer. The cream tempers the garlic slightly and creates softer, rounder flavors compared to the butter-wine sauce alone. However, the sauce remains delicious without cream for those watching calories or preferring lighter preparations, so consider this addition optional based on your preferences and dietary goals.
Fresh lemon juice added at the end provides crucial brightness that cuts through the butter’s richness and prevents the sauce from tasting heavy or monotonous. This final acid addition awakens your palate and makes all the other flavors more pronounced and enjoyable, transforming good sauce into great sauce. Never skip this simple finishing touch, as it elevates the entire dish with minimal effort.
Fresh parsley contributes color and fresh, herbaceous notes that balance the rich sauce and add visual appeal. While dried herbs can work in the sauce itself, fresh herbs added at the end provide vibrant flavor and aroma that dried versions cannot match. The bright green color also makes the dish more appetizing and shows care in preparation that elevates home cooking to something more refined.
Maximizing Garlic Flavor Without Bitterness
Cooking garlic in butter rather than oil alone creates mellower, richer flavor because the milk solids in butter cushion the garlic and prevent burning. The butter’s lower smoke point means you naturally cook at more moderate temperatures, reducing the risk of scorching that creates harsh, bitter flavors. Additionally, butter carries garlic’s essential oils more effectively than oil, creating more even flavor distribution throughout the sauce.
Mincing garlic finely ensures it distributes evenly and cooks quickly without leaving large chunks that remain raw or burn before the rest cooks through. Using a garlic press or microplane creates even finer texture that melts into the sauce almost completely, contributing pure garlic essence rather than textural presence. This approach creates more subtle, integrated garlic flavor that enhances without overwhelming the delicate chicken.
Stirring the garlic constantly during its brief cooking time prevents any pieces from sitting on the hot pan surface long enough to burn and turn bitter. Those 45 to 60 seconds of active stirring make the difference between beautifully fragrant garlic and acrid, unpleasant flavors that ruin the entire sauce. This simple attention to timing and technique ensures your sauce tastes vibrant and delicious rather than harsh or burnt.
Adding Complexity with Herbs and Spices
Italian seasoning brings oregano, basil, thyme, and rosemary together in one convenient blend that adds herbal complexity without requiring multiple bottles. This dried herb mixture works beautifully in quick pan sauces where fresh herbs might not have time to release their flavors fully. Furthermore, the combination creates familiar, comforting taste that most people find appealing and that pairs naturally with garlic and butter.
The optional red pepper flakes add subtle warmth that makes the sauce more interesting without creating obvious heat. Even people who don’t typically enjoy spicy food often appreciate the gentle warmth that wakes up the palate and prevents richness fatigue. Starting with just 1/4 teaspoon allows you to gauge your preference, adding more in future preparations if you enjoy the added dimension.
Paprika in the chicken seasoning contributes both color and subtle sweet pepper flavor that enhances the overall profile. While its contribution might seem minor, paprika helps create that appetizing golden-brown color on the seared chicken and adds another layer of flavor that makes the dish more complex. Similarly, garlic powder in the initial seasoning ensures the chicken itself tastes flavorful even before the sauce, creating depth that simple salt and pepper cannot achieve alone.
Serving and Storing Tips
Serving Tips
Serve this garlic butter chicken immediately while the sauce is hot and fluid for optimal texture and enjoyment. The butter-based sauce begins solidifying as it cools, so eating within minutes of preparation ensures you experience the silky, coating consistency that makes it so appealing. Using warmed plates helps maintain temperature longer and keeps the sauce liquid and luxurious throughout the meal.
Classic accompaniments include mashed potatoes, rice, or pasta that soak up the incredible garlic butter sauce, ensuring not a drop goes to waste. Roasted vegetables like asparagus, green beans, or Brussels sprouts provide color and nutrition while their slight bitterness balances the rich sauce beautifully. Alternatively, serve with crusty bread and a simple green salad for a complete meal that feels both comforting and refined.
For family-style service, arrange the chicken on a platter, drizzle generously with sauce, and garnish with fresh lemon slices and parsley for impressive presentation. This approach creates a convivial atmosphere while allowing everyone to serve themselves, making dinner feel special without formal fussiness. Additionally, any extra sauce can be passed in a small pitcher or bowl for those who want additional spoonfuls over their sides.
Storage Tips
Store leftover chicken and sauce in an airtight container in the refrigerator for up to 3 days, though the sauce will solidify as it cools. The butter sauce separates slightly during storage and may look less appealing cold, but it comes back together reasonably well when reheated gently. Keep the chicken and sauce together rather than separating them, as the moisture from the sauce helps prevent the chicken from drying out during storage.
When reheating, warm the chicken gently in a covered skillet over medium-low heat, adding a tablespoon or two of chicken broth to refresh the sauce. Alternatively, microwave in 30-second intervals, checking temperature and stirring the sauce between each burst to ensure even heating. Avoid high heat or extended reheating, which can make the chicken rubbery and cause the butter sauce to separate permanently.
Freezing works reasonably well for up to 2 months, though expect some texture changes in both the chicken and sauce upon thawing. Cool completely before transferring to freezer-safe containers, removing as much air as possible to prevent freezer burn. Thaw overnight in the refrigerator, then reheat gently, whisking the sauce as it warms to re-emulsify the butter and create smoother consistency.
Helpful Notes
Using bone-in, skin-on chicken thighs instead of breasts creates even more flavorful, foolproof results that stay juicy despite slightly longer cooking times. Thighs contain more fat and connective tissue that keep them moist, making them nearly impossible to overcook. Increase cooking time to 8 to 10 minutes per side and ensure internal temperature reaches 175°F for optimal texture, then remove the skin before serving if desired for lighter presentation.
For extra richness and flavor, brown the butter before adding the garlic by cooking it until the milk solids turn golden-brown and smell nutty. This technique, called beurre noisette in French cooking, adds incredible depth and complexity with no additional ingredients. Watch carefully during this process as butter can burn quickly once it starts browning, ruining the sauce instantly.
Adding mushrooms, sun-dried tomatoes, or spinach creates more complete nutrition and adds interest without significantly changing the basic preparation. Sauté sliced mushrooms in the pan before cooking the chicken, or stir spinach into the finished sauce where it will wilt in seconds. These additions stretch the recipe further and add color that makes the dish more visually appealing and satisfying.
Common mistakes include using salted butter which makes the sauce too salty when combined with seasoned chicken and reduced broth, or cooking garlic over heat that’s too high, which burns it and creates bitter, unpleasant flavor. Additionally, skipping the deglazing step wastes the flavorful fond and creates thinner, less complex sauce that doesn’t taste as rich or satisfying as properly prepared pan sauce.
Chef Tips
Professional chefs often finish the chicken in a 375°F oven after initial searing, which ensures even cooking throughout without risk of burning the exterior. After searing both sides for 3 to 4 minutes each, transfer the skillet directly to the oven for 8 to 10 minutes to finish cooking through. This technique creates more reliable results and frees you to prepare the sauce without worrying about monitoring the chicken.
Another expert approach involves butterflying the chicken breasts before cooking, which creates thinner cutlets that cook faster and more evenly. Slice horizontally through the thickest part of the breast, stopping before cutting completely through, then open it like a book and pound gently to even thickness. This method reduces cooking time to about 4 minutes per side while creating more surface area for the delicious garlic butter sauce to coat.
Frequently Asked Questions
Can I use chicken thighs instead of breasts? Absolutely, boneless thighs work beautifully and stay even juicier; increase cooking time to 8-10 minutes per side until they reach 175°F internally.
What can I substitute for white wine? Use additional chicken broth or a splash of white wine vinegar; the sauce will be slightly less complex but still delicious.
How do I prevent the garlic from burning? Reduce heat to medium before adding garlic, stir constantly, and cook for only 45-60 seconds before adding liquid to stop the cooking.
Can I make this dairy-free? Use olive oil instead of butter and omit the cream; add extra chicken broth and lemon juice for flavor and consistency.
Why is my chicken dry and tough? You likely overcooked it; chicken breasts should reach exactly 165°F and rest for 5 minutes before serving for juiciest results.
Embracing Simple, Satisfying Comfort
Mastering straightforward recipes like garlic butter chicken proves that impressive dinners don’t require complicated techniques or exotic ingredients. This dish demonstrates how quality basics prepared with care create more satisfaction than elaborate preparations using mediocre components. When you focus on proper technique and good ingredients, simple food becomes extraordinary, making home cooking feel rewarding rather than overwhelming or inadequate compared to restaurant meals.
The practical value of having reliable, quick recipes in your repertoire extends far beyond convenience to include significant cost savings and health benefits. Preparing this chicken at home costs a fraction of what you’d pay at a restaurant while allowing complete control over ingredients and portions. Furthermore, cooking at home means you know exactly what’s in your food, avoiding excessive sodium, preservatives, or low-quality oils that restaurants often use to cut costs.
As winter settles in and comfort becomes increasingly important, having recipes for warming, satisfying dinners that come together quickly becomes essential for maintaining energy and morale. The aroma of garlic and butter fills your home with warmth that extends beyond the physical, creating atmosphere that makes even the coldest evenings feel cozy. Many people find that cooking comforting meals becomes a cherished ritual that marks the season and provides moments of calm and satisfaction during busy, stressful days.
The simple pleasure of cutting into perfectly cooked chicken and watching rich garlic butter sauce pool on your plate creates moments of contentment that remind us why we cook. Each satisfying bite offers comfort that goes beyond mere nutrition, providing sensory pleasure and emotional warmth that nourish more than just our bodies. These moments of genuine enjoyment, whether shared with loved ones or savored quietly alone, become the memories we return to when we need reminding that simple pleasures often provide the deepest satisfaction.
Did this Winter Garlic Butter Chicken become your new weeknight staple? If you loved how the rich sauce made simple chicken extraordinary, how quickly this impressive dinner came together, and how the incredible aromas filled your kitchen with comfort, we’d be absolutely thrilled if you could save this recipe for regular rotation, pin it to your easy dinner or comfort food board, or share it with friends who need reliable recipes that never disappoint. Your support and enthusiasm mean everything to us and inspire us to keep creating and sharing recipes that make home cooking accessible, rewarding, and deeply satisfying for everyone. Tell us in the comments what you served alongside your chicken and whether you tried any creative variations—we love hearing about your cooking successes and the joy that good food brings to your table!