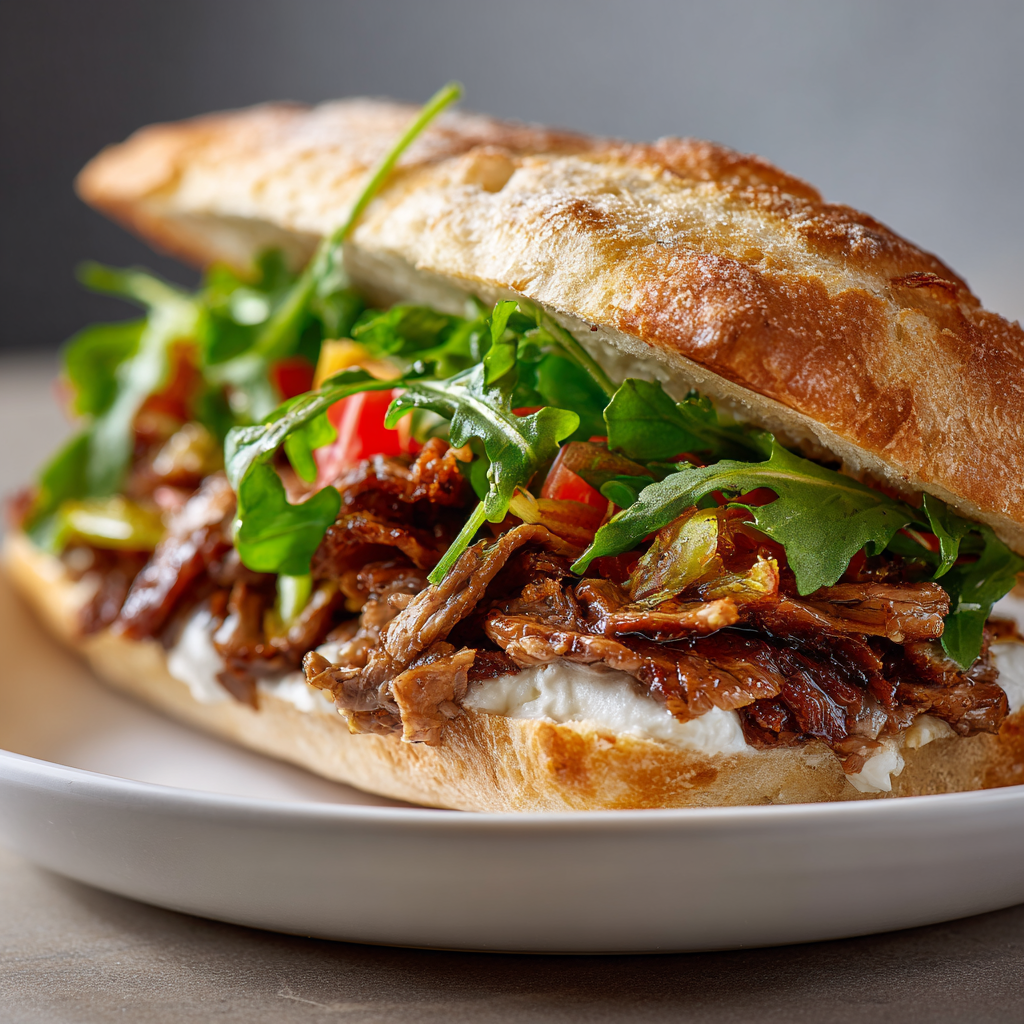
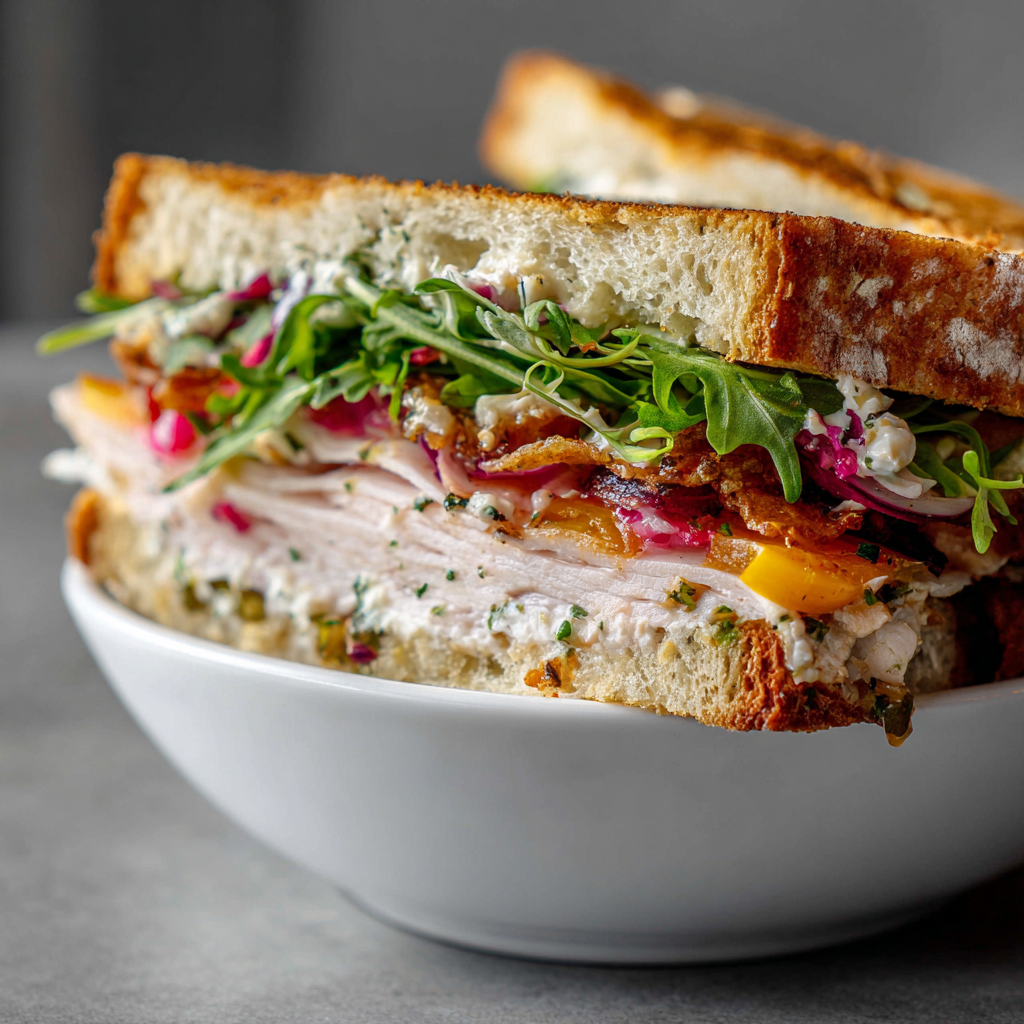
There’s something truly magical about biting into a warm, crusty grinder sandwich filled with layers of savory meats, melted cheese, and vibrant vegetables that create an explosion of flavor in every bite. The Winter Grinder Sandwich transforms ordinary lunch or dinner into something extraordinary that rivals your favorite Italian deli. What makes this recipe truly special is how it combines multiple proteins and fresh ingredients into one satisfying creation that feels like comfort food and gourmet eating simultaneously. First, the combination of Italian cold cuts, crispy vegetables, and perfectly melted cheese creates an irresistible sandwich that satisfies even the most demanding palates. Additionally, this sandwich comes together in under 20 minutes, making it perfect for quick weeknight dinners, weekend lunches, or meal prep when you want something impressive without extensive cooking. Whether you’re feeding a crowd at a gathering, packing lunch for your family, or simply craving a hearty sandwich that sticks with you, this Winter Grinder Sandwich delivers restaurant-quality results with maximum flavor and satisfaction.
Ingredients
This recipe makes 4 hearty grinder sandwiches, serving 4 people generously.
- 4 grinder rolls or submarine sandwiches buns (6 to 8 inches each)
- ¼ pound thinly sliced capicola or pepperoni
- ¼ pound thinly sliced mortadella or ham
- ¼ pound thinly sliced provolone cheese
- ¼ pound thinly sliced mozzarella cheese
- 2 roasted red peppers, sliced into strips
- 1 cup iceberg lettuce, shredded finely
- 1 medium tomato, sliced thin
- ½ medium red onion, sliced thin
- ¼ cup sliced black olives
- ¼ cup sliced pepperoncini peppers
- 3 tablespoons olive oil
- 2 tablespoons red wine vinegar
- 1 tablespoon dried Italian seasoning
- 2 cloves fresh garlic, minced
- ½ teaspoon smoked paprika
- Salt and freshly ground black pepper to taste
- ¼ teaspoon red pepper flakes
- 2 tablespoons butter, melted
- 2 tablespoons fresh parmesan cheese, grated
- Fresh basil leaves for garnish
- 1 tablespoon Italian parsley, finely chopped
Step-by-Step Instructions
Preparing the Italian Dressing
- In a small mixing bowl, whisk together the olive oil, red wine vinegar, dried Italian seasoning, minced garlic, smoked paprika, salt, freshly ground black pepper, and red pepper flakes. Stir everything together thoroughly until well combined and the spices are evenly distributed.
- Taste the dressing and adjust the balance of oil, vinegar, and seasonings according to your preference. Add more vinegar if you want extra tang, more oil for richness, or more red pepper flakes for additional heat.
- Set the Italian dressing aside in a convenient location, as you’ll need it for layering the grinders later. Additionally, if you’re preparing the dressing ahead, store it in an airtight container and shake well before using, as the oil and vinegar naturally separate.
Preparing the Sandwich Components
- If your grinder rolls aren’t fresh from the bakery, lightly toast them in a preheated 375°F oven for about 3 to 4 minutes until they develop a slightly crispy exterior. However, avoid over-toasting, as this can make the rolls dry and difficult to bite through.
- Remove the toasted grinder rolls from the oven and let them cool for about 1 minute. Next, carefully slice each roll horizontally, opening it like a book but being careful not to separate the two halves completely.
- Brush the inside surfaces of each grinder roll with melted butter and sprinkle lightly with grated Parmesan cheese. This step adds richness and creates a more gourmet presentation that feels restaurant-quality.
- Arrange the sliced tomato on a plate, and place the shredded lettuce in a separate small bowl. Additionally, combine the sliced red onion with the roasted red peppers in another bowl, creating organized stations for efficient assembly.
Building the Grinder Sandwich
- Begin assembly by laying out all four prepared grinder rolls with their insides facing up. Drizzle approximately 1 tablespoon of the prepared Italian dressing evenly across the bottom half of each grinder roll.
- Layer the capicola or pepperoni on the bottom half of the first grinder, using approximately 4 to 5 slices per sandwich. Make sure the meat is distributed evenly across the entire width of the roll.
- Top the capicola with slices of mortadella or ham, using approximately 3 to 4 slices per sandwich. Next, arrange the slices so they overlap slightly, creating an attractive, even layer of protein.
- Add a layer of provolone cheese slices over the meats, using approximately 2 to 3 slices per sandwich. The heat from the toasted rolls will warm the cheese slightly, making it more pliable and flavorful.
- Top the provolone with mozzarella cheese slices, using approximately 2 to 3 slices per sandwich. The combination of two cheeses creates complexity and richness that elevates the entire sandwich experience.
- Layer the roasted red peppers and sliced red onion over the cheese, distributing them evenly across each sandwich. Additionally, sprinkle the black olives and pepperoncini peppers over the pepper and onion layer.
- Add a generous handful of shredded iceberg lettuce on top of the vegetables, ensuring it’s distributed evenly. Next, top the lettuce with tomato slices, arranging them neatly so they don’t slide around during eating.
- Drizzle approximately ½ tablespoon of additional Italian dressing over the tomato layer, adding extra flavor and moisture. This final dressing layer ties all components together and prevents the sandwich from feeling dry.
- Sprinkle fresh Italian parsley over the top layer and add a small pinch of fresh cracked black pepper for finishing. Carefully close each grinder roll, pressing gently so all components stay in place without squishing them excessively.
Finishing Touches
- If you prefer warm grinders, wrap each assembled sandwich loosely in aluminum foil and place them in a preheated 375°F oven for 4 to 5 minutes. This warming step melts the cheese slightly and brings all flavors together beautifully.
- Remove the warmed grinders from the oven and let them rest for 1 minute before serving. Next, carefully unwrap the foil, being cautious of escaping steam.
- Cut each grinder sandwich diagonally, creating two visually appealing halves that are easier to handle and eat. This angled cut also makes the sandwich more impressive when served on a platter.
- Arrange the cut grinder halves on a serving platter, standing them up slightly so the beautiful layers are visible. Serve immediately while warm, providing small bowls of extra Italian dressing on the side for dipping or additional drizzling.
Serving and Storage Tips
Serving Suggestions
Winter Grinder Sandwiches work beautifully as the centerpiece of casual entertaining, picnics, or simple weeknight dinners. Serve them alongside classic sides like crispy potato chips, homemade french fries, or seasoned roasted potatoes for a complete meal. Additionally, a refreshing Italian pasta salad or Caesar salad provides excellent balance to the hearty, rich sandwich. For a lighter option, pair these grinders with fresh vegetable sides like marinated zucchini, crispy pickles, or a simple green salad dressed with vinaigrette.
Next, consider serving these grinders at casual parties where guests appreciate substantial, satisfying food. Set up a grinder assembly bar where everyone customizes their sandwich with preferred ingredients and dressing amounts. Furthermore, this interactive serving style makes entertaining easier while allowing guests to create exactly what they want. You can arrange all ingredients separately and let people build their own perfect combination.
These sandwiches work exceptionally well for game-day entertaining, backyard gatherings, or casual family dinners where hearty food is appreciated. Pair them with cold beverages like iced tea, lemonade, or Italian sodas for a refreshing accompaniment. Additionally, serve them alongside classic Italian sides like marinated vegetables, fresh mozzarella, and cured olives for an authentic Italian experience.
Proper Storage and Keeping
Store any leftover assembled grinders in an airtight container in the refrigerator for up to 2 days. However, these sandwiches are best eaten fresh while the vegetables remain crisp and the cheese hasn’t dried out. If you must store them, wrap each sandwich individually in plastic wrap or parchment paper to maintain freshness and prevent the bread from drying out excessively.
Additionally, you can prepare the components separately and assemble sandwiches fresh as needed, which maintains optimal quality. Store sliced meats and cheeses in separate airtight containers in the refrigerator for up to 1 week. Keep vegetables in the crisper drawer for maximum crispness, and store the Italian dressing in an airtight glass container for up to 1 week.
These grinders freeze reasonably well for up to 1 month when wrapped tightly in plastic wrap and stored in freezer bags, though the vegetables become softer upon thawing. To reheat frozen grinders, thaw them in the refrigerator overnight, then warm gently in a 325°F oven for about 8 minutes wrapped in foil. Avoid microwaving, as this can make the bread tough and the cheese overly hot compared to other components.
Helpful Notes and Tips
This recipe is wonderfully adaptable to your personal preferences and ingredient availability. However, if capicola isn’t available, substitute with regular pepperoni or Italian sausage for similar flavors and textures. For those seeking additional vegetables, add thinly sliced cucumbers, artichoke hearts, or sun-dried tomatoes for extra freshness and complexity.
Next, you can adjust the cheese selection based on preference or availability. Substituting different Italian cheeses like fontina, asiago, or pecorino Romano creates varied flavor profiles. Additionally, adding roasted garlic cloves or fresh garlic slices to the grinder intensifies the Italian flavors beautifully. For those preferring milder sandwiches, reduce the pepperoncini peppers or omit them entirely.
One common mistake involves using too much dressing, which can make the sandwich soggy and difficult to eat. Therefore, use dressing sparingly, adding more as needed rather than saturating everything initially. Additionally, not toasting the grinder rolls results in bread that’s too soft to support the heavy fillings, so don’t skip this crucial step.

Another mistake involves adding all vegetables at once without organization, making the sandwich difficult to assemble and unbalanced in appearance. Therefore, layer components strategically, distributing ingredients evenly so each bite contains proper ratios of meat, cheese, and vegetables. Furthermore, cutting vegetables unevenly results in some pieces falling out during eating, so take time to slice uniformly.
Chef’s Professional Tips
First, using high-quality Italian cold cuts from an Italian deli rather than supermarket lunch meat elevates the entire sandwich dramatically. The superior flavor and texture of artisanal meats transform this from an ordinary sandwich to something genuinely special. Next, toasting the rolls with butter and Parmesan before assembly creates a crispy, flavorful foundation that prevents sogginess and adds richness.
Frequently Asked Questions
Can I make these grinders vegetarian? Absolutely—replace the cold cuts with roasted vegetables, fresh mozzarella, and additional vegetables for a delicious vegetarian version maintaining all the Italian flavors.
How can I prevent the grinder from getting soggy? Toast the rolls before assembly, use dressing sparingly, add lettuce as a barrier between bread and wet ingredients, and avoid storing assembled sandwiches longer than a few hours.
What if I don’t have roasted red peppers? Use sun-dried tomatoes, fresh red bell pepper slices, or roasted portobello mushrooms for similar sweetness and texture that complements the other ingredients beautifully.
Can I prepare these grinders in advance for events? Prepare components separately and assemble sandwiches just before serving for optimal quality, or assemble 2 to 3 hours ahead and wrap tightly in plastic wrap.
Are these grinders suitable for dietary restrictions? Yes, when using vegetarian cold cuts or omitting them entirely, and ensuring all ingredients are certified gluten-free if needed.
Why These Grinders Become an Instant Favorite
Winter Grinder Sandwiches represent everything home cooks love about Italian cuisine presented in convenient sandwich format. The combination of multiple proteins, fresh vegetables, and perfectly melted cheese creates complexity that satisfies completely. Additionally, the hands-on assembly time remains minimal, yet the results look like you spent considerable effort creating something special.
Furthermore, this recipe proves that you don’t need complicated techniques or exotic ingredients to create restaurant-quality sandwiches at home. The combination of quality Italian ingredients transforms into something far greater than the sum of its parts. Next, the versatility of this recipe allows endless customization, so every family member creates their perfect combination.
These grinders work equally well for weeknight family dinners when you need something quick and satisfying, or for entertaining situations where substantial, delicious food matters most. Whether you’re introducing family to authentic Italian flavors, hosting casual gatherings, or simply craving a hearty sandwich that sticks with you, these Winter Grinder Sandwiches deliver every single time. The reliability of this recipe combined with its impressive results makes it a permanent addition to your sandwich rotation.
The beauty of this dish lies in how it captures the essence of Italian deli sandwiches while remaining approachable for home cooks of all skill levels. First-time cooks achieve delicious results while experienced home chefs appreciate the opportunity to customize with preferred ingredients. Additionally, the layering and assembly process creates an interactive cooking experience that engages family members in meal preparation.
These grinders remain delicious at various temperatures, though they’re most spectacular when served warm with cheese partially melted and flavors fully developed. The contrast between warm cheese and bread with cool, crisp vegetables creates sensory excitement with every bite. However, cold grinders work beautifully for lunches and picnics, making them versatile for any occasion.
Did you love this recipe? Save it to your favorite recipe app, pin it to your Pinterest board, and share it with your friends and family who would absolutely adore these Winter Grinder Sandwiches! Your feedback and shares encourage us to keep creating more delicious recipes for your table. We can’t wait to hear how your grinders turn out—leave us a comment and let us know what you thought!